
Singer ProFinish Serger Manual: A Comprehensive Guide
This guide offers detailed instructions for the Singer ProFinish serger, covering setup, threading, troubleshooting, and maintenance – ensuring optimal performance and beautiful finishes.
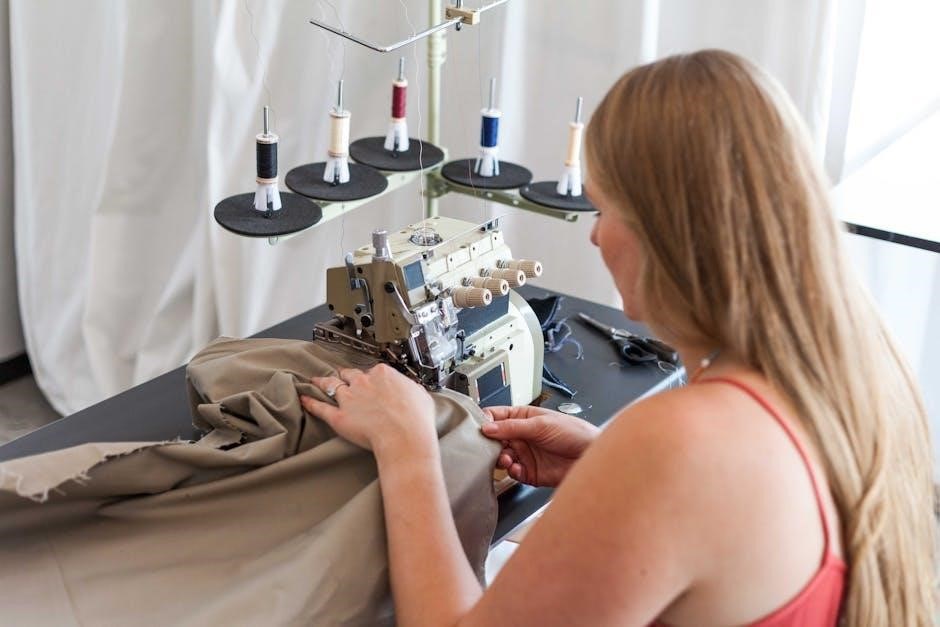
The Singer ProFinish serger is a versatile machine designed to streamline sewing projects with professional-quality finishes. This serger excels at seam finishing, creating rolled hems, and decorative edging, offering a significant upgrade over traditional sewing machines. It’s particularly known for its ease of use, making it suitable for both beginners and experienced sewists.
The 14CG754 model, a popular choice, boasts adjustable stitch length and differential feed, providing control over fabric handling. Accessing the manual, available for free PDF download, is crucial for unlocking its full potential and mastering its features.
Understanding the Singer ProFinish 14CG754 Model
The Singer ProFinish 14CG754 is a 2-3-4 thread serger, offering flexibility for various fabric types and project needs. Its key strength lies in its adjustable stitch length, allowing for customized seam finishes. The differential feed ensures even fabric feeding, preventing puckering or stretching, especially crucial for knits.
This model features built-in rolled hem options, simplifying the creation of delicate edges. A readily available, downloadable PDF manual provides comprehensive guidance, while online resources offer additional support and troubleshooting tips for optimal performance.

Key Features and Benefits
The Singer ProFinish 14CG754 boasts several advantages for sewing enthusiasts. It provides a wide selection of stitch options, including four built-in rolled hems, delivering professional-looking edge finishes effortlessly. The adjustable stitch length allows for customization based on fabric weight and desired seam strength.
Differential feed is a standout feature, preventing fabric distortion during serging. This serger simplifies sewing, making it ideal for both beginners and experienced users seeking efficient and high-quality results.
Adjustable Stitch Length
The Singer ProFinish serger offers adjustable stitch length, a crucial feature for versatile sewing; This allows users to customize stitch density based on the fabric type and project requirements. Shorter stitch lengths are ideal for lightweight fabrics, creating a more delicate seam, while longer lengths suit heavier materials for increased durability.

Precise control over stitch length ensures professional-looking results and prevents puckering or stretching, enhancing the overall quality of your serged projects.
Differential Feed Functionality

The Singer ProFinish serger’s differential feed is a key feature preventing fabric distortion during serging. It allows independent adjustment of the feed dogs, controlling how fabric is fed through the machine. A higher differential feed setting is beneficial for stretchy fabrics, preventing elongation, while a lower setting works well with delicate materials to avoid puckering.
Mastering this function ensures even seams and professional finishes on a wide range of fabrics.
Built-In Rolled Hem Options
The Singer ProFinish 14CG754 boasts four built-in rolled hem options, simplifying the creation of delicate and professional edge finishes. These pre-programmed stitches eliminate the need for manual adjustments, offering convenience and consistent results. Easily switch between different rolled hem widths to suit various fabric weights and project requirements.
Achieving beautifully finished hems has never been easier with these integrated features.
Setting Up Your Serger
Proper setup is crucial for optimal performance of your Singer ProFinish serger. Begin by ensuring a stable, level work surface. Next, familiarize yourself with the machine’s components, including the thread tension dials and stitch length adjustment. Accurate threading is paramount; refer to the detailed step-by-step guide provided within this manual.
Correctly inserting the thread will prevent issues and ensure smooth operation, leading to professional-quality serged seams.
Threading the Serger: A Step-by-Step Guide
Begin by raising the presser foot; this releases thread tension. Follow the numbered threading path indicated on the machine, starting with the thread stand and thread tray. Guide the thread through each tension disc, ensuring it ‘clicks’ into place. Next, lead the thread through the loopers and finally, the needle.
Repeat for each thread (2-4, depending on desired stitch). Incorrect threading is a common issue, so double-check each step!
Essential Parts and Their Functions
The Singer ProFinish serger boasts several key components. The thread tray and bin efficiently store and manage spools during operation, preventing tangles. Tension discs regulate thread flow, crucial for balanced stitches. Loopers create interlocking stitches, while the needle secures the fabric. The blade trims excess fabric as you sew, providing a clean edge.
Understanding each part’s role is vital for successful serging and troubleshooting potential issues. Regular inspection ensures optimal functionality.
Thread Tray and Bin Usage
The thread tray and bin are incredibly helpful features on the Singer ProFinish serger, designed for managing the larger spools of serger thread. They keep threads organized, preventing tangles and ensuring smooth feeding during operation. Properly positioning the spools within the tray and bin allows for consistent tension.
Always ensure threads unwind freely from the spools, avoiding snags. This simple step contributes significantly to a trouble-free serging experience.
Replacement Blade Information
Maintaining a sharp blade is crucial for clean, precise serging with your Singer ProFinish. Sewing Parts Online offers a valuable resource for locating compatible replacement blades, allowing you to search specifically by your machine’s make and model – the 14CG754. Dull blades cause skipped stitches and frayed edges.
Regular blade inspection and timely replacement ensure consistently high-quality serged seams. Always follow safety precautions when handling and changing blades.
Basic Serging Techniques
Mastering fundamental serging techniques unlocks the full potential of your Singer ProFinish. Begin with 4-thread serging for robust, professional-grade seams ideal for garments and durable projects. Explore 3-thread serging to create narrower, refined finishes suitable for lightweight fabrics and decorative edging.
Finally, utilize 2-thread serging for delicate materials, achieving a clean finish without excessive bulk. Practice each technique to build confidence and skill;
4-Thread Serging for Durable Seams
Achieve exceptionally strong and resilient seams with the 4-thread serging technique on your Singer ProFinish. This method interlocks four threads – two needles and two loopers – creating a secure, professional finish perfect for high-stress areas like garment construction and outdoor projects.

Ensure consistent tension for a balanced stitch. This technique is ideal for preventing fabric fraying and enhancing seam longevity, offering a polished and durable result.
3-Thread Serging for Narrow Finishes
The 3-thread serging technique is excellent for creating neat, narrow seam finishes, particularly on lightweight or delicate fabrics. Utilizing one needle and two loopers, this method provides a clean edge while minimizing bulk, making it ideal for rolled hems and finishing sheer materials.
Adjust the stitch length for optimal results. This technique offers a professional look and prevents unraveling, enhancing the garment’s overall quality and appearance.
2-Thread Serging for Lightweight Fabrics
Employing the 2-thread serging method is specifically beneficial when working with very lightweight or sheer fabrics where minimizing bulk is crucial. This configuration, utilizing only one needle and one looper, creates a delicate and subtle seam finish.
It’s perfect for preventing fraying on edges without adding unnecessary weight or visible stitching. Adjust tension carefully to avoid puckering and ensure a smooth, professional result on delicate materials.
Troubleshooting Common Issues
Encountering problems with your Singer ProFinish serger is common, but often easily resolved. Frequent issues include thread breakage, often caused by incorrect threading or tension imbalances. Looping problems, where the stitches appear uneven or tangled, can stem from improper needle or looper timing.
This section provides solutions for these and other typical challenges, guiding you through diagnostics and adjustments to restore smooth, reliable serging performance. Regular maintenance minimizes these occurrences.
Dealing with Thread Breakage
Thread breakage on the Singer ProFinish serger is frequently linked to incorrect threading – meticulously retrace the threading path for each thread, ensuring it’s properly seated in the tension discs and guides. Incorrect tension settings also contribute; experiment with slight adjustments, remembering to balance upper and lower looper tensions.
Using the correct needle size for your fabric is crucial, as is ensuring the blade is sharp. Old or damaged thread can also cause breaks, so always use quality thread.
Addressing Looping Problems
Looping issues with your Singer ProFinish serger often indicate tension imbalances. If loops appear on the fabric’s upper side, tighten the upper looper tension. Conversely, loops on the underside suggest loosening it. Regularly check and adjust the needle and looper thread tensions for optimal stitch formation.
Ensure proper threading, as even a minor error can cause looping. A dull blade or incorrect needle size can also contribute to this problem, so consider replacement or adjustment.
Maintenance and Care
Regular maintenance extends the life of your Singer ProFinish serger. Cleaning lint from the machine after each use prevents jams and ensures smooth operation. Use a soft brush to remove debris from all areas, including the blade cover and thread paths. Oil key lubrication points as indicated in the manual.
Periodically inspect and replace the blade when it becomes dull, and always use the correct needle type for your fabric. Proper care guarantees consistent, high-quality serging results.
Cleaning Your Serger
Consistent cleaning is vital for optimal performance. After each use, power off and unplug your Singer ProFinish. Use the provided brush, or a soft-bristled brush, to remove lint and thread fragments from the blade area, feed dogs, and loopers. Pay close attention to the thread paths and tension discs.
A vacuum cleaner with a brush attachment can help remove stubborn lint. Avoid using compressed air, as it can push debris further inside the machine. Regular cleaning prevents jams and ensures smooth operation.
Blade Replacement Procedures
Dull blades cause poor cutting and skipped stitches. Always power off and unplug the serger before replacing blades. Carefully remove the needle plate and access the blades. Use appropriate tools – often a small screwdriver – to loosen and remove the old blades.

Install new blades, ensuring they are correctly oriented and securely tightened. Sewing Parts Online offers compatible blades for your 14CG754 model. Test the serger on scrap fabric after replacement to confirm proper cutting action.
Accessing the Singer ProFinish Manual
Finding your Singer ProFinish 14CG754 manual is easy! You can download the PDF manual directly from the Internet Archive, offering a 53-page comprehensive guide. Alternatively, explore online resources and support forums dedicated to Singer sergers.
These platforms often host manuals and troubleshooting tips. The manual details everything from threading to maintenance. Ensure you have the correct manual for your specific model for accurate instructions and optimal serger performance.
Downloading the PDF Manual
Accessing the Singer ProFinish 14CG754 manual in PDF format is straightforward. The Internet Archive provides a downloadable 53-page manual, offering a complete resource for your serger. Look for options like “download 1 file PDF WITH TEXT” for a searchable document.
Ensure a stable internet connection during the download. This digital copy allows convenient access to instructions for threading, maintenance, and troubleshooting, directly on your computer or mobile device.
Online Resources and Support
Beyond the downloadable PDF, numerous online resources bolster your Singer ProFinish experience. The Internet Archive hosts the manual, while sewing communities and forums offer peer support and troubleshooting advice. Websites like Sewing Parts Online provide model-specific assistance.
Amazon product pages often feature user reviews and Q&A sections. Remember to utilize these platforms to connect with fellow serger enthusiasts and find solutions to common issues, maximizing your machine’s potential.

Finding Replacement Parts
Maintaining your Singer ProFinish requires occasional part replacements. Sewing Parts Online is a valuable resource, offering a feature to locate compatible parts specifically for your 14CG754 model. This ensures correct fit and functionality, extending the serger’s lifespan.
Always verify part numbers before ordering. Online retailers and sewing machine repair shops also stock common replacement blades, needles, and other essential components. Prioritize genuine Singer parts for optimal performance.
Sewing Parts Online Resources
Sewing Parts Online stands out as a premier destination for Singer ProFinish replacement components. Their intuitive search function allows users to pinpoint parts compatible with the 14CG754 model, simplifying the process significantly. This platform offers a comprehensive inventory, including blades, needles, and belts.
Beyond specific parts, Sewing Parts Online provides helpful diagrams and resources to aid in identification and installation. Regularly checking their site ensures access to the latest parts and support.
Advanced Serging Techniques
Mastering the Singer ProFinish extends beyond basic seams. Explore the built-in rolled hem options – four distinct styles – for delicate finishes on scarves and napkins. Experiment with decorative serging, utilizing varied thread colors and tensions to create unique edge detailing.
Further refine skills by practicing techniques like chain stitching and flatlock seams, unlocking the serger’s full creative potential. Online tutorials can inspire innovative applications and advanced pattern work.
Rolled Hem Stitching
The Singer ProFinish 14CG754 excels at rolled hems, offering four built-in options for beautifully finished edges. Engage the rolled hem mode, adjusting the stitch length for desired tightness. Practice on scrap fabric to perfect tension and ensure a consistent, narrow roll.
This technique is ideal for lightweight fabrics like chiffon and silk, creating professional-looking hems on scarves, napkins, and garments. Experiment with different thread weights for varied effects and a polished final product.
Decorative Serging Options
Beyond basic seams, the Singer ProFinish serger unlocks creative possibilities. Utilize different thread colors and weights to add unique embellishments to projects. Experiment with varying stitch lengths and differential feed settings to create textured edges and decorative patterns.
Consider serging raw fabric edges for a modern, unfinished look, or combine serging with other techniques like rolled hems for added detail. Explore online resources for inspiration and unlock the full potential of your serger’s decorative capabilities.