
Singer 5400 Sewing Machine Manual: A Comprehensive Guide
This guide offers detailed instructions for the Singer Sew Mate 5400, a 64-page manual available as a PDF. It covers setup, operation, and maintenance.
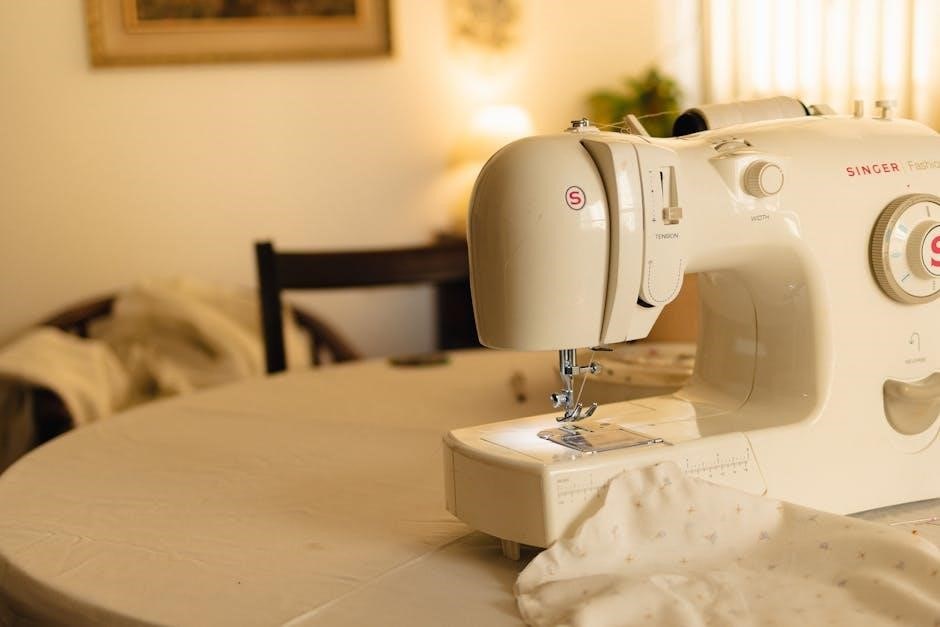
The Singer 5400, also known as the Sew Mate 5400, is an automatic sewing machine designed for ease of use and versatility. This comprehensive sewing machine boasts a range of features suitable for both beginners and experienced sewers. A detailed instruction manual, readily available in PDF format (approximately 35.2MB in size), accompanies the machine, providing step-by-step guidance.
The manual, spanning 64 pages, covers everything from initial setup and threading to advanced techniques like buttonhole sewing and zipper insertion. It’s designed to help users quickly become proficient with their new machine. Singer emphasizes making sewing easy, and this model reflects that philosophy. Furthermore, Singer provides supplemental video instructions on their YouTube channel, offering an additional learning resource. The manual is available in English and caters to various skill levels, ensuring a smooth sewing experience.
Understanding the Machine’s Features
The Singer 5400 offers a diverse range of stitch patterns, detailed within its 64-page manual. While specific stitch details aren’t explicitly listed in the provided snippets, the manual guides users through selecting and adjusting these patterns. Key features include adjustable stitch length and width, allowing for customization based on fabric and project needs.
The machine’s capabilities extend to more complex techniques, such as reverse stitching, buttonhole creation, and zipper insertion – all thoroughly explained in the PDF instruction guide. Understanding presser foot pressure adjustment is also covered, crucial for handling different fabric types. The manual also details compatible bobbin types and available optional accessories. Singer B.R.K. electric motors power the machine, ensuring reliable performance. The manual serves as a complete reference for unlocking the full potential of the Singer 5400.
Safety Precautions
The Singer 5400 manual emphasizes crucial safety instructions to prevent injury during operation. A prominent warning within the manual stresses the importance of referring to the complete instruction booklet for detailed guidance. While specific precautions aren’t fully detailed in the provided text, the presence of “IMPORTANT SAFETY INSTRUCTIONS” highlights their significance.
Users should always disconnect the power cord before performing any maintenance, such as cleaning or changing the needle. Exercise caution when the machine is in operation, keeping fingers away from moving parts. The manual likely details safe handling of the power cord and proper machine placement to avoid electrical hazards. Singer prioritizes user safety, and the manual serves as a vital resource for understanding and adhering to these guidelines. Always consult the PDF for a comprehensive list of safety measures before operating the Singer 5400.
Setting Up Your Singer 5400
Initial setup involves unboxing, connecting the power cord, and preparing the machine for sewing – including bobbin winding and upper thread threading.
Unboxing and Initial Inspection
Carefully unpack your Singer 5400 sewing machine, ensuring all components are present. The box should contain the machine itself, the power cord, various presser feet, bobbins, needles, a screwdriver, and this instruction manual.
Inspect the machine for any visible damage that may have occurred during shipping. Check for cracks, dents, or loose parts. Verify that all accessories are included and in good condition.
Retain the original packaging for potential future transport or storage. Before proceeding, familiarize yourself with the machine’s basic parts as illustrated in the manual. A thorough initial inspection will help ensure a smooth sewing experience and identify any potential issues early on.
Confirm the model number (5400) matches the information on the machine and packaging.
Attaching the Power Cord
Before connecting the power cord, ensure the machine’s power switch is in the “OFF” position. Locate the power jack on the back of the Singer 5400. It’s typically a two-prong receptacle.
Carefully insert the power cord plug fully into the power jack. A secure connection is crucial for safe operation. Do not force the plug; it should fit snugly without excessive pressure.
Plug the other end of the power cord into a properly grounded electrical outlet. Verify the outlet’s voltage matches the machine’s requirements (refer to the machine’s label or manual).
Avoid using extension cords if possible. If an extension cord is necessary, ensure it’s appropriately rated for the machine’s power consumption. Always disconnect the power cord when the machine is not in use or during maintenance.
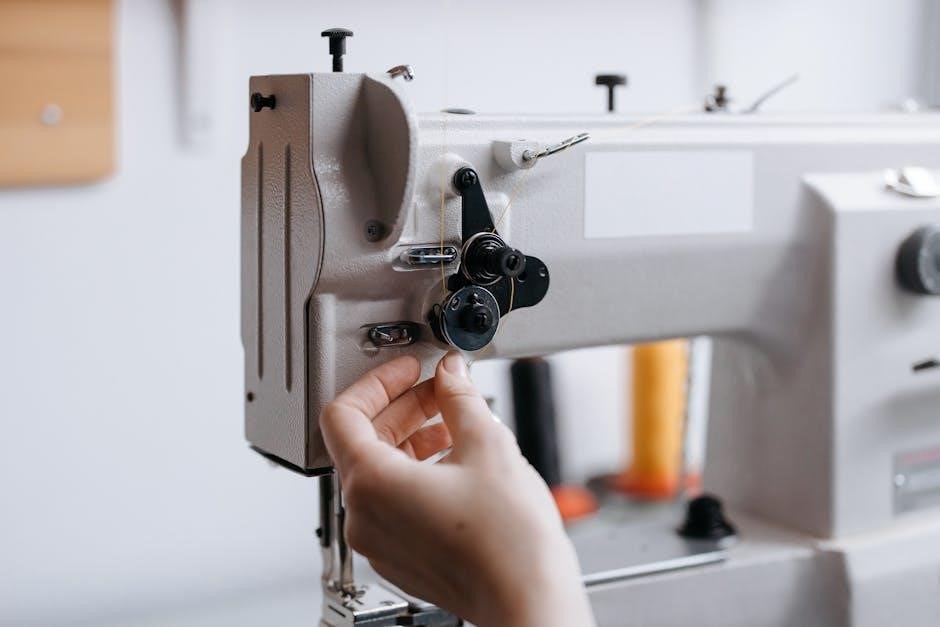
Winding the Bobbin
Begin by placing the spool of thread onto the spool pin, securing it with the spool cap. Then, draw the thread through the thread guide, following the path indicated in your manual. Next, thread the end of the thread through the tension disc – ensuring it ‘clicks’ into place.
Place an empty bobbin onto the bobbin winder spindle. Press the bobbin firmly against the spindle and begin winding by pressing down on the bobbin winder stem. The machine will automatically stop when the bobbin is full.
Cut the thread close to the bobbin. It’s important to wind the bobbin evenly; uneven winding can cause tension issues during sewing. Refer to the diagrams in your Singer 5400 manual for a visual guide to this process.
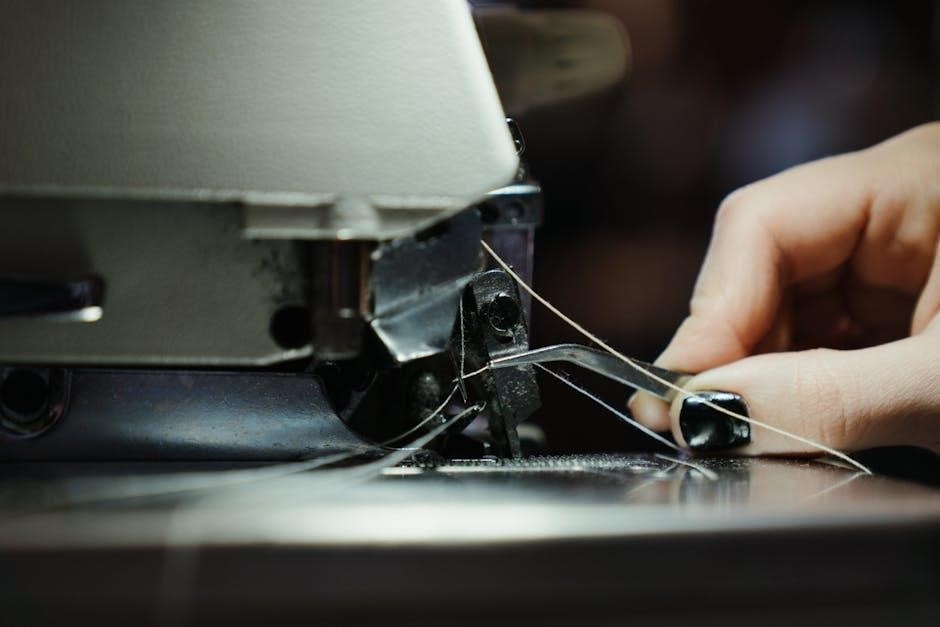
Threading the Upper Thread

Start by ensuring the presser foot is raised and the needle is in its highest position. Place the spool of thread on the spool pin, securing it with a spool cap. Guide the thread through the first thread guide, then down and around the tension discs – a ‘click’ confirms proper placement.
Continue threading upwards, following the numbered path indicated on the machine. This includes guiding the thread through the take-up lever, and then down through the upper thread guide. Finally, thread the needle from front to back.
Draw a sufficient length of thread through the needle eye (approximately 6 inches). Your Singer 5400 manual provides detailed diagrams illustrating this process. Always refer to the manual for the correct threading path to avoid issues.
Basic Sewing Operations
Master fundamental techniques like selecting stitch patterns, adjusting length/width, and executing straight/zigzag stitches with your Singer 5400, as detailed in the manual.
Selecting Stitch Patterns
The Singer 5400 offers a variety of stitch patterns to accommodate diverse sewing projects. Your instruction manual is crucial for understanding each stitch’s purpose and optimal settings. Typically, a stitch selection dial or electronic controls allow you to choose from straight stitches, zigzag stitches, and potentially decorative or stretch stitches.
Refer to the manual’s stitch guide for visual representations of each pattern and recommended uses – garment construction, mending, or decorative embellishments. The manual will also detail how to adjust stitch width and length for different fabric types and desired effects. Experimenting with these settings is encouraged, but always test on a scrap fabric first to ensure the desired outcome.
Proper stitch selection significantly impacts the finished project’s appearance and durability. The Singer 5400 manual provides clear guidance on matching the appropriate stitch to your specific sewing needs, ensuring professional-looking results. Don’t hesitate to consult the PDF manual for detailed diagrams and explanations.
Adjusting Stitch Length and Width
The Singer 5400 allows for precise control over stitch length and width, crucial for achieving professional results. Your instruction manual details how to use the corresponding dials or electronic controls to modify these settings. Stitch length determines the distance between each stitch, impacting durability – shorter for delicate fabrics, longer for heavier materials.
Stitch width primarily affects zigzag stitches, controlling the breadth of the zig-zag pattern. Wider stitches are suitable for stretch fabrics or decorative applications, while narrower widths are ideal for reinforcing seams. The manual provides recommended settings for various fabrics and stitch types.
Always test adjustments on a scrap piece of fabric before sewing your project. This ensures the chosen settings create the desired appearance and prevent puckering or breakage. The Singer 5400 manual, available as a PDF, offers detailed guidance and visual aids for mastering these essential adjustments.
Sewing Straight Stitches
The Singer 5400 excels at creating consistent, reliable straight stitches – the foundation of most sewing projects. Begin by selecting the straight stitch pattern on your machine, referencing your instruction manual for the specific dial or button. Ensure the presser foot is correctly installed for standard sewing.
Guide fabric gently under the presser foot, maintaining a consistent speed. Use the markings on the needle plate as a guide to ensure a straight seam allowance. Avoid pulling or pushing the fabric; let the machine feed it through. The manual emphasizes proper fabric handling for optimal results.
Practice on scrap fabric to develop a feel for the machine’s rhythm. Adjust stitch length as needed, shorter for delicate fabrics and longer for heavier materials. The Singer 5400 manual, available in PDF format, provides detailed illustrations and troubleshooting tips for achieving perfect straight stitches.
Sewing Zigzag Stitches
The Singer 5400 offers versatile zigzag stitching capabilities, ideal for finishing raw edges, creating decorative elements, and sewing stretch fabrics. To begin, select the zigzag stitch pattern using the stitch selection dial, consulting your instruction manual for precise settings. Adjust the stitch width to control the breadth of the zigzag.
Experiment with different stitch widths and lengths on scrap fabric. Wider stitches are suitable for decorative applications, while narrower stitches provide a secure edge finish. The manual details how to adjust these parameters for various fabric types and desired effects.
Guide the fabric smoothly under the presser foot, ensuring even feeding. Zigzag stitches require a slightly slower sewing speed for optimal control. Refer to the Singer 5400 manual’s PDF version for detailed diagrams and troubleshooting advice to master this essential technique.
Advanced Sewing Techniques
The Singer 5400 manual details techniques like reverse stitching, buttonholes, zipper insertion, and presser foot pressure adjustments for skilled sewing projects.
Using the Reverse Stitch
The Singer 5400’s reverse stitch function, as outlined in the manual, is crucial for securing seams at the beginning and end of a sewing line. This prevents unraveling and ensures durability. To engage the reverse stitch, locate the dedicated lever or button – the manual provides a clear diagram of its position.
Typically, depressing this lever before starting to sew will initiate the reverse function. Sew a few stitches backward, then release the lever to return to forward stitching. Repeat this process at the end of your seam. The manual emphasizes practicing this technique to achieve consistent and neat backstitching.
Adjusting the length of the reverse stitches is also possible, allowing for greater control over the seam finish. Refer to the manual’s section on stitch length adjustment for detailed instructions. Mastering the reverse stitch is fundamental for creating professional-quality garments and projects with your Singer 5400.
Buttonhole Sewing
The Singer 5400 simplifies buttonhole creation with its dedicated buttonhole foot and programmed stitch patterns. The manual details a step-by-step process, beginning with selecting the appropriate buttonhole stitch on the machine. It’s vital to measure your button accurately before starting, as the machine needs this dimension for a correctly sized buttonhole.
The manual instructs users to place the buttonhole foot onto the machine and position the fabric carefully. Typically, the machine will automatically sew the buttonhole outline, and you’ll need to stop and reposition the fabric for each side.
Pay close attention to the manual’s illustrations showing the correct fabric placement and stitch sequence. Practicing on scrap fabric is highly recommended before working on your final project. The manual also covers troubleshooting common buttonhole issues, such as uneven stitching or incorrect sizing, ensuring successful results with your Singer 5400.
Zipper Insertion
The Singer 5400 manual provides detailed guidance on inserting various zipper types, including standard, invisible, and centered zippers. It emphasizes using the correct zipper foot, which is often included with the machine’s accessories. The manual begins by outlining fabric preparation, recommending stabilizing the zipper area with interfacing for added durability.
Step-by-step illustrations demonstrate pinning the zipper tape to the fabric, ensuring even alignment. The manual stresses the importance of a consistent seam allowance throughout the process. It details specific stitch selections for zipper application, often utilizing a straight stitch or a specialized zipper stitch.
Troubleshooting tips within the manual address common issues like puckering or uneven zipper teeth. Practicing on scrap fabric is encouraged to master the technique before applying it to a garment. The Singer 5400 offers versatility in zipper insertion, and the manual unlocks these capabilities.
Adjusting Presser Foot Pressure
The Singer 5400 manual explains how adjusting presser foot pressure is crucial for achieving optimal stitch quality across different fabric weights. Lower pressure is recommended for delicate fabrics like silk or chiffon to prevent puckering and fabric damage. Conversely, higher pressure is ideal for thicker materials like denim or canvas, ensuring consistent fabric feed.
The manual details the location of the pressure adjustment dial, typically found on the back of the machine. It provides a scale indicating pressure levels and suggests starting with a medium setting before fine-tuning. Experimentation with scrap fabric is strongly advised to determine the appropriate pressure for each project.
Incorrect pressure can lead to skipped stitches, uneven seams, or fabric slippage. The Singer 5400 manual emphasizes that proper adjustment enhances sewing precision and overall project quality. Mastering this feature unlocks the machine’s full potential for handling diverse materials.

Maintenance and Troubleshooting
The Singer 5400 manual details cleaning, oiling points, and resolving common issues like skipped stitches. Regular upkeep ensures longevity and performance.
Cleaning the Machine
Regular cleaning is crucial for maintaining your Singer 5400’s optimal performance. Dust and lint buildup can cause malfunctions and affect stitch quality. Always disconnect the power cord before beginning any cleaning procedure. Use a soft brush, often included with the machine, to remove lint from the bobbin area, feed dogs, and around the needle plate.
For more stubborn lint, a small vacuum cleaner attachment can be helpful. Avoid using compressed air, as it can blow dust further into the machine. Wipe down the exterior surfaces with a slightly damp cloth. Never use abrasive cleaners or solvents, as these can damage the finish. Pay particular attention to the areas around the tension discs and the needle bar, ensuring they are free of debris. Consistent cleaning, as outlined in the Singer 5400 manual, will extend the life of your sewing machine and ensure smooth operation.
Oil Points and Lubrication
Proper lubrication is essential for the smooth operation of your Singer 5400. Refer to your instruction manual for specific oiling points, as incorrect lubrication can cause damage; Typically, key areas requiring oil include the bobbin race, the hook assembly, and the motor shaft. Use only sewing machine oil – never use oil intended for other purposes.
Apply oil sparingly, using an oiler to precisely target the designated points. Avoid over-oiling, as excess oil can attract dust and lint. After oiling, run the machine briefly to distribute the oil evenly. Regular oiling, as recommended in the manual, prevents friction and wear, ensuring the longevity of your machine. Always disconnect the power before lubricating. Consistent maintenance, including proper oiling, will keep your Singer 5400 running efficiently for years to come.
Troubleshooting Common Issues
Encountering problems with your Singer 5400? The manual provides solutions to frequent issues. Thread bunching often indicates incorrect threading or improper tension. If the needle breaks, ensure you’re using the correct needle type and size for your fabric. A skipped stitch can be caused by a dull or incorrectly inserted needle.
If the machine is noisy, check for lint buildup or the need for lubrication. Power issues may stem from a loose power cord or a tripped circuit breaker. Always refer to the manual’s troubleshooting section before attempting repairs. Remember to disconnect the power before inspecting or cleaning any internal components. For more complex problems, consult a qualified Singer service technician. Following the manual’s guidance can resolve many common issues quickly and safely.
Replacing the Needle
Regular needle replacement is crucial for optimal Singer 5400 performance. The manual details a straightforward process. First, always power off and disconnect the machine. Loosen the needle clamp screw using the screwdriver. Gently remove the old needle, noting its flat side orientation.
Insert a new needle, ensuring the flat side faces the back of the machine – this is vital for correct stitch formation. Tighten the needle clamp screw securely, but avoid over-tightening. Use only Singer-approved needles to prevent damage. Different fabrics require different needle types (universal, ballpoint, etc.), as outlined in the manual. A dull or bent needle can cause skipped stitches, fabric damage, and even machine malfunction. Replace the needle with each new project or if damage is detected.
Accessories and Their Uses
The Singer 5400 manual details various presser feet, bobbin types, and optional accessories. Understanding these enhances sewing capabilities and project versatility.
Presser Feet Guide
The Singer 5400 boasts compatibility with a range of presser feet, each designed for specific sewing tasks. The standard presser foot is ideal for everyday sewing, while the zipper foot facilitates smooth zipper insertion. A buttonhole foot ensures professional-looking buttonholes, and a satin stitch foot delivers beautiful decorative stitches.
Furthermore, specialized feet like the rolled hem foot create delicate rolled edges, perfect for lightweight fabrics. An open toe foot provides better visibility for appliqué and free-motion quilting. The manual details each foot’s function and proper installation. Utilizing the correct presser foot significantly improves stitch quality and overall sewing efficiency. Exploring these options unlocks the full potential of your Singer 5400, allowing for diverse and creative projects.
Always refer to the manual for specific foot recommendations based on fabric type and desired stitch outcome.
Bobbin Types and Compatibility
The Singer 5400 utilizes a class 15 plastic bobbin, a common type ensuring easy availability. It’s crucial to use the correct bobbin to prevent damage to the machine and maintain optimal stitch quality. Metal bobbins are not recommended for this model, as they can cause timing issues and potentially harm internal components.
The manual emphasizes the importance of winding the bobbin correctly, ensuring even distribution of thread. Incorrectly wound bobbins can lead to inconsistent stitches and thread breakage. Always test a new bobbin with scrap fabric before starting a project. Compatibility issues can arise from using low-quality or incorrectly sized bobbins, so sourcing reliable bobbins is essential.
Refer to the Singer 5400’s manual for detailed diagrams and instructions on bobbin winding and insertion for best results.
Optional Accessories Available
The Singer 5400’s versatility can be significantly expanded with a range of optional accessories. While the base model offers essential functions, additional presser feet unlock specialized sewing capabilities. These include a zipper foot for precise zipper insertion, a buttonhole foot for consistent buttonholes, and a blind hem foot for professional-looking hems.
Other useful accessories include a gathering foot, a quilting guide, and various needle sets tailored for different fabrics. Singer also offers extension tables to provide a larger work surface, particularly beneficial for quilting or handling large projects. The manual doesn’t detail every accessory, but Singer’s website and authorized dealers provide comprehensive lists.
Investing in these accessories can greatly enhance your sewing experience and allow you to tackle a wider variety of projects with greater ease and precision.
Understanding the User Manual (PDF)
The Singer 5400’s user manual, readily available as a PDF, is a crucial resource for maximizing your sewing machine’s potential. This manual, spanning 64 pages, provides detailed, step-by-step instructions covering everything from initial setup and threading to advanced sewing techniques; It includes comprehensive diagrams illustrating proper procedures, ensuring clarity for users of all skill levels.
Key sections detail safety precautions, machine features, and troubleshooting common issues. The PDF format allows for easy searching, enabling quick access to specific information. It’s recommended to download and familiarize yourself with the manual before operating the machine.
Singer also provides video tutorials on their YouTube channel, complementing the written instructions. Regularly referencing the manual will help you maintain your Singer 5400 and achieve optimal sewing results.