auto drive fm transmitter manual

Auto Drive FM Transmitter Manual: A Comprehensive Guide

This manual provides detailed instructions for the Auto Drive FM Transmitter, a versatile device for wireless audio streaming in your vehicle․ It covers setup, Bluetooth pairing, operation, troubleshooting, and safety guidelines․ Explore features like hands-free calling and music playback from USB drives or TF cards․

Auto Drive FM transmitters represent a convenient solution for wirelessly connecting your smartphone or other Bluetooth-enabled devices to your car’s stereo system․ These devices bypass the limitations of older car stereos lacking Bluetooth connectivity or auxiliary input jacks, enabling seamless audio streaming of music, podcasts, and audiobooks․ The core function involves modulating audio signals onto an FM radio frequency, transmitting them over a short range to your car radio․

Modern Auto Drive FM transmitters, like the IMDEN Bluetooth FM Transmitter and models from VicTsing (B01DDPUQTS-VD), often incorporate additional features such as hands-free calling via a built-in microphone, USB charging ports for your devices (often 3․1A/1A dual USB), and support for playing audio directly from USB drives or TF cards․ Some models, like the FM02, even include a display for easy operation and frequency selection․ They are designed for ease of use, typically pairing with your phone via Bluetooth using a standard password like ‘0000’․

These transmitters offer a cost-effective upgrade to your in-car entertainment system, transforming your driving experience with enhanced audio capabilities․

Understanding FM Transmitter Technology

FM (Frequency Modulation) transmission relies on encoding audio signals onto carrier waves within the 87․5 – 108․0 MHz frequency band, the same band used by commercial FM radio stations․ An FM transmitter takes an audio input – from Bluetooth, USB, or TF card – and varies the frequency of the carrier wave in proportion to the audio signal’s amplitude․ This modulation process allows the audio to be transmitted wirelessly․

Auto Drive FM transmitters operate at low power, typically under 100mW, to comply with regulatory limits and minimize interference․ Selecting an unused or weakly used FM frequency is crucial for clear audio reception․ Interference can occur from nearby radio stations, other electronic devices, or even environmental factors․ Modern transmitters often include features like automatic frequency searching to identify optimal channels․

The quality of the transmission depends on several factors, including the transmitter’s circuitry, antenna design, and the receiver’s sensitivity․ Bluetooth connectivity utilizes a separate wireless protocol to initially transfer audio to the transmitter, before FM modulation occurs․ Understanding these principles helps optimize performance and troubleshoot potential issues․

Key Features of the Auto Drive FM Transmitter

The Auto Drive FM Transmitter boasts a comprehensive suite of features designed for seamless in-car entertainment and communication․ Core functionality includes wireless audio streaming via Bluetooth, enabling hands-free calling and music playback from smartphones or other Bluetooth-enabled devices․ It also supports direct audio playback from USB flash drives and Micro SD (TF) cards, offering versatile media source options․

A built-in microphone facilitates clear hands-free calling, while integrated controls allow for easy volume adjustment and track/frequency selection․ The transmitter features a digital display screen for showing the current FM frequency and Bluetooth connection status․ Dual USB charging ports (3․1A + 1A) provide convenient power for smartphones and other devices․

Furthermore, many models include noise cancellation technology for improved call quality and a wide FM frequency range for optimal signal clarity; Some versions offer fast charging capabilities (Type-C) and customizable LED backlighting for enhanced visibility․ Its compact design ensures it fits discreetly within most vehicle interiors․

Package Contents and Initial Setup

Upon opening the package, verify that all components are present․ You should find the Auto Drive FM Transmitter unit itself, a user manual detailing operation and troubleshooting, and potentially an auxiliary audio cable for non-Bluetooth devices․ Some packages may include an additional air vent mount or a DC car charger adapter․

Initial setup is straightforward․ Begin by inserting a Micro SD card (TF card) if you intend to use this feature, ensuring it’s properly seated in the designated slot․ Next, securely attach the transmitter to your vehicle’s air vent using the provided clip or mount․ Ensure it’s firmly in place to prevent movement during driving․

Plug the transmitter into your car’s 12V/24V cigarette lighter socket․ The unit should power on automatically․ If not, check the connection and ensure your vehicle’s ignition is switched on․ Familiarize yourself with the button layout and the digital display before proceeding to the next step – powering on and basic operation․

Powering On and Basic Operation

To power on the Auto Drive FM Transmitter, simply ensure it’s plugged into your vehicle’s 12V/24V cigarette lighter socket and your car’s ignition is turned on․ The unit will typically activate automatically, displaying the current FM frequency on the digital screen․ If it doesn’t, a dedicated power button may be present – consult the quick start guide․

Basic operation revolves around the multifunction button or a combination of buttons․ These control power, volume adjustment, and frequency selection․ Short presses often cycle through preset FM frequencies, while a long press might initiate Bluetooth pairing․ The display will indicate the currently selected frequency․

Volume control is usually managed via dedicated ‘+’ and ‘-’ buttons, or by rotating a dial․ Start with a low volume level and gradually increase it to a comfortable listening level․ Before connecting your smartphone, familiarize yourself with the frequency selection process, as you’ll need to choose an unused frequency to avoid interference․

Bluetooth Pairing Instructions

To pair your smartphone with the Auto Drive FM Transmitter, first ensure the transmitter is in Bluetooth pairing mode․ This is often activated by a long press of the multifunction button, indicated by a flashing blue light․ On your smartphone, navigate to the Bluetooth settings menu and initiate a device search․

The transmitter should appear in the list of available devices, typically identified as “TF-FMT22BT” or a similar designation․ Select this device to begin the pairing process․ You may be prompted to enter a pairing code; the default code is commonly “0000”․ Enter this code if requested, and confirm the pairing on both devices․

Once successfully paired, the transmitter’s indicator light will usually turn solid blue, signifying a stable connection․ Subsequent connections will typically occur automatically when both devices are within range and Bluetooth is enabled․ If pairing fails, try restarting both the transmitter and your smartphone, and repeat the process․

Connecting to Your Smartphone

After successful Bluetooth pairing, the Auto Drive FM Transmitter seamlessly integrates with your smartphone for audio streaming and hands-free calling․ Ensure your smartphone’s volume is at a reasonable level before initiating playback․ Once connected, open your preferred music application – Spotify, Apple Music, or others – and begin playing your desired audio․

The transmitter will automatically switch to audio playback mode, transmitting the sound wirelessly to your car’s stereo system via FM radio; For optimal sound quality, refer to the ‘Frequency Selection and Tuning’ section to find a clear FM frequency with minimal interference․ The transmitter also supports hands-free calling; incoming calls will automatically pause music playback․

Answer calls by pressing the multifunction button on the transmitter․ The built-in microphone allows for clear voice transmission․ To end a call, press the button again․ Some models feature voice assistant integration, allowing you to activate Siri or Google Assistant with a simple press․ Enjoy a safer and more convenient driving experience!

Frequency Selection and Tuning

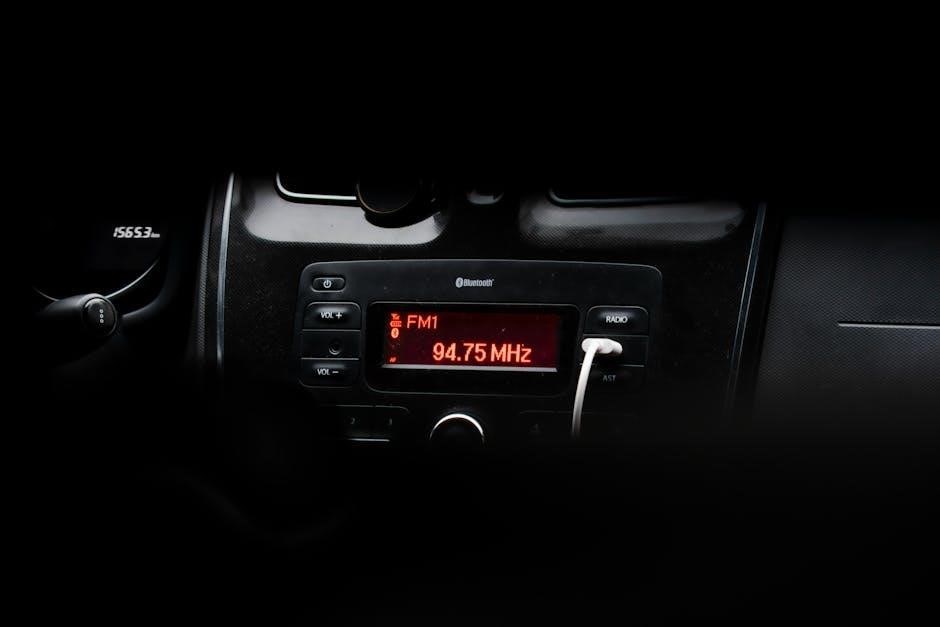
Achieving optimal audio quality relies on selecting a clear FM frequency․ Begin by turning on your car’s radio and scanning for unoccupied frequencies – those with minimal static or broadcasting signals․ The Auto Drive FM Transmitter allows you to manually select a frequency using the dedicated buttons or dial․

Once you’ve chosen a frequency on the transmitter, tune your car’s radio to exactly the same frequency․ Slight adjustments may be necessary on either the transmitter or your car radio to achieve the clearest possible signal․ Static interference is common, especially in urban areas; experiment with different frequencies until you find one with minimal disruption․

Avoid frequencies used by local radio stations to prevent interference․ Some transmitters offer a ‘scan’ function that automatically searches for the best available frequency․ Remember to re-tune if you travel to a different location, as available frequencies vary geographically․ A stable, clear frequency ensures an enjoyable listening experience․

Adjusting Volume Levels

Controlling the audio output involves adjusting volume levels on both the Auto Drive FM Transmitter and your car’s radio․ Start by setting the volume on the transmitter to a moderate level – approximately 70-80% of its maximum․ This provides a good baseline for fine-tuning․

Next, use your car’s radio volume control to increase the sound to your desired listening level․ Avoid maxing out the volume on either device, as this can introduce distortion and reduce audio quality․ If you experience static or crackling, slightly reduce the transmitter’s volume first․

The ideal volume balance depends on your car’s audio system and your personal preference․ Experiment with different combinations until you achieve a clear, balanced sound․ Some transmitters feature a volume limiter to prevent sudden loud noises․ Ensure the volume is set at a safe level to avoid distracting you while driving and to protect your hearing․

Hands-Free Calling Functionality

The Auto Drive FM Transmitter offers a convenient hands-free calling feature, enhancing safety while driving․ Once paired with your smartphone via Bluetooth, incoming calls are automatically routed through the car’s speakers․ Answering or ending a call is typically done using a multi-function button on the transmitter itself․

To answer an incoming call, simply press the designated button․ To end a call, press the same button again․ Some models support voice commands, allowing you to answer or reject calls without physically interacting with the device․ The built-in microphone ensures clear voice transmission during calls․

For optimal call quality, position the transmitter’s microphone towards you․ Ensure there’s minimal background noise in the vehicle․ The transmitter automatically switches back to music playback once the call ends․ Prioritize safe driving; use this feature responsibly and adhere to local traffic laws regarding phone use while operating a vehicle․

Music Playback from USB Drives

The Auto Drive FM Transmitter allows seamless music playback directly from USB flash drives․ Simply plug your USB drive, containing MP3 or other compatible audio files, into the designated USB port on the transmitter․ The device will automatically detect the drive and begin playing the music files․

Navigation through your music library is typically controlled using buttons on the transmitter․ These buttons usually include functions for play/pause, skip forward, skip backward, and volume adjustment․ Some models may also offer folder selection, allowing you to browse through different directories on your USB drive․

Ensure your USB drive is formatted with a compatible file system, such as FAT32 or exFAT․ The transmitter supports a wide range of USB drive capacities․ For optimal performance, use a USB 2․0 or 3․0 drive․ Enjoy your favorite tunes on the road with this convenient feature, providing a diverse audio experience during your commute․

Using the TF Card Slot for Music

The Auto Drive FM Transmitter features a built-in TF (MicroSD) card slot, offering another convenient way to enjoy your music collection while driving․ Insert a TF card loaded with MP3 or compatible audio files into the designated slot on the transmitter․ The device will automatically recognize the card and initiate music playback․

Similar to USB drive playback, navigation through your music library on the TF card is managed using the transmitter’s control buttons․ These buttons typically include play/pause, next track, previous track, and volume controls․ Some models may also support folder browsing, enabling you to select specific directories on the TF card․

Ensure your TF card is formatted with a compatible file system, commonly FAT32․ The transmitter supports various TF card capacities, allowing you to store a substantial music library․ This feature provides a flexible and portable solution for accessing your favorite songs on the go, enhancing your driving experience․

Troubleshooting Common Issues: No Sound

Experiencing no sound from your Auto Drive FM Transmitter? Several factors could be at play․ First, verify the volume level on both the transmitter and your car radio․ Ensure neither is muted or set to a minimum volume․ Confirm the transmitter is correctly tuned to a clear FM frequency not occupied by a broadcasting station – try scanning for an open frequency․

Next, check the audio source․ If using Bluetooth, ensure your smartphone is properly paired and the volume is audible on the phone itself․ For USB or TF card playback, confirm the files are compatible (MP3 is generally supported) and the card is securely inserted․ A faulty cable connection can also cause issues; try a different USB cable․

Finally, power cycle the transmitter and your car radio․ If the problem persists, test the transmitter in another vehicle to isolate whether the issue lies with the transmitter or your car’s audio system․ If still no sound, consult the warranty information for support․

Troubleshooting Common Issues: Bluetooth Connection Problems

Encountering difficulties pairing or maintaining a Bluetooth connection with your Auto Drive FM Transmitter? Begin by ensuring Bluetooth is enabled on your smartphone and that the transmitter is in pairing mode – typically indicated by a flashing light․ If prompted, enter the pairing code “0000” as a default, as some devices require it․

If pairing fails, try deleting the transmitter from your phone’s Bluetooth list and re-initiating the pairing process․ Ensure no other Bluetooth devices are actively attempting to connect, as interference can occur․ Move your smartphone closer to the transmitter during pairing for a stronger signal․

For intermittent disconnections, check for obstructions between your phone and the transmitter․ Update your phone’s operating system, as Bluetooth compatibility improves with updates; A full reset of both the transmitter and your phone’s Bluetooth settings can sometimes resolve persistent connection issues․ If problems continue, refer to the FAQ section or warranty details․

Troubleshooting Common Issues: Static Interference

Experiencing static or crackling sounds during audio playback with your Auto Drive FM Transmitter? This is often due to radio frequency (RF) interference․ Begin by changing the transmission frequency on the transmitter․ Scan for a clear frequency with minimal static – a quieter channel will provide better audio quality․

External sources can also cause interference․ Move away from tall buildings, power lines, or other electronic devices that may emit RF signals․ Ensure the transmitter’s antenna is fully extended and positioned for optimal reception․ Check the car’s electrical system; a faulty component could be generating noise․

Try a different USB cable or TF card, as a damaged cable or card can introduce static․ Lowering the volume on both the transmitter and your smartphone can sometimes reduce the perceived static․ If the issue persists, consult the FAQ section or contact customer support for further assistance․ A reset of the device may also help․

Safety Precautions and Warnings

To ensure safe operation of your Auto Drive FM Transmitter, please adhere to the following precautions․ Do not use the device while driving if it distracts you from the road․ Prioritize safe driving practices at all times․ Avoid exposing the transmitter to extreme temperatures, humidity, or direct sunlight for prolonged periods․

Do not disassemble or attempt to repair the device yourself․ This will void the warranty and may pose a safety hazard․ Keep the transmitter away from liquids and flammable materials․ Use only the provided USB cable or a certified equivalent for power․ Ensure proper ventilation around the device during operation to prevent overheating․

Avoid dropping or subjecting the transmitter to strong impacts․ Disconnect the device from the car’s power outlet when not in use for extended periods․ Follow all local traffic laws and regulations regarding the use of electronic devices while driving․ Improper use may result in damage to the device or your vehicle․

Cleaning and Maintenance

To maintain the optimal performance and longevity of your Auto Drive FM Transmitter, regular cleaning and proper maintenance are essential․ Always disconnect the device from the power source before cleaning․ Use a soft, dry cloth to gently wipe the exterior surfaces, removing dust and fingerprints․ Avoid using abrasive cleaners, solvents, or excessive moisture, as these can damage the finish․

For stubborn dirt or grime, lightly dampen the cloth with a mild detergent solution and wipe carefully․ Ensure the cloth is only slightly damp, not wet․ Clean the USB and TF card slots periodically with a soft brush or compressed air to remove any accumulated debris; Inspect the cable for any signs of damage, such as fraying or exposed wires․

If the cable is damaged, replace it immediately with a certified equivalent․ Store the transmitter in a cool, dry place when not in use, away from direct sunlight and extreme temperatures․ Regular maintenance will help ensure your Auto Drive FM Transmitter continues to provide reliable performance for years to come․

Technical Specifications

The Auto Drive FM Transmitter boasts a range of technical features designed for optimal performance․ It operates within a frequency range of 87․5 – 108․0 MHz, covering standard FM radio bands․ Bluetooth connectivity is provided via version 5․0, ensuring a stable and efficient wireless connection with smartphones and other devices․ The transmitter supports MP3 and WAV audio formats for versatile music playback․

Power input is 12-24V DC, compatible with most vehicle cigarette lighter sockets․ It features dual USB charging ports, delivering 3․1A and 1A output for simultaneous device charging․ The built-in microphone enables hands-free calling functionality․ The device supports TF cards up to 32GB for extended music storage․

Dimensions are approximately 4․5 x 1․8 x 0․8 inches, making it compact and unobtrusive․ Signal-to-noise ratio exceeds 60dB, providing clear audio transmission․ Operating temperature ranges from -10°C to 60°C․ The transmitter includes an integrated noise reduction system for enhanced sound quality and minimizes static interference․

Frequently Asked Questions (FAQ)

Q: Why is there no sound? Ensure the FM transmitter is powered on and correctly paired with your smartphone via Bluetooth․ Verify the selected FM frequency doesn’t overlap with a local radio station․ Adjust the volume on both the transmitter and your phone․

Q: How do I fix Bluetooth connection issues? Delete previous pairings on your phone and the transmitter․ Restart both devices and attempt pairing again, using the default password “0000” if prompted․ Ensure Bluetooth is enabled on your phone․

Q: What causes static interference? Try changing the FM frequency to a clearer channel․ Move the transmitter away from other electronic devices․ Check the cigarette lighter socket for a secure connection․ A faulty or low-quality audio source can also cause static․

Q: Can I charge two devices simultaneously? Yes, the transmitter features dual USB ports – one for fast charging (3․1A) and another for standard charging (1A)․

Q: What file formats are supported? The transmitter supports MP3 and WAV audio files stored on USB drives or TF cards․

Warranty Information

Our Auto Drive FM Transmitter is covered by a one-year limited warranty, commencing from the original date of purchase; This warranty protects against defects in materials and workmanship under normal use․ We will, at our discretion, repair or replace the defective unit, free of charge․

This warranty does not cover damage resulting from misuse, accidents, unauthorized modifications, or natural disasters․ It also excludes normal wear and tear․ Proof of purchase (receipt or invoice) is required for all warranty claims․

To initiate a warranty claim, please contact our customer support team with a detailed description of the issue and your proof of purchase․ We will provide instructions for returning the unit for inspection․ Shipping costs for warranty returns are the responsibility of the customer․

This warranty is non-transferable and applies only to the original purchaser․ Any implied warranties, including merchantability and fitness for a particular purpose, are limited to the duration of this express warranty․ We are not liable for any incidental or consequential damages․

Disposal and Recycling

Responsible disposal of your Auto Drive FM Transmitter is crucial for environmental protection․ This device contains electronic components that should not be discarded with household waste․ Improper disposal can harm the environment and human health․

Please do not throw this product into regular trash bins․ Instead, utilize designated electronic waste (e-waste) collection points in your community․ Many retailers offer e-waste recycling programs, providing a convenient and environmentally sound disposal option․

You can also check with your local municipal waste management authorities for information on e-waste recycling facilities in your area․ Proper recycling ensures that valuable materials are recovered and reused, reducing the need for new resource extraction․

By participating in e-waste recycling, you contribute to a sustainable future and help minimize the environmental impact of electronic devices․ Adhering to local regulations regarding electronic waste disposal is essential for responsible ownership․ Let’s work together to protect our planet․

coefficient of thermal expansion table pdf

Understanding material responses to temperature is crucial; readily available PDF tables detail the coefficient of thermal expansion for diverse building materials like glass and metals․

What is Thermal Expansion?

Thermal expansion describes the tendency of matter to change in volume in response to temperature changes․ When a substance is heated, its particles move more and thus maintain a greater average separation․ Because thermometers rely on this principle, understanding it is vital․

Materials expand dimensionally – linearly, in area, or volumetrically – and the extent of this change is quantified by the coefficient of thermal expansion․ Conveniently, PDF tables compile these coefficients for numerous materials, including glass, metals, wood, and plastics․ These resources are invaluable for engineers and designers․

These tables, often found through online databases, provide critical data for predicting how materials will behave under varying thermal conditions, ensuring structural integrity and preventing failures․ The values typically range from 3․7 to 13․6 millionths per °C․

Importance of Understanding CTE in Engineering

Accurate material selection hinges on comprehending the Coefficient of Thermal Expansion (CTE)․ Ignoring CTE can lead to significant engineering failures, particularly in structures exposed to temperature fluctuations․ Bridges, buildings, and aerospace components all demand careful consideration of thermal behavior․

PDF tables detailing CTE values are essential tools for engineers․ These resources allow for precise calculations of dimensional changes, preventing stress build-up and ensuring component compatibility․ For example, Invar 36, with a low CTE, is crucial in aerospace․

Utilizing these tables, engineers can proactively design systems that accommodate expansion and contraction, maintaining functionality and safety․ Accessing and interpreting these PDF resources is a fundamental skill in many engineering disciplines․

Coefficient of Thermal Expansion: Definitions and Types

CTE describes material expansion; PDF tables categorize this as linear, area, or volume change, crucial for engineering calculations and material selection․

Linear Thermal Expansion

Linear thermal expansion specifically details changes in a material’s length relative to temperature fluctuations․ Numerous PDF tables, often sourced from material databases like MatWeb or organizations like the Clay Brick Association of Southern Africa, provide coefficients for various substances․ These tables are essential for engineers and designers․

The formula ΔL = αLΔT, frequently illustrated in resources like Clemson University Physics Lab materials, demonstrates how to calculate this change, where α represents the coefficient, L is the original length, and ΔT is the temperature difference․ Values typically range, as noted in online resources, from approximately 0․6×10⁻⁶ for Invar 36 to significantly higher values for other materials․ Accessing these PDF resources allows for precise calculations and informed material choices, preventing structural issues caused by expansion or contraction․

Area Thermal Expansion

Area thermal expansion describes how the surface area of a material changes with temperature․ While often less directly presented in readily available PDF tables compared to linear expansion, it’s fundamentally linked․ The coefficient of area expansion (β) is approximately twice the coefficient of linear expansion (α)․ Therefore, data from linear expansion PDFs can be utilized to estimate area changes․

Understanding this is vital in applications involving plates, sheets, or surface coatings․ Resources detailing thermal stress and strain often implicitly address area expansion․ Precise values for β are sometimes found within comprehensive material property databases accessible as PDF documents․ Careful consideration of area expansion, alongside linear data, ensures accurate design and prevents issues like buckling or warping due to temperature variations, particularly in larger structures․

Volume Thermal Expansion

Volume thermal expansion details how a substance’s volume alters with temperature fluctuations․ While not always explicitly detailed in basic coefficient of thermal expansion PDF tables, it’s crucial for understanding the behavior of fluids and solids in three dimensions․ The volumetric expansion coefficient (γ) is roughly three times the linear coefficient (α)․

Consequently, linear expansion data from PDF resources can be extrapolated to estimate volume changes․ This is particularly important in applications like designing containers, pipelines, or any system where volume changes could induce stress․ More specialized material property PDFs, often found in engineering databases, will directly list γ values․ Accurate consideration of volume expansion prevents issues like overpressure or material failure due to thermal stresses․

Coefficient of Thermal Expansion Values for Common Materials

Comprehensive PDF tables showcase CTE values; Invar 36 exhibits around 0․6×10⁻⁶, while typical building materials range from 3․7 to 13․6×10⁻⁶/°C․

Coefficient of Thermal Expansion for Metals

Metal CTE values, meticulously documented in accessible PDF resources, are vital for engineering design․ Steel alloys demonstrate varied expansion rates, necessitating precise data from comprehensive tables for accurate calculations․ Aluminum alloys also exhibit a range of CTEs, influencing their suitability for specific applications․

Copper, a widely used metal, possesses a well-defined coefficient, readily found in material property databases and PDF charts; Notably, Invar 36 stands out with an exceptionally low CTE – approximately 0․6×10⁻⁶ – making it ideal for applications demanding dimensional stability across temperature fluctuations, particularly within aerospace engineering․ These PDF tables provide critical data for selecting appropriate metals based on thermal performance requirements, ensuring structural integrity and functional reliability․

Steel (Various Alloys)

Steel’s coefficient of thermal expansion isn’t a single value; it varies significantly depending on the alloy composition, detailed in numerous PDF material property tables․ Carbon steel, alloy steels, and stainless steels each exhibit distinct CTEs, impacting their behavior in thermal environments․

Accessing comprehensive PDF resources is crucial for engineers, as these tables provide precise CTE data for specific steel grades․ These values are essential for calculating thermal stresses and strains in steel structures․ Understanding these variations, documented in readily available PDF formats, allows for informed material selection and design optimization, preventing failures due to thermal expansion or contraction․ Accurate CTE data ensures the longevity and reliability of steel components across diverse operating temperatures․

Aluminum (Various Alloys)

Aluminum alloys demonstrate a relatively high coefficient of thermal expansion compared to steel, with values meticulously documented in accessible PDF material databases․ Different aluminum alloys – such as 6061-T6 or 5052 – possess unique CTEs, necessitating precise data for engineering applications․

Detailed PDF tables are invaluable for engineers needing accurate CTE values for aluminum components․ These resources outline the expansion behavior across temperature ranges, crucial for designs involving thermal stresses․ Utilizing these PDF resources ensures correct calculations for expansion joints and prevents structural failures․ The availability of comprehensive PDF data simplifies material selection, guaranteeing optimal performance and reliability in diverse thermal conditions, and preventing costly errors․

Copper

Copper exhibits a moderately high coefficient of thermal expansion, a property thoroughly detailed within readily available PDF material property tables․ These PDF resources provide precise CTE values essential for engineers designing systems involving copper components, particularly those exposed to fluctuating temperatures․

Accessing comprehensive PDF data allows for accurate calculations of thermal stresses and strains․ Engineers can utilize these tables to determine appropriate expansion allowances in designs, preventing potential failures due to thermal loading․ The PDF format ensures easy access and portability of critical material data․ Understanding copper’s CTE, as outlined in these PDF documents, is vital for applications ranging from electrical wiring to heat exchangers, guaranteeing long-term reliability and optimal performance․

Invar 36

Invar 36, a nickel-iron alloy, is renowned for its exceptionally low coefficient of thermal expansion – typically around 0․6 x 10⁻⁶ /°C – a value meticulously documented in numerous engineering PDF tables․ These PDF resources are invaluable for applications demanding dimensional stability across a wide temperature range, such as precision instruments and aerospace components․

Detailed PDF data sheets provide precise CTE values, enabling engineers to confidently predict and mitigate thermal distortions․ The availability of these PDF tables simplifies material selection and design calculations․ Utilizing Invar 36, as informed by these PDF resources, minimizes thermal stress and ensures consistent performance in demanding environments․ Its unique properties, clearly outlined in accessible PDF formats, make it a preferred choice where thermal stability is paramount․

Coefficient of Thermal Expansion for Building Materials

Building materials exhibit varied responses to temperature fluctuations, detailed in comprehensive PDF tables․ These resources document CTE values for glass, brick, masonry, wood, and plastics, ranging from approximately 3․7 to 13․6 millionths per °C (2․1 to 7․6 per °F), with an average around 6․3 (3․5)․ Accessing these PDFs is vital for structural engineers․

PDF tables aid in predicting expansion and contraction, preventing stress and potential failure․ Clay Brick Association PDFs specifically address movement in masonry․ Understanding these CTEs, readily available in PDF format, ensures durable and safe construction․ Proper material selection, guided by these PDF resources, minimizes structural issues caused by thermal changes, leading to long-lasting buildings․

Glass

Glass, an inorganic material, presents a unique challenge due to its relatively high coefficient of thermal expansion (CTE), detailed in accessible PDF tables․ These PDF resources document CTE values crucial for applications ranging from windows to specialized optics․ Variations exist between glass types; glass-crystal materials also have documented CTEs․

PDF tables allow engineers to accurately predict expansion and contraction, preventing stress fractures․ Understanding these values, often found in material property PDFs, is vital for bonding glass to other materials․ Careful consideration of CTE, as outlined in these PDFs, ensures structural integrity and prevents failures caused by thermal stress, leading to safer and more durable glass products․

Brick and Masonry

Brick and masonry structures exhibit thermal expansion and contraction, documented in comprehensive PDF tables detailing CTE values․ These PDF resources, like those from the Clay Brick Association of Southern Africa, are essential for understanding movement within masonry․ The coefficients typically range from 3․7 to 13․6 millionths per °C (2․1 to 7․6 per °F), with an average around 6․3 (3;5)․

PDF tables aid in predicting expansion/contraction, crucial for joint design and preventing cracking․ Clay versus brick movement is specifically addressed in available PDFs, highlighting material differences․ Proper consideration of CTE, as detailed in these PDFs, ensures structural stability and longevity, mitigating issues caused by temperature fluctuations within masonry constructions․

Wood

Wood’s behavior with temperature changes is detailed in coefficient of thermal expansion PDF tables, though its anisotropic nature complicates matters․ Unlike metals, wood expands differently along and across the grain․ These PDF resources provide values for these varying directions, crucial for accurate calculations in construction and woodworking․

Finding precise CTE values for specific wood species within PDF documents is vital․ While generally lower than metals, expansion and contraction still occur, impacting joints and finishes․ PDF tables help designers account for these movements, preventing warping or stress fractures․ Understanding wood’s CTE, as presented in these readily available PDFs, ensures durable and aesthetically pleasing wood structures․

Plastics

Plastic materials exhibit a wide range of thermal expansion coefficients, comprehensively documented in accessible PDF tables․ These PDF resources are essential because CTE varies significantly depending on the plastic type – from polyethylene to polycarbonate – and even specific formulations․ Designers rely on these PDFs to select appropriate plastics for applications involving temperature fluctuations․

PDF tables detailing plastic CTE values are critical for preventing stress, deformation, or failure in plastic components․ The higher CTE of many plastics compared to metals necessitates careful consideration in composite designs․ Accessing these PDFs allows engineers to accurately predict dimensional changes, ensuring proper fit and function․ Understanding these values, readily available in PDF format, is paramount for successful plastic product development․

Accessing Coefficient of Thermal Expansion Tables (PDF Format)

Numerous online databases and resources offer PDF tables containing CTE data for various materials, aiding material selection and engineering calculations․

Online Databases and Resources for CTE Data

Accessing reliable coefficient of thermal expansion (CTE) data is simplified through several online resources․ MatWeb stands out as a free database, boasting engineering properties for over 64,000 materials, including comprehensive CTE values․ Clemson University’s Physics Lab provides educational resources and examples demonstrating linear thermal expansion calculations, utilizing CTE and original dimensions․

Furthermore, organizations like the Clay Brick Association of Southern Africa offer PDF documents detailing movement characteristics of masonry, including CTE information for brick and clay․ These resources often present data in easily digestible table formats․ AmesWeb provides a CTE calculator alongside detailed tables, emphasizing the importance of using temperature-dependent CTE values for accurate analysis․ Utilizing these platforms ensures engineers and designers have access to the necessary data for informed material selection and structural integrity․

Using PDF Tables for Material Selection

PDF tables containing coefficient of thermal expansion (CTE) data are invaluable during material selection․ These tables allow for quick comparison of expansion rates across various substances – metals, glass, plastics, and building materials – crucial for preventing stress and failure in designs․

When utilizing these resources, carefully note the units (e․g․, per °C or °F) and temperature range for the reported CTE values․ Consider applications involving significant temperature fluctuations; alloys like Invar 36, with exceptionally low CTEs, become vital․ Analyzing PDF data enables informed decisions, ensuring compatibility between joined materials and predicting dimensional changes, ultimately enhancing structural reliability and long-term performance․ Proper interpretation of these tables minimizes risks associated with thermal stress․

Factors Affecting Coefficient of Thermal Expansion

CTE isn’t constant; temperature and composition influence it, as detailed in PDF tables—alloying metals alters expansion rates, demanding careful material consideration․

Temperature Dependence of CTE

Coefficient of Thermal Expansion (CTE) values aren’t static; they fluctuate with temperature changes, a critical consideration often detailed within comprehensive PDF material property tables․ Relying on a single, room-temperature CTE value can introduce significant errors in engineering calculations, particularly across broad temperature ranges․

Many materials exhibit non-linear thermal expansion behavior․ This means the rate of expansion isn’t consistent throughout the temperature spectrum․ PDF resources often present CTE as a function of temperature, allowing for more accurate predictions․ For instance, metals demonstrate varying expansion rates at extremely high or low temperatures․

Furthermore, phase transitions within a material can cause abrupt changes in CTE․ Accessing detailed PDF tables, which often include graphical representations of CTE versus temperature, is vital for precise engineering design and material selection, ensuring structural integrity and functionality․

Material Composition and Alloying

A material’s CTE is profoundly influenced by its composition; alloying significantly alters thermal expansion characteristics, information frequently compiled in detailed PDF material databases; Pure metals possess distinct CTE values, but introducing alloying elements modifies these properties, often intentionally․

For example, Invar 36, highlighted in resources, achieves a remarkably low CTE (around 0․6×10⁻⁶) due to its nickel-iron composition․ These specialized alloys are crucial in applications demanding dimensional stability across temperature variations, as detailed in PDF specifications․

PDF tables often provide CTE data for various alloys of common metals like steel, aluminum, and copper․ Understanding these compositional effects is paramount for engineers selecting materials for specific thermal environments, ensuring compatibility and preventing stress-induced failures․ Careful review of these resources is essential․

the land of stories the wishing spell pdf

The Land of Stories: The Wishing Spell PDF ─ A Comprehensive Guide

Discover the enchanting world of “The Wishing Spell” by Chris Colfer, readily available as a 3.3 MB PDF file, initiating a captivating series exploration!

The Land of Stories, conceived by Chris Colfer, is a captivating middle-grade fantasy series that masterfully blends classic fairy tales with a modern narrative. The series debuted with “The Wishing Spell” in 2013, quickly gaining popularity for its inventive storytelling and fresh perspectives on beloved characters.

The core concept revolves around twins, Alex and Conner Bailey, who are unexpectedly transported from our world into a fantastical realm where fairy tale characters live and breathe. This initial journey, detailed within the readily available PDF version of “The Wishing Spell”, sets the stage for a sprawling adventure across numerous interconnected stories.

Colfer’s unique approach isn’t simply retelling familiar tales; he reimagines them, exploring the complexities of these characters and the world they inhabit. The series, available in PDF format, offers readers a chance to rediscover the magic of childhood stories through a contemporary lens, making it a delightful read for all ages.

What is “The Wishing Spell”? ⎻ A Synopsis

“The Wishing Spell,” the inaugural novel in The Land of Stories series, introduces siblings Alex and Conner Bailey. Their lives take a dramatic turn when they stumble upon a mysterious book that transports them to a magical land – a realm populated by characters from classic fairy tales.

However, this isn’t the happily-ever-after world they imagined. The fairy tale kingdom is facing a crisis, threatened by an evil Queen who seeks to erase all happiness. The PDF version of the book reveals that the twins quickly learn they are central to a prophecy, tasked with finding a Wishing Spell to restore balance.

Their quest is fraught with danger, requiring them to navigate treacherous landscapes and encounter both helpful and hostile fairy tale figures. The 3.3 MB PDF offers a thrilling introduction to this enchanting universe, setting the stage for a grand adventure.

Chris Colfer: The Author Behind the Magic

Chris Colfer, celebrated for his role as Kurt Hummel on the hit television series Glee, is the creative force behind The Land of Stories series, including “The Wishing Spell.” Beyond acting, Colfer demonstrates remarkable literary talent, crafting a captivating world rooted in beloved fairy tales.

He penned “The Wishing Spell” – initially released in 2013 – showcasing a unique storytelling ability that appeals to readers of all ages. The PDF version of the book allows fans to delve into Colfer’s imaginative universe. His passion for storytelling shines through, blending familiar narratives with original twists.

Colfer’s work has garnered critical acclaim and a dedicated readership, proving his versatility as an entertainer and author. He continues to expand the Land of Stories, captivating audiences with each new installment.

Availability of “The Wishing Spell” in PDF Format

“The Wishing Spell” in PDF format is widely accessible online, offering a convenient way to experience Chris Colfer’s enchanting tale. A readily available file, approximately 3.3 MB in size, allows readers to instantly download and immerse themselves in the Land of Stories.

However, it’s crucial to exercise caution when sourcing PDF copies. While numerous websites offer downloads, ensuring legitimacy is paramount to avoid potential security risks. The PDF format facilitates portability, enabling reading on various devices – tablets, smartphones, and computers.

This digital accessibility expands the book’s reach, making it available to a broader audience. Readers can enjoy the magic of “The Wishing Spell” anytime, anywhere, thanks to the convenience of the PDF format.

Legitimate Sources for Downloading the PDF

Finding a legal PDF of “The Wishing Spell” requires careful navigation. While direct, free downloads are rare, authorized platforms offer options. Checking official publisher websites is a primary step, though PDF availability isn’t always guaranteed.

Reputable eBook retailers, like Amazon Kindle or Barnes & Noble Nook, frequently sell digital versions that can be read on compatible devices or converted to PDF. Subscription services offering digital books, such as Scribd or similar platforms, may also include “The Wishing Spell” in their libraries.

Always prioritize purchasing from legitimate sources to support Chris Colfer and ensure a safe, virus-free reading experience. Avoid unofficial websites offering free downloads, as these often pose security risks.

Risks Associated with Unofficial PDF Downloads

Downloading “The Wishing Spell” PDF from unofficial sources carries significant risks. These websites frequently harbor malware, viruses, and other malicious software that can compromise your device and personal data. Such files can lead to identity theft, financial loss, or system damage.

Furthermore, accessing copyrighted material illegally is a violation of the law, potentially resulting in legal consequences. Unofficial PDFs often have poor formatting, missing pages, or are simply incomplete, diminishing the reading experience.

Supporting authors and publishers by purchasing legitimate copies ensures continued creation of quality content. Prioritize safety and legality by opting for authorized sources when seeking a digital copy of this beloved novel.

Characters in “The Wishing Spell”

“The Wishing Spell” introduces a vibrant cast of characters central to the unfolding narrative. At the heart of the story are siblings Alex and Conner Bailey, ordinary children thrust into an extraordinary adventure. Their journey intertwines them with iconic figures from classic fairy tales.

The Queen, a formidable antagonist, plays a pivotal role, driven by a mysterious curse. Numerous familiar fairy tale characters appear, reimagined within Colfer’s unique world, each possessing distinct personalities and motivations. These include Red Riding Hood, Cinderella, and Snow White, among others.

These characters collectively contribute to the rich tapestry of the Land of Stories, creating a dynamic and engaging reading experience.

Alex and Conner Bailey: The Protagonists

Alex and Conner Bailey are the central protagonists of “The Wishing Spell,” siblings whose lives are dramatically altered by a mysterious book. Alex, the elder sister, is characterized by her intelligence, determination, and love for reading, while Conner is portrayed as more lighthearted and imaginative.

Their contrasting personalities create a compelling dynamic as they navigate the challenges of the Land of Stories. Initially, they represent ordinary children, but their experiences within the fairy tale world force them to confront their fears and discover hidden strengths.

Their bond as siblings is tested and ultimately strengthened throughout their adventure, making them relatable and engaging characters for readers.

Key Supporting Characters and Their Roles

Beyond Alex and Conner, “The Wishing Spell” features a vibrant cast of supporting characters crucial to the narrative. The Queen, a formidable antagonist, seeks to maintain her power and control over the Land of Stories, driving much of the initial conflict.

Other significant figures include the charming Prince Charming, whose role evolves beyond the traditional fairy tale archetype, and the wise and helpful Cinderella. These characters aren’t simply static figures from familiar tales; Colfer reimagines them with depth and complexity.

Each supporting character contributes to the unfolding plot, offering assistance, posing obstacles, or revealing crucial information to the Bailey siblings on their quest.

Plot Summary and Major Themes

“The Wishing Spell” plunges siblings Alex and Conner into a magical realm accessed through a mysterious book. They discover the Land of Stories, populated by characters from classic fairy tales, but find it threatened by an evil Queen’s curse. The plot centers on their quest to break this curse and restore balance.

Major themes explored include the power of storytelling, the importance of family bonds, and the courage to confront adversity. The narrative cleverly deconstructs familiar fairy tales, presenting nuanced perspectives on traditional tropes.

The story emphasizes that even ordinary individuals can become heroes, and that true strength lies in embracing one’s unique qualities.

The Journey into the Land of Stories

Alex and Conner’s unexpected adventure begins with their grandmother’s mysterious book, a portal to a world where fairy tales are real. Drawn into its pages during a difficult time, they find themselves in the Land of Stories, a kingdom brimming with familiar faces and forgotten lore.

Their initial arrival is chaotic, quickly revealing the land’s political tensions and the looming threat of the Queen. The journey isn’t merely physical; it’s a transformative experience, forcing them to adapt to a world governed by magic and ancient rules.

This initial passage sets the stage for their quest, highlighting the contrast between their ordinary lives and the extraordinary challenges ahead.

The Queen’s Curse and the Wishing Spell

The narrative’s central conflict revolves around a devastating curse placed upon the Queen, rendering her cruel and power-hungry. This curse, a dark enchantment, threatens to unravel the delicate balance of the Land of Stories, plunging it into eternal darkness.

The “Wishing Spell” itself becomes the key to breaking the curse, a legendary incantation capable of restoring the Queen’s goodness. However, obtaining the spell is fraught with peril, requiring Alex and Conner to navigate treacherous landscapes and overcome formidable obstacles.

Their quest is a race against time, as the Queen’s influence grows stronger with each passing moment, jeopardizing the fate of all fairy tale characters.

Exploring Themes of Family, Courage, and Storytelling

“The Wishing Spell” beautifully explores the enduring power of family bonds, showcasing the unwavering love between siblings Alex and Conner as they face extraordinary challenges together. Their relationship is tested, but ultimately strengthened, throughout their adventure.

Courage is a central theme, as both protagonists must overcome their fears and insecurities to protect the Land of Stories. They demonstrate bravery not through physical strength, but through resilience and determination.

The novel also celebrates the magic of storytelling itself, highlighting how narratives shape our understanding of the world and connect us to something larger than ourselves. It’s a tribute to the tales we cherish.

The Land of Stories World – A Detailed Look

The Land of Stories is a vibrant realm where fairy tale characters live and interact, reimagined with unique personalities and complex histories. It’s a kingdom steeped in tradition, yet facing modern challenges, creating a compelling political landscape.

Familiar figures from classic tales – Cinderella, Snow White, and Little Red Riding Hood – are not simply archetypes, but fully developed individuals with their own motivations and flaws. Their adaptations offer fresh perspectives on beloved stories.

The kingdom itself is a richly detailed setting, with its own rules, customs, and power structures. This world, accessible through a mysterious book, feels both fantastical and surprisingly relatable, drawing readers into its enchanting embrace.

Familiar Fairy Tale Characters and Their Adaptations

Colfer masterfully reimagines classic fairy tale characters, moving beyond simplistic tropes to present nuanced and often surprising portrayals. Cinderella isn’t merely a damsel in distress, and Snow White possesses a strength rarely acknowledged in traditional narratives.

These adaptations breathe new life into well-known stories, exploring the characters’ motivations and backstories with depth and creativity. Little Red Riding Hood, for example, is presented with a complexity that challenges conventional interpretations.

The author skillfully blends familiar elements with unexpected twists, creating a world where fairy tale characters grapple with relatable issues and forge their own destinies. This innovative approach elevates the series beyond simple retellings.

The Kingdom and its Political Landscape

The Land of Stories features a complex kingdom governed by a Queen with a formidable, and often ruthless, political agenda. This realm isn’t a utopian paradise; it’s a society riddled with power struggles and intricate alliances.

The Queen’s authority is challenged by various factions, including those loyal to former rulers and those seeking to exploit loopholes in the established order. Political maneuvering and strategic betrayals are commonplace, creating a tense atmosphere.

The kingdom’s laws and customs are deeply rooted in fairy tale lore, but Colfer introduces elements of political intrigue and social commentary, adding layers of depth to the world-building. This landscape shapes the characters’ journeys and influences their decisions.

Critical Reception and Reader Reviews

“The Wishing Spell” garnered generally positive reviews, praised for its inventive blend of classic fairy tales and modern storytelling. Critics highlighted Chris Colfer’s imaginative world-building and engaging narrative style, appealing to both younger and older audiences.

Reader reviews frequently commend the book’s humor, relatable characters, and clever twists on familiar stories. Many appreciate the novel’s ability to spark a renewed interest in fairy tales, while others celebrate its themes of family and courage.

Some criticisms focus on pacing issues or perceived predictability in certain plot points. However, the overwhelming consensus is that “The Wishing Spell” is a delightful and captivating read, launching a successful series.

Awards and Recognition Received by the Book

While specific comprehensive lists detailing every award for “The Wishing Spell” are scarce in readily available online resources, the book’s success clearly translates to significant recognition within the young adult and children’s literature spheres.

The series as a whole, launched with “The Wishing Spell,” has consistently appeared on bestseller lists, including those compiled by The New York Times and other prominent publications. This sustained commercial success is a form of recognition in itself.

Furthermore, the book’s author, Chris Colfer, has received numerous accolades for his work, indirectly benefiting the reputation of “The Wishing Spell” and establishing its place in contemporary literature.

Common Praise and Criticisms of “The Wishing Spell”

Readers frequently commend “The Wishing Spell” for its imaginative premise, seamlessly blending classic fairy tales into a modern narrative. The book’s appeal lies in its clever twists on familiar stories and the engaging journey of the Bailey siblings. Many appreciate the accessible writing style, making it suitable for a wide range of young readers.

However, some criticisms center around the pacing, with a few reviewers noting a slightly slow start. Others suggest that the plot, while inventive, occasionally relies on convenient coincidences. Despite these minor points, the overall consensus is overwhelmingly positive, highlighting the book’s charm and originality.

“The Wishing Spell” and its Sequels

“The Wishing Spell” serves as the captivating inaugural installment in Chris Colfer’s beloved “The Land of Stories” series. Following its success, Colfer expanded the universe with “The Enchantress Returns,” continuing Alex and Conner’s adventures. The series progresses through several books, each building upon the established lore and introducing new characters and challenges.

The complete series unfolds a continuous narrative, with connections and continuity woven throughout each volume. Readers are encouraged to experience the books in order to fully appreciate the evolving storyline and character development. The PDF format allows convenient access to the initial book, paving the way for a complete immersion into this fantastical world.

The Complete Series Order

Embark on a literary journey through “The Land of Stories” with this comprehensive series order! It begins with “The Wishing Spell,” the foundational PDF adventure. Following this, “The Enchantress Returns” continues the tale, deepening the magical world. Subsequent books include “The Seven Dwarfs,” “Queens of Exchange,” “An Author’s Odyssey,” and “Worlds Collide.”

Each installment builds upon the previous, creating a rich tapestry of interconnected narratives. Experiencing the series chronologically is crucial for understanding the evolving character arcs and overarching plotlines. Accessing “The Wishing Spell” in PDF format provides a convenient starting point for this enchanting saga, ensuring a seamless transition through each captivating chapter.

Connections and Continuity Throughout the Series

Delve into the intricate web of connections woven throughout “The Land of Stories” series, beginning with the foundational “Wishing Spell” PDF. Recurring characters from classic fairy tales reappear, their stories subtly altered and expanded upon. Plot threads initiated in earlier books, like the Queen’s curse, resurface with increasing significance.

The series maintains a strong continuity, rewarding attentive readers with a deeper understanding of the world’s lore. Chris Colfer masterfully interlinks events and character motivations across all installments. Downloading “The Wishing Spell” in PDF format is the ideal starting point to appreciate these nuances, allowing for a complete and immersive reading experience as the narrative unfolds.

Educational Value and Target Audience

“The Wishing Spell” PDF offers substantial educational value, particularly for middle-grade readers. The narrative encourages critical thinking by reimagining familiar fairy tales and exploring themes of family and courage. It can be effectively utilized in educational settings to stimulate discussions about storytelling, character development, and literary analysis.

The book’s age appropriateness aligns with readers aged 8-12, with a reading level suitable for students in grades 3-6. The engaging plot and relatable characters foster a love of reading. Utilizing the PDF version allows for easy annotation and classroom activities. The series, starting with “The Wishing Spell”, promotes literacy and imaginative thinking.

Using “The Wishing Spell” in Educational Settings

“The Wishing Spell” PDF is a versatile tool for educators. Teachers can leverage the text for comparative analysis, contrasting Colfer’s interpretations with original fairy tales. Classroom discussions can center on character motivations, plot structure, and thematic elements like bravery and familial bonds.

The PDF format facilitates interactive reading exercises, allowing students to annotate passages and highlight key themes. Creative writing prompts inspired by the story encourage imaginative expression. Oral presentations based on character analysis or plot summaries enhance communication skills. The book’s accessibility, through the PDF, supports diverse learning styles and promotes a collaborative learning environment.

Age Appropriateness and Reading Level

“The Wishing Spell” PDF is generally considered appropriate for readers aged 8-12, aligning with middle-grade literature. The reading level is estimated to be around grades 4-6, though this can vary based on individual reading abilities. The narrative’s complexity, blending familiar fairy tales with original storytelling, offers a stimulating challenge for developing readers.

Educators may find the PDF useful for differentiated instruction, providing support for struggling readers while offering enrichment activities for advanced learners. The themes explored – family, courage, and the power of stories – are universally relatable and promote valuable discussions. Parental guidance is recommended for younger or more sensitive readers.

Frequently Asked Questions (FAQ) about the PDF

Is downloading the “Wishing Spell” PDF legal? Accessing the PDF through unofficial channels may violate copyright laws. Legitimate sources are crucial. Troubleshooting PDF issues? Ensure your PDF reader is updated. If the file is corrupted, try re-downloading from a trusted source. Compatibility issues can arise; Adobe Acrobat Reader is generally recommended.

File size concerns? The PDF is approximately 3.3 MB, requiring sufficient storage space. Can I share the PDF? Sharing without permission infringes copyright. Support the author by purchasing official copies. Remember, accessing content legally ensures continued creativity and quality literature!

Is it Legal to Download the PDF?

Downloading the PDF of “The Wishing Spell” from unauthorized sources is generally illegal. Copyright laws protect Chris Colfer’s work, and distributing or obtaining it without permission constitutes infringement. While the internet offers numerous free PDF downloads, many are unlawful and potentially harmful, containing viruses or malware;

Supporting the author by purchasing the book—either in physical or legitimate digital format—is the legal and ethical way to enjoy the story. Official retailers and publishers ensure fair compensation for the creator’s work. Respecting copyright encourages continued literary contributions and protects intellectual property rights.

Troubleshooting Common PDF Issues

Encountering problems with a downloaded “Wishing Spell” PDF is common. If the file won’t open, ensure you have a compatible PDF reader like Adobe Acrobat Reader installed and updated. A corrupted download can also cause issues; try re-downloading the file from a legitimate source.

If the PDF displays incorrectly, check your reader’s display settings. Zooming in or out, or adjusting page layout, might resolve formatting errors. For password-protected PDFs, verify you have the correct password. If problems persist, consider converting the PDF to another format or contacting the source for assistance. Always scan downloaded files for viruses.

Where to Purchase Physical Copies of the Book

While PDF versions exist, supporting Chris Colfer and the series directly is best achieved by purchasing physical copies of “The Wishing Spell.” Major booksellers like Amazon, Barnes & Noble, and independent bookstores readily stock the book. Checking local libraries is another excellent option for borrowing a copy.

Many retailers offer both hardcover and paperback editions, catering to different preferences and budgets. Online retailers often provide discounts and shipping options. Consider purchasing from bookstores to support the literary community and enjoy the tactile experience of reading a physical book. This ensures continued support for the author’s work!

Alternative Formats: Audiobook and E-book

Beyond the PDF format, “The Wishing Spell” is accessible in various convenient alternatives. An engaging audiobook version allows listeners to immerse themselves in the story, narrated professionally for an enhanced experience. E-book editions are available through platforms like Kindle, Kobo, and Apple Books, offering portability and adjustable font sizes.

These digital formats provide flexibility for readers on the go, eliminating the need for a physical copy. Choosing an audiobook or e-book supports the author while catering to different learning and reading preferences. Explore these options for a captivating journey into the Land of Stories, beyond just the PDF!

Supporting Chris Colfer and the Series

Demonstrating support for Chris Colfer and “The Land of Stories” series is vital for encouraging continued creativity and storytelling. Purchasing official copies – whether physical books, e-books, or audiobooks – directly benefits the author and publisher. Engaging with the series through reviews, social media discussions, and book clubs amplifies its reach and impact.

Consider exploring Colfer’s other works and advocating for the series within educational settings. Sharing the magic of the Land of Stories with friends and family fosters a community of readers. By actively supporting the author and the series, you contribute to the continuation of this enchanting literary world!

ca form 540nr instructions 2023

Form 540NR Instructions 2023: A Comprehensive Guide

Form 540NR instructions for 2023 detail reporting income for nonresidents and part-year residents of California, alongside Schedule CA (540NR) adjustments.

What is Form 540NR?

Form 540NR, California Nonresident or Part-Year Resident Income Tax Return, is the designated form utilized by individuals who do not maintain residency in California throughout the entire tax year. This includes those who are considered nonresidents for the full year, or those who become residents during the tax year – categorized as part-year residents.

The primary function of this form is to report income sourced from California, even if the individual does not live within the state. This encompasses wages, salaries, commissions, and other forms of compensation earned while working in California. It also includes income derived from California-based property, businesses, or other sources.

Essentially, Form 540NR ensures that California receives tax revenue from individuals who benefit from the state’s economy, even if they are not full-time residents. It’s a crucial component of California’s tax system, designed to maintain fairness and equity in revenue collection. Understanding its purpose is the first step in navigating nonresident tax obligations.

Who Needs to File Form 540NR?

You are required to file Form 540NR if you meet specific criteria regarding your residency status in California. Generally, this includes individuals who are nonresidents of California for the entire year, meaning they did not live in California at any point during the tax year.

Additionally, individuals who become residents of California during the tax year, known as part-year residents, must also file this form. This applies if you moved to California from another state or country during the year. Conversely, if you were a California resident at the beginning of the year but moved out before the year’s end, you are also considered a part-year resident.

Specifically, if you had any income sourced from California – wages, salaries, business income, or property income – you likely need to file Form 540NR, regardless of your residency status for the entire year. It’s essential to determine your residency status accurately to ensure proper tax filing.

Understanding Nonresident and Part-Year Resident Status

Determining your residency status is crucial for accurate California tax filing. A nonresident has no ties to California for the entire year; they haven’t lived there and haven’t established significant connections. Income sourced from California is taxable, but only the portion attributable to California sources.

A part-year resident, however, has ties to California for only a portion of the year. This occurs when someone moves to or from California during the tax year. They are taxed on all income received while a California resident, and on California-sourced income earned while a nonresident.

Establishing residency involves factors like physical presence, intent to remain, and maintaining a permanent home. The FTB considers these elements when evaluating residency. Proper classification impacts which income is taxable and the deductions you can claim. Carefully assess your situation to correctly identify your status when completing Form 540NR.

Key Dates and Deadlines for 2023 Filing

For the 2023 tax year, understanding key dates is vital for avoiding penalties. Generally, Form 540NR, along with Schedule CA (540NR), is due on April 15th, 2024. However, if you file an extension, the deadline is automatically extended to October 15th, 2024.

It’s important to note that even with an extension, any taxes owed must be paid by the original due date to avoid interest and penalties. The FTB provides options for requesting an extension through their website.

Keep track of estimated tax payment deadlines if you anticipate owing more than $1,000 in taxes. Missing these deadlines can result in underpayment penalties. Confirm all dates on the official FTB website, as dates can occasionally shift. Timely filing and payment are crucial for compliance with California tax laws.

Required Documents for Filing

Successfully filing Form 540NR for 2023 necessitates gathering several key documents. Primarily, you’ll need your W-2 forms reflecting income earned in California, even if you’re a nonresident. Include any 1099 forms detailing other income sources like dividends, interest, or self-employment earnings.

Schedule CA (540NR) requires information for calculating California adjustments, so have relevant records readily available. If claiming any deductions, gather supporting documentation such as receipts or statements. For electronic filing, ensure you have your prior-year California tax return information.

If filing on behalf of another individual, a power of attorney is essential. Finally, a copy of your federal tax return may be required. Carefully review the FTB instructions to confirm all necessary documents are included to avoid processing delays or rejections.

Income Reporting on Form 540NR

Form 540NR requires meticulous income reporting, even for nonresidents. Begin by accurately transferring wages reported on your W-2 forms to the designated sections. Include all California-sourced income, regardless of residency. This encompasses salaries, wages, tips, and other compensation earned while working within the state.

Report income from 1099 forms, such as dividends, interest, and self-employment earnings, specifically identifying the California portion. If you received income from partnerships or S corporations, report your share of the California-sourced income.

Remember to report any gains or losses from the sale of California property. Accurate income reporting is crucial for calculating your California tax liability. Refer to the FTB instructions for detailed guidance on specific income types and reporting requirements.

California Adjustments ─ Schedule CA (540NR)

Schedule CA (540NR) is vital for nonresidents and part-year residents to adjust their federal income to calculate California taxable income. This form necessitates adding back certain deductions taken on your federal return that are not allowed for California purposes. Common adjustments include those related to state and local bond interest, and certain moving expense deductions.

Conversely, you may be able to add certain deductions not allowed federally, such as California lottery winnings. Carefully review the FTB instructions to determine which adjustments apply to your specific situation. Accurate completion of Schedule CA (540NR) ensures you report your income correctly to the state.

These adjustments directly impact your final tax liability, so meticulous attention to detail is paramount. Failing to properly account for these adjustments could lead to an inaccurate tax return and potential penalties.

Deductions Claimed by Nonresidents

Nonresidents of California have limited deduction options compared to full-year residents. Generally, they can only claim deductions directly related to California-sourced income. This includes expenses incurred to produce or collect that income, such as business expenses or depreciation on property located within the state.

Itemized deductions are significantly restricted. Nonresidents typically cannot claim the standard deduction, nor can they deduct expenses like medical costs or charitable contributions unless those contributions are specifically to California-based organizations and directly generate taxable income within the state.

Understanding the source of your income is crucial. Deductions are only permissible if they are demonstrably linked to income earned within California. Thorough documentation supporting these deductions is essential to avoid potential scrutiny from the FTB during an audit.

Tax Credits Available for Nonresidents

While fewer in number than those available to residents, several tax credits can benefit nonresidents filing Form 540NR. These credits primarily focus on incentivizing specific activities or providing relief for particular situations related to California-sourced income.

Common credits include those for hiring veterans, investing in qualified small businesses within the state, or contributing to specific California programs. The availability and amount of these credits can change annually, so consulting the latest FTB publications is vital.

Carefully review eligibility requirements for each credit. Many have specific income limitations or require detailed documentation. Claiming a credit incorrectly can lead to penalties. The California Franchise Tax Board provides detailed instructions and forms for each available credit, ensuring accurate application and maximizing potential tax savings.

Calculating Your California Tax Liability

Determining your California tax liability on Form 540NR involves several steps, beginning with calculating your total California-source income. This includes wages, salaries, business income, and any other income earned within the state. After establishing your total income, you’ll apply the appropriate tax rates based on your filing status.

California utilizes a progressive tax system, meaning higher income brackets are subject to higher tax rates. The FTB provides detailed tax rate schedules in the Form 540NR instructions. Remember to account for any adjustments made on Schedule CA (540NR), which can either increase or decrease your taxable income.

Finally, subtract any applicable tax credits to arrive at your final tax liability. Accurate calculations are crucial; the FTB offers resources and tools to assist taxpayers in ensuring correct reporting and avoiding potential penalties.

Payment Options for Taxes Due

The California Franchise Tax Board (FTB) offers several convenient methods for remitting taxes due when filing Form 540NR. Electronic payment is highly encouraged and can be made through the FTB’s website using a direct debit from your bank account or a credit/debit card – processing fees may apply for card payments.

Traditional payment methods include mailing a check or money order, payable to the FTB, along with your tax return. Ensure the check includes your Form 540NR number and social security number for proper credit. Electronic Funds Withdrawal (EFW) is another option when e-filing your return.

The FTB also provides installment agreement options for taxpayers unable to pay the full amount due by the deadline. Explore these options on the FTB website to avoid penalties and interest. Prompt payment is essential to maintain good standing with the state.

Electronic Filing Options

Form 540NR can be filed electronically, offering a secure and efficient alternative to traditional mail-in submissions. The California Franchise Tax Board (FTB) encourages e-filing through authorized e-file providers, a list of which is available on the FTB website. These providers often offer user-friendly interfaces and may include additional services.

FTB’s e-file system supports direct uploads of tax data, streamlining the filing process. When e-filing, taxpayers typically need to create an account and verify their identity. Ensure your software is updated to reflect the latest 2023 tax laws and forms.

Electronic filing generally results in faster processing and quicker refunds. Remember to retain a copy of your electronically filed return for your records, along with any supporting documentation. The ERO signature and PIN are crucial for secure electronic submissions.

Tax Clearance Letter Information

A Tax Clearance Letter from the California Franchise Tax Board (FTB) confirms that you have complied with all California tax requirements. This letter is often required when transferring out of California, selling a business, or for specific legal proceedings.

While Form 540NR itself doesn’t directly initiate the Tax Clearance Letter process, accurate and timely filing of your nonresident or part-year resident return is a prerequisite. You must request the letter separately from the FTB, and there may be a fee associated with the request.

The FTB will review your account to ensure all taxes, penalties, and interest have been paid. Processing times for Tax Clearance Letters can vary, so it’s advisable to apply well in advance of any deadlines. Information regarding the request process can be found on the FTB website, alongside relevant forms and instructions.

W-2 Form and Income Verification

Form 540NR requires accurate reporting of all income, and your W-2 forms are crucial for this process. These forms, received from employers, detail your wages, salary, and any taxes already withheld for California income tax. Ensure all W-2s received are included when preparing your return.

If you have income not reported on a W-2, such as self-employment income or income from partnerships, you’ll need to verify it with supporting documentation. This might include 1099 forms, receipts, or bank statements. Maintaining organized records is essential for accurate income reporting.

Review your W-2 carefully for any discrepancies before filing. If errors exist, contact your employer for a corrected form. Accurate income reporting minimizes the risk of audits or penalties from the California Franchise Tax Board (FTB). A preview of your W-2 can help with verification.

Form I-9 and Employment Eligibility

While Form 540NR focuses on California income tax for nonresidents and part-year residents, understanding Form I-9 is vital for employment verification. Form I-9, officially titled the Employment Eligibility Verification form, is used by employers to confirm an employee’s identity and authorization to work in the United States.

It’s important to note that completing Form I-9 is the employer’s responsibility, not the taxpayer filing Form 540NR. However, as a nonresident or part-year resident working in California, you will be required to complete Section 1 of Form I-9, providing documentation establishing your identity and work authorization.

Employers cannot specify which documents you present; you choose from a list of acceptable options. The FTB doesn’t directly handle Form I-9, but proper employment eligibility is a foundational aspect of legally earning income reported on your California tax return.

Section 501(c)(3) Exemption Requests

Although Form 540NR is primarily for reporting California income for nonresidents and part-year residents, organizations seeking exemption from state income tax based on their federal 501(c)(3) status have a separate process. These entities don’t typically file Form 540NR directly, but may need to submit a specific form to the California Franchise Tax Board (FTB) to claim exemption.

Organizations must submit a form, along with a copy of their IRS determination letter confirming 501(c)(3) status. This letter demonstrates the organization’s purpose is charitable, religious, educational, scientific, or literary. The FTB reviews these requests to determine eligibility for California tax exemption.

Exemption isn’t automatic; it requires a formal application and approval. While not directly related to individual Form 540NR filing, understanding exemption procedures is crucial for qualifying organizations operating within California, ensuring compliance with state tax regulations.

Reviewing Your Return Details

Before submitting your 2023 California Form 540NR, a thorough review of all entered details is paramount. This crucial step minimizes errors and potential delays in processing your return. Carefully verify all personal information, including your name, address, and Social Security number, ensuring accuracy and consistency.

Double-check all income reported, confirming it matches your W-2 forms and other income documentation. Scrutinize any adjustments or deductions claimed on Schedule CA (540NR), ensuring eligibility and proper calculation. Confirm the accuracy of your tax liability calculation and payment information.

Reviewing involves confirming taxpayer names, signatures, and the Electronic Return Originator’s (ERO) signature and PIN for electronic filing. A meticulous review safeguards against discrepancies, potentially avoiding future correspondence with the FTB and ensuring a smooth tax filing experience.

ERO Signature and PIN for Electronic Filing

When electronically filing Form 540NR for 2023, the Electronic Return Originator (ERO) plays a vital role. The ERO is responsible for the accurate transmission of the tax return to the California Franchise Tax Board (FTB). A valid ERO signature is required on the return, confirming their responsibility for the electronic submission.

Crucially, the ERO must also provide a Personal Identification Number (PIN). This PIN serves as a digital signature, authenticating the ERO and ensuring the integrity of the electronically filed return. The PIN is a confidential piece of information and should be protected from unauthorized access.

This information, including taxpayer names, social security numbers, signatures, and the ERO’s signature and PIN, is contained within the electronic filing documentation. Proper handling of this sensitive data is essential for maintaining taxpayer privacy and complying with security regulations.

Resources and Where to Find More Information

For comprehensive guidance on Form 540NR and its associated schedules for the 2023 tax year, the California Franchise Tax Board (FTB) website is the primary resource. You can directly access the 2023 Form 540NR booklet, the form itself, and Schedule CA (540NR), along with detailed instructions for each.

The FTB website also provides access to other relevant forms, such as the 2023 Form 540, and associated schedules. Furthermore, helpful resources include publications, frequently asked questions (FAQs), and online tools designed to assist taxpayers in understanding their obligations.

For visual learners, a YouTube playlist offers examples of various state tax returns, potentially clarifying the process. Additionally, the Texas Comptroller’s office provides information regarding Tax Clearance Letters, a requirement for certain transactions. Remember to always refer to the official FTB website for the most up-to-date and accurate information.

Frequently Asked Questions (FAQs)

Many taxpayers filing Form 540NR for 2023 commonly inquire about residency status and its impact on tax obligations. Determining whether you are a nonresident or part-year resident is crucial for accurate filing. Questions also arise regarding income reporting, specifically how to correctly report income sourced from California while residing elsewhere.

Another frequent concern involves California adjustments detailed on Schedule CA (540NR). Taxpayers often seek clarification on which adjustments apply to their specific situations. Understanding available tax credits for nonresidents is also a common query, as these can significantly reduce tax liability.

Furthermore, questions frequently surface regarding electronic filing options and the necessary steps for obtaining a Tax Clearance Letter. The FTB website provides a wealth of information addressing these and other common concerns. Reviewing the form instructions thoroughly and utilizing available resources can resolve many frequently asked questions.

Contacting the California Franchise Tax Board (FTB)

If you require assistance while navigating Form 540NR instructions for 2023, the California Franchise Tax Board (FTB) offers several avenues for support. Taxpayers can access comprehensive resources, including FAQs and detailed guides, directly on the FTB website. This online portal is often the quickest way to find answers to common questions regarding nonresident and part-year resident tax filings.

For more personalized assistance, the FTB provides phone support during business hours. Be prepared for potential wait times, especially during peak filing season. Written correspondence can also be submitted to the FTB, though response times are generally longer than phone or online inquiries.

When contacting the FTB, having your Form 540NR and related documents readily available will expedite the process. Clearly articulate your question and provide any relevant details to ensure a helpful and efficient response. The FTB is dedicated to assisting taxpayers in fulfilling their California tax obligations.

overhead door model 2026 manual

Overhead Door Model 2026 Manual: A Comprehensive Guide

This guide provides detailed instructions for the Overhead Door Model 2026‚ covering installation‚ operation‚ maintenance‚ and troubleshooting‚ alongside downloadable PDF resources.

The Overhead Door Model 2026 represents a significant advancement in garage door opener technology‚ offering reliability and convenience for residential use. This manual serves as a comprehensive resource for owners and installers‚ detailing every aspect of the unit.

Understanding the features and proper operation of your Model 2026 ensures optimal performance and longevity. Access to the official PDF manual‚ available through the Overhead Door website‚ is crucial for detailed diagrams and safety information. This opener is designed for easy integration with smart home systems‚ enhancing accessibility and control.

Proper installation and regular maintenance‚ as outlined within‚ are key to a safe and efficient operating experience.

Understanding the 2026 Model Features

The Overhead Door Model 2026 boasts several key features designed for enhanced performance and user experience. These include a robust motor for reliable operation‚ safety sensors to prevent door closure on obstructions‚ and adjustable travel limits for customized operation.

Compatibility with remote controls and potential smart home integration adds convenience. The Model 2026 is engineered for quiet operation‚ minimizing disturbance. Detailed specifications‚ including dimensions and power requirements‚ are available in the official PDF manual.

Understanding these features‚ as detailed in the owner’s manual‚ allows for optimal utilization and troubleshooting.

Safety Precautions & Warnings

Always disconnect power before maintenance. Never operate a damaged door. Review the manual for crucial safety guidelines and specific warnings for Model 2026.

General Safety Guidelines

Prior to any installation‚ operation‚ or maintenance of your Overhead Door Model 2026‚ carefully read and fully understand this manual. Always disconnect the power supply to the opener before performing any adjustments or repairs to prevent accidental operation and potential injury. Never attempt to modify or alter the system beyond the instructions provided.

Keep children and bystanders away from the door during operation and maintenance. Regularly inspect the door‚ springs‚ cables‚ and all hardware for signs of wear or damage. Do not operate the door if any parts are damaged or malfunctioning. Ensure the safety reversal system is functioning correctly through monthly testing. Professional assistance is recommended for complex repairs.

Specific Warnings for Model 2026

The Overhead Door Model 2026 incorporates advanced features; however‚ specific cautions apply. Ensure proper grounding to prevent electrical hazards. Avoid operating the door in high winds or severe weather conditions. Be mindful of the door’s travel path‚ ensuring it’s clear of obstructions.

Do not attempt to lubricate the system with flammable substances. Regularly check the force settings to prevent excessive pressure. If the door exhibits erratic behavior‚ immediately discontinue use and contact qualified service personnel. Never bypass or disable safety features. Improper installation or modification can void the warranty and create dangerous conditions.

Installation Guide

Proper installation requires careful preparation‚ secure mounting‚ precise door connection‚ and accurate travel limit adjustments for optimal Model 2026 performance.

Preparing for Installation

Before beginning the installation of your Overhead Door Model 2026‚ ensure you have thoroughly reviewed all safety precautions outlined in this manual. Verify all necessary components are present and undamaged. Clear the garage area of any obstructions‚ providing ample workspace;

Confirm the garage door itself is balanced and moves smoothly by hand; any binding or resistance must be addressed before proceeding. Gather the required tools‚ including a ladder‚ wrenches‚ screwdrivers‚ and a level. Disconnect the power supply to the garage door circuit to prevent electrical shock during installation.

Finally‚ familiarize yourself with the wiring diagram and mounting hardware included with the opener unit.

Mounting the Opener Unit

Securely mount the Overhead Door Model 2026 opener unit to the header bracket‚ ensuring it’s centered above the garage door opening. Utilize the provided mounting hardware and follow the specified torque settings to guarantee a stable installation. Double-check the header bracket’s attachment to the building structure for adequate support.

Employ a level to confirm the opener unit is perfectly horizontal‚ preventing operational issues. Carefully align the rail sections‚ connecting them according to the diagram‚ and ensure smooth gliding.

Avoid over-tightening bolts‚ which could damage the unit or mounting surface. Verify all connections are firm before proceeding to the next step.

Connecting the Opener to the Door

Attach the door bracket to the top section of the garage door‚ centering it for balanced operation. Connect the opener arm to both the door bracket and the trolley on the rail‚ ensuring a secure linkage. Verify proper alignment to prevent binding or uneven movement during operation.

Carefully adjust the arm’s length to achieve the correct arc and travel range. Confirm the door moves freely through its entire cycle without obstruction.

Double-check all connections are tight and secure before proceeding to adjust travel limits and safety features.

Adjusting Travel Limits

Precisely set the up and down travel limits using the adjustment screws located on the opener unit. Begin by loosening the screws and incrementally adjusting until the door reaches the desired fully open and fully closed positions.

Ensure the door doesn’t overtravel‚ potentially damaging the door or opener. Test the limits multiple times‚ making small adjustments as needed for smooth and accurate operation.

Properly adjusted limits are crucial for safety and prevent strain on the opener’s motor and components.

Operating the Overhead Door 2026

This section details how to use the wall control‚ remote‚ and potential smart home features for seamless operation of your Overhead Door 2026.

Using the Wall Control

The wall control serves as the primary method for operating your Overhead Door Model 2026. Typically‚ a single button press initiates the door’s movement – either opening or closing. Pay attention to the indicator lights; they provide crucial feedback on the door’s status and any potential safety concerns.

For safety‚ the wall control often features a “stop” function‚ immediately halting the door’s operation. Ensure the area is clear of obstructions before activating the control. If the door reverses unexpectedly‚ consult the troubleshooting section of this manual. Regularly test the wall control to confirm its functionality and responsiveness. Proper use ensures safe and reliable operation.

Remote Control Operation

Your Overhead Door Model 2026 remote control offers convenient‚ keyless operation. To activate‚ simply press the appropriately programmed button. Ensure a clear line of sight between the remote and the opener unit for optimal performance. If the remote’s range seems diminished‚ check the battery – replacement is straightforward.

Programming additional remotes or re-pairing existing ones is detailed in the installation section of this manual. Keep remotes secure to prevent unauthorized access. If a remote is lost‚ immediately reprogram the remaining remotes to disable the lost one. Regular testing ensures reliable operation.

Smart Home Integration (if applicable)

The Overhead Door Model 2026 may be compatible with select smart home systems‚ offering control via smartphone or voice assistants. Check the product packaging or Overhead Door’s website for confirmed integrations‚ such as compatibility with popular platforms.

Setup typically involves connecting the opener to your home’s Wi-Fi network and linking it within your smart home app. Detailed instructions are available on the Overhead Door website. Enjoy features like remote monitoring‚ scheduled operation‚ and integration with other smart devices for enhanced convenience and security.

Maintenance & Troubleshooting

Regular upkeep ensures optimal performance of your Overhead Door Model 2026; this section details maintenance schedules and solutions for common operational issues.

Regular Maintenance Schedule

To maintain peak performance and longevity of your Overhead Door Model 2026‚ adhere to a consistent maintenance schedule. Monthly‚ visually inspect the door for any signs of damage‚ including bent tracks or loose hardware. Lubricate moving parts – rollers‚ hinges‚ and springs – with a silicone-based lubricant.

Quarterly‚ check the balance of the door by disconnecting the opener and manually lifting it halfway; it should remain stationary. Annually‚ a professional inspection is recommended to assess the entire system‚ including safety features and the opener unit. Addressing minor issues promptly prevents costly repairs and ensures continued safe operation.

Troubleshooting Common Issues

Encountering problems with your Overhead Door Model 2026? Here’s a quick guide. If the door doesn’t open/close‚ check the power supply‚ safety sensors‚ and ensure the lock isn’t engaged. For a non-responsive remote‚ replace the battery and reprogram it to the opener.

Unusual noises often indicate lubrication needs or loose components; inspect and address accordingly. Verify travel limits are correctly adjusted. If issues persist‚ consult the full manual or contact Overhead Door support for professional assistance. Always prioritize safety and disconnect power before attempting repairs.

Door Doesn’t Open/Close

If your Overhead Door Model 2026 fails to open or close‚ begin by verifying the power supply to the opener unit. Check for tripped breakers or blown fuses. Next‚ inspect the safety sensors aligned near the door’s path; ensure they are clean and properly aligned. Confirm the door isn’t locked‚ and the wall control’s release cord isn’t engaged.

Also‚ examine the travel limits – incorrect settings can prevent full operation. If these steps don’t resolve the issue‚ consult the complete manual for detailed diagnostics or contact a qualified technician.

Remote Control Not Working

When your Overhead Door Model 2026’s remote control malfunctions‚ first replace the batteries with fresh ones. Then‚ ensure there’s no obstruction hindering the signal between the remote and the opener unit. Try reprogramming the remote to the opener; refer to the manual for specific instructions on entering programming mode.

If multiple remotes aren’t functioning‚ the receiver within the opener unit might be the issue. Check for any interference from other electronic devices. For persistent problems‚ consult the full manual or contact Overhead Door support for assistance.

Opener Making Unusual Noises

If your Overhead Door Model 2026 opener emits grinding‚ squeaking‚ or clicking sounds‚ immediate investigation is crucial. First‚ inspect the chain or belt for proper tension and lubrication – a dry or loose drive can cause noise. Check the rollers and tracks for obstructions or damage‚ as these contribute to operational sounds.

A humming sound with no movement suggests a potential motor issue. For loud clanging‚ examine the door’s springs. Always disconnect power before inspecting internal components; consult the manual or a professional if unsure.

Lubrication Guide

Regular lubrication is vital for the Overhead Door Model 2026’s smooth operation and longevity. Apply a silicone-based lubricant to the rollers‚ tracks‚ and springs every six months. Avoid using oil-based lubricants‚ as they attract dust and grime. The chain or belt drive requires periodic lubrication – consult the manual for specific product recommendations.

Lubricate the hinges and any moving parts. Ensure the lubricant is evenly distributed. Wipe away any excess to prevent buildup. Proper lubrication minimizes friction‚ reduces noise‚ and extends the lifespan of your garage door system.

Parts & Components

The Model 2026 utilizes a motor unit‚ rail system‚ door brackets‚ a wall control‚ and safety sensors; replacement parts are readily available online and through dealers.

Identifying Key Components

Understanding the core parts of your Overhead Door Model 2026 is crucial for maintenance and repair. The opener unit houses the motor‚ gears‚ and logic board‚ powering the entire system. The rail system guides the door’s movement‚ ensuring smooth operation. Door brackets securely connect the door to the opener.

Essential components include the wall control for manual operation and safety sensors preventing accidental closure. The remote control offers convenient access. Inspect these regularly for wear and tear. Familiarizing yourself with each part simplifies troubleshooting and ensures optimal performance. Refer to diagrams within the full manual for detailed illustrations and part numbers.

Replacement Parts Information

Genuine Overhead Door parts are recommended to maintain the integrity and safety of your Model 2026 opener. Replacements can be sourced through authorized Overhead Door distributors or directly from the Overhead Door website. When ordering‚ have your model number readily available for accurate part selection.

Commonly replaced parts include rollers‚ springs‚ brackets‚ and the logic board. Always prioritize safety; some repairs require professional assistance. The official manual lists part numbers for easy identification. Ensure compatibility before purchasing‚ and follow installation instructions carefully. Using non-genuine parts may void your warranty.

Technical Specifications

The Model 2026 boasts specific dimensions‚ weight‚ and power requirements crucial for installation and compatibility; detailed information is available in the official manual.

Dimensions & Weight

Understanding the physical characteristics of the Overhead Door Model 2026 is vital for proper installation and ensuring compatibility with your garage space. While precise figures vary based on configuration‚ the opener unit generally measures approximately 10.5 inches in height‚ 12 inches in width‚ and 15 inches in depth.

The total weight of the unit‚ including all components‚ typically falls between 30 and 35 pounds. These dimensions and weight are crucial for assessing mounting requirements and ensuring sufficient structural support. Refer to the official manual for detailed specifications pertaining to your specific Model 2026 configuration‚ as variations may exist.

Power Requirements

The Overhead Door Model 2026 operates on a standard 120-volt AC power supply‚ utilizing a 60Hz frequency. It’s essential to have a dedicated 15-amp circuit for optimal performance and to prevent overloading. The opener requires a grounded outlet‚ and a GFCI (Ground Fault Circuit Interrupter) outlet is highly recommended for enhanced safety.

Ensure the power supply meets these specifications before installation. Improper voltage or wiring can damage the unit and void the warranty. Always consult a qualified electrician if you are unsure about your electrical system’s compatibility with the Model 2026’s power needs.

Downloading the Official Manual (PDF)

Access the official Overhead Door Model 2026 manual in PDF format directly from the Overhead Door website for comprehensive guidance and support.

Accessing the Overhead Door Website

To locate the official Model 2026 manual‚ begin by navigating to the Overhead Door corporate website. A quick internet search for “Overhead Door” will direct you to their homepage. From there‚ explore the “Support” or “Resources” section – these areas typically house downloadable manuals and documentation.

Look for a dedicated area for “Owners Manuals” or “Product Manuals.” You may need to filter by product type (garage door openers) and then specifically search for the Model 2026. The website often provides a search bar for quick access to specific documents. Ensure you are downloading the correct PDF version for your specific opener.

Locating the Model 2026 Manual

Once on the Overhead Door website‚ utilize the search function‚ entering “Model 2026 manual” or “Legacy 800 2026 manual” as search terms. The Legacy 800 series is closely related. Browse the search results for a PDF document specifically labeled for the Model 2026 opener.

Alternatively‚ navigate through the product categories‚ selecting “Garage Door Openers” and then filtering by model number. Direct links to manuals‚ like the Legacy 800 manual‚ may also be available on third-party sites‚ but always verify the source’s legitimacy before downloading. Confirm the manual covers the 2026 features.

Warranty Information

The warranty for the Model 2026 covers defects in materials and workmanship‚ with specific durations for parts and labor; claim details are available online.

Warranty Coverage Details

The Overhead Door Model 2026 warranty provides coverage against defects in materials and workmanship under normal use. Typically‚ the opener motor itself is covered for a longer period‚ often lifetime‚ while parts like belts‚ chains‚ and electronic components have a shorter coverage duration‚ usually several years. Labor costs for repair or replacement are generally covered for a limited time‚ typically one year from the installation date.

This warranty does not cover damage resulting from improper installation‚ misuse‚ accidents‚ or unauthorized modifications. Proof of purchase is required to validate any warranty claim. Full warranty terms and conditions are detailed in the official product manual‚ accessible through the Overhead Door website.

How to File a Warranty Claim

To initiate a warranty claim for your Overhead Door Model 2026‚ first gather your proof of purchase‚ including the date and place of installation. Contact Overhead Door customer support via phone or through their online support portal‚ detailing the issue and providing your product’s model number.

A representative will guide you through the claim process‚ potentially requesting photos or videos of the defect. If the issue is covered under warranty‚ Overhead Door will authorize a repair or replacement‚ either through a local authorized dealer or direct shipment of parts. Ensure you retain all documentation related to your claim.

Contacting Overhead Door Support

For assistance‚ reach out to Overhead Door’s customer service team by phone or explore their comprehensive online resources for troubleshooting and support.

Customer Service Phone Number

To directly connect with Overhead Door’s dedicated support team regarding your Model 2026‚ or for any inquiries related to installation‚ operation‚ or troubleshooting‚ please utilize their customer service phone number. While a universally listed number isn’t prominently displayed in the provided snippets‚ reaching out through their official website is recommended to obtain the most current and accurate contact information.

Alternatively‚ referencing your purchase documentation or warranty information may reveal a specific support line. Overhead Door prioritizes customer satisfaction and aims to provide prompt assistance‚ ensuring a seamless experience with their products. Expect knowledgeable representatives ready to address your concerns efficiently.

Online Support Resources

Overhead Door provides extensive online resources to assist Model 2026 owners. The official Overhead Door website (overheaddoor.com) is a central hub for accessing downloadable manuals‚ including PDF versions for the Legacy 800 2026 and related models. These manuals cover installation‚ operation‚ and maintenance procedures.

Furthermore‚ the website likely hosts FAQs‚ troubleshooting guides‚ and potentially video tutorials to address common issues. Exploring these resources can often resolve problems independently. Searching for “Overhead Door support” online will also yield relevant articles and forum discussions from other users‚ offering additional insights and solutions.

owners manual for troy bilt bronco tiller

Welcome! This comprehensive guide unlocks the full potential of your Troy-Bilt Bronco tiller‚ offering detailed instructions and insights for optimal garden preparation.

Refer to the engine operator’s manual for complete details‚ and explore the lifetime limited warranty covering gear-drive transmissions on Troy-Bilt tillers.

This manual serves as your roadmap‚ ensuring confident operation and maintenance‚ while troubleshooting guides assist with common issues encountered during use.

Overview of the Bronco Model

The Troy-Bilt Bronco CRT is a robust rear-tine walk-behind tiller‚ uniquely positioned within the Troy-Bilt lineup. Designed for effective soil preparation‚ it excels at breaking up ground for gardens and landscaping projects.

This model features a gear-drive transmission‚ covered by a lifetime limited warranty‚ ensuring durability and reliable performance. Owners manuals provide detailed instructions for safe operation‚ maintenance‚ and troubleshooting‚ maximizing the tiller’s lifespan and efficiency.

Safety Precautions

Prioritize safety! Always inspect the tiller before each use‚ ensuring all components are securely attached. Never operate a damaged machine and consult an authorized dealer for repairs.

Refer to the engine operator’s manual for comprehensive safety guidelines. Be aware of rotating blades and maintain a safe distance during operation. Understand safety switches and protective guards to prevent accidental injury while tilling.

Understanding Your Tiller

Familiarize yourself! The Troy-Bilt Bronco CRT is a specialized garden tiller designed for effective soil preparation‚ differing from other models in the lineup.

This section details key components and specifications‚ ensuring you grasp the tiller’s functionality and capabilities.

Key Components and Their Functions

Essential parts include the engine‚ providing power for tilling; the gearbox‚ transmitting power to the blades; and the tilling blades themselves‚ breaking up the soil.

Handles control direction and speed‚ while the clutch engages or disengages the tilling action. Safety switches prevent accidental starting‚ and protective guards shield operators.

Understanding each component’s role is crucial for safe and efficient operation‚ ensuring optimal performance in your garden. Refer to diagrams for visual identification.

Tiller Specifications (Engine‚ Dimensions‚ Weight)

Engine details vary by model year‚ but typically feature a Briggs & Stratton or similar gasoline engine. Dimensions are approximately 68 inches long‚ 28 inches wide‚ and 42 inches high.

Weight generally ranges between 180 to 220 pounds‚ depending on attachments. These specifications are crucial for storage‚ transport‚ and assessing suitability for your gardening needs.

Always consult your specific model’s documentation for precise measurements and engine horsepower information.

Assembly and Preparation

Begin by carefully unboxing your Troy-Bilt Bronco tiller and inspecting all components. Attach handles securely‚ then verify proper fluid levels—oil and fuel—before operation.

Unboxing and Initial Inspection

Carefully remove the Troy-Bilt Bronco tiller from its packaging‚ taking inventory of all included parts. Inspect for any shipping damage—report issues immediately to your dealer.

Confirm the presence of handles‚ tilling blades‚ and the engine operator’s manual. Ensure all protective guards and shields are securely attached. A thorough initial inspection prevents potential issues and ensures safe‚ efficient operation. Retain the packaging for potential warranty claims.

Attaching Handles and Components

Securely attach the handles to the tiller chassis‚ ensuring proper alignment and tightening all bolts firmly. Refer to the parts diagram within the owner’s manual for correct placement.

Install any additional components‚ like protective shields‚ following the illustrated steps. Double-check all connections before operation. Proper assembly is crucial for safe and effective tilling‚ preventing vibrations and ensuring optimal control during use.

Fluid Level Checks (Oil‚ Fuel)

Before each use‚ meticulously check the engine oil level using the dipstick‚ adding oil as needed to maintain the recommended level specified in the engine manual.

Verify the fuel tank contains fresh gasoline‚ free from debris. Never operate with low fluid levels. Consistent fluid checks are vital for engine longevity and optimal tiller performance‚ preventing damage and ensuring reliable operation throughout your gardening tasks.

Operating Instructions

Begin with a thorough review of all safety precautions before starting the engine. Adjust tilling depth and speed based on soil conditions for effective garden preparation.

Starting the Engine

Before attempting to start‚ ensure the fuel valve is open and the throttle is set to the appropriate starting position. Engage the safety bail – the tiller will not run without it!

Prime the engine as directed in the separate engine manual‚ then firmly pull the starter rope. If the engine fails to start‚ consult the troubleshooting section or your authorized dealer for assistance.

Never attempt to start a flooded engine‚ and always disconnect the spark plug wire before performing any maintenance.

Adjusting Tilling Depth and Speed

Depth adjustment is achieved via the depth stake located at the rear of the tiller; lowering the stake increases tilling depth. For initial passes‚ a shallower depth is recommended‚ gradually increasing with subsequent passes.

Speed is controlled by the forward/reverse lever on the handle. Start with a slower speed for heavier soils and increase as conditions allow. Always prioritize control and safety.

Adjust settings based on soil type and desired results‚ ensuring consistent tilling for optimal garden preparation.

Tilling Techniques for Different Soil Types

For hard‚ compacted soil‚ make multiple passes at increasing depths. Begin with a shallow pass‚ then gradually lower the depth stake with each subsequent run.

In loose or sandy soil‚ a shallower depth and faster speed are generally sufficient. Avoid over-tilling‚ which can create a powdery texture.

Clay soils benefit from thorough tilling‚ but may require more power and multiple passes to break up clumps effectively.

Maintenance and Service

Regular upkeep is crucial! Inspect blades frequently‚ perform oil changes‚ and maintain the gearbox for peak performance and longevity of your Troy-Bilt Bronco.

Follow the schedule outlined in this manual for optimal results and to uphold warranty validity.

Regular Maintenance Schedule

Prioritize consistent care! After each use‚ inspect for loose fasteners and debris. Every 25 hours‚ check and clean the air filter‚ and verify fluid levels (oil & fuel).

Annually‚ change the engine oil‚ inspect the spark plug‚ and thoroughly grease all moving parts. Blade inspection and sharpening should also occur annually. Adhering to this schedule ensures reliable operation and extends the life of your Troy-Bilt Bronco tiller.

Blade Inspection and Replacement

Safety first! Always disconnect the spark plug before inspecting or replacing blades. Regularly check blades for wear‚ cracks‚ or damage. Sharpen dull blades to maintain optimal tilling performance.

If blades are severely damaged or worn‚ replace them as a set to ensure balanced operation. Consult your parts diagram for correct blade identification and follow proper installation procedures. A damaged blade can cause excessive vibration.

Gearbox Maintenance

Crucially‚ maintain the gearbox for reliable performance. Periodically check the gearbox oil level and condition. If the oil appears dirty or low‚ drain and replace it with the recommended type‚ as specified in your engine manual.

Ensure proper lubrication prevents wear and tear. Listen for unusual noises during operation‚ which could indicate gearbox issues. Contact an authorized dealer for complex repairs or concerns.

Engine Maintenance (Oil Changes‚ Spark Plug)

Regular engine maintenance is vital for longevity. Consult your engine operator’s manual for oil change intervals and recommended oil type. Always check the spark plug condition periodically; clean or replace as needed to ensure optimal ignition.

Proper maintenance prevents engine issues. Adhere to the schedule outlined in the manual‚ and address any concerns promptly. Refer to authorized channels for export distribution information.

Troubleshooting Common Issues

Facing problems? This section addresses typical concerns like engine failure‚ excessive vibration‚ or difficulty moving the tiller‚ guiding you towards solutions.

Contact your local dealer or the Troy-Bilt Technical Service Department for further assistance and specific instructions.

Engine Won’t Start

Troubleshooting a non-starting engine: First‚ verify the fuel valve is open and the fuel tank contains fresh gasoline. Check the spark plug connection and condition – a faulty plug prevents ignition.

Ensure the engine’s kill switch is in the ‘run’ position. If issues persist‚ consult the engine operator’s manual for detailed starting procedures and potential carburetor problems.

Contact an authorized dealer if you cannot resolve the starting issue independently.

Tiller Vibrates Excessively

Excessive vibration indicates a potential issue: Immediately stop the tiller and inspect the tilling blades for damage‚ looseness‚ or imbalance. Ensure all bolts and fasteners are securely tightened‚ particularly those connecting the blades and gearbox.

Check for debris lodged within the blade housing. If vibration continues after inspection‚ contact your authorized Troy-Bilt dealer for professional assistance.

Do not operate the tiller with persistent‚ strong vibrations.

Difficulty Moving the Tiller

Struggling to maneuver your Troy-Bilt Bronco? First‚ verify the tilling depth isn’t set too low‚ creating excessive resistance. Ensure the tiller is operating on a relatively level surface‚ avoiding steep inclines.

Inspect the drive system for obstructions or tangled debris. If issues persist‚ consult your local authorized Troy-Bilt dealer for guidance and potential repairs.

Avoid forcing the tiller; this could cause damage.

Warranty Information

Rest assured! Your Troy-Bilt Bronco is protected by a Lifetime Limited Warranty‚ specifically covering rear tine‚ walk-behind tillers with gear drive transmissions.

Contact Troy-Bilt for claim processes and authorized export distribution details.

Lifetime Limited Warranty Details

Exceptional Coverage: The Troy-Bilt Bronco tiller boasts a Lifetime Limited Warranty‚ a testament to its durable design and quality construction. This warranty specifically applies to all Troy-Bilt branded rear tine‚ walk-behind tillers equipped with gear drive transmissions.

This warranty provides peace of mind‚ safeguarding against defects in materials and workmanship for the lifetime of the tiller‚ under normal residential use. Refer to the full warranty statement for complete terms‚ conditions‚ and exclusions.

Warranty Claim Process

Initiating a Claim: To initiate a warranty claim for your Troy-Bilt Bronco tiller‚ first contact your local authorized Troy-Bilt dealer. They will guide you through the necessary steps and documentation required for processing your request.

Alternatively‚ you can reach the Troy-Bilt Technical Service Department directly for instructions. Be prepared to provide proof of purchase and a detailed description of the defect or issue encountered.

Parts Diagrams and Ordering

Locate diagrams to identify components‚ then order replacements through authorized dealers or online. Ensure correct part numbers for your Troy-Bilt Bronco model.

Accessing these resources simplifies maintenance and repairs‚ keeping your tiller operating efficiently for years to come.

Locating Parts Diagrams

Accessing detailed parts diagrams is crucial for maintaining your Troy-Bilt Bronco tiller. Begin by consulting your owner’s manual‚ which often includes exploded views of key components.

Alternatively‚ visit the official Troy-Bilt website; their online parts lookup tool allows you to search by model number‚ providing interactive diagrams. These diagrams clearly illustrate each part’s location and identification number‚ simplifying repairs and ensuring you order the correct replacements.

Authorized dealers can also provide physical copies of parts diagrams.

Ordering Replacement Parts

Securing replacement parts for your Troy-Bilt Bronco tiller is straightforward. Utilize the parts diagrams (found online or in your manual) to identify the correct component number.

You can order directly through the Troy-Bilt website‚ leveraging their online store. Alternatively‚ authorized Troy-Bilt dealers stock a wide range of parts and can assist with ordering. When placing your order‚ always verify the part number and model compatibility.

Keep your model number handy!

Storage and Off-Season Care

Proper storage extends your tiller’s life. Prepare it by draining fuel‚ checking for loose parts‚ and storing it in a dry‚ sheltered location.

Protect against corrosion and ensure it’s ready for the next gardening season!

Preparing the Tiller for Storage

Before long-term storage‚ thoroughly clean the Troy-Bilt Bronco tiller‚ removing all dirt and debris. Drain the fuel tank completely to prevent carburetor issues during inactivity.

Check for any loose components and tighten them accordingly. Apply a corrosion protectant to metal surfaces. Disconnect the spark plug wire for added safety. Store in a dry‚ covered area‚ protected from the elements.

This ensures optimal performance when you’re ready to garden again!

Proper Storage Location

Select a dry‚ sheltered location for storing your Troy-Bilt Bronco tiller‚ such as a garage‚ shed‚ or covered porch. Avoid damp areas to prevent rust and corrosion.

Ensure the location is protected from direct sunlight and extreme temperatures. A level surface is ideal. Keep the tiller away from flammable materials.

Proper storage safeguards your investment‚ maintaining the tiller’s functionality and extending its lifespan for years of reliable garden service.

Technical Specifications

Detailed engine specs and drive system details are crucial for understanding your Bronco tiller’s performance. Consult the engine manual for comprehensive information.

These specifications ensure proper maintenance and optimal operation‚ maximizing the tiller’s efficiency in your gardening tasks.

Detailed Engine Specifications

Engine details are found within the separate engine operator’s manual‚ packed alongside your Troy-Bilt Bronco tiller. This manual provides crucial information regarding horsepower‚ displacement‚ and fuel requirements.

Specifically‚ it outlines recommended oil types‚ spark plug specifications‚ and optimal operating speeds. Understanding these details ensures peak engine performance and longevity‚ preventing potential issues. Refer to it for troubleshooting engine-related concerns.

Drive System Details

The Bronco’s drive system features a robust gear-drive transmission‚ covered by the Troy-Bilt Lifetime Limited Warranty for rear tine walk-behind tillers. This system delivers reliable power to the tines‚ enabling efficient soil preparation.

The manual details proper engagement and disengagement procedures‚ alongside maintenance recommendations for optimal performance. Understanding the drive system ensures effective tilling and extends the tiller’s operational lifespan.

Safety Features

Prioritize safety! The Bronco includes crucial safety switches and protective guards‚ detailed in the manual‚ to prevent accidental starting and shield operators during operation.

Understanding Safety Switches

Critical safety features are integrated into the Troy-Bilt Bronco tiller‚ notably the safety switches. These switches are designed to immediately halt engine operation if certain conditions aren’t met‚ preventing accidental starts or operation.

Always ensure the operator is properly positioned and controls are engaged before starting. If a switch malfunctions‚ do not operate the tiller; consult an authorized dealer for immediate repair and instructions.

Protective Guards and Shields

Essential for safe operation‚ the Troy-Bilt Bronco tiller incorporates robust protective guards and shields. These components are strategically positioned to deflect debris‚ preventing potential injury from thrown objects during tilling.

Never remove or disable these guards. Regularly inspect them for damage‚ and replace any compromised parts immediately through authorized channels. Maintaining these shields ensures a secure tilling experience.

Optional Attachments

Expand your tiller’s versatility! Explore available accessories to enhance functionality‚ from furrowers to aerators. Installation guides ensure proper attachment and safe operation.

Available Accessories

Unlock even greater gardening potential with a range of optional attachments designed specifically for your Troy-Bilt Bronco tiller. These accessories broaden its capabilities beyond standard tilling‚ allowing for specialized tasks like creating perfectly formed rows with a furrower‚ or efficiently aerating your lawn for improved health.

Consider a planting attachment for seed distribution‚ or a dethatching blade to revitalize your turf. Explore the full catalog at your authorized Troy-Bilt dealer or online to discover the perfect additions for your gardening needs!

Attachment Installation Guide

Proper attachment installation is crucial for safe and effective operation of your Troy-Bilt Bronco tiller; Always refer to the specific instructions included with each accessory‚ as procedures vary depending on the attachment type.

Ensure the tiller engine is completely off and cooled before beginning installation. Securely fasten all components‚ verifying proper alignment and tightening all bolts to the manufacturer’s specifications. If unsure‚ consult an authorized dealer.

Frequently Asked Questions (FAQ)

Common questions regarding operation‚ maintenance‚ and warranty coverage are addressed here. Refer to the engine manual for detailed troubleshooting and support information.

Contact Troy-Bilt customer support or locate an authorized dealer for further assistance with your Bronco tiller’s specific needs.

Common User Questions and Answers

Q: Where can I find detailed parts diagrams?

A: Locate parts diagrams through Troy-Bilt’s official website or by contacting an authorized dealer. These diagrams are essential for identifying replacement parts needed for maintenance.

Q: What does the lifetime limited warranty cover?

A: The warranty covers rear tine‚ walk-behind tillers with gear drive transmissions. Refer to the warranty documentation for specific terms and claim processes.

Q: What if my tiller won’t start?

A: Consult the engine operator’s manual for troubleshooting steps. Ensure proper fuel levels and spark plug functionality before seeking professional assistance.

Contact Information

For support‚ reach out to Troy-Bilt customer service or locate an authorized dealer for assistance with your Bronco tiller and manual inquiries.

Access expert guidance and parts information through their official channels for a seamless experience.

Troy-Bilt Customer Support

Need assistance with your Bronco tiller? Troy-Bilt provides dedicated customer support to address your questions and concerns regarding operation‚ maintenance‚ or parts replacement.

For immediate help‚ consult the comprehensive owner’s manual packed with your tiller‚ or visit the official Troy-Bilt website for FAQs and troubleshooting guides.

You can also connect with their technical service department for expert advice and warranty claim assistance‚ ensuring a smooth and productive gardening experience.

Authorized Dealer Locator

Locate a trusted expert near you! Troy-Bilt maintains a network of authorized dealers equipped to provide specialized service‚ genuine parts‚ and valuable advice for your Bronco tiller.

Utilize the official Troy-Bilt website’s dealer locator tool to find the nearest authorized retailer‚ ensuring access to qualified technicians and authentic components.

These dealers can assist with assembly‚ maintenance‚ repairs‚ and warranty claims‚ maximizing the lifespan and performance of your gardening equipment.

canon t3 manual

The Canon EOS Rebel T3, also known as the EOS 1100D, offers a 9․1-rated, 292-page PDF manual․ It’s a gateway to photographic exploration, detailed in readily available guides․

What is the Canon EOS Rebel T3?

The Canon EOS Rebel T3 (or EOS 1100D) represents an accessible entry point into DSLR photography․ This camera, extensively documented in a comprehensive 292-page PDF manual, is designed for beginners eager to explore beyond point-and-shoot limitations․ The readily available guide, scoring a solid 9․1 from users, details every aspect of operation․

It’s a camera that bridges the gap, offering manual controls alongside user-friendly automatic modes․ Resources like the downloadable manual and Canon’s support website empower users to learn and grow their photographic skills․ It’s a solid foundation for aspiring photographers․

Key Features and Specifications

The Canon EOS Rebel T3 boasts features detailed within its extensive PDF manual․ Key specs include compatibility with Canon EF and EF-S lenses, like the Canon EF 50mm f/1․2L USM․ The camera supports various gamma curves, including Canon Log and Canon Log 3, accessible via Canon XF Utility for transfer․

It utilizes standard 4GB cards for storage, as per Canon’s testing conditions․ The 292-page manual covers image quality settings (RAW vs․ JPEG) and video recording basics․ It’s a feature-rich camera, thoroughly explained in its documentation․

Target Audience for this Manual

This Canon EOS Rebel T3 manual is designed for both beginner and intermediate photographers; It caters to those new to DSLR cameras, offering a comprehensive guide from initial setup to advanced features․ The manual assists users in understanding shooting modes, focus, and exposure settings․

It also benefits users exploring Canon Log and utilizing Canon XF Utility․ The PDF version, available online, supports those seeking detailed instructions for customization and troubleshooting․ It’s a resource for anyone wanting to maximize their T3’s potential․

Getting Started with Your Camera

Begin with unboxing, battery and memory card insertion, and familiarizing yourself with the camera’s buttons and dials, as detailed in the manual․

Unboxing and Initial Setup

Upon receiving your Canon EOS Rebel T3, carefully unpack the box, ensuring all components are present․ These typically include the camera body, kit lens (often an 18-55mm), battery, battery charger, neck strap, and essential documentation – crucially, the comprehensive manual․ Before proceeding, inspect each item for any physical damage sustained during shipping․

Initial setup involves connecting the battery charger to a power source and fully charging the battery․ Simultaneously, locate the slot for the memory card (SD card) and gently insert a compatible card․ Refer to the manual for proper insertion orientation․ This initial preparation ensures a smooth and uninterrupted start to your photographic journey with the Canon EOS Rebel T3․

Inserting the Battery and Memory Card

The Canon EOS Rebel T3 requires a charged battery and a compatible SD memory card to operate․ Locate the battery compartment, usually at the bottom of the camera, and follow the manual’s instructions for unlocking and opening it․ Insert the battery, ensuring correct polarity, until it clicks into place․ Securely close the compartment door․

Next, find the SD card slot, often alongside the battery compartment․ Gently insert the SD card until it clicks․ Avoid forcing it! The manual details the correct orientation․ Proper insertion is vital for image storage․ Always eject the card safely through the camera’s menu before removal to prevent data corruption․

Understanding the Camera Buttons and Dials

The Canon EOS Rebel T3 features various buttons and dials controlling its functions․ The manual provides a detailed diagram identifying each control; The power button initiates camera operation, while the shutter button captures images․ Dials adjust settings like shooting mode and exposure compensation․

The directional buttons navigate menus, and the ‘Set’ button confirms selections․ Familiarize yourself with the ‘Q’ button for quick access to frequently used settings․ The manual explains each button’s purpose, enabling efficient camera control․ Mastering these controls unlocks the camera’s full potential for creative photography․

Basic Camera Operations

Canon’s manual guides users through powering the T3 on/off, setting the date and time, and navigating the menu system for fundamental operation․

Powering On and Off

The Canon EOS Rebel T3’s operation begins with a simple process․ To power on, locate the camera’s power switch, typically positioned around the shutter button․ Sliding this switch to the “ON” position activates the camera, initiating the startup sequence and displaying the live view on the LCD screen․

Conversely, to power off, return the switch to the “OFF” position․ This ensures the camera conserves battery life when not in use․ The manual emphasizes that proper powering down prevents accidental image capture or settings alterations․ Always confirm the LCD screen is dark before storing the camera․

Setting the Date and Time

Accurate date and time settings are crucial for proper image organization and metadata․ The Canon EOS Rebel T3 manual guides users through this process via the camera’s menu system․ Navigate to the “Settings” menu, then locate the “Date/Time” option․

Here, you can input the current date and time, ensuring they are correctly formatted․ The manual details how to adjust the year, month, day, hour, and minute․ Correct settings are vital for chronological sorting of photos and accurate timestamping, enhancing your workflow and image management․

Navigating the Menu System

The Canon EOS Rebel T3’s manual emphasizes mastering the menu system for full camera control․ Accessed via the ‘MENU’ button, it’s organized into distinct tabs – Shooting, AF, Setup, and more․ Use the directional buttons to highlight desired options and press ‘SET’ to confirm selections․

The manual details each menu item’s function, from image quality settings to custom functions․ Familiarity with this system unlocks advanced features․ Understanding the layout and terminology, as explained in the 292-page PDF, is key to customizing your camera experience․

Shooting Modes Explained

The Canon T3 manual details various shooting modes, including Auto, Program (P), Aperture Priority (Av), Shutter Priority (Tv), and full Manual (M) control․

Auto Mode for Beginners

Auto mode on the Canon EOS Rebel T3 is designed for simplicity, making it perfect for those new to DSLR photography․ The camera automatically handles all settings – aperture, shutter speed, ISO, and white balance – allowing users to focus solely on composition and capturing the moment․

This mode is ideal for everyday snapshots and situations where quick, hassle-free shooting is desired․ While offering minimal creative control, Auto mode ensures properly exposed images in a wide range of lighting conditions․ The Canon T3 manual emphasizes this mode’s ease of use, encouraging beginners to build confidence before exploring more advanced settings․

Program Mode (P) for More Control

Program (P) mode on the Canon EOS Rebel T3 offers a step up from Auto, providing more creative control while still assisting the photographer․ The camera automatically sets the aperture and shutter speed, but allows adjustments to other settings like ISO, white balance, and exposure compensation․

This mode is excellent for situations where you want some influence over the image’s look without fully manual control․ The Canon T3 manual highlights Program mode as a good starting point for learning about exposure, enabling users to experiment with different settings and observe their effects on the final image․

Aperture Priority (Av) Mode

Aperture Priority (Av) mode on the Canon EOS Rebel T3 empowers photographers to control the depth of field․ You select the aperture (f-stop), influencing how much of the image is in focus, while the camera automatically determines the appropriate shutter speed for correct exposure․

A wider aperture (lower f-number) creates a shallow depth of field, ideal for portraits with blurred backgrounds․ Conversely, a narrower aperture (higher f-number) maximizes depth of field, suitable for landscapes․ The Canon T3 manual details how mastering Av mode unlocks creative possibilities, allowing precise control over image aesthetics․

Shutter Priority (Tv) Mode

Shutter Priority (Tv) mode on the Canon EOS Rebel T3 grants control over motion blur․ You choose the shutter speed, dictating how long the camera’s sensor is exposed to light, while the camera adjusts the aperture for proper exposure․ Faster shutter speeds freeze action, perfect for sports or wildlife photography․

Slower shutter speeds create motion blur, ideal for conveying a sense of movement, like flowing water․ The Canon T3 manual explains how Tv mode is crucial for capturing dynamic scenes․ Understanding this mode, as detailed in the provided guides, allows photographers to creatively manipulate time and motion within their images․

Manual Mode (M) for Full Control

Manual Mode (M) on the Canon EOS Rebel T3 provides complete photographic control․ You independently set both the aperture and shutter speed, allowing precise exposure adjustments․ This mode demands a strong understanding of the exposure triangle – aperture, shutter speed, and ISO – as detailed within the Canon T3 manual․

While challenging for beginners, Manual mode unlocks creative potential․ It’s essential for consistent results in complex lighting situations․ Mastering this mode, as the guides explain, allows photographers to override the camera’s automatic settings and achieve their desired artistic vision, offering ultimate flexibility․

Understanding Focus and Exposure

The Canon T3 manual details autofocus modes and exposure compensation, alongside ISO sensitivity settings, crucial for achieving sharp, well-lit images consistently․

Autofocus Modes and Selection

The Canon EOS Rebel T3 manual comprehensively explains the available autofocus (AF) modes, empowering users to capture sharp images in diverse scenarios․ One-Shot AF is ideal for stationary subjects, locking focus when the shutter button is half-pressed․ AI Servo AF continuously tracks moving subjects, maintaining focus as they change position․ Automatic selection allows the camera to intelligently choose the appropriate mode․

Understanding AF point selection is also vital․ The T3 offers various AF area modes, including a single AF point, allowing precise focus control․ Zone AF utilizes a cluster of points, useful for subjects within a defined area․ The manual guides users through customizing these settings for optimal performance, ensuring consistently focused photographs, regardless of the shooting situation․

Exposure Compensation

The Canon EOS Rebel T3 manual details exposure compensation, a crucial tool for adjusting image brightness․ When the camera’s automatic metering doesn’t yield desired results, exposure compensation allows manual overrides․ Users can brighten or darken images by adjusting the compensation value, measured in stops (+/- EV)․

Positive values increase brightness, useful for dark subjects, while negative values decrease it, ideal for bright scenes․ The manual explains how to access and modify exposure compensation through the camera’s menu system․ Mastering this feature ensures accurate exposures, preventing underexposed or overexposed images, and achieving creative control over the final photograph’s look and feel․

ISO Sensitivity Settings

The Canon EOS Rebel T3 manual thoroughly explains ISO sensitivity, a key setting impacting image brightness and noise․ ISO determines the camera sensor’s sensitivity to light; higher ISO values are beneficial in low-light conditions, allowing for faster shutter speeds․ However, increasing ISO also introduces more digital noise, potentially reducing image quality․

The manual details available ISO settings, ranging from lower values for bright conditions to higher values for dimly lit environments․ Understanding the trade-off between brightness and noise is crucial․ Users learn to select the optimal ISO setting based on the shooting scenario, balancing image clarity with the need for sufficient light․

Working with Images and Video

The Canon T3 manual details image quality choices – RAW versus JPEG – and basic video recording․ It also covers viewing and deleting captured content efficiently․

Image Quality Settings (RAW vs․ JPEG)

Understanding image quality settings is crucial for Canon EOS Rebel T3 users․ The manual explains the difference between shooting in RAW and JPEG formats․ JPEG files are compressed, resulting in smaller file sizes, ideal for immediate sharing and requiring less storage space․ However, this compression sacrifices some image data․

RAW files, conversely, contain all the data captured by the camera’s sensor, offering significantly greater flexibility during post-processing․ This allows for extensive adjustments to exposure, white balance, and other parameters without degrading image quality․ While RAW files are larger and require dedicated software for editing, they are preferred by photographers seeking maximum control and archival quality․ The Canon T3 manual guides users in selecting the appropriate format based on their needs and workflow․

Video Recording Basics

The Canon EOS Rebel T3 manual details fundamental video recording features․ Users can initiate video recording by switching to Movie mode on the camera’s mode dial․ The T3 supports standard definition video recording, offering a straightforward entry point into videography․ Understanding the limitations of the camera’s video capabilities, such as resolution and frame rates, is essential․

The manual explains how to control recording start/stop, zoom functionality during recording, and basic audio settings․ Proper lighting and stable camera support (tripod recommended) are highlighted for optimal video quality․ Reviewing recorded footage is done through the camera’s playback function, allowing immediate assessment of results․

Viewing and Deleting Images

The Canon EOS Rebel T3 manual guides users through image playback․ Pressing the playback button allows reviewing captured photos and videos on the camera’s LCD screen․ Navigation is achieved using the directional buttons, enabling zooming and scrolling through images․ The manual details how to display shooting information like date, time, and camera settings alongside each image․

Deleting unwanted images is straightforward, with options for single or multiple selections․ A confirmation prompt appears to prevent accidental deletion․ The manual emphasizes the permanence of deletion, advising caution․ Images can also be protected from accidental deletion using the protect function, ensuring valuable photos remain safe;

Advanced Features and Settings

The Canon T3 manual details Canon Log and Canon Log 3 (gamma curves) alongside Canon XF Utility for efficient file transfer and management․

Canon Log and Gamma Curves

Delving into advanced color grading, the Canon EOS Rebel T3 manual explains Canon Log, Canon Log 2, and Canon Log 3․ These gamma curves expand dynamic range, crucial for post-production flexibility․ Utilizing these settings allows for greater control over highlights and shadows during editing, preserving detail in challenging lighting conditions․

The manual clarifies how to select between Canon Log options, alongside Wide DR and Normal 1 (Standard), tailoring image capture to specific shooting scenarios․ Understanding these curves unlocks professional-level color manipulation capabilities, enhancing the visual storytelling potential of your footage․ Refer to the PDF “Read This First” document for detailed guidance․

Using Canon XF Utility for Transfer

The Canon EOS Rebel T3 manual references Canon XF Utility as a tool for efficient file transfer and management․ While primarily associated with professional cinema cameras like the EOS C300 Mark II, understanding its capabilities can streamline workflow․ The manual directs users to download Canon XF Utility from Canon’s website and follow provided instructions for proper setup․

This software facilitates importing footage, organizing files, and performing basic editing tasks․ It’s particularly useful when working with large volumes of data or requiring precise control over file naming and organization․ Consult the PDF documentation for detailed guidance on utilizing Canon XF Utility with your T3 camera․

Customizing Camera Settings

The Canon EOS Rebel T3 manual details extensive customization options to tailor the camera to your shooting style․ Users can adjust image quality settings, choosing between RAW and JPEG formats for varying levels of editing flexibility․ Gamma curves, including Canon Log and Canon Log 3, are available for advanced color grading control, enhancing dynamic range․

Further personalization includes configuring autofocus modes, exposure compensation, and ISO sensitivity․ The manual guides users through menu navigation to access these settings, allowing for precise adjustments to achieve desired photographic results․ Explore the options to unlock the full potential of your T3․

Troubleshooting Common Issues

The Canon T3 manual addresses problems like the camera not powering on, focusing difficulties, and deciphering error messages, offering clear solutions for users․

Camera Not Turning On

If your Canon EOS Rebel T3 fails to power on, consult the manual for systematic troubleshooting; First, ensure the battery is fully charged and correctly inserted, checking the compartment latch․ Verify the battery contacts are clean and free of corrosion․

Next, try a different, known-working battery if available․ Also, confirm the memory card is properly seated, as a faulty card can sometimes prevent startup․ If these steps don’t resolve the issue, the manual suggests checking the power switch position and potentially seeking professional repair, as internal component failure might be the cause․

Focusing Problems

Experiencing focusing issues with your Canon EOS Rebel T3? The manual details several solutions․ First, ensure you’ve selected the appropriate autofocus (AF) mode for your subject – One-Shot for static subjects, and AI Servo for moving ones․ Confirm sufficient light is available, as low light hinders autofocus performance․

Check the lens for cleanliness, as smudges can interfere with focusing accuracy․ Also, verify the focus point is correctly positioned over your intended subject․ If problems persist, the manual recommends trying manual focus to determine if the issue lies with the autofocus system itself․

Error Messages and Solutions

The Canon EOS Rebel T3 manual provides a comprehensive list of error messages and their corresponding solutions․ Common errors include card errors (ensure card is compatible and properly inserted) and lens errors (verify lens is securely attached)․ If an error occurs during shooting, the manual advises restarting the camera and re-attempting the operation․

For persistent errors, consult the detailed troubleshooting section within the PDF․ It suggests checking battery levels and, if necessary, performing a factory reset․ Remember to note the specific error code displayed for accurate diagnosis and resolution, as detailed in the user guide․

Maintaining Your Canon T3

The Canon T3 manual details sensor cleaning, battery care, and firmware updates for optimal performance and longevity of your camera, ensuring lasting quality․

Cleaning the Sensor

Maintaining a clean sensor is crucial for image quality with your Canon EOS Rebel T3․ The official manual doesn’t extensively detail sensor cleaning, but recommends professional servicing․ Dust accumulation impacts photos, appearing as spots․ Carefully use a blower to dislodge loose particles; avoid touching the sensor directly․

If professional cleaning isn’t immediately accessible, specialized sensor cleaning kits are available․ These typically include swabs and cleaning fluid designed for delicate sensor surfaces․ Always follow kit instructions precisely to prevent damage․ Improper cleaning can scratch the sensor, requiring costly repairs․ Regular preventative measures, like lens changes in clean environments, minimize dust buildup․

Battery Care and Storage

Proper battery care extends the life of your Canon EOS Rebel T3’s power source․ The manual advises against exposing the battery to extreme temperatures – both heat and cold can diminish performance․ Avoid short-circuiting by keeping the terminals free from conductive materials․

When storing for extended periods, charge the battery to approximately 40-60% to prevent over-discharge․ Store in a cool, dry place․ Don’t leave a fully charged or fully discharged battery unused for long durations․ Canon recommends using only Canon-branded chargers and batteries for optimal safety and performance, safeguarding your camera and battery health․

Firmware Updates

Keeping your Canon EOS Rebel T3’s firmware current ensures optimal performance and compatibility․ The manual doesn’t detail the update process directly, but Canon provides updates via their support website․ Regularly check for new versions, as they often address bugs and add new features․

Firmware updates typically involve downloading a file to an SD card, inserting the card into the camera, and following on-screen prompts․ Crucially, do not interrupt the update process, as this could damage your camera․ Always follow Canon’s official instructions carefully to avoid any issues during the firmware update procedure․

Resources and Further Learning

Explore Canon’s support website for the complete PDF manual and tutorials․ Online communities offer additional learning and assistance for your Canon T3․

Downloading the Complete User Manual (PDF)

Accessing the comprehensive 292-page PDF manual for your Canon EOS Rebel T3 (or EOS 1100D) is straightforward․ Numerous online resources provide free downloads, ensuring you have detailed guidance at your fingertips․ This manual, consistently rated around 9․1 by users, covers every aspect of your camera’s operation, from initial setup to advanced features․

It’s an invaluable tool for both beginners and experienced photographers seeking to maximize their Canon T3’s potential․ Look for official Canon websites or reputable photography resource sites to ensure you obtain a legitimate and up-to-date version of the PDF document․

Canon Support Website

Canon’s official support website is a crucial resource for Canon EOS Rebel T3 owners․ Here, you’ll find the complete PDF manual available for download, alongside frequently asked questions, troubleshooting guides, and driver updates․ The website provides direct access to Canon’s expertise, ensuring you can resolve any issues or learn more about your camera’s capabilities․

Furthermore, Canon often posts firmware updates to improve performance and add features․ Regularly checking the support site guarantees your T3 operates optimally․ It’s a central hub for all things Canon, offering reliable and official assistance․

Online Tutorials and Communities

Beyond the official manual, a wealth of learning resources exists online for the Canon EOS Rebel T3․ Numerous websites and YouTube channels offer tutorials covering everything from basic operation to advanced techniques․ These resources often present information in a visual and easily digestible format․

Active online communities and forums dedicated to Canon cameras provide a space to ask questions, share experiences, and learn from fellow photographers․ Engaging with these communities can accelerate your learning curve and offer practical solutions to common challenges․

xaviera hollander books pdf

Xaviera Hollander Books PDF: A Comprehensive Guide

This guide explores accessing Xaviera Hollander’s literary works in PDF format, detailing availability, legality, and safety considerations for downloading her books.

Her impactful writing, starting with “The Happy Hooker,” continues to spark discussion and remains widely translated, offering unique insights into her experiences.

Xaviera Hollander is a Dutch-American author, best known for her groundbreaking and controversial 1972 autobiography, “The Happy Hooker.” This work catapulted her to international fame, detailing her experiences as a high-class escort in New York City. Hollander’s writing challenged societal norms surrounding sexuality and female agency, sparking both outrage and fascination.

Beyond “The Happy Hooker,” Hollander has authored several other books, including “Xaviera Supersex,” “Xaviera on the Best Part of a Man,” “Child No More,” and “Madame l’Ambassadrice.” Her literary career spans decades, consistently exploring themes of sexuality, power dynamics, and personal liberation.

The enduring interest in Hollander’s work is reflected in the ongoing search for her books in digital formats, particularly PDF, making accessibility a key consideration for readers today. Her impact on cultural conversations remains significant.

The Happy Hooker: Origins and Impact

“The Happy Hooker,” published in 1972, originated from Hollander’s collaboration with journalist Robin Moore and editor Yvonne Dunleavy. The book offered an unprecedentedly candid account of a woman’s life in the world of high-class prostitution, challenging prevailing societal taboos. Its immediate impact was sensational; it became a bestseller and sparked widespread debate about sexuality and morality.

The book’s success led to numerous translations – fifteen languages to date – and cemented Hollander’s status as a cultural icon. It broke ground by presenting a female perspective on sexual encounters, devoid of shame or judgment, a radical departure from existing narratives.

Consequently, “The Happy Hooker” continues to be a sought-after title, driving demand for accessible formats like PDF, allowing new generations to engage with its provocative content and historical significance.

Availability of “The Happy Hooker” in PDF Format

Finding a legitimate PDF version of “The Happy Hooker” can be challenging. While numerous websites claim to offer free downloads, many are unreliable and may contain malware or viruses. The Internet Archive hosts some digitized copies, but availability fluctuates due to copyright restrictions and scanning progress.

Currently, a direct, legally sanctioned PDF download from the author or publisher isn’t readily available. Users often encounter unofficial scans or converted versions circulating online. Caution is strongly advised when sourcing PDFs from unknown origins; verifying the file’s safety is crucial.

Alternatively, exploring e-book retailers or digital lending libraries might yield access to digital editions in formats like EPUB, offering a safer and legal alternative to potentially risky PDF downloads.

Other Books by Xaviera Hollander

Beyond “The Happy Hooker,” Xaviera Hollander authored several other revealing works exploring sexuality and personal experiences. These include “Xaviera Supersex,” delving into further explicit encounters, and “Xaviera on the Best Part of a Man,” offering her perspectives on male intimacy.

Her autobiographical writing continued with “Happy Hooker,” a revisiting of her initial experiences, “Child No More,” and “Madame l’Ambassadrice,” each offering unique insights into her life and career. Finding PDF versions of these titles mirrors the challenges of locating “The Happy Hooker” – unofficial scans are prevalent, but legal access is limited.

Availability on platforms like the Internet Archive varies, and caution regarding download safety remains paramount when seeking these books in PDF format. Exploring alternative formats like EPUB is recommended.

Xaviera Supersex

“Xaviera Supersex” represents a continuation of Hollander’s explicit exploration of her experiences within the world of high-class prostitution. This book, like her others, details intimate encounters and offers a candid perspective on sexuality, pushing boundaries of societal norms.

Finding a legitimate PDF version of “Xaviera Supersex” proves difficult; most available downloads originate from unofficial sources. These sources often carry risks of malware or viruses, necessitating extreme caution. The Internet Archive may contain listings, but availability fluctuates.

Readers seeking this title should prioritize safety and consider alternative formats like EPUB or purchasing physical copies. Due to the book’s explicit content, legal restrictions may apply depending on location.

Xaviera on the Best Part of a Man

“Xaviera on the Best Part of a Man” delves further into Hollander’s provocative and often controversial perspectives on male sexuality and relationships, building upon the themes established in “The Happy Hooker.” It offers a direct, unfiltered account of her observations and experiences with numerous partners.

Locating a secure PDF download of this title presents similar challenges to her other works. Unofficial websites frequently offer downloads, but these pose significant security risks, including potential malware infections. Verification of file integrity is crucial.

Potential readers should exercise caution and explore legitimate avenues for accessing the book, such as purchasing a physical copy or seeking authorized digital formats. Legal considerations regarding explicit content should also be acknowledged.

Happy Hooker

“Happy Hooker” remains Xaviera Hollander’s most famous work, a groundbreaking and intensely debated account of her life as a high-class escort. Finding a reliable PDF version requires careful navigation, as numerous unofficial sources exist online.

Many websites claim to offer free downloads, but these often contain viruses or lead to compromised files. The Internet Archive sometimes hosts digitized copies, but availability fluctuates due to copyright concerns and content restrictions.

Prioritizing safety is paramount; scanning any downloaded PDF with updated antivirus software is essential. Legally, obtaining the book through authorized retailers – either physical copies or legitimate ebook platforms – is the recommended approach.

Child No More

“Child No More” delves into Hollander’s formative years and the experiences that shaped her path, offering a deeper understanding of the woman behind “The Happy Hooker.” Locating a PDF of this title proves similarly challenging to her more famous work, with unofficial sources dominating online searches.

The Internet Archive may occasionally feature scans, but these are subject to availability and potential removal. Caution is advised when encountering free PDF downloads, as they frequently harbor malware or lead to dubious websites.

Purchasing a legitimate ebook version or a physical copy remains the safest and most ethical option. Always verify the source before downloading any file, and ensure your antivirus software is up-to-date to mitigate potential risks.

Madame l’Ambassadrice

“Madame l’Ambassadrice” represents another facet of Hollander’s writing, exploring themes of power, diplomacy, and the complexities of international relationships through her unique perspective. Finding a readily available PDF version of this book presents significant difficulties, mirroring the scarcity of her other titles in digital format.

Online searches predominantly yield links to unofficial download sites, which pose substantial security risks. These sites often contain viruses or malware disguised as ebooks. The Internet Archive’s collection is inconsistent, and a PDF may not be currently accessible.

Prioritizing legal and secure avenues, such as purchasing an ebook from reputable retailers or acquiring a physical copy, is strongly recommended to avoid potential harm and support the author.

Finding Xaviera Hollander Books Online

Locating Xaviera Hollander’s books online, particularly in PDF format, can be challenging. While “The Happy Hooker” enjoys wider availability, other titles like “Xaviera Supersex” and “Child No More” are harder to find digitally. Initial searches often lead to numerous unofficial websites offering free downloads, but these are fraught with risks.

The Internet Archive presents a potential resource, though its holdings are variable and may not include all her works in PDF. Reputable ebook retailers are the safest option, but availability is limited. Be cautious of sites promising free PDFs, as they frequently harbor malware or viruses.

Always verify the source’s legitimacy before downloading any file to protect your device and personal information. Prioritize legal purchasing options whenever possible.

Legality and Ethical Considerations of Downloading PDFs

Downloading PDFs of Xaviera Hollander’s books from unauthorized sources raises significant legal and ethical concerns. Copyright laws protect authors’ intellectual property, and obtaining books through illegal downloads constitutes copyright infringement, potentially leading to legal penalties.

Beyond the legal ramifications, ethical considerations are paramount. Authors deserve compensation for their work, and illegal downloading deprives them of rightful earnings. Supporting authors through legitimate purchases ensures they can continue creating content.

Furthermore, websites offering free PDFs often operate outside the law and may expose users to malware, viruses, and privacy risks. Choosing legal avenues demonstrates respect for the author and safeguards your digital security.

Internet Archive Resources for Xaviera Hollander Books

The Internet Archive serves as a valuable resource for accessing digitized versions of various books, including some works related to Xaviera Hollander. While direct PDF downloads of all her titles aren’t consistently available, the platform offers potential access through archived webpages and lending libraries.

Users can search the Internet Archive’s “Books” section using keywords like “Xaviera Hollander” or specific book titles to discover available resources. It’s important to note that access may be limited by lending restrictions or copyright considerations.

Currently, the archive indicates limited suitable files for direct display, but it remains a dynamic repository. Checking periodically may reveal newly added content or access to related materials, offering a glimpse into her literary history.

Exploring Xaviera Hollander’s Writing Style

Hollander’s writing is characterized by a strikingly candid and unvarnished tone, directly addressing taboo subjects with remarkable openness. Her prose is often described as conversational and accessible, drawing readers into her experiences with a sense of immediacy and intimacy.

She employs a narrative style that blends personal anecdote with broader social commentary, offering insights into the world of high-class prostitution and challenging conventional societal norms. This directness, while controversial, is a defining feature of her work.

Her ability to present a complex and often provocative subject matter with clarity and a lack of pretense has contributed to the enduring interest in her books, even decades after their initial publication.

Themes and Controversies in Hollander’s Work

Central themes in Hollander’s writing revolve around female sexuality, power dynamics, and societal hypocrisy. Her work directly confronts the stigma surrounding sex work, presenting a perspective often absent from mainstream discourse. This exploration of taboo subjects inevitably sparked significant controversy upon publication and continues to generate debate.

The frank depiction of her experiences challenged prevailing moral standards, leading to accusations of exploitation and sensationalism. However, supporters argue her work offers a valuable, albeit unconventional, examination of female agency and economic realities.

Furthermore, the authenticity of her narrative has been questioned, adding another layer of complexity to the controversies surrounding her books and their enduring cultural impact.

The Cultural Significance of “The Happy Hooker”

“The Happy Hooker” transcended mere sensationalism, becoming a cultural touchstone of the 1970s and beyond. It coincided with, and arguably fueled, a period of increased sexual liberation and challenged conventional norms surrounding female sexuality and prostitution.

The book’s impact extended to discussions about power, money, and the commodification of intimacy. It sparked widespread debate, appearing on bestseller lists and prompting both condemnation and fascination. Its availability in paperback further democratized access to its controversial content.

Despite criticisms, “The Happy Hooker” remains a significant work in understanding shifting societal attitudes towards sex and gender, continuing to be analyzed for its historical and cultural relevance even today.

Translations of Xaviera Hollander’s Books

Xaviera Hollander’s most famous work, “The Happy Hooker,” has been translated into at least fifteen languages, demonstrating its broad international appeal and the universality of its themes. This widespread translation facilitated discussions about sexuality and societal norms across diverse cultures.

While comprehensive lists are difficult to compile, translations exist in languages including French, German, Spanish, Italian, and Japanese, among others. The availability of these translations indicates a global interest in Hollander’s perspective and experiences.

Finding PDF versions of these translated editions can be challenging, often requiring searches in the specific language. However, the Internet Archive and other digital libraries may contain some translated copies, alongside the original English text.

Xaviera Hollander’s Life and Background

Xaviera Hollander gained notoriety for her unconventional life as a high-class escort in New York City during the early 1970s. This experience formed the basis for her groundbreaking and controversial autobiography, “The Happy Hooker.” Her background is crucial to understanding the context of her writing.

Before becoming a well-known figure in the adult entertainment industry, Hollander pursued various creative endeavors. Her life story, detailed in her books, challenges conventional societal norms and explores themes of female agency and sexual liberation.

Understanding her personal history provides valuable insight into the motivations and perspectives that shaped her literary work, making her books more than just sensational accounts, but rather social commentaries.

Reviews and Critical Reception of Her Books

Xaviera Hollander’s books, particularly “The Happy Hooker,” initially faced significant controversy and polarized critics. Some dismissed her work as exploitative and sensationalistic, while others lauded it for its frankness and challenge to societal taboos surrounding female sexuality.

Over time, critical perspectives have evolved, with scholars increasingly analyzing her writing through feminist and sociological lenses. Discussions often center on her portrayal of power dynamics, sexual agency, and the commodification of intimacy.

Despite ongoing debate, Hollander’s books remain culturally significant, prompting conversations about sex work, gender roles, and the complexities of human relationships. The availability of PDF versions has broadened access to these discussions.

The Evolution of Hollander’s Career

Xaviera Hollander’s career trajectory is remarkable, beginning with the explosive success of “The Happy Hooker” in 1972. This initial fame propelled her into the public eye, leading to numerous interviews, media appearances, and subsequent book publications.

She didn’t shy away from continuing to explore themes of sexuality and personal experience in works like “Xaviera Supersex” and “Xaviera on the Best Part of a Man,” solidifying her brand as a provocative author.

The shift towards PDF accessibility of her books represents a new phase, allowing wider dissemination of her work beyond traditional publishing channels. Hollander continues to actively promote her writing, demonstrating enduring engagement with her audience.

Xaviera Hollander’s Current Activities

Currently, Xaviera Hollander remains actively involved in promoting her literary work, including overseeing the digital availability of her books in formats like PDF and e-pub. She maintains a presence online, engaging with readers and discussing her perspectives on sexuality and societal norms.

Hollander is described as actively promoting her own work, indicating a continued dedication to sharing her stories and insights. This includes managing the distribution of her books through various platforms, ensuring accessibility for a global audience;

The availability of her books in PDF format reflects her adaptability to modern publishing trends, allowing readers to easily access her writing. She appears to be focused on maintaining her legacy as a groundbreaking author.

PDF Download Safety and Virus Concerns

Downloading PDF versions of Xaviera Hollander’s books from unofficial sources carries inherent risks. These files may contain malware, viruses, or other malicious software that can compromise your device and personal information. It’s crucial to exercise extreme caution when selecting a download site.

Prioritize reputable platforms like official publisher websites or well-known digital bookstores to minimize these risks. Avoid suspicious links or websites offering “free” downloads, as they are often breeding grounds for harmful content.

Always scan downloaded files with a reliable antivirus program before opening them. Ensure your operating system and security software are up-to-date to provide the best possible protection against potential threats. Protecting your digital security is paramount.

Alternative Formats: E-pub and Paperback

While seeking PDF versions, consider alternative formats for enjoying Xaviera Hollander’s work. The e-pub format offers a flexible reading experience, adaptable to various e-readers and devices, often providing adjustable font sizes and layouts.

However, many readers still prefer the tactile experience of a physical book. Hollander’s titles, including “The Happy Hooker” and her other works, are frequently available in paperback editions.

Purchasing physical copies ensures authenticity and supports the author. Paperback editions can be found through online retailers, bookstores, and sometimes even second-hand markets, offering a reliable and safe way to access her literature.

Where to Purchase Physical Copies of Her Books

For those preferring physical copies, several avenues exist to acquire Xaviera Hollander’s books. Major online retailers like Amazon and Barnes & Noble consistently stock titles such as “The Happy Hooker,” “Xaviera Supersex,” and others.

Independent bookstores can also be a valuable resource, often offering to order books not currently in stock. Websites specializing in used and rare books, such as Abebooks, frequently list Hollander’s works at varying prices and conditions.

Additionally, checking the publisher’s website directly might reveal exclusive editions or signed copies. Local libraries may also hold copies available for borrowing, providing a cost-effective way to explore her literature.

Accessing and Understanding Xaviera Hollander’s Literature

Xaviera Hollander’s work remains a compelling, albeit controversial, exploration of sexuality and societal norms. Accessing her books, whether through PDF downloads, e-pub formats, or physical copies, presents various options, each with its own considerations.

Navigating the digital landscape requires caution regarding legality and security, prioritizing reputable sources to avoid malware. Understanding the historical context and critical reception enhances appreciation of her impact.

Ultimately, Hollander’s literature offers a unique perspective, challenging conventional thinking and prompting reflection on personal freedom and societal expectations. Her enduring legacy lies in her willingness to openly discuss taboo subjects.