woozoo fan manual

Woozoo Fan Manual: A Comprehensive Guide

Welcome! This manual details operation for IRIS USA WOOZOO fans, offering cooling solutions for bedrooms, offices, and dorms. Explore features like remote control, oscillation, and timer settings.

Woozoo fans, manufactured by IRIS USA, represent a modern approach to personal cooling, blending functionality with a sleek design. These air circulators are engineered to maximize airflow and provide comfortable cooling in various settings – from bedrooms and offices to dorm rooms and beyond. Unlike traditional fans, Woozoo models prioritize focused air circulation, delivering a powerful breeze across considerable distances.

Available in a range of sizes and configurations, Woozoo fans cater to diverse needs. Key features include remote control operation, multiple speed settings (3 or 5, depending on the model), and adjustable oscillation – offering both standard and full 360° rotation. The integrated timer function allows for convenient automated operation, with options for 2, 4, or 8-hour settings.

Furthermore, Woozoo fans are designed with portability in mind, often featuring lightweight construction and built-in handles for easy relocation. The quiet motor operation, typically around 30db, ensures minimal disruption, making them ideal for use during sleep or work. Models boast impressive air distance capabilities, ranging from 52ft to 82ft, ensuring widespread cooling coverage.

Woozoo Fan Models: Overview

IRIS USA’s Woozoo fan lineup currently features several distinct models, each tailored to specific cooling requirements and space constraints. The standard Woozoo Air Circulator Fan provides a balance of power and portability, offering 3-speed settings and a maximum air distance of 52ft. A slightly larger variant boosts performance to 74ft, maintaining the 3-speed operation and compact design.

For more extensive cooling, the Woozoo Globe Fan Large delivers powerful, multi-directional oscillation with a quiet DC motor. This model includes advanced features like a delayed start function alongside the standard 2, 4, and 8-hour timer options. The premium Woozoo Air Circulator Fan with 5 Speeds maximizes control, reaching an impressive 82ft air distance and offering a 90° adjustable tilt.

Dimensions vary across models; the SDC18T Globe Fan measures 10.24L x 10.24W x 14.25H inches, while smaller desk fans are approximately 8.27L x 8.27W x 11.42H inches. All models prioritize ease of use with included remote controls and user-friendly interfaces.

Key Features of Woozoo Fans

Woozoo fans are engineered for optimal performance and user convenience. A standout feature is the 360° oscillation, providing comprehensive air circulation throughout a room, with some models also offering standard oscillation modes. Multiple speed control options – typically 3 or 5 – allow for customized airflow intensity, catering to individual preferences.

The integrated timer functionality, with settings for 2, 4, and 8 hours, enables automated operation and energy savings. Many models boast an exceptionally quiet motor, operating at around 30db, ensuring minimal disruption during sleep or work. Remote controls provide effortless adjustment of settings from a distance.

Furthermore, Woozoo fans prioritize portability, often featuring lightweight designs and built-in handles for easy relocation. Air distance capabilities range from 52ft to 82ft, depending on the model, ensuring effective cooling even in larger spaces. Adjustable tilt functions enhance directional airflow, maximizing comfort and efficiency.

Setting Up Your Woozoo Fan

Begin with unboxing, verifying all components are present. Ensure proper placement before powering on. Familiarize yourself with the remote control for convenient operation and adjustments.

Unboxing and Component Check

Carefully unpack your new Woozoo fan from its packaging. Retain the box and packing materials for potential future transport or warranty claims. The package should include the fan unit itself, a remote control (with batteries potentially included – check packaging), and this user manual.

Inspect all components for any signs of damage during shipping. Look for cracks, dents, or missing parts. If any damage is present, do not attempt to operate the fan. Contact the retailer or IRIS USA customer support immediately.

Verify the presence of the fan base, the fan motor/globe assembly, and any included accessories. Some models may have adjustable tilt stands or additional mounting hardware. Ensure the power cord is securely attached to the fan unit and is free from any visible damage.

Familiarize yourself with the location of the control panel on the fan itself, as well as the buttons on the remote control. A quick visual check will help you understand the fan’s basic operation before proceeding to power it on. Proper component verification ensures a smooth setup process.

Powering On and Initial Operation

Before first use, ensure the fan is placed on a stable, level surface. Connect the power cord to a standard electrical outlet. Avoid using extension cords if possible; if necessary, use a heavy-duty extension cord rated for the fan’s power consumption.

To power on, locate the power button on the fan’s control panel or the remote control; Press the button once to initiate operation. The fan will typically start on a low speed setting. You can then adjust the speed using the speed control buttons, selecting from 3 or 5 available speeds depending on your model.

Test the oscillation function by pressing the oscillation button. Observe the fan head rotating through its range of motion – either a standard oscillation or a full 360° rotation, depending on the model. Verify the tilt adjustment is functioning smoothly.

Initial operation should be a brief test to confirm all functions are working correctly. Listen for any unusual noises from the motor. If any issues are detected, immediately disconnect the power and consult the troubleshooting section of this manual.

Remote Control Functionality

Your Woozoo fan includes a convenient remote control for effortless operation from a distance. Before use, ensure the remote has fresh batteries installed – typically AAA or AA size (not included). Point the remote directly at the fan’s control panel for optimal signal transmission.

The remote replicates all functions available on the fan’s control panel. This includes power on/off, speed control (3 or 5 speeds), oscillation mode selection (360° or standard), and timer settings (2, 4, or 8 hours). Dedicated buttons allow for direct access to these features.

Utilize the timer function to automatically shut off the fan after a set period, conserving energy and providing comfortable cooling during sleep. The remote also controls the adjustable tilt feature, allowing you to direct airflow precisely where needed.

For optimal performance, keep the remote control dry and avoid dropping it. Store the remote in a safe place when not in use to prevent loss or damage. If the remote becomes unresponsive, try replacing the batteries.

Operating Modes and Settings

Woozoo fans offer versatile modes! Choose from standard or 360° oscillation, adjust speed across 3 or 5 settings, and utilize the convenient 2/4/8-hour timer function.

Oscillation Settings (360° vs. Standard)

Woozoo fans provide two distinct oscillation modes to cater to your cooling preferences: standard oscillation and a comprehensive 360° rotation. Standard oscillation features a wider, back-and-forth sweeping motion, ideal for circulating air within a defined space, like a bedroom or office. This mode effectively distributes airflow across a room without being overly disruptive.

Conversely, the 360° oscillation mode offers complete, all-around air circulation. This setting allows the fan head to rotate a full circle, ensuring even cooling throughout the entire room. It’s particularly beneficial for larger spaces or when you want to avoid concentrated airflow on a single point. The 360° function is excellent for gatherings or when multiple people are present.

Switching between these modes is typically done via the remote control or directly on the fan unit. The choice depends on the room size, desired airflow pattern, and personal comfort. Experiment with both settings to discover which best suits your needs and maximizes the cooling efficiency of your Woozoo fan.

Speed Control (3, 5 Speeds Options)

Woozoo fans offer versatile speed control, available in both 3-speed and 5-speed configurations, allowing for precise adjustment of airflow intensity. The 3-speed models provide Low, Medium, and High settings, suitable for basic cooling needs and energy conservation. These are perfect for gentle breezes or focused airflow.

For more granular control, select a Woozoo fan with 5-speed options. This expands your choices, offering finer adjustments to match your comfort level. The additional speeds allow you to create a subtle airflow for quiet operation or ramp up to a powerful breeze for rapid cooling. This flexibility is ideal for adapting to changing temperatures or personal preferences.

Speed adjustments are easily made using the included remote control or the control panel on the fan itself. Lower speeds minimize noise, while higher speeds maximize air circulation. Experiment with the different settings to find the optimal balance between cooling power and quiet operation for your specific environment.

Timer Functionality (2, 4, 8 Hour Settings)

Woozoo fans are equipped with a convenient timer function, enhancing energy efficiency and providing automated operation. You can select from three timer settings: 2, 4, or 8 hours. This allows the fan to automatically shut off after the chosen duration, preventing unnecessary energy consumption while you sleep or are away.

The 2-hour timer is ideal for short-term cooling, such as during a nap or while reading. The 4-hour setting provides a longer cooling period, suitable for overnight use or extended periods of inactivity. For all-night cooling or prolonged comfort, the 8-hour timer offers the most extended automated operation.

Setting the timer is simple, using the dedicated timer button on the remote control or the fan’s control panel. The fan will operate normally until the timer expires, then automatically power down. Some models also offer a delayed start function, allowing you to schedule the fan to turn on at a later time, further enhancing convenience and energy savings.

Maintenance and Care

Ensure longevity by regularly cleaning your Woozoo fan. Dust accumulation reduces efficiency. Check and replace filters (if applicable) for optimal airflow and performance.

Cleaning Instructions

Maintaining a clean Woozoo fan is crucial for optimal performance and longevity. Before any cleaning, always disconnect the fan from the power source to prevent electrical shock. Begin by wiping down the exterior surfaces – the fan housing, base, and remote control – with a soft, slightly damp cloth. Avoid using harsh chemicals, abrasive cleaners, or solvents, as these can damage the plastic components.

For more thorough cleaning, particularly of the fan blades, you may need to disassemble certain parts. Refer to your specific model’s diagram (often found online or in supplemental documentation) for guidance. Gently dust the blades with a soft brush or cloth. If grime is present, lightly dampen the cloth with a mild detergent solution, ensuring it’s not dripping wet.

Pay attention to the air intake areas, as dust tends to accumulate there. Use a vacuum cleaner with a brush attachment to carefully remove any debris. After cleaning, ensure all parts are completely dry before reassembling and plugging in the fan. Regular cleaning, ideally every few weeks depending on usage, will keep your Woozoo fan operating efficiently and extend its lifespan.

Filter Replacement (If Applicable)

Not all Woozoo fan models feature air filters; however, some larger units, particularly those designed for enhanced air circulation, may include a pre-filter to capture dust and allergens. If your model does have a filter, it’s essential to replace it periodically to maintain air quality and fan performance. The replacement frequency depends on usage and environmental conditions, but generally, every 3-6 months is recommended.

To determine if your fan has a filter, consult your model’s specific documentation. The filter is typically located on the rear of the unit, behind a removable panel. Always disconnect the fan from power before accessing the filter. Gently remove the old filter and discard it responsibly.

Install the new filter, ensuring it’s properly seated and the panel is securely reattached. Using a non-genuine filter may compromise performance or damage the fan. Replacement filters can often be purchased directly from IRIS USA or authorized retailers. Regularly checking and replacing the filter, when applicable, contributes to a cleaner and healthier indoor environment.

Troubleshooting Common Issues

Fan won’t turn on: First, ensure the power cord is securely plugged into a working outlet. Check the remote control batteries; replace if necessary. If the issue persists, try a different outlet to rule out electrical problems.

No oscillation: Verify the oscillation function is activated on the remote or control panel. Some models have a dedicated oscillation button. Ensure nothing is obstructing the fan’s movement.

Reduced airflow: Check if the air intake or exhaust vents are blocked by dust or debris. Clean the fan thoroughly (see ‘Cleaning Instructions’). If your model has a filter, replace it if it’s dirty.

Remote not working: Ensure there’s a clear line of sight between the remote and the fan. Replace the batteries. Try resetting the fan by unplugging it for a few minutes. If problems continue, contact IRIS USA customer support for assistance. Always refer to your model’s specific manual for detailed troubleshooting steps.

Advanced Features & Specifications

Woozoo fans boast impressive air distances (52ft, 74ft, 82ft) and a remarkably quiet 30db motor. Portable designs, with varying dimensions, suit diverse spaces effectively.

Air Distance Capabilities (52ft, 74ft, 82ft Models)

Woozoo fans are engineered to deliver powerful airflow across a variety of room sizes, offering models with distinct air distance capabilities. The entry-level model achieves a maximum air distance of 52 feet, ideal for smaller bedrooms or personal workspaces. This provides a focused stream of air for direct cooling.

For medium-sized rooms, the 74-foot model extends the reach of the airflow, ensuring consistent circulation throughout the space. This is particularly useful in offices or larger dorm rooms where broader coverage is desired. Finally, the premium 82-foot model is designed for larger living areas, providing comprehensive cooling even at considerable distances.

These varying distances are achieved through optimized fan blade design and powerful motor performance. The ability to select a model with the appropriate air distance ensures efficient cooling without unnecessary energy consumption; Consider your room size when choosing the best Woozoo fan for your needs, maximizing comfort and airflow.

Noise Level (30db Quiet Motor)

Woozoo fans prioritize a peaceful environment alongside effective cooling, boasting a remarkably quiet motor operating at just 30 decibels (dB). This low noise level ensures the fan won’t disrupt sleep, work, or conversations, making it ideal for bedrooms, offices, and nurseries. Compared to traditional fans, the Woozoo’s DC motor significantly reduces operational sounds.

The 30dB rating is comparable to a whisper, creating a subtle background presence rather than an intrusive hum. This quiet operation is achieved through precision engineering and high-quality components, minimizing vibrations and airflow turbulence. Users consistently praise the fan’s ability to provide cooling comfort without sacrificing tranquility.

Whether you’re focusing on a task, enjoying a relaxing evening, or sleeping soundly, the Woozoo fan’s quiet motor allows you to maintain a peaceful atmosphere. This feature distinguishes Woozoo fans from many competitors, offering a superior user experience focused on both performance and serenity.

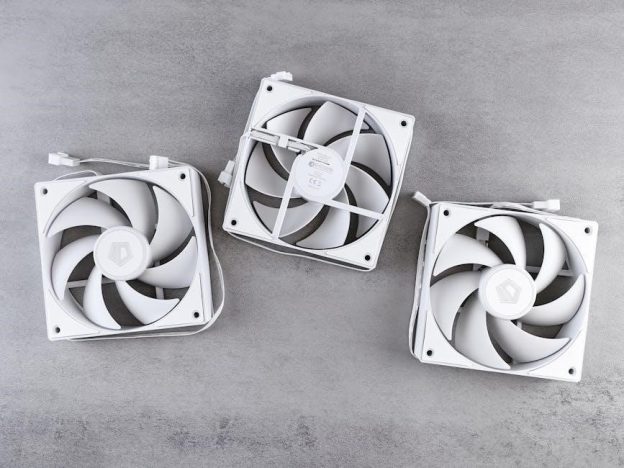
Portability and Dimensions (Various Model Sizes)

Woozoo fans are designed with portability in mind, offering convenient cooling solutions for various spaces. Models range in size to suit different needs, from compact desk fans to larger circulators. Many feature a built-in handle, facilitating easy movement between rooms – perfect for homes, offices, or dorms.

Dimensions vary significantly between models. The SDC18T Globe Fan measures approximately 10.24L x 10.24W x 14.25H inches, while smaller desk fans are around 8.27L x 8.27W x 11.42H inches. These compact footprints ensure the fans fit neatly on desks, countertops, and nightstands without taking up excessive space.

The lightweight construction further enhances portability. Despite their powerful performance, Woozoo fans remain easy to carry and position as needed. This flexibility allows you to direct airflow precisely where it’s most beneficial, maximizing cooling efficiency and personal comfort throughout your environment.

op 175 form 2023 pdf

OP 175 Form 2023 PDF: A Comprehensive Overview

OP 175, crucial for per session employment and retention rights, is a document created electronically on April 7, 2023, and relates to DOE and City Contracts․

What is the OP 175 Form?

The OP 175 form is a vital document utilized for applications concerning per session employment and asserting retention rights within specific organizational contexts․ Created in electronic format on April 7, 2023, by Марфина Е․М․, it’s a ten-page document (page 1 of 10)․

This form is directly linked to operational permits and licenses, often required for regulatory filings․ It mandates completion before commencing per session work, and applicants must claim any applicable retention rights․ A key limitation is a maximum employment cap of 400 hours․

Furthermore, it’s connected to both DOE and City Contracts, demonstrating its importance within public sector employment frameworks․

Purpose of the OP 175 Form

The primary purpose of the OP 175 form is to formally document an individual’s application for per session employment opportunities, alongside any claims for retention rights․ It serves as a crucial tool for managing contingent workforce arrangements, ensuring compliance with established regulations and contractual obligations related to DOE and City Contracts․

Specifically, the form facilitates the tracking of employment hours, adhering to a maximum limit of 400 hours․ It also confirms eligibility and prioritizes individuals with existing rights․

Created on April 7, 2023, it streamlines the onboarding process and maintains accurate employment records․

Jurisdictional Relevance and Usage

The OP 175 form’s relevance is primarily within jurisdictions overseeing educational institutions and programs tied to Department of Education (DOE) and City contracts․ Its usage is particularly prominent in institutions like MBDOU CRR Kindergarten 175, where it manages per session employment for various roles․

Furthermore, the form extends to specialized programs such as the Chemical Technology program (specialty 43․02․06), ensuring proper documentation for instructors and staff․

Compliance with regulations governing these contracts necessitates the form’s consistent and accurate completion․

Understanding the 2023 Version

The 2023 OP 175 form is an electronically created document, updated as of April 7, 2023, and is essential for regulatory filings and employment․

Key Changes in the 2023 OP 175 Form

The 2023 iteration of the OP 175 form emphasizes a mandatory completion requirement before commencing any per session employment activity․ Applicants must now explicitly claim retention rights, if applicable, directly on the form itself․ A significant change involves a stipulated maximum employment limit of 400 hours․

This version, created electronically on April 7, 2023, streamlines the process for both applicants and supervisors․ It’s directly linked to DOE and City Contracts, ensuring compliance with relevant regulations․ The form’s structure reflects updated procedural legislation allowing for electronic document submission to courts since January 1, 2017․

Form Updates as of April 7, 2023

As of April 7, 2023, the OP 175 form exists as an electronically created document, versioned as 175/оп․ Updates focus on clarifying eligibility for per session employment and detailing retention rights procedures․ The form now explicitly references relevant DOE and City Contracts, strengthening its legal grounding․

Key updates include refined sections for applicant information and program details, specifically referencing educational programs like those at MBDOU CRR Kindergarten 175 and chemical technology programs (specialty 43․02․06)․ The calendar for the 2023-2024 academic year is also referenced, alongside winter session results․

Electronic Form Availability

The OP 175 form is readily available in a digital PDF format, designed for convenient access and electronic submission․ This online version streamlines the application process for per session employment and retention rights claims․ Applicants are directed to complete and submit the form to their per session supervisor before commencing any work․

The electronic format supports integration with other regulatory filings and ensures compliance with data privacy standards․ Notably, the form mandates adherence to a maximum employment limit of 400 hours․ Submission procedures are designed to align with evolving legal frameworks, including those enacted since January 1, 2017, regarding electronic document submission to courts․

Completing the OP 175 Form

OP 175 completion requires applicants to claim retention rights, if applicable, and adhere to a 400-hour employment maximum before starting per session work․

Eligibility Criteria for Using the Form

The OP 175 form is primarily intended for individuals seeking per session employment opportunities, particularly within educational institutions like MBDOU CRR Kindergarten 175, or those claiming retention rights․ Eligibility extends to applicants in programs such as the Chemical Technology program (specialty 43․02․06), offered on a full-time, budget-funded basis, including those with special privileges․

Specifically, the form applies to those involved in the 2023-2024 academic calendar and those impacted by the winter 2023/2024 exam session results․ Completion is mandatory before commencing any per session activity, ensuring compliance with relevant regulations and contract stipulations related to DOE and City Contracts․

Required Information and Documentation

Completing the OP 175 form necessitates detailed information, including age category and group affiliation, particularly relevant for institutions like MBDOU CRR Kindergarten 175, specifying the year of birth (e․g․, 2023)․ Applicants must declare their educational program and indicate if they possess special rights․

Documentation confirming eligibility for budget-funded positions or special privileges may be required․ The form mandates claiming retention rights, if applicable, and adherence to a maximum employment limit of 400 hours․ Submission must occur prior to starting per session work, ensuring all details align with DOE and City Contract requirements․

Step-by-Step Guide to Filling Out the Form

Begin by accessing the OP 175 form, ensuring it’s the 2023 version․ Carefully input personal details, age category, and group affiliation – crucial for educational institutions․ Accurately declare your educational program and any special rights applicable to your situation․

Thoroughly review sections regarding retention rights and the 400-hour employment limit․ Submit the completed form to your per session supervisor before commencing any work․ Confirm all information aligns with DOE and City Contract stipulations, and retain a copy for your records․

Specific Applications of the Form

OP 175 applies to per session employment, retention rights, educational settings like MBDOU CRR Kindergarten 175, and chemical technology programs (specialty 43․02․06)․

Per Session Employment and Retention Rights

The OP 175 form is fundamentally linked to applications for per session employment and the assertion of retention rights․ It’s a mandatory requirement; applicants must complete and submit this form to their per session supervisor before commencing any per session work․

Crucially, the form facilitates claiming those existing retention rights, if applicable․ Regulations stipulate a maximum employment limit – specifically, a cap of 400 hours․ This form serves as the official documentation to verify eligibility and adherence to these guidelines, ensuring compliance with employment regulations and contractual obligations within the relevant institutions․

Application in Educational Institutions (MBDOU CRR Kindergarten 175)

The OP 175 form finds specific application within educational institutions, notably MBDOU CRR Kindergarten 175․ Documentation indicates its use in categorizing children by age group – 2-3 years (1st junior group/nursery, born 2023) and 3-4 years (2nd junior group)․

This form likely supports administrative processes related to staffing and program implementation within the kindergarten․ It’s connected to the educational program of MBDOU CRR Kindergarten 175, aiding in the organization of student demographics․ The form’s use ensures accurate record-keeping and facilitates efficient resource allocation within the early childhood education setting․

Use in Chemical Technology Programs (Specialty 43․02․06)

The OP 175 form is also relevant within vocational training, specifically the specialty 43․02․06 – Chemical Technology of Modern Energy Materials․ A calendar academic schedule for the 2023-2024 academic year exists for this program, suggesting the form’s role in managing student employment or practical training components․

Its application likely involves tracking per-session employment opportunities for students enrolled in this program, potentially related to laboratory work or industry placements․ The form supports the program’s full-time, budget-funded structure, and may be used for students with special rights or privileges within the curriculum․

Technical Aspects and Access

The OP 175 form is available as a PDF document, requiring completion and submission to a per-session supervisor before commencing any employment activity․

Downloading the OP 175 Form (PDF)

Accessing the OP 175 form in PDF format is a critical first step for individuals seeking per session employment or aiming to claim retention rights․ While a direct download link isn’t explicitly provided in the available information, the document’s existence as an electronic form created on April 7, 2023, confirms its digital availability․

Applicants should typically obtain the form from their per session supervisor or the relevant administrative department within their institution – such as MBDOU CRR Kindergarten 175 or institutions offering programs like Chemical Technology (specialty 43․02․06)․

It’s essential to ensure the downloaded PDF is the current 2023 version to guarantee compliance with the latest regulations and requirements․

Online Submission Procedures

The provided information indicates a shift towards electronic document submission, aligning with procedural legislation enacted since January 1, 2017, allowing for court filings in digital format; While specific details regarding OP 175’s online submission aren’t explicitly stated, the form’s creation as an electronic document on April 7, 2023, strongly suggests an online pathway exists․

Applicants should confirm the preferred submission method with their per session supervisor․ Institutions like those offering Chemical Technology programs or MBDOU CRR Kindergarten 175 likely have established digital workflows․

Ensure compatibility with required software before submitting․

Compatibility and Software Requirements

As the OP 175 form was created electronically in 2023, it’s highly probable the PDF version is designed for broad compatibility across modern operating systems – Windows, macOS, and potentially mobile platforms․ However, specific software requirements aren’t detailed in the available information․

Users will almost certainly need a PDF reader, such as Adobe Acrobat Reader, or a compatible browser with built-in PDF viewing capabilities․ Institutions utilizing the form, like those in chemical technology programs, may specify preferred software for optimal rendering and submission․

Ensure your system meets basic PDF viewing standards․

Legal and Regulatory Context

The OP 175 form adheres to regulations allowing electronic document submission since 2017, impacting operational permits and licenses within relevant jurisdictions․

Relevant Regulations and Legislation

The OP 175 form’s usage is deeply rooted in procedural legislation enacted since January 1, 2017, permitting electronic document submission to courts․ This facilitates compliance with operational requirements for per session employment and retention rights․ The form mandates completion before commencing work, alongside claiming any applicable retention rights, with a maximum employment limit of 400 hours․

Furthermore, its application extends to various educational programs, like those at MBDOU CRR Kindergarten 175, and specialized training in areas such as chemical technology (specialty 43․02․06)․ Adherence to these regulations ensures proper documentation for both employees and institutions, aligning with DOE and City Contract stipulations․

Compliance Requirements

Successful OP 175 form submission necessitates meticulous adherence to established guidelines․ Applicants must complete all sections accurately before initiating per session employment, explicitly declaring any retention rights they may possess․ A critical compliance aspect is staying within the stipulated 400-hour employment limit․

Educational institutions, like MBDOU CRR Kindergarten 175, and programs in chemical technology (43․02․06) must ensure proper form usage for all relevant personnel․ Compliance also involves aligning with DOE and City Contract regulations, and maintaining accurate records for potential audits․ Failure to comply may result in employment restrictions or contractual penalties․

Data Privacy and Security

Given the OP 175 form’s electronic creation and submission, robust data privacy and security measures are paramount․ Compliance with relevant data protection legislation is essential, safeguarding sensitive applicant information․ Secure storage and transmission protocols must be implemented to prevent unauthorized access or data breaches․

Institutions handling these forms, such as those linked to DOE and City Contracts, are responsible for maintaining data integrity and confidentiality․ The form’s use in educational settings and specialized programs (like chemical technology) necessitates adherence to strict privacy standards․ Electronic submission, enabled since 2017, requires secure digital infrastructure․

Related Forms and Documents

The OP 175 form connects to DOE and City Contracts, alongside other regulatory filings, and requires supporting documentation for complete submissions․

Connections to DOE and City Contracts

The OP 175 form demonstrates a clear connection to both Department of Education (DOE) and City Contracts, functioning as a key component within their regulatory frameworks․ Specifically, it’s utilized for applications pertaining to per session employment and asserting retention rights for individuals working under these contracts․

This form ensures compliance with established guidelines governing temporary staffing and continued employment opportunities․ It’s a printable version, facilitating a streamlined process for applicants and supervisors alike․ The form’s completion is mandatory prior to commencing any per session activity, solidifying its integral role in contract adherence and workforce management within these public sector entities;

Integration with Other Regulatory Filings

The OP 175 form isn’t typically a standalone filing, but rather integrates with broader regulatory processes, particularly concerning employment and educational program administration․ Its completion often precedes or accompanies other documentation required for personnel records and contract compliance․

Notably, since January 1, 2017, electronic submission of documents, including potentially supporting materials for the OP 175, has been permissible under procedural legislation․ This suggests a move towards digital integration with other filings․ Furthermore, it’s linked to educational program details, like those for the Chemical Technology program (specialty 43․02․06), requiring comprehensive documentation․

Supporting Documentation Needed

Completing the OP 175 form often necessitates supporting documentation, varying based on application – per session employment, retention rights, or educational context․ For educational institutions like MBDOU CRR Kindergarten 175, documentation confirming age category and group affiliation (e․g․, 2-3 years, 1st junior group) is essential․

For programs like Chemical Technology (specialty 43․02․06), proof of enrollment and program details are required․ Applicants claiming retention rights must provide evidence substantiating their claim․ Generally, identification and potentially employment history may also be needed to fully support the OP 175 submission․

Important Dates and Deadlines

Key dates include the 2023-2024 academic calendar, the August 31, 2023, schedule for specialty programs, and winter 2023/2024 exam results․

2023-2024 Academic Calendar (Kalendarnyy Uchebnyy Grafik)

The Kalendarnyy Uchebnyy Grafik, or 2023-2024 academic calendar, is a vital component for personnel utilizing the OP 175 form, particularly within educational institutions like MBDOU CRR Kindergarten 175․ This calendar dictates the timeframe for per session employment opportunities and impacts retention rights claims․ Specifically, it outlines the schedule for programs preparing specialists of intermediate level, such as the Chemical Technology program (specialty 43․02․06)․

Understanding these dates is crucial for timely form submission and adherence to institutional guidelines․ The calendar’s structure directly influences eligibility criteria and documentation requirements related to the OP 175 form’s application․

Exam Session Results (Winter 2023/2024)

The results of the Winter 2023/2024 exam session are indirectly relevant to the OP 175 form, particularly concerning retention rights for educators and staff․ Absolute academic performance, assessed in this session, can influence eligibility for continued per-session employment․ Institutions utilizing the OP 175, like MBDOU CRR Kindergarten 175, may consider these results when evaluating applications․

Successful completion of courses and programs, reflected in these results, strengthens an applicant’s position․ Understanding the grading scale and overall performance metrics is therefore important when completing and submitting the OP 175 form․

Form Submission Deadlines

Specific submission deadlines for the OP 175 form are crucial for securing per-session employment and asserting retention rights․ While a precise date isn’t explicitly stated in the provided context, timely submission prior to commencing any per-session activity is mandated․ The 2023-2024 academic calendar (Kalendarnyy Uchebnyy Grafik) likely influences these deadlines, particularly for educational institutions like MBDOU CRR Kindergarten 175․

Applicants should confirm deadlines with their per-session supervisor to ensure compliance and avoid potential employment disruptions․ Proactive submission is highly recommended․

Troubleshooting and Support

OP 175 form assistance is available; contact your per session supervisor for help avoiding common errors and ensuring proper completion before employment begins․

Common Errors and How to Avoid Them

Several common errors can occur when completing the OP 175 form․ A frequent mistake involves incomplete sections, particularly regarding retention rights claims; ensure all applicable fields are thoroughly addressed․ Another issue arises from failing to submit the form before commencing per session employment – this is a strict requirement․

Incorrectly identifying the educational program or contract details also leads to rejection․ Carefully verify program names (like the Chemical Technology program ─ Specialty 43․02․06) and contract numbers․ Finally, exceeding the 400-hour limit without proper justification is a common oversight․ Double-check your hours and provide supporting documentation if necessary to avoid processing delays or denials․

Contact Information for Assistance

For immediate assistance with the OP 175 form and related queries, direct your inquiries to the per session supervisor responsible for your employment activity․ Specific contact details will vary depending on your institution or department; consult your employing agency’s internal resources for the appropriate personnel․

Further support regarding regulatory filings and contract compliance can be obtained through the relevant DOE (Department of Education) or City Contract offices․ While dedicated OP 175 support lines aren’t explicitly mentioned, general inquiries regarding per session employment policies should be directed to these central administrative bodies․

Frequently Asked Questions (FAQ)

Q: What is the primary purpose of the OP 175 form? A: It’s used for applications related to per session employment and asserting retention rights before commencing work․ Q: Is the form exclusively digital? A: Yes, the document was created in electronic form on April 7, 2023․

Q: What is the 400-hour limit mentioned? A: Applicants must adhere to a maximum of 400 hours of per session work․ Q: Which institutions utilize this form? A: MBDOU CRR Kindergarten 175 and institutions with chemical technology programs (specialty 43․02․06) are examples․

honeywell th4110u2005 manual pdf

Honeywell TH4110U2005 Manual PDF: A Comprehensive Guide

Honeywell TH4110U2005 manuals, including the PDF version, simplify setup and operation. These guides offer clear instructions and illustrations for users, ensuring a smooth experience.

The T4 Pro series manuals, like the TH4110U2005 user guide, are available as optimized PDF documents from Honeywell Home, licensed from Honeywell International, Inc.

The Honeywell TH4110U2005 is a member of the T4 Pro Programmable Thermostat series, designed to provide efficient and convenient climate control within your home. This thermostat offers a user-friendly interface coupled with advanced scheduling capabilities, allowing for customized comfort and potential energy savings.

Understanding the core functionalities of the TH4110U2005 begins with accessing its comprehensive documentation. The official manual PDF serves as an invaluable resource, guiding users through installation, setup, and daily operation. It details each button’s function, display readings, and the various system and fan modes available.

This thermostat isn’t just about setting a temperature; it’s about creating a personalized comfort profile. The manual explains how to program schedules tailored to your lifestyle, utilizing features like temporary and permanent holds to override settings when needed. Furthermore, it provides crucial information on troubleshooting common issues and interpreting error codes displayed on the screen.

Whether you’re a first-time thermostat user or experienced with programmable systems, the Honeywell TH4110U2005 manual PDF is your key to unlocking the full potential of this device, ensuring optimal performance and a comfortable living environment.

Understanding the T4 Pro Programmable Thermostat Series

The Honeywell T4 Pro Programmable Thermostat series, including the TH4110U2005 model, represents a significant step forward in home climate control. These thermostats are engineered for ease of use while delivering sophisticated features for energy management and personalized comfort.

A core characteristic of the T4 Pro series is its intuitive programming interface. The manual PDF for the TH4110U2005 details how to navigate this interface, setting up customized schedules to match your daily routines. This allows for automatic temperature adjustments, reducing energy consumption when you’re away or asleep.

The series also emphasizes compatibility and integration. While the manual focuses on the TH4110U2005 specifically, it’s important to note these thermostats are designed to work seamlessly within the broader Honeywell Home system, offering potential for remote control and advanced automation.

Accessing the official manual PDF is crucial for understanding the full capabilities of your T4 Pro thermostat. It provides detailed explanations of all functions, troubleshooting tips, and safety precautions, ensuring you can maximize the benefits of this advanced home comfort solution.

Where to Find the Official Honeywell TH4110U2005 PDF Manual

Locating the official Honeywell TH4110U2005 PDF manual is straightforward, ensuring you have access to comprehensive support documentation. A primary source is the Honeywell Home website, where optimized PDF versions of user guides are readily available for download. Searching directly for “Honeywell TH4110U2005 manual PDF” will typically yield the correct document.

Several online repositories also host the manual. These platforms often provide access to a wide range of Honeywell product documentation, including guides for the T4 Pro series. However, always verify the source to ensure you’re downloading an authentic and up-to-date version.

The manual, licensed under Honeywell International, Inc., is a vital resource for installation, programming, and troubleshooting. It details everything from basic operation to advanced scheduling options. Downloading the PDF allows for convenient offline access and easy searching for specific information.

Remember to prioritize official Honeywell sources to avoid potentially inaccurate or outdated information. Having the correct manual ensures you can fully utilize the features of your TH4110U2005 thermostat.

Key Features of the Honeywell TH4110U2005

The Honeywell TH4110U2005, a T4 Pro Programmable Thermostat, boasts several key features designed for comfort and energy efficiency. It offers flexible scheduling options, allowing users to create customized temperature programs to suit their lifestyles. The thermostat supports both heating and cooling modes, adapting to various climate control needs.

A prominent feature is its intuitive user interface, making programming and adjustments relatively simple. The manual details how to utilize the SYSTEM and FAN buttons for mode selection, providing control over your home’s climate. The thermostat also includes a ‘Hold’ function, enabling temporary overrides of the programmed schedule.

Furthermore, the TH4110U2005 provides error code diagnostics, assisting in troubleshooting common issues. The PDF manual comprehensively explains these codes and their corresponding solutions. Compatibility with Honeywell Home systems enhances its functionality, allowing for potential integration with other smart home devices.

Its programmable nature and ease of use make it a valuable tool for managing energy consumption and maintaining a comfortable indoor environment. The detailed manual unlocks the full potential of these features.

Thermostat Display and Button Functions

The Honeywell TH4110U2005 thermostat features a clear display providing essential information, including the current temperature, setpoint, time, and operating mode. The PDF manual details each display element, aiding in quick understanding. Key buttons control the thermostat’s functions.

The MENU and buttons are crucial for navigating the programming options and adjusting settings; Holding these buttons simultaneously initiates specific actions, such as resetting to factory defaults, as outlined in the manual. The SET and MODE buttons are used for programming schedules and selecting operating modes.

The SYSTEM button allows switching between Heat, Cool, and Off modes, while the FAN button controls fan operation – Auto or On. The manual provides step-by-step instructions for utilizing these buttons effectively. Understanding these functions is vital for optimal thermostat control.

The display also indicates the current schedule status (e.g., ‘Following Schedule’) and time of day. The PDF guide offers visual representations of the display and button layout, simplifying the learning process for new users.

System and Fan Mode Selection

The Honeywell TH4110U2005 thermostat offers versatile control over your home’s heating and cooling system through its SYSTEM and FAN buttons. The PDF manual comprehensively explains each mode’s function, ensuring optimal comfort and energy efficiency.

Using the SYSTEM button, you can select Heat mode for warming your home, Cool mode for cooling, or Off mode to disable the heating and cooling systems. The manual details how to cycle through these options. The FAN button controls the fan’s operation, offering Auto and On settings.

In Auto mode, the fan runs only when heating or cooling is active. Selecting On keeps the fan running continuously, improving air circulation. The PDF guide clarifies the benefits of each fan setting. Proper mode selection is crucial for maintaining desired temperatures and minimizing energy consumption.

The manual emphasizes that understanding these modes allows users to tailor the thermostat to their specific needs and preferences. Detailed diagrams within the PDF illustrate the selection process, making it easy to follow.

Programming the Honeywell TH4110U2005: Basic Scheduling

The Honeywell TH4110U2005’s programming capabilities, detailed in the PDF manual, allow for customized temperature schedules to maximize comfort and energy savings. Basic scheduling involves setting different temperatures for various times of the day, aligning with your lifestyle.

The manual guides users through setting Wake, Leave, Return, and Sleep periods. For each period, you can define a start time and desired temperature. The thermostat then automatically adjusts the temperature based on this schedule. The PDF provides step-by-step instructions, including button sequences.

To begin programming, access the schedule settings via the Menu button, as illustrated in the manual. You can then adjust each period’s time and temperature. The PDF emphasizes the importance of accurate time setting for proper schedule execution.

The Honeywell Home manual clarifies that basic scheduling is a foundation for more advanced programming options. Understanding these fundamentals is key to unlocking the thermostat’s full potential.

Advanced Scheduling Options

Beyond basic scheduling, the Honeywell TH4110U2005, as detailed in its PDF manual, offers advanced programming features for refined climate control. These options cater to more complex lifestyles and energy-saving goals.

The manual explains 7-day programming, allowing unique schedules for each day of the week. This contrasts with 5-2 day programming, where weekdays and weekends share a schedule. The PDF illustrates how to navigate these settings using the thermostat’s buttons.

Another advanced feature is the ability to create multiple schedules. This is useful for households with varying occupancy patterns. The Honeywell Home manual provides clear instructions on switching between schedules.

Furthermore, the TH4110U2005 supports temporary overrides and holds, allowing you to deviate from the programmed schedule without permanently altering it. The PDF clarifies the difference between temporary and permanent holds.

The manual emphasizes that mastering these advanced options requires careful review of the PDF guide and experimentation with the thermostat’s interface.

Setting Temperature Preferences: Heat and Cool Points

The Honeywell TH4110U2005’s PDF manual details how to customize temperature settings for both heating and cooling modes. Precise control over these “setpoints” is crucial for comfort and energy efficiency.

The manual explains how to adjust the heating setpoint – the temperature the thermostat aims to maintain when the system is in heat mode. Similarly, it guides users through setting the cooling setpoint for air conditioning. These adjustments are made using the up and down arrow buttons.

A key feature highlighted in the PDF is the ability to define different setpoints for different time periods within a schedule. For example, a lower temperature can be set for nighttime during heating, and a higher temperature during daytime.

The Honeywell Home manual also explains the concept of “swing” or “temperature differential.” This setting determines how much the temperature can deviate from the setpoint before the system activates. Adjusting the swing can prevent short-cycling.

The PDF stresses the importance of finding the optimal setpoints for your home and comfort level, balancing energy savings with desired temperature control.

Understanding and Using the Hold Function

The Honeywell TH4110U2005’s PDF manual thoroughly explains the “Hold” function, a powerful feature for overriding programmed schedules. This allows users to maintain a constant temperature indefinitely, bypassing the pre-set time periods.

The manual details two primary types of Hold: “Permanent Hold” and “Temporary Hold.” Permanent Hold locks the current temperature setting until manually changed, effectively disabling the schedule. Temporary Hold maintains the set temperature until the next scheduled program change.

Activating Hold is typically achieved by pressing and holding a specific button combination, as outlined in the PDF. The thermostat display will clearly indicate when Hold is active, often with a dedicated icon.

Honeywell’s documentation emphasizes that the Hold function is ideal for situations where a regular schedule is disrupted, such as during vacations or unexpected changes in occupancy. It provides immediate and sustained temperature control.

The PDF also clarifies how to release the Hold function and return to the programmed schedule, ensuring users can easily resume automated temperature management when desired.

Resetting the Thermostat to Factory Defaults

The Honeywell TH4110U2005’s PDF manual provides clear instructions for restoring the thermostat to its original factory settings. This process erases all personalized programming, including schedules, temperature preferences, and any custom configurations.

According to the manual, resetting to factory defaults typically involves a specific button sequence. Often, this requires simultaneously pressing and holding the “SET” and “MODE” buttons for a designated duration – approximately 5 seconds – until the display indicates a reset is in progress.

Honeywell’s documentation stresses that a factory reset should only be performed when necessary, as it will remove all user-defined settings. It’s useful for troubleshooting persistent issues or preparing the thermostat for a new user.

The PDF highlights that after a reset, the thermostat will revert to its initial setup state, requiring users to re-enter their preferences and reprogram the schedule. This ensures a clean slate for configuration.

The manual also cautions users to consult the PDF for the precise button combination and reset procedure specific to their TH4110U2005 model, as variations may exist.

Troubleshooting Common Issues

The Honeywell TH4110U2005’s PDF manual dedicates a section to resolving frequently encountered problems. It guides users through diagnosing and fixing issues, minimizing the need for professional assistance. Common concerns addressed include unresponsive displays, inaccurate temperature readings, and unexpected system behavior.

The manual suggests checking battery levels as a first step for display problems. It also details how to interpret error codes displayed on the screen, providing specific solutions for each code. These codes often indicate issues with wiring, sensor functionality, or system compatibility.

For heating or cooling malfunctions, the PDF advises verifying the system’s power supply and ensuring the thermostat is correctly configured for the appropriate system type. It also outlines steps for checking the wiring connections to the furnace or air conditioner.

Honeywell’s documentation emphasizes the importance of consulting the manual’s troubleshooting section before attempting any repairs. It warns against disassembling the thermostat, as this could void the warranty and pose safety risks.

The PDF provides a systematic approach to problem-solving, helping users identify the root cause of issues and implement effective solutions, ultimately restoring optimal thermostat performance.

Battery Replacement and Maintenance

The Honeywell TH4110U2005 thermostat, as detailed in its PDF manual, requires periodic battery replacement to maintain functionality, particularly during power outages. The manual clearly specifies the correct battery type needed for optimal performance – typically AA alkaline batteries.

Honeywell recommends replacing the batteries at least once a year, or sooner if a low battery indicator appears on the display. The PDF provides step-by-step instructions with illustrations, guiding users through the battery replacement process safely and efficiently.

Beyond battery changes, the manual outlines basic maintenance practices. These include periodically cleaning the thermostat’s display with a soft, dry cloth to remove dust and debris. Avoid using liquids or abrasive cleaners, as these could damage the screen.

Regularly checking the wiring connections is also advised, ensuring they remain secure and free from corrosion. The PDF stresses the importance of turning off power to the system before inspecting or adjusting any wiring.

Following these simple maintenance steps, as outlined in the Honeywell TH4110U2005 manual, will help ensure the thermostat continues to operate reliably for years to come.

Decoding Error Codes on the TH4110U2005 Display

The Honeywell TH4110U2005 thermostat’s PDF manual dedicates a section to understanding error codes displayed on the unit. These codes are crucial for diagnosing system issues and determining the appropriate course of action. The manual emphasizes that error codes aren’t necessarily indicative of a thermostat malfunction, but rather a communication problem or issue within the heating/cooling system.

Common error codes, as detailed in the PDF, relate to sensor failures, wiring problems, or issues with the heating or cooling equipment itself. The manual provides a comprehensive list of these codes, along with clear explanations of their meaning and suggested troubleshooting steps.

For example, certain codes might indicate a faulty temperature sensor, while others could point to a loss of communication with the furnace or air conditioner. The Honeywell manual advises users to consult a qualified HVAC technician if they are unable to resolve the issue themselves.

The PDF also stresses the importance of noting the specific error code before contacting technical support, as this information will help expedite the troubleshooting process. Accurate code reporting ensures a faster and more efficient resolution.

Compatibility with Honeywell Home Systems

The Honeywell TH4110U2005 thermostat, as outlined in its PDF manual, is designed for broad compatibility within the Honeywell Home ecosystem. However, the manual clarifies that full integration and access to all smart features may require a Honeywell Home Hub. This hub acts as a central connection point, enabling remote control and advanced scheduling via the Honeywell Home mobile app.

The PDF details that the thermostat can function as a standalone programmable thermostat without a hub, offering basic heating and cooling control. But, connecting to a Honeywell Home Hub unlocks features like geofencing, voice control (via Amazon Alexa or Google Assistant), and integration with other smart home devices.

The manual also specifies compatibility with various heating and cooling systems, including furnaces, heat pumps, and air conditioners. It’s crucial to consult the PDF’s compatibility chart to ensure the thermostat is suitable for your specific system configuration.

Honeywell Home utilizes licensing from Honeywell International, Inc., ensuring a cohesive and reliable smart home experience. The PDF manual provides detailed instructions for connecting the TH4110U2005 to the Honeywell Home system.

Technical Specifications: TH4110U2005

The Honeywell TH4110U2005’s PDF manual details comprehensive technical specifications. It’s a U T4 Pro Programmable Thermostat, designed for 24VAC systems. The thermostat supports 2 heating stages and 2 cooling stages, offering flexible climate control. The temperature range is 40°F to 90°F (4°C to 32°C) for heating and 50°F to 90°F (10°C to 32°C) for cooling, as specified in the manual.

Power requirements are 24VAC, and the manual notes it doesn’t require batteries for timekeeping when continuously powered. However, battery backup is supported for maintaining settings during power outages. The display type is a backlit LCD, providing clear readability. The thermostat’s dimensions are detailed within the PDF, aiding in installation planning.

The manual also outlines wiring configurations for various system types. It’s crucial to refer to the wiring diagrams in the PDF for correct installation. Honeywell Home, licensed from Honeywell International, Inc., ensures adherence to industry standards. The TH4110U2005’s specifications are designed for reliable performance and energy efficiency.

Safety Precautions and Warnings

The Honeywell TH4110U2005 manual PDF emphasizes crucial safety precautions. Honeywell Home, operating under license from Honeywell International, Inc., strongly advises disconnecting power at the circuit breaker before installation or maintenance to avoid electrical shock. Improper wiring can damage the thermostat or the HVAC system, so carefully follow the wiring diagrams in the manual.

Do not attempt to disassemble or repair the thermostat yourself; refer servicing to qualified personnel. The manual warns against exposing the thermostat to extreme temperatures or humidity. Keep the device dry and avoid direct sunlight. Ensure the thermostat is installed in a location that doesn’t obstruct airflow to the HVAC system.

The PDF also cautions against using abrasive cleaners or solvents on the thermostat’s surface. Always use a soft, dry cloth for cleaning. If you notice any unusual smells, smoke, or malfunctions, immediately disconnect power and consult a qualified technician. Ignoring these warnings could lead to hazards or damage, as detailed in the manual.

yaskawa v1000 pdf manual

Yaskawa V1000 PDF Manual: A Comprehensive Guide

Yaskawa’s V1000 drive’s PDF manual details application functions, preventing damage and warranty voiding; access U.S. manuals at http://www.yaskawa.com.

The Yaskawa V1000 is a globally recognized AC drive, celebrated for its robust performance and versatile applications across diverse industries. This drive expertly controls AC induction motors, optimizing efficiency and providing precise control for various processes. Yaskawa, a leading manufacturer of automation technologies, including robots, servo systems, and drives, positions the V1000 as a cornerstone of their product line.

Understanding the intricacies of the V1000 requires a thorough review of its accompanying PDF manual. This document serves as an essential resource for installers, programmers, and maintenance personnel. It details critical information regarding safety precautions, installation procedures, parameter settings, and troubleshooting guidance. Accessing the official manual is crucial for maximizing the drive’s potential and ensuring safe, reliable operation.

What is the Yaskawa V1000 Drive?

The Yaskawa V1000 drive is a micro-drive designed for general-purpose applications, offering cost-effective motor control. It’s a compact and powerful solution for controlling AC induction motors, widely used in pumps, fans, conveyors, and various industrial machinery. As a core component of Yaskawa’s extensive automation portfolio, the V1000 delivers reliable performance and ease of use.

The drive’s functionality is comprehensively documented in its PDF manual, detailing its capabilities and operational parameters. This manual highlights features like built-in PLC functionality and support for communication protocols like Modbus and Ethernet. Proper understanding, guided by the manual, is vital for successful integration and optimal performance within semiconductor manufacturing and other demanding environments.

Importance of the PDF Manual

The Yaskawa V1000 PDF manual is crucial for safe and effective operation, detailing application-specific functions and preventing potential drive damage that could void the warranty. It serves as a primary resource for installation, wiring, parameter setting, and troubleshooting. Understanding the manual’s guidance ensures correct configuration and avoids costly errors.

Furthermore, the manual unlocks the drive’s advanced features, including built-in PLC functionality and communication protocol integration (Modbus, Ethernet). It’s essential for users modifying the product, as Yaskawa isn’t responsible for user-made alterations. Accessing this documentation empowers users to maximize the V1000’s potential and maintain optimal performance.

Understanding the V1000 Drive Components

Yaskawa’s V1000 components include the drive housing, control terminals, and power supply; the PDF manual details dimensions and connection specifics.

Drive Housing and Dimensions

The Yaskawa V1000 drive’s housing is a critical component, protecting internal electronics from environmental factors. The PDF manual provides precise dimensional data, essential for proper mounting and integration into machinery. Understanding these dimensions – height, width, and depth – is paramount for ensuring adequate clearance within control panels and avoiding interference with other components.

Yaskawa designed the V1000 with a compact footprint, maximizing space efficiency. The manual details mounting hole locations and overall weight, aiding in mechanical design and installation planning. Proper housing integrity is vital for maintaining drive performance and longevity, safeguarding against dust, moisture, and physical impacts. Referencing the manual’s specifications guarantees correct installation and optimal operation.

Control Terminal Details

The Yaskawa V1000 drive’s control terminals are comprehensively documented within the PDF manual. These terminals facilitate communication between the drive and external devices, such as PLCs, HMIs, and operator stations. The manual meticulously details each terminal’s function, including signal types (digital input, analog input, digital output, analog output), voltage levels, and wiring diagrams.

Understanding these details is crucial for correct system integration and control. The manual clarifies terminal assignments for speed reference, start/stop commands, fault reset, and various protection signals. Proper wiring and configuration of these terminals ensure reliable drive operation and seamless communication with the control system. Yaskawa emphasizes adherence to the manual’s specifications to prevent damage and ensure optimal performance.

Power Supply Requirements

The Yaskawa V1000 drive’s PDF manual provides detailed power supply requirements essential for safe and reliable operation. It specifies acceptable input voltage ranges, both single-phase and three-phase options, and permissible voltage fluctuations. The manual clearly outlines the required input frequency (typically 50/60 Hz) and the importance of maintaining stable power conditions.

Furthermore, it details necessary overcurrent protection, recommended fuse or circuit breaker ratings, and grounding procedures. Yaskawa stresses the importance of adhering to these specifications to prevent drive damage, ensure longevity, and avoid warranty voidance. Incorrect power supply connections can lead to malfunctions or even pose safety hazards, making the manual a critical resource.

Installation and Wiring

The Yaskawa V1000 manual details mounting procedures, wiring diagrams, and input/output signal connections for proper installation and safe operation of the drive.

Mounting the V1000 Drive

Proper mounting of the Yaskawa V1000 drive is crucial for optimal performance and longevity, as detailed within the comprehensive PDF manual. The manual emphasizes selecting a location that ensures adequate ventilation, preventing overheating and potential damage.

It specifies maintaining sufficient clearance around the drive for easy access during maintenance and troubleshooting. The manual also provides precise dimensional drawings and mounting hole locations, ensuring secure attachment to a suitable mounting surface.

Furthermore, it highlights the importance of using appropriate mounting hardware and adhering to specified torque values to avoid vibration and potential loosening over time. Following these guidelines, as outlined in the manual, guarantees a stable and reliable installation.

Wiring Diagram Overview

The Yaskawa V1000 PDF manual provides detailed wiring diagram overviews, essential for correct installation and operation. These diagrams clearly illustrate the connections for power supply, control signals, and motor leads.

The manual emphasizes the importance of adhering strictly to the specified wiring configurations to prevent damage to the drive and connected equipment. It details the proper grounding procedures, crucial for safety and minimizing electrical noise.

Different diagrams cater to various control schemes, including keypad control, external potentiometer control, and PLC integration. The manual also includes notes on wire sizing and recommended terminal block usage, ensuring a secure and reliable electrical connection.

Input and Output Signal Connections

The Yaskawa V1000 PDF manual meticulously details input and output signal connections, vital for integrating the drive into automated systems. It clarifies the function of each terminal, specifying voltage levels and current requirements for signals like start/stop, forward/reverse, and speed reference.

The manual explains how to configure digital inputs for various functions, including emergency stop and fault reset. It also outlines the capabilities of the analog outputs, which can provide feedback on motor speed, frequency, or current.

Proper connection of these signals is crucial for safe and reliable operation. The manual stresses the importance of using shielded cables and following recommended wiring practices to minimize interference and ensure accurate signal transmission.

Parameter Setting and Programming

The Yaskawa V1000 manual guides users through accessing and configuring parameters, enabling customization of drive behavior for specific application needs.

Accessing the Parameter Menu

Accessing the parameter menu on the Yaskawa V1000 drive is crucial for tailoring its operation to specific applications. The official PDF manual provides detailed, step-by-step instructions on navigating the drive’s control panel to reach this menu. Typically, this involves utilizing the drive’s keypad and display, often requiring a specific sequence of button presses – such as ‘MODE’ or ‘ENTER’ – to unlock parameter adjustment capabilities.

The manual emphasizes the importance of understanding the menu structure, which is logically organized into functional groups. Users can then scroll through these groups to locate and modify individual parameters. Careful attention to the manual’s guidance is essential to avoid unintended changes and ensure optimal drive performance. The PDF provides screenshots and clear explanations to facilitate this process.

Basic Parameter Configuration

Basic parameter configuration of the Yaskawa V1000, as detailed in the PDF manual, involves setting fundamental drive characteristics. This includes specifying motor voltage and frequency, acceleration and deceleration times, and minimum/maximum frequency limits. Correctly configuring these parameters ensures the drive operates safely and efficiently with the connected motor.

The manual stresses the importance of verifying motor nameplate data before entering these values. Incorrect settings can lead to reduced performance, motor overheating, or even damage. Users should also configure parameters related to the drive’s input and output signals, defining their functions and scaling. Following the manual’s guidance ensures a stable and reliable starting point for operation.

Advanced Parameter Settings

The Yaskawa V1000 PDF manual details numerous advanced parameter settings for optimized performance. These include sophisticated motor control modes, such as vector control and V/F control, allowing fine-tuning for specific applications. Users can adjust slip compensation, autotuning parameters, and current limits for enhanced motor responsiveness and protection.

Furthermore, the manual covers advanced functions like stall prevention, DC braking, and adjustable speed reference scaling. Modbus communication parameters are also found here, enabling integration with PLCs and other control systems. Modifying these settings requires a thorough understanding of drive operation; improper adjustments can negatively impact performance or cause instability, so caution is advised.

Operation and Control

The Yaskawa V1000 manual guides starting, stopping, and speed control; explore frequency settings for precise adjustments and optimal performance of your system.

Starting and Stopping the Drive

The Yaskawa V1000 PDF manual provides detailed instructions regarding the proper procedures for initiating and terminating drive operation. Understanding these steps is crucial for ensuring both safe and efficient performance of the connected machinery. The manual emphasizes referencing its contents for application-specific guidance, as incorrect starting or stopping sequences can potentially lead to equipment damage and will invalidate the product warranty.

Specifically, the manual outlines the necessary input signal configurations and parameter settings required to enable smooth starting and controlled stopping. It details the function of various control terminals and their impact on the drive’s behavior during these critical phases. Users are strongly advised to consult the manual before attempting any operational procedures to avoid unintended consequences and maximize the lifespan of the V1000 drive.

Speed Control Methods

The Yaskawa V1000 PDF manual comprehensively details the various methods available for controlling the speed of the connected motor. These methods range from simple potentiometer-based adjustments to sophisticated communication protocols like Modbus and Ethernet, enabling precise and dynamic speed regulation. The manual stresses the importance of selecting the appropriate control method based on the specific application requirements.

It explains how to configure parameters related to frequency setting, acceleration/deceleration times, and speed references. Furthermore, the manual illustrates how to utilize the built-in PLC functionality for implementing complex speed control algorithms. Users are directed to the manual for detailed explanations and programming examples to optimize performance and ensure compatibility with their overall system architecture.

Frequency Setting and Adjustment

The Yaskawa V1000 PDF manual provides detailed instructions on setting and adjusting the output frequency of the drive, directly impacting the motor’s speed. It outlines various methods for frequency input, including analog signals, digital communication, and keypad operation. The manual emphasizes the importance of understanding the motor’s nameplate data to ensure proper frequency range configuration.

Users can learn how to fine-tune parameters related to frequency resolution, maximum and minimum frequency limits, and frequency boost. The manual also covers advanced techniques like slip compensation and vector control for enhanced performance. Detailed diagrams and troubleshooting tips are included to assist users in achieving precise and stable frequency control, maximizing efficiency and extending equipment lifespan.

Protection and Troubleshooting

The Yaskawa V1000 PDF manual details drive protection functions and common fault codes, offering solutions to prevent damage and maintain operational efficiency.

Drive Protection Functions

The Yaskawa V1000 PDF manual comprehensively outlines the drive’s robust protection features, crucial for ensuring longevity and preventing costly downtime. These functions safeguard against a variety of potential issues, including overvoltage, undervoltage, overcurrent, and phase loss. The manual details how these protections operate, their corresponding fault codes, and recommended corrective actions.

Furthermore, it explains thermal overload protection, preventing damage from excessive heat, and short-circuit protection, immediately halting operation in the event of a fault. Yaskawa emphasizes adherence to the manual’s guidelines to avoid voiding the warranty, as modifications can compromise these vital safety mechanisms. Understanding these functions, as described in the manual, is paramount for safe and reliable operation.

Common Fault Codes and Solutions

The Yaskawa V1000 PDF manual dedicates a significant section to deciphering common fault codes, a critical resource for troubleshooting operational issues. These codes, displayed on the drive’s interface, pinpoint the source of the problem, ranging from power supply irregularities to motor faults. The manual provides detailed explanations for each code, outlining potential causes and step-by-step solutions.

It covers issues like overcurrent trips, overvoltage alarms, and communication errors. Yaskawa stresses the importance of consulting the manual before attempting repairs, as incorrect intervention could exacerbate the problem or void the warranty. Proper diagnosis, guided by the manual’s fault code directory, ensures efficient and safe resolution of drive malfunctions.

Emergency Stop Procedures

The Yaskawa V1000 PDF manual emphasizes strict adherence to emergency stop procedures for operator and equipment safety. It details how to immediately halt drive operation via dedicated hardware inputs, overriding normal control functions. The manual clearly illustrates wiring configurations for emergency stop circuits, ensuring reliable functionality.

Yaskawa highlights the importance of regularly testing the emergency stop system to verify its responsiveness. The manual cautions against relying solely on software-based stops in critical situations. Following these procedures minimizes potential hazards during malfunctions or unforeseen events, safeguarding personnel and preventing damage. The PDF provides comprehensive guidance for safe and effective emergency shutdown.

Advanced Features and Applications

The Yaskawa V1000 PDF manual details built-in PLC functionality, Modbus/Ethernet communication, and semiconductor manufacturing applications for enhanced control.

Built-in PLC Functionality

The Yaskawa V1000 drive impressively integrates built-in Programmable Logic Controller (PLC) functionality, offering users a streamlined and cost-effective automation solution. This eliminates the need for a separate, external PLC in many applications, reducing complexity and overall system costs. The manual details how to program and utilize this feature, allowing for customized control sequences and logic operations directly within the drive itself.

This integrated PLC capability enables the V1000 to handle tasks such as sequencing, timing, and interlocking, providing enhanced flexibility and responsiveness. Users can leverage the PLC functionality to optimize machine performance, improve process control, and implement advanced automation strategies. The Yaskawa documentation thoroughly explains the programming languages and tools available for configuring the built-in PLC, empowering users to tailor the drive’s behavior to their specific needs.

Communication Protocols (Modbus, Ethernet)

The Yaskawa V1000 drive supports a variety of robust communication protocols, including Modbus and Ethernet, facilitating seamless integration into larger automation systems. The comprehensive manual provides detailed instructions on configuring these protocols for data exchange and remote control. Modbus allows for straightforward communication with PLCs and other industrial devices, while Ethernet enables high-speed connectivity for advanced monitoring and control applications.

These communication capabilities empower users to monitor drive status, adjust parameters, and implement sophisticated control strategies remotely. The Yaskawa documentation clearly outlines the necessary settings and procedures for establishing reliable communication links. Utilizing these protocols enhances system efficiency, simplifies troubleshooting, and enables centralized management of multiple drives within a network.

Applications in Semiconductor Manufacturing

Yaskawa’s V1000 drive excels in the demanding environment of semiconductor manufacturing, offering precise motion control crucial for various processes. The manual details how the drive’s features support applications like wafer handling, precision etching, and automated assembly. Its high-speed response and accurate torque control ensure consistent and reliable performance in these critical operations.

The V1000’s ability to integrate seamlessly with other automation components, as outlined in the documentation, optimizes production efficiency. Furthermore, the drive’s robust design and reliable operation minimize downtime, a vital consideration in semiconductor facilities. Yaskawa provides solutions for unparalleled precision and innovation in this sector.

Manual Resources and Support

Yaskawa provides official V1000 PDF manuals via their websites; access U.S. resources at http://www.yaskawa.com, and explore Yaskawa Europe support.

Locating the Official Yaskawa V1000 PDF Manual

Finding the official Yaskawa V1000 PDF manual is crucial for proper installation, operation, and troubleshooting of your AC drive. Yaskawa makes these resources readily available through their regional websites, ensuring users have access to the most up-to-date information.

For users in the United States, a comprehensive collection of manuals, including the V1000 documentation, can be found directly on the Yaskawa America website at http://www.yaskawa.com. Navigating this site allows you to search by drive model or series to pinpoint the exact manual you require.

Yaskawa Europe also provides extensive support and documentation. Their website offers a dedicated section for manual downloads, catering specifically to the European market. Always refer to the official Yaskawa documentation to ensure safe and effective operation of your V1000 drive, and to maintain your warranty.

Yaskawa Europe Support Website

Yaskawa Europe provides robust support for its V1000 AC drives, including easy access to the official PDF manual and a wealth of technical resources. Their website serves as a central hub for European customers seeking assistance with installation, programming, and troubleshooting.

The Yaskawa Europe website offers a dedicated support section where users can download the V1000 manual directly. This ensures you have the latest version with all relevant updates and revisions. Beyond the manual, the site features FAQs, application notes, and contact information for local support teams.

Yaskawa is committed to providing exceptional customer service, and their European website reflects this dedication. Utilizing these resources will help maximize the performance and longevity of your V1000 drive.

U.S. Yaskawa Manual Access

For U.S. customers, Yaskawa provides straightforward access to the V1000 drive’s PDF manual and comprehensive documentation through their official website. This ensures technicians and engineers have readily available resources for installation, operation, and maintenance.

Directly accessing the manual is simplified via the provided link: http://www.yaskawa.com. This portal hosts a complete library of manuals for all Yaskawa products, including detailed guides for the V1000 series. Users can easily search and download the appropriate documentation based on their specific drive model.

Yaskawa America’s commitment to customer support is evident in their accessible online resources, empowering users to effectively utilize and troubleshoot their V1000 drives.

Safety Precautions and Warranty

Manual compliance is crucial; failure to follow instructions can damage the drive and void the Yaskawa warranty, as stated in documentation.

Important Safety Instructions

Safety is paramount when installing and operating the Yaskawa V1000 drive. The official PDF manual provides critical guidance to prevent hazards and ensure personnel safety. Yaskawa explicitly states that non-compliance with the manual’s instructions can lead to drive damage and will invalidate the product warranty.

Users must carefully review all safety precautions before any work begins. Yaskawa is not liable for modifications made by the user, emphasizing the importance of adhering to the original design and instructions. Always disconnect power before performing maintenance or wiring changes. Proper grounding is essential to prevent electrical shock. The manual details specific procedures for emergency stops and fault conditions, which must be understood and followed diligently.

Warranty Information and Limitations

Yaskawa’s V1000 drive warranty is contingent upon proper installation, operation, and adherence to the guidelines detailed within the official PDF manual. Failure to comply with these instructions explicitly voids the warranty, leaving the user responsible for any resulting damage or repair costs.

The manual outlines specific limitations to the warranty coverage, which may include damage caused by misuse, improper maintenance, unauthorized modifications, or external factors beyond Yaskawa’s control. Yaskawa explicitly disclaims responsibility for modifications made by the user. Warranty claims require proof of purchase and a detailed description of the fault. Refer to the manual for complete warranty terms and conditions.

Compliance with Industry Standards

The Yaskawa V1000 drive, as detailed in its comprehensive PDF manual, is engineered to comply with a broad spectrum of international industry standards. These standards ensure safety, electromagnetic compatibility (EMC), and performance reliability.

The manual references adherence to relevant European directives and global safety regulations. Yaskawa prioritizes building products that meet or exceed these benchmarks, providing users with confidence in the drive’s operational integrity. Compliance documentation and specific standard certifications are often referenced within the manual’s technical specifications section. Users should consult the manual for detailed information regarding applicable standards in their region.

download a court of wings and ruin pdf

Understanding “A Court of Wings and Ruin” PDF Downloads

Readers are actively seeking downloadable PDF versions of Sarah J. Maas’s popular novel, “A Court of Wings and Ruin,” exploring convenient access to this fantasy epic;

The Popularity of Sarah J. Maas’s Series

Sarah J. Maas has cultivated a devoted readership with her enthralling fantasy series, notably “A Court of Thorns and Roses” and its sequels, including “A Court of Wings and Ruin.” Her intricate world-building, compelling characters, and captivating romantic elements have propelled her books to the top of bestseller lists.

This widespread acclaim fuels the demand for accessible formats, driving many readers to explore options for downloading “A Court of Wings and Ruin” as a PDF. The series’ devoted fanbase actively seeks convenient ways to immerse themselves in Maas’s imaginative realms.

Why Readers Seek PDF Versions

The appeal of PDF versions stems from their portability and accessibility. Readers appreciate the ability to enjoy “A Court of Wings and Ruin” on various devices – smartphones, tablets, and computers – without needing an internet connection after the initial download.

PDFs offer a convenient, offline reading experience, and sometimes, readers seek them out due to cost considerations or immediate access, though these options often carry legal and security risks.

Legality and Risks of Downloading PDFs

Downloading PDFs from unofficial sources raises significant copyright concerns and risks exposure to eBook piracy, potentially leading to legal repercussions for the user.

Copyright Concerns and eBook Piracy

Illegally downloading “A Court of Wings and Ruin” as a PDF infringes upon Sarah J. Maas’s and the publisher’s copyright, violating intellectual property laws. This constitutes eBook piracy, depriving creators of deserved compensation and hindering future literary works. Offering the book for free, as seen on some unofficial sites, directly undermines the publishing industry. Supporting authors through legal purchases ensures continued creativity and quality storytelling. Choosing legitimate sources protects the rights of those involved in bringing these stories to life, fostering a sustainable ecosystem for literature.

Risks Associated with Unofficial Websites

Unofficial websites offering “A Court of Wings and Ruin” PDFs pose significant security risks. These sites frequently harbor malware, viruses, and other malicious software that can compromise your device and personal data. Downloading from such sources could lead to identity theft, financial loss, or device damage. They often lack proper security protocols, like HTTPS, making your information vulnerable; Prioritizing official, reputable platforms is crucial for a safe and legal reading experience, safeguarding your digital wellbeing against potential cyber threats.

Official Sources for Purchasing “A Court of Wings and Ruin”

Securely obtain “A Court of Wings and Ruin” through legitimate platforms like Amazon Kindle, Apple Books, Google Play Books, and Barnes & Noble Nook.

Amazon Kindle Store

The Amazon Kindle Store provides a reliable and convenient avenue to purchase the digital version of “A Court of Wings and Ruin.” Readers can easily download the eBook directly to their Kindle devices or utilize the free Kindle app available on various platforms. Purchasing through Amazon ensures a legitimate copy, supporting Sarah J. Maas and the publishing industry.

Amazon often features promotional pricing and Kindle Unlimited eligibility, potentially offering cost-effective access. The store boasts robust security measures, safeguarding your payment information and device from potential malware risks associated with unofficial download sources.

Apple Books

Apple Books offers a seamless and secure platform for acquiring “A Court of Wings and Ruin” in digital format. Users with Apple devices – iPhones, iPads, and Macs – can readily purchase and download the eBook directly through the Apple Books app. This ensures a legal and high-quality reading experience, supporting the author and publisher.

Apple’s ecosystem provides built-in security features, protecting your device from potential threats often found on unofficial websites offering free PDF downloads. Furthermore, Apple Books integrates with iCloud, allowing for synchronized reading across all your Apple devices.

Google Play Books

Google Play Books presents another reliable avenue for legally obtaining “A Court of Wings and Ruin” as a digital eBook. Accessible on Android devices, tablets, and through web browsers, it offers a convenient download option. Purchasing through Google Play Books guarantees a legitimate copy, free from the risks associated with unofficial PDF sources.

The platform boasts features like adjustable font sizes, brightness settings, and the ability to sync your reading progress across multiple devices linked to your Google account, enhancing your reading experience.

Barnes & Noble Nook

Barnes & Noble’s Nook platform provides a secure and legal method to download “A Court of Wings and Ruin” in eBook format. Compatible with Nook eReaders and the Nook app on various devices, it ensures a quality reading experience. Purchasing from Barnes & Noble directly supports the author and publishing industry, avoiding the pitfalls of unauthorized PDF downloads.

Nook offers features like adjustable fonts, margin controls, and built-in dictionaries, enhancing readability. It’s a trusted source, safeguarding you from potential malware risks found on unofficial websites.

Identifying Safe and Legal Download Options

Prioritize platforms like Amazon Kindle, Apple Books, and Barnes & Noble Nook, verifying Digital Rights Management (DRM) and secure HTTPS connections for safety.

Checking for Digital Rights Management (DRM)

Digital Rights Management (DRM) technologies are crucial indicators when considering legal eBook downloads of “A Court of Wings and Ruin.” DRM restricts unauthorized copying and distribution, protecting the author’s copyright. Official retailers, such as Amazon Kindle, Apple Books, and Google Play Books, consistently employ DRM on their eBooks.

Conversely, PDFs from unofficial websites frequently lack DRM, a significant red flag suggesting copyright infringement. While DRM can present compatibility issues with certain devices, its presence generally confirms a legitimate purchase and supports the author’s work. Always look for indications of DRM protection when choosing where to obtain your digital copy.

Verifying Website Security (HTTPS)

Prioritizing online safety is paramount when seeking “A Court of Wings and Ruin” PDF downloads. Always confirm a website utilizes HTTPS – indicated by a padlock icon in the address bar – before entering any personal or payment information. HTTPS encrypts data transmission, safeguarding against potential interception by malicious actors.

Unofficial websites offering free PDFs often lack this crucial security layer, exposing you to risks like malware and identity theft. Legitimate eBook retailers consistently employ HTTPS, ensuring a secure browsing and purchasing experience. A missing padlock is a strong warning sign to avoid the site.

Potential Malware and Viruses

Illegitimate PDFs frequently harbor malware and viruses, posing significant threats to your device’s security and data integrity when downloading “A Court of Wings and Ruin.”

Common Threats Found in Illegitimate PDFs

Downloading “A Court of Wings and Ruin” from unofficial sources exposes users to various malicious threats. These illegitimate PDFs often contain viruses, Trojans, and spyware designed to compromise your device. Malware can steal personal information, including financial details and login credentials. Furthermore, these files may install ransomware, encrypting your data and demanding payment for its release. Phishing links embedded within the PDF can redirect you to fraudulent websites, attempting to harvest sensitive data. Always prioritize official and secure sources to avoid these risks.

Protecting Your Device During Downloads

To safeguard your device when considering a “A Court of Wings and Ruin” PDF, ensure your antivirus software is up-to-date and actively scanning. Exercise extreme caution when clicking links or opening attachments within downloaded PDFs from untrusted sources. Enable a firewall to create a barrier against unauthorized access. Regularly back up your important data to an external drive or cloud storage. Consider using a virtual machine for testing potentially risky files. Prioritize legitimate purchasing options to minimize exposure to malware and protect your digital security.

Alternatives to Downloading PDFs

Explore legal options like borrowing eBooks from libraries or utilizing subscription services such as Kindle Unlimited and Scribd for convenient access.

Borrowing eBooks from Libraries

Public libraries offer a fantastic, legal alternative to downloading PDFs from unofficial sources. Many libraries now provide extensive digital collections, including popular titles like “A Court of Wings and Ruin.” Accessing these eBooks is typically free with a valid library card, eliminating copyright concerns and potential malware risks.

Borrowing periods are usually a few weeks, automatically returning the book digitally. This method supports authors and the publishing industry while providing readers with convenient access to desired titles. Check your local library’s website or app to explore their eBook offerings and borrowing procedures.

Subscription Services (Kindle Unlimited, Scribd)

eBook subscription services, such as Kindle Unlimited and Scribd, present legitimate avenues for reading “A Court of Wings and Ruin” without purchasing the eBook outright. These platforms offer access to a vast library of titles for a monthly fee, providing cost-effective reading options.

Availability varies; confirm if “A Court of Wings and Ruin” is currently included in the subscription catalog before signing up. These services ensure legal access, eliminating the risks associated with unofficial PDF downloads, and directly support authors and publishers.

Louisiana Court System Information (Related to Legal Documents)

Louisiana’s court system manages legal documents; however, it is unrelated to accessing or downloading copyrighted eBooks like “A Court of Wings and Ruin” PDFs.

St. Tammany Parish Clerk of Court

The St. Tammany Parish Clerk of Court diligently serves residents with dedication and integrity, focusing on legal documents and essential records. Their services do not extend to providing or assisting with the illegal downloading of copyrighted materials like “A Court of Wings and Ruin” PDFs.

They prioritize assisting with legitimate legal processes. The Clerk’s office emphasizes personalized service and navigating digital resources for official court-related needs. The Slidell Annex Office offers limited services, so contacting them beforehand is crucial. Mail should be sent to the Covington location.

Washington Parish Courthouse

The Washington Parish Courthouse, located in Franklinton, Louisiana, provides essential court services but does not facilitate or endorse the unauthorized downloading of copyrighted eBooks like “A Court of Wings and Ruin” in PDF format. Their focus remains on upholding the law and administering justice.

Contact information for the Clerk of Court and various judges (Childress, Burris) is available. The courthouse’s role is strictly related to legal proceedings, not providing access to illegally obtained digital content.

Specific Court Contact Information

Slidell City Court (985-643-1274) and Bogalusa City Court (985-732-6204) offer no assistance with obtaining or validating PDF downloads of the novel.

Slidell City Court

The Slidell City Court, located at Bouscaren Street, Slidell, LA 70458, and reachable at 985-643-1274, or via their website citycourtofslidell.com, does not provide any resources or guidance regarding the legal acquisition of “A Court of Wings and Ruin” in PDF format.

Their jurisdiction focuses on local ordinances and traffic violations, not copyright law or eBook distribution. Seeking information about legally purchasing the eBook should be directed to authorized retailers like Amazon, Apple Books, or Barnes & Noble.

Bogalusa City Court

The Bogalusa City Court, situated at 202 Arkansas Avenue, Bogalusa, LA 70427, and contactable at 985-732-6204, or through their website bogalusa.org/department/index.php?structureid14, offers no assistance concerning the lawful download of “A Court of Wings and Ruin” PDFs.

This court handles local legal matters and does not address copyright infringement or eBook purchasing options. For legitimate eBook acquisition, consult official platforms such as Kindle, Apple Books, or Google Play Books to ensure compliance with copyright regulations.

District Attorney Information ‒ St. Tammany Parish

The St. Tammany Parish District Attorney (985-809-8383, 22ndjdc.org) does not provide guidance on obtaining “A Court of Wings and Ruin” PDFs.

Contact Details and Website

The St. Tammany Parish District Attorney’s Office, located at 701 North Columbia Street, Covington, LA 70433, can be reached at 985-809-8383. Their official website, www.22ndjdc.org, offers information regarding the parish’s legal system and prosecutorial services. However, this office does not offer assistance or guidance concerning the acquisition of digital copies, such as PDF versions, of novels like “A Court of Wings and Ruin.”

Clerk of Court Services and Locations

The St. Tammany Parish Clerk of Court provides essential records and legal document assistance, but does not facilitate downloads of eBooks like “A Court of Wings and Ruin.”

Covington Main Office

The Covington Main Office of the St. Tammany Parish Clerk of Court is dedicated to serving residents with integrity and personalized service. While they expertly handle legal documents and records, their services do not extend to providing or assisting with the download of digital books such as “A Court of Wings and Ruin” in PDF format.

Residents seeking the eBook should explore official digital retailers. The Clerk’s office focuses on traditional court-related functions, ensuring efficient access to legal information and processes within the parish, rather than digital entertainment options.

Slidell Annex Office Limitations

The Slidell Annex Office of the St. Tammany Parish Clerk of Court offers a limited range of services compared to the Covington Main Office. Critically, it does not provide assistance with downloading eBooks like “A Court of Wings and Ruin” in PDF format, nor does it handle inquiries related to digital book access.

Due to these limitations, residents seeking the eBook should utilize official digital platforms. All mail and packages should be directed to the Covington location, as the Annex cannot accept them, focusing solely on a restricted set of in-person services.

Emergency Legal Resources

For genuine legal emergencies in Louisiana, dial 1-866-602-9175. This resource is unrelated to eBook downloads of “A Court of Wings and Ruin.”

Emergency Number for Louisiana

While seeking digital copies of “A Court of Wings and Ruin” is common, remember that downloading PDFs from unofficial sources carries risks. However, should you encounter a genuine emergency requiring legal assistance within Louisiana – entirely separate from eBook acquisition – a crucial resource is available.

The statewide emergency number is 1-866-602-9175. This number connects you to vital services for immediate legal concerns, not related to downloading or accessing the novel. Prioritize personal safety and legal rights above all else, and utilize this number only when facing a true emergency situation.

Understanding eBook Formats

Different eBook formats exist, including PDF, EPUB, and MOBI, each with unique features impacting readability and compatibility with various devices and platforms.

PDF vs. EPUB vs. MOBI

PDFs (Portable Document Format) maintain fixed formatting, ideal for preserving the book’s original layout, but can be less adaptable to different screen sizes. EPUB (Electronic Publication) is a reflowable format, adjusting text to fit the device, enhancing readability on e-readers. MOBI, primarily for Kindle devices, also offers reflowability and supports features like bookmarks and notes.

Choosing the right format depends on your reading preference and device. While “A Court of Wings and Ruin” is available in various formats, PDFs might be encountered during unofficial downloads, potentially posing risks due to security concerns and copyright issues.

Troubleshooting PDF Download Issues

Common errors during PDF downloads include corrupted files or incomplete transfers; solutions involve checking internet connections, clearing browser caches, and retrying the download.

Common Error Messages and Solutions

Encountering download issues? “File not found” suggests a broken link, requiring a search for a valid source. “Connection timed out” indicates internet instability; check your network. A “corrupted file” message means the download was incomplete – retry it.

If problems persist, clear your browser’s cache and cookies. Ensure sufficient storage space on your device. Temporarily disable antivirus software, as it might interfere. Consider using a different browser or download manager for improved reliability. Always prioritize official sources to avoid malicious files.

The Future of eBook Distribution

Digital publishing trends point towards increased accessibility, subscription models, and enhanced DRM technologies, impacting how readers access titles like “A Court of Wings and Ruin.”

Trends in Digital Publishing

The eBook landscape is rapidly evolving, with a noticeable shift towards subscription services like Kindle Unlimited and Scribd, offering readers access to vast libraries for a monthly fee. This impacts purchasing decisions for individual titles, including “A Court of Wings and Ruin.” Simultaneously, publishers are strengthening Digital Rights Management (DRM) to combat piracy and protect copyright.

Furthermore, there’s a growing demand for seamless reading experiences across multiple devices, driving innovation in eBook formats and accessibility features. The availability of books on platforms like Amazon, Apple Books, and Google Play continues to expand, offering convenience and choice to consumers.

Supporting Authors and the Publishing Industry

Legally purchasing eBooks directly supports Sarah J. Maas and the publishing ecosystem, ensuring continued creation of beloved stories like “A Court of Wings and Ruin.”

The Importance of Purchasing eBooks Legally

Choosing official sources for “A Court of Wings and Ruin” demonstrates respect for the author’s creative work and the publishing industry’s efforts. Illegal downloads undermine these foundations, potentially reducing future literary output. Supporting authors through legitimate purchases ensures they can continue crafting captivating narratives.

Furthermore, legal eBook purchases contribute to a sustainable ecosystem for digital publishing, fostering innovation and accessibility for all readers. Avoiding unofficial websites protects you from malware and supports ethical practices within the book world.

effective c pdf

Effective C, like Scott Meyers’ work, focuses on improving programs and designs, offering a modern perspective on the language. Resources like “Programming in C Solutions Detailed”
and Robert Seicord’s “Effective C” (2022) provide valuable insights into mastering this powerful, low-level language, ideal for system software.

What is C and Why is it Still Relevant?

C is a foundational, general-purpose programming language developed in the 1970s, initially for creating the UNIX operating system. Its enduring relevance stems from its unique combination of low-level memory access and high-level features, offering unparalleled control over system resources. This makes C exceptionally well-suited for developing operating systems, embedded systems, and performance-critical applications.

Despite the emergence of newer languages, C remains vital because of its efficiency and direct hardware interaction. Resources like “Effective C” by Robert Seicord demonstrate the continued need for skilled C programmers. Understanding C’s principles provides a strong base for learning other languages, and its influence is evident in languages like C++, Java, and Python. The language’s small size and structured approach, coupled with extensive pointer usage, contribute to its power and flexibility. Even with modern tools like static analysis, a solid grasp of C fundamentals is invaluable.

The Importance of Writing “Effective” C Code

Writing “effective” C code transcends simply achieving functionality; it’s about crafting robust, maintainable, and safe programs. Given C’s low-level nature and manual memory management, errors can easily lead to crashes, security vulnerabilities, or unpredictable behavior. Resources like Scott Meyers’ “Effective C” and Robert Seicord’s work emphasize techniques to mitigate these risks.

Effective C code prioritizes clarity, avoiding ambiguity and promoting readability. It involves careful consideration of data types, pointer usage, and error handling. Explicitly handling errors, as highlighted in available resources, prevents silent failures and aids debugging. Avoiding memory leaks and dangling pointers – common pitfalls in C – is crucial for long-term stability. Furthermore, adopting modern C practices, utilizing static analysis tools, and rigorous testing are essential components of effective C development; Ultimately, effective C code minimizes bugs, enhances performance, and simplifies future maintenance.

Foundations of Effective C

Foundational C concepts—memory management, data types, and pointers—are critical. Understanding these, as detailed in resources like “Programming in C Solutions Detailed,” is key to writing safe and efficient code.

Understanding Memory Management in C

C’s manual memory management is both a strength and a significant source of potential errors. Unlike languages with automatic garbage collection, C requires developers to explicitly allocate and deallocate memory using functions like malloc and free. This control offers performance benefits, but introduces risks like memory leaks and dangling pointers.

Effective C programming demands a deep understanding of how memory is organized and utilized. Failing to properly manage memory can lead to unpredictable program behavior, crashes, and security vulnerabilities. Resources like Robert Seicord’s “Effective C” emphasize the importance of careful memory handling.

Techniques such as RAII (Resource Acquisition Is Initialization), though traditionally associated with C++, can be adapted in C to help manage resources more safely. Always ensure that allocated memory is eventually freed, and avoid accessing memory after it has been deallocated. Tools like static analysis can help detect potential memory management issues before runtime, improving code reliability.

Data Types and Their Implications

C offers a range of data types – int, float, char, and more – each with specific size and representation characteristics. Understanding these implications is crucial for writing effective and portable code. Incorrectly assuming data type sizes can lead to unexpected behavior, especially when dealing with memory allocation or data exchange between systems.

The language’s loose typing, as noted in descriptions of C, requires careful attention to type conversions and potential overflows. Explicitly managing types helps prevent subtle bugs that can be difficult to diagnose. Consider using fixed-width integer types (e.g., int32_t) from for greater portability and clarity.

“Effective C” resources highlight the importance of choosing the appropriate data type for each variable, balancing memory usage with the required precision and range. Always be mindful of potential data loss during conversions and prioritize type safety to enhance code robustness and maintainability.

Pointers: Power and Pitfalls

Pointers are a defining feature of C, granting powerful control over memory but also introducing significant risks. As described in resources detailing C’s structure, extensive use of pointers is characteristic of the language. Mastering pointer arithmetic and dereferencing is essential, but requires diligence to avoid common pitfalls like dangling pointers and memory leaks.

“Effective C” emphasizes the importance of initializing pointers to avoid undefined behavior. Always ensure a pointer points to valid memory before dereferencing it. Careful consideration must be given to pointer ownership and lifetime, especially when passing pointers to functions.

Understanding the relationship between pointers and arrays is also critical. Incorrectly manipulating pointers can lead to buffer overflows and security vulnerabilities. Employing techniques like const pointers can help prevent accidental modification of data and improve code safety, as highlighted in discussions of effective C programming practices.

Specific Techniques for Improvement

Specific techniques, like RAII and robust error handling, are crucial for writing safer C code. Resources such as “Effective C” detail strategies for avoiding memory leaks and dangling pointers.

RAII (Resource Acquisition Is Initialization) in C

RAII, a cornerstone of modern C++ programming, can be effectively adapted to C, though it requires a more manual approach. The core principle involves tying the lifecycle of a resource – such as memory, file handles, or network connections – to the lifespan of an object.

In C, this often translates to encapsulating resource management within structures and functions. When an object (structure instance) is created, it acquires the necessary resources. Crucially, the object’s destructor (a function called when the object goes out of scope) releases those resources. This ensures that resources are automatically cleaned up, even in the presence of exceptions or early returns, preventing leaks.

While C lacks built-in destructors like C++, careful design and adherence to coding conventions can achieve similar results. “Effective C” by Robert Seicord likely details patterns for implementing RAII-like behavior in C, emphasizing the importance of deterministic resource cleanup for robust and reliable software. This approach promotes safer code with no performance penalties, as highlighted in related resources.

Error Handling Strategies in C

Effective C programming demands robust error handling, a critical aspect often overlooked. C traditionally relies on return codes to signal errors, requiring developers to meticulously check the return value of every function call. This can become tedious and error-prone, leading to unhandled errors and unpredictable behavior.

A more structured approach involves defining custom error codes or using enumerated types to represent different error conditions. Functions can then return these codes, allowing for more meaningful error reporting. Furthermore, utilizing assertions (assert.h) can help detect logical errors during development, though they are typically disabled in production builds.

Resources like Robert Seicord’s “Effective C” likely emphasize the importance of explicitly handling errors and avoiding silent failures. Strategies such as using setjmp/longjmp for non-local error handling, while powerful, should be employed cautiously due to their potential complexity and impact on stack unwinding. Prioritizing clear error messages and logging is also crucial for debugging and maintenance.

Avoiding Memory Leaks and Dangling Pointers

Effective C programming hinges on meticulous memory management. C’s manual memory allocation (malloc, calloc, realloc) necessitates explicit deallocation (free) to prevent memory leaks – situations where allocated memory is no longer accessible but remains reserved. Failing to free allocated memory gradually consumes system resources.

Dangling pointers, another common pitfall, occur when a pointer references memory that has already been freed. Dereferencing a dangling pointer leads to undefined behavior, often causing crashes or subtle bugs. Careful pointer arithmetic and avoiding returning pointers to local variables are crucial preventative measures.

Resources like “Effective C” by Robert Seicord likely detail techniques like RAII (Resource Acquisition Is Initialization) – though adapting it to C requires careful implementation – and employing tools like Valgrind to detect memory errors. Consistent coding standards and thorough code reviews are also vital for identifying and eliminating these issues.

Advanced C Programming Concepts

Effective C delves into utilizing const for safety, leveraging preprocessor directives, and mastering function pointers for flexible code design, enhancing program robustness and efficiency.

Using `const` Correctly for Code Safety

Const correctness is paramount in Effective C programming, significantly enhancing code safety and readability. Applying const where appropriate signals intent, preventing accidental modifications of data. This practice extends beyond simple variables to function parameters and pointers, creating a robust barrier against unintended side effects.

Proper const usage allows the compiler to enforce immutability, catching potential errors during compilation rather than runtime. This is especially crucial when dealing with complex data structures and shared resources. Consider function arguments; declaring them const assures the function won’t alter the original data, fostering trust and simplifying debugging.

Furthermore, const can be applied to pointers, distinguishing between a pointer to a constant value and a constant pointer. Understanding these nuances is vital for avoiding subtle bugs. Resources like “Effective C” by Robert Seicord emphasize that consistent const application leads to more maintainable and reliable C code, reducing the risk of unexpected behavior and improving overall software quality.

Leveraging Preprocessor Directives Effectively

Preprocessor directives in C, while powerful, demand careful application for truly effective code. Overuse can lead to decreased readability and increased complexity, hindering maintainability. However, judicious use of directives like #define, #ifdef, and #include can significantly enhance code portability and flexibility.

Employing #define for symbolic constants improves code clarity and simplifies modifications. Conditional compilation with #ifdef allows tailoring code for specific platforms or configurations, crucial for cross-platform development. However, avoid excessive nesting and complex logic within preprocessor blocks, as debugging becomes challenging.

Resources like “Effective C” highlight the importance of minimizing preprocessor dependencies. Consider alternatives like const variables and inline functions where appropriate. A balanced approach—leveraging directives for essential tasks while prioritizing clarity and maintainability—is key to writing robust and effective C code. Proper usage prevents unexpected behavior and promotes long-term project success.

Understanding and Utilizing Function Pointers

Function pointers represent a cornerstone of advanced C programming, enabling dynamic behavior and flexible code design. They allow passing functions as arguments to other functions, facilitating powerful abstractions and callbacks. Mastering function pointers is crucial for writing truly effective C code, as highlighted in resources like “Effective C.”

Utilizing function pointers promotes code reusability and reduces redundancy. They are particularly valuable in scenarios involving event handling, sorting algorithms, and implementing strategy patterns. However, incorrect usage can lead to subtle bugs and crashes, demanding careful attention to type safety and memory management.

When working with function pointers, ensure the pointed-to function has the correct signature. Resources emphasize the importance of clear documentation and consistent naming conventions. Employing typedef can enhance readability when declaring function pointer types. A solid grasp of function pointers unlocks a new level of control and expressiveness in C programming, leading to more adaptable and effective solutions.

Modern C Practices

Effective C programming now incorporates C11 standards and beyond, alongside static analysis tools for enhanced code safety. Testing and debugging are vital for robust, modern C applications.

C11 and Beyond: New Features and Standards

The evolution of C didn’t halt with its initial creation for UNIX. The C11 standard, and subsequent updates, introduced significant enhancements aimed at improving code safety, expressiveness, and concurrency. These features address long-standing concerns within the C community and bring the language more in line with modern programming paradigms.

Key additions in C11 include improved support for Unicode, multi-threading capabilities via the _Thread_local storage class, and enhanced type-generic math functions. These additions allow developers to write more portable and efficient code. Later standards, like C17 and C23, continue to refine the language, addressing ambiguities and adding further features.

Understanding these newer standards is crucial for writing effective C code today. Resources like Robert Seicord’s “Effective C” often highlight how to leverage these features to create safer, more maintainable, and performant applications. Ignoring these advancements means missing opportunities to improve code quality and potentially introducing vulnerabilities.

Static Analysis Tools for C Code

Writing robust and reliable C code demands more than just careful coding practices; it requires proactive identification of potential issues. Static analysis tools play a vital role in this process, examining code without actually executing it to detect bugs, vulnerabilities, and style violations. These tools are essential for achieving truly effective C programming.

Several powerful static analyzers are available, each with its strengths. They can identify memory leaks, buffer overflows, null pointer dereferences, and other common C pitfalls. Integrating these tools into the development workflow – ideally as part of a continuous integration pipeline – allows for early detection and remediation of problems.

Resources like “Effective C” by Robert Seicord emphasize the importance of utilizing such tools. They complement manual code review and testing, providing an additional layer of defense against errors. By embracing static analysis, developers can significantly improve the quality and security of their C applications, reducing the risk of runtime failures and security breaches.

Testing and Debugging C Programs Effectively

Thorough testing and debugging are paramount when striving for effective C programming. Given C’s low-level nature and potential for memory-related errors, a robust testing strategy is crucial. This extends beyond simple unit tests to include integration, system, and even fuzz testing to uncover edge cases and vulnerabilities.

Debugging C code often requires a deep understanding of memory management and pointer arithmetic. Utilizing debuggers like GDB allows developers to step through code, inspect variables, and identify the root cause of issues. However, preventative measures, as highlighted in resources like Robert Seicord’s “Effective C”, are equally important.

Employing techniques like code reviews and static analysis (discussed elsewhere) can significantly reduce the number of bugs that reach the testing phase. A combination of proactive prevention and reactive debugging ensures the creation of reliable, secure, and high-performing C applications.

instructions for cuisinart ice cream maker

Understanding Your Cuisinart Ice Cream Maker

Cuisinart ice cream makers offer delightful frozen treats; always read the instruction booklet before use for optimal performance and safety precautions․

Model Identification & Components

Identifying your Cuisinart model is crucial for accessing the correct resources․ Common models include the ICE-21, ICE-30BC, and various stainless steel options․ Key components generally consist of a motor base housing the stirring mechanism, a double-insulated freezing bowl requiring pre-freezing, a clear lid with a feed tube for adding mix-ins, and a dasher – the paddle that mixes and freezes the ice cream․

Some models feature a compact ice switch for initial low-speed mixing․ Ensure all parts are present and undamaged before operation; Refer to your specific model’s documentation for a detailed parts list and diagram․ Understanding these components will aid in proper assembly and operation, ensuring delicious homemade frozen desserts․

Safety Precautions

Prioritize safety when operating your Cuisinart ice cream maker․ Always unplug the unit before cleaning or disassembling․ Never immerse the motor base in water or other liquids․ The freezing bowl should be thoroughly frozen before use to prevent damage to the unit․

Be cautious of moving parts during operation; keep hands and utensils clear of the dasher․ The unit features an automatic shut-off if the motor overheats – do not attempt to restart immediately․ Supervise children when the appliance is in use․ Refer to the user manual for a complete list of safety guidelines and troubleshooting steps to ensure safe and enjoyable ice cream making․

Preparing for Ice Cream Making

Successful ice cream requires a fully frozen bowl, carefully considered ingredients, and a chosen recipe for delicious homemade frozen desserts․

Freezing the Bowl

Proper bowl freezing is crucial for successful ice cream making with your Cuisinart machine․ Ensure the freezer bowl is completely dry before placing it in the freezer; any moisture will hinder freezing․ It typically requires at least 16-24 hours to freeze solid, depending on your freezer’s temperature․

The bowl must be thoroughly frozen – if it isn’t, the mixture won’t freeze properly; A simple test is to shake the bowl; if you hear liquid sloshing, it needs more freezing time․ Place the bowl on the lowest shelf, where it’s coldest, and avoid frequently opening the freezer door․ Do not use the bowl for other purposes while it’s dedicated to ice cream making, as temperature fluctuations can affect its performance․

Ingredient Considerations

High-quality ingredients yield the best results when using your Cuisinart ice cream maker․ Use fresh, full-fat dairy for a richer, creamier texture․ Avoid recipes with excessive alcohol, as it can prevent proper freezing; if using, add it sparingly towards the end of the mixing process․

Chill your liquid base thoroughly before churning – this reduces freezing time and improves consistency․ Sugar content is vital; it not only sweetens but also affects the texture․ Ensure sweeteners are fully dissolved before adding to the machine․ Pre-cooking mixtures, like custards, is essential, and allow them to cool completely before churning․

Recipe Selection

Choosing the right recipe is key to Cuisinart ice cream maker success․ Start with simpler recipes, like classic vanilla, to familiarize yourself with the process․ The “Complete Cuisinart Homemade Frozen Yogurt, Sorbet, Gelato, Ice Cream Maker Book” offers 100 decadent options for your 2-quart ICE-30BC model․

Consider your freezer bowl’s capacity when selecting a recipe; Ensure the volume fits comfortably to prevent overflow during churning․ Recipes designed specifically for ice cream makers generally yield better results than adapting standard recipes․ Explore frozen yogurt, sorbet, and gelato variations for diverse flavors and textures․

Operating Your Cuisinart Ice Cream Maker

Proper assembly and operation are crucial; the stirrer rotates at approximately 21 rpm when the compact ice switch is pressed, initiating the mixing process․

Assembling the Unit

Before beginning, ensure all components are thoroughly washed, as detailed in the provided instructions․ Carefully place the frozen freezer bowl onto the base unit, aligning it correctly for proper operation․ Next, attach the dasher assembly – this includes the paddle and the outer drive shaft – into the lid․

Secure the lid firmly onto the freezer bowl, ensuring a snug fit to prevent splashing during the mixing process․ The dasher should rotate freely within the bowl․ Finally, plug the unit into a grounded electrical outlet․ It’s vital to double-check all connections before adding your ice cream mixture, guaranteeing a smooth and efficient freezing experience with your Cuisinart maker․

The Mixing Process

With the unit assembled, pour your chilled ice cream mixture into the freezer bowl, being careful not to exceed the maximum fill line․ This prevents overflow during churning․ Press the power button to initiate the mixing process; the dasher will begin rotating at a relatively low speed, approximately 21 rpm for some compact models․

Allow the machine to run for approximately 20-40 minutes, depending on your recipe and desired consistency․ The mixture will gradually thicken as it freezes․ Avoid interrupting the process prematurely, as this can result in a grainy texture․ The Cuisinart maker’s automatic shut-off feature will activate when the ice cream reaches optimal consistency․

Monitoring the Consistency

Throughout the mixing process, periodically observe the ice cream’s consistency through the viewing window, if your model has one․ Initially, the mixture will be liquid, then transition to a soft-serve consistency․ Continue churning until it reaches a firm, yet scoopable texture, resembling store-bought ice cream․

Be mindful that over-churning can lead to a grainy texture, while under-churning results in a soft, melty consistency․ If the mixture appears too soft after the recommended churning time, allow it to continue for a few more minutes, checking frequently․ Remember the automatic shut-off is a guide, not a definitive endpoint․

Troubleshooting Common Issues

If issues arise, consult the user manual for troubleshooting steps; the Cuisinart maker features a safety shut-off if the motor overheats․

Unit Won’t Start

If your Cuisinart ice cream maker fails to start, first ensure it’s properly plugged into a functioning electrical outlet․ Verify the unit’s power switch is firmly in the ‘on’ position․ The machine is equipped with a safety feature; check if the bowl lock is securely fastened – it won’t operate if not correctly aligned․

Additionally, confirm the freezer bowl is sufficiently frozen, as the unit requires the bowl’s coldness to initiate the mixing process․ A warm bowl can prevent startup․ If the motor seems unresponsive, it might have overheated; allow it to cool down completely before attempting to restart․ Refer to the manual’s limited 3-year warranty information for further assistance and troubleshooting guidance․

Ice Cream Not Freezing

If your ice cream mixture isn’t freezing, the most common cause is an insufficiently frozen freezer bowl․ Ensure it has been frozen for the recommended 16-24 hours, remaining completely solid․ Verify the mixture is adequately chilled before pouring it into the bowl; room-temperature liquids significantly prolong freezing time․

Also, confirm the bowl is properly seated and locked into the unit․ Insufficient mixture volume or a too-rapid pouring speed can hinder freezing․ Alcohol content in recipes can also slow the process․ Stir the mixture thoroughly to dissolve sweeteners․ If issues persist, consult the instruction manual for specific troubleshooting steps related to your model․

Motor Overheating

If the motor overheats, the Cuisinart ice cream maker is equipped with a safety feature that automatically stops the unit to prevent damage․ Avoid continuous operation exceeding 30 minutes; allow the motor to rest before resuming․ Ensure the mixture isn’t too thick, as excessive resistance can strain the motor․

Check that the freezer bowl is correctly assembled and securely locked into place․ Overfilling the bowl can also contribute to overheating․ If overheating continues, unplug the unit and allow it to cool completely before attempting to use it again․ Refer to the user manual for detailed troubleshooting and warranty information․

Cleaning and Maintenance

Regular cleaning ensures longevity; wash all parts after each use, following the manual’s instructions for disassembly and proper cleaning procedures․

Disassembling for Cleaning

Before cleaning your Cuisinart ice cream maker, always unplug the unit to prevent accidental activation․ Carefully remove the freezer bowl from the base․ Detach the mixing paddle – typically, a gentle pull or a slight twist will release it․ The dasher, or paddle assembly, often consists of multiple parts that separate for thorough cleaning․

Refer to your specific model’s manual for detailed disassembly instructions, as designs can vary․ Some models may have a removable drive connector․ Ensure you keep track of all components to simplify reassembly․ Avoid disassembling beyond what is necessary for cleaning, as forcing parts could cause damage․ Once disassembled, proceed to the proper cleaning procedures for each part․

Proper Cleaning Procedures

Wash all removable parts – the freezer bowl, mixing paddle, and any included lids or measuring cups – in warm, soapy water after each use․ Avoid abrasive cleaners or scouring pads, as these can damage the surfaces․ The freezer bowl is often hand-wash only; check your manual․

The mixing paddle and other plastic components are usually dishwasher-safe (top rack recommended)․ Wipe down the motor base with a damp cloth; never immerse it in water․ Ensure all parts are thoroughly dried before reassembling and storing․ A clean machine ensures optimal performance and prevents flavor contamination in future batches․

Storage Instructions

After thorough cleaning and drying, store the Cuisinart ice cream maker components in a cool, dry place․ The freezer bowl must be completely dry before being stored in the freezer, ready for your next batch․ It’s recommended to store the bowl upright to prevent any residual moisture buildup․

Keep the motor base away from direct sunlight and extreme temperatures․ Store the mixing paddle and other accessories with the motor base or in a separate container․ Proper storage extends the life of your appliance and ensures it’s ready for delicious homemade ice cream whenever inspiration strikes!

Recipe Ideas & Variations

Explore endless possibilities! From classic vanilla to frozen yogurt, sorbet, and gelato, Cuisinart unlocks a world of decadent and fun frozen dessert recipes․

Classic Vanilla Ice Cream

Creating a timeless treat is simple! Begin with 2 cups of heavy cream, 1 cup of whole milk, and ¾ cup of granulated sugar․ Whisk these ingredients together until the sugar dissolves completely․ Next, add 1 tablespoon of vanilla extract – pure vanilla provides the best flavor․

Pour the mixture into your Cuisinart ice cream maker, ensuring the freezer bowl is thoroughly frozen․ Allow the machine to churn for approximately 20-25 minutes, or until the ice cream reaches a soft-serve consistency․

For a firmer texture, transfer the ice cream to an airtight container and freeze for an additional 2-4 hours․ Enjoy this classic, creamy vanilla ice cream – a perfect base for toppings or enjoyed on its own!

Frozen Yogurt Recipes

Explore healthier delights with frozen yogurt! A basic recipe starts with 3 cups of your favorite yogurt – Greek yogurt yields a tangier result․ Add ½ cup of sugar or honey, adjusting to your sweetness preference․ For enhanced flavor, incorporate 1 teaspoon of vanilla extract or a squeeze of lemon juice․

Pour the mixture into your pre-chilled Cuisinart ice cream maker bowl․ Churn for roughly 20-30 minutes, monitoring for a soft-serve consistency․ Experiment with fruit purees – strawberry, raspberry, or mango – added during the last few minutes of churning․

Transfer to a freezer-safe container for a firmer texture, freezing for at least 2 hours․ Enjoy a guilt-free, refreshing frozen yogurt treat!

Sorbet & Gelato Options

Expand your frozen dessert repertoire! For vibrant sorbets, combine 2 cups of fruit puree (berries, mango, peach) with 1 cup of water and ¾ cup of sugar․ Simmer until sugar dissolves, then chill thoroughly before churning in your Cuisinart maker․

Gelato, denser and richer than ice cream, requires a base of milk, cream, sugar, and often egg yolks․ A simple recipe uses 2 cups milk, 1 cup cream, ¾ cup sugar, and 4 egg yolks; Heat gently, then chill and churn․

Remember to pre-freeze your bowl! Sorbet typically takes 20-30 minutes, while gelato may require slightly longer for its signature texture․

cuisinart ice cream maker ice 21 manual

Cuisinart ICE-21 Ice Cream Maker: A Comprehensive Guide

Discover effortless frozen dessert creation with the Cuisinart ICE-21! This guide details operation‚ recipes‚ and troubleshooting‚ referencing the official Cuisinart manual available online.

Understanding the Cuisinart ICE-21

The Cuisinart ICE-21 is an automatic frozen yogurt‚ ice cream‚ and sorbet maker designed for convenient home use. It operates by freezing a bowl beforehand and then using a mixing paddle within the machine to churn ingredients into a delicious frozen treat. Accessing the instruction and recipe booklet is crucial; Cuisinart provides it on their website (www.cuisinart.com) for download.

The Internet Archive hosts downloadable PDF versions of the ICE-21 manual‚ offering multiple formats including single-page processed JP2 ZIP and torrent downloads. Understanding the importance of having the mixing paddle and lid securely in place before operation is highlighted in the manual. The machine’s functionality relies on these components working in unison to achieve the desired consistency. ManualsLib also provides access to the ICE-21 instruction booklet.

Availability of the Manual

Finding the Cuisinart ICE-21 manual is remarkably easy thanks to several online resources. The official source is the Cuisinart website (www.cuisinart.com)‚ where you can directly download the instruction and recipe booklet in PDF format. Alternatively‚ the Internet Archive offers a comprehensive collection‚ allowing you to download the manual as a PDF‚ a single-page processed JP2 ZIP file‚ or even via torrent.

Multiple files are available on the Internet Archive‚ including versions uploaded as early as August 9‚ 2020. ManualsLib also hosts the ICE-21 manual for convenient access. With over a million PDF guides from 10‚000+ brands in their database‚ locating support materials is streamlined. These resources ensure users have readily available guidance for optimal operation.

Key Features and Specifications

The Cuisinart ICE-21 is an automatic frozen yogurt‚ ice cream‚ and sorbet maker designed for convenient home use. It boasts a double-insulated freezing bowl‚ requiring pre-freezing for optimal performance. The unit features a fully automatic operation – simply add ingredients‚ and the machine handles the rest! Key components include the mixing paddle and lid‚ essential for proper function.

Nutritional information for recipes‚ like chocolate sauce‚ is included in the booklet‚ detailing calories (e.g.‚ 330 with 79 from fat)‚ carbohydrates‚ protein‚ fat content‚ cholesterol‚ and sodium levels. The ICE-21 allows for recreating flavors like s’mores in frozen form‚ offering versatility and delicious results. Detailed specifications are found within the downloadable manual.

Getting Started with Your ICE-21

Prepare for delightful frozen treats! This section guides initial setup‚ component identification‚ and crucial freezing bowl preparation‚ referencing the Cuisinart ICE-21 manual.

Initial Setup and Component Overview

Before your first batch of homemade ice cream‚ carefully unpack all components. The Cuisinart ICE-21 includes the motor base‚ the 1.5-quart freezing bowl‚ the mixing paddle‚ and a lid with a feed tube. Ensure all parts are present and undamaged. Thoroughly wash the freezing bowl‚ mixing paddle‚ and lid with warm‚ soapy water‚ then dry completely.

The freezing bowl requires pre-freezing for at least 16 hours – a critical step detailed in the instruction manual. Place the bowl in the freezer‚ ensuring it’s level and not obstructed. The motor base simply needs to be placed on a stable‚ flat surface near an electrical outlet. Before operation‚ confirm the mixing paddle is correctly attached to the motor shaft and the lid is securely in place‚ aligning the arrow on the lid with the arrow on the base.

Preparing the Freezing Bowl

Proper freezing of the bowl is paramount for successful ice cream making with the Cuisinart ICE-21. The instruction manual emphasizes a minimum of 16 hours of freezing time‚ ensuring the liquid inside is completely solidified. Place the bowl on a level surface deep within the freezer‚ avoiding contact with the freezer walls or other items that might impede freezing.

A fully frozen bowl will feel very cold to the touch and have a solidified liquid inside – shaking it should produce no sloshing sound. If the bowl isn’t adequately frozen‚ the ice cream mixture won’t freeze properly‚ resulting in a soupy consistency. It’s recommended to keep the bowl dedicated solely to ice cream making to maintain optimal freezing performance. Re-freezing after each use is essential for consistent results.

Making Ice Cream: A Step-by-Step Process

Follow the manual’s guidance: chill the bowl‚ combine ingredients‚ pour into the frozen bowl‚ and activate the machine for delicious‚ homemade ice cream!

Ingredient Preparation Guidelines

Successful ice cream making with your Cuisinart ICE-21 hinges on proper ingredient preparation. The instruction booklet emphasizes thoroughly chilling all liquid ingredients beforehand; this accelerates the freezing process and yields a smoother texture. Recipes often include nutritional information‚ like a sample showing 222 calories with 18g of fat.

Ensure sugar is fully dissolved in the liquid base to prevent icy crystals. For richer flavors‚ consider using high-quality ingredients. The manual doesn’t specify strict limitations‚ but balanced recipes are key. When adapting recipes‚ maintain appropriate liquid-to-solid ratios. Remember‚ the machine handles frozen yogurt and sorbet too‚ requiring adjusted ingredient proportions as detailed in the booklet’s recipe section‚ including chocolate sauce options!

The Freezing Process Explained

The Cuisinart ICE-21 utilizes a pre-frozen bowl to create ice cream. The bowl must be completely frozen – typically 16-24 hours – before use‚ as detailed in the instruction manual. Once frozen‚ the bowl is locked into the base‚ and the chilled mixture is poured inside.

The mixing paddle‚ crucial for incorporating air and preventing large ice crystals‚ begins to churn as the machine operates. The manual stresses ensuring both the paddle and lid are securely in place. The freezing process takes approximately 20-30 minutes‚ depending on the mixture’s temperature and recipe. Consistent churning is vital for achieving the desired creamy consistency‚ avoiding a grainy texture.

Mixing Paddle Operation and Importance

The Cuisinart ICE-21’s mixing paddle is fundamental to successful ice cream making. As highlighted in the instruction booklet‚ it’s essential to ensure the paddle clicks securely into place before operation. This paddle isn’t merely for stirring; it actively incorporates air into the mixture during the freezing process.

This aeration prevents the formation of large‚ undesirable ice crystals‚ resulting in a smoother‚ creamier final product. The manual emphasizes that the paddle’s consistent rotation is key. Without proper mixing‚ the ice cream will be icy and lack the desired texture. Always verify the paddle spins freely before starting‚ and never attempt to operate the machine without it correctly installed.

Recipes and Variations

Explore delicious possibilities! The Cuisinart ICE-21 manual offers basic ice cream‚ frozen yogurt‚ and sorbet recipes‚ plus inspiring variations like chocolate and smore flavors.

Basic Ice Cream Recipe

Creating classic ice cream with your Cuisinart ICE-21 is remarkably simple! The instruction and recipe booklet provides a foundational recipe to get you started. Typically‚ this involves combining 2 cups of heavy cream‚ ¾ cup of whole milk‚ ¾ cup of sugar‚ and a pinch of salt.

Flavorings‚ such as 1 teaspoon of vanilla extract‚ are then added. Ensure all ingredients are thoroughly chilled before beginning the freezing process for optimal results. The manual emphasizes the importance of a properly frozen freezing bowl – a minimum of 24 hours is recommended.

Pour the mixture into the bowl‚ and let the ICE-21 work its magic! Expect a creamy‚ delightful ice cream within approximately 20-25 minutes. Remember to consult the booklet for precise measurements and additional flavoring suggestions.

Frozen Yogurt Recipes

Expand your dessert horizons with the Cuisinart ICE-21’s frozen yogurt capabilities! The included instruction booklet features several variations. A basic recipe starts with 2 cups of yogurt – Greek yogurt yields a thicker consistency – ¾ cup of milk‚ and ¾ cup of sugar. Adjust sweetness to your preference.

Fruit purees‚ like strawberry or mango‚ are excellent additions‚ typically around ½ to ¾ cup. For a tangier flavor‚ consider a squeeze of lemon juice. Remember‚ chilling ingredients beforehand is crucial for successful freezing.

The ICE-21 transforms this mixture into a refreshing frozen treat in roughly the same timeframe as ice cream. Explore the manual for more complex recipes‚ including options with chocolate sauce!

Sorbet Recipes

Unlock vibrant‚ fruity delights with the Cuisinart ICE-21’s sorbet-making prowess! The instruction booklet provides a foundation for experimentation. A classic sorbet begins with 2 cups of fruit puree – raspberries‚ mangoes‚ or peaches work wonderfully – 1 cup of water‚ and ¾ cup of sugar. Adjust sugar based on fruit sweetness.

For a smoother texture‚ strain the puree to remove seeds or pulp. A touch of lemon or lime juice enhances the flavor. Ensure all ingredients are well-chilled before initiating the freezing process.

The ICE-21 efficiently transforms this simple mixture into a refreshing sorbet. Consult the manual for variations and flavor combinations to elevate your dessert experience!

Troubleshooting Common Issues

Resolve freezing‚ consistency‚ or motor problems with the ICE-21! The Cuisinart manual offers solutions‚ ensuring smooth operation and delicious frozen treats every time.

Bowl Not Freezing Properly

If your Cuisinart ICE-21’s freezing bowl isn’t solidifying the mixture‚ several factors could be at play. First‚ ensure the bowl is completely frozen for the recommended 16-24 hours – uninterrupted! The manual stresses a consistently cold freezer temperature is crucial; avoid frequent door openings.

Verify the bowl is level during operation. Also‚ confirm the mixing paddle and lid are securely in place‚ as the machine won’t activate without them. A partially thawed bowl will hinder freezing. If issues persist‚ re-freeze the bowl for a longer duration. Inspect the freezer for any obstructions blocking airflow around the bowl. Remember‚ proper preparation‚ as detailed in the instruction booklet‚ is key to successful ice cream making!

Ice Cream Consistency Problems

Experiencing issues with your Cuisinart ICE-21’s ice cream texture? The manual highlights ingredient ratios as a primary factor. Too much sugar or fat can result in a soft‚ soupy consistency. Conversely‚ insufficient liquid leads to a grainy texture. Ensure your recipe adheres to recommended proportions.

Prolonged churning can sometimes overwork the mixture‚ also causing softness. The ideal churning time varies depending on the recipe and desired consistency. If the ice cream is too soft‚ transfer it to a freezer-safe container and harden for a few hours. Conversely‚ if it’s too hard‚ let it sit at room temperature briefly before serving. Refer to the recipe booklet for guidance!

Motor Issues and Solutions

If your Cuisinart ICE-21’s motor isn’t functioning‚ first ensure the unit is properly assembled – the mixing paddle and lid must be securely in place. The machine won’t operate without these safety features engaged. Check the power outlet and cord for any damage or disconnection. A tripped circuit breaker could also be the culprit; reset if necessary.

Overloading the machine with a too-full freezing bowl can strain the motor. Reduce the mixture volume to within the recommended maximum fill line. If the motor hums but doesn’t turn‚ the mixture may be too frozen; allow it to thaw slightly before restarting. Consult the manual for specific troubleshooting steps and avoid attempting repairs yourself.

Maintenance and Care

Ensure longevity by thoroughly cleaning all components after each use‚ following the detailed procedures outlined in the Cuisinart ICE-21 instruction manual.

Cleaning Procedures

After each use‚ disassemble the Cuisinart ICE-21 for thorough cleaning. The freezing bowl must be washed by hand; it’s not dishwasher safe. Gently wash with warm‚ soapy water‚ rinse completely‚ and dry. The mixing paddle‚ lid‚ and outer housing can be washed in the top rack of the dishwasher‚ or hand washed.

Avoid abrasive cleaners‚ as they can damage the surfaces. Ensure all parts are completely dry before reassembling and storing. Regularly inspect the motor housing for any spills or residue and wipe clean with a damp cloth. Never immerse the motor base in water or any other liquid. Proper cleaning maintains hygiene and ensures optimal performance of your ice cream maker‚ extending its lifespan as detailed in the official manual.

Storage Instructions

To ensure longevity‚ store your Cuisinart ICE-21 properly when not in use. The freezing bowl requires special attention; it should be thoroughly dried and stored in a freezer-safe bag to prevent odor absorption. The lid and mixing paddle can be stored with the main unit‚ ensuring all parts are completely dry beforehand.

Keep the motor base in a cool‚ dry place‚ away from direct sunlight and extreme temperatures. Avoid storing the unit in a damp environment. It’s recommended to store the instruction manual with the appliance for future reference. Following these guidelines‚ as outlined in the Cuisinart manual‚ will help maintain your ice cream maker in optimal condition for years of delicious frozen treats.

capitalization and punctuation worksheets pdf

Article Plan: Capitalization and Punctuation Worksheets PDF

Capitalization and punctuation are essential writing skills, and utilizing PDF worksheets provides focused practice for students of all levels, enhancing their literacy foundation.

Capitalization and punctuation are the cornerstones of clear and effective written communication. Often overlooked, these elements act as vital “road signs” for readers, guiding them through text and ensuring comprehension.

Correct capitalization—using uppercase letters where appropriate—signals the start of sentences and highlights proper nouns, distinguishing specific people, places, and things. Similarly, punctuation marks like periods, question marks, and exclamation points provide structure, clarity, and emotional tone.

Mastering these skills isn’t about rigid adherence to rules, but about enabling smooth readability. When capitalization or punctuation are incorrect, they disrupt the flow and can alter the intended meaning. Worksheets, particularly in PDF format, offer a convenient and focused way to practice and reinforce these fundamental grammar concepts, building a strong foundation for confident writing.

Why are Worksheets Important?

Worksheets are invaluable tools for solidifying grammar skills, offering targeted practice that reinforces learning beyond classroom instruction. They provide a structured environment for students to apply capitalization and punctuation rules, identifying areas where they excel and where they need further support.

Unlike passive learning methods, worksheets demand active engagement. Students aren’t simply reading about rules; they’re actively using them. This hands-on approach fosters deeper understanding and retention.

PDF worksheets, in particular, offer flexibility and accessibility. They can be easily printed for traditional practice or completed digitally, allowing for convenient review anytime, anywhere. Furthermore, they allow teachers to easily assess individual student progress and tailor instruction accordingly, ensuring no student is left behind in mastering these crucial writing fundamentals.

Benefits of Using PDF Worksheets

PDF worksheets offer a multitude of advantages for both educators and students. Their portability allows for learning on-the-go, while the standardized format ensures consistent presentation of material. PDFs are easily printable, reducing paper costs when utilized thoughtfully, and readily shareable via email or learning platforms.

A key benefit is the ability to include answer keys, facilitating self-assessment and independent learning. Many PDFs incorporate clear instructions and examples, promoting student autonomy. The digital format also allows for potential interactive features, though this varies by worksheet.

Furthermore, PDFs preserve formatting across different devices, ensuring a consistent learning experience. They are a cost-effective resource, with numerous free options available alongside premium, more comprehensive sets, catering to diverse budgetary needs.

Core Capitalization Rules

Capitalization, often overlooked, acts as a crucial “road sign” for readers, guiding comprehension. Fundamental rules include capitalizing the first word of every sentence, providing a clear starting point. Equally important is capitalizing proper nouns – names of specific people, places, organizations, and brands.

Understanding proper nouns is key; common nouns like “city” remain lowercase, while specific cities like “Paris” require capitalization. Similarly, “dog” is common, but “Fido” is a proper noun. Organizations such as the “United Nations” and brands like “Google” also demand capitalization.

Worksheets focusing on these rules reinforce understanding. Printable resources often include the rules themselves at the top of the page, aiding retention and application. Mastering these core principles builds a strong foundation for effective written communication.

Capitalizing the First Word of a Sentence

Capitalizing the initial word of each sentence is a cornerstone of English grammar, signaling the beginning of a new thought. This seemingly simple rule dramatically improves readability, acting as a visual cue for the reader. Worksheets dedicated to this skill provide targeted practice, reinforcing this fundamental concept.

Effective worksheets present students with sentences, some correctly capitalized and others not, requiring them to identify and correct errors. Variations include rewriting sentences or filling in the missing capital letter. This repetitive practice solidifies understanding.

Many PDF resources incorporate this rule within broader exercises, combining it with proper noun capitalization for a more comprehensive assessment. Consistent practice ensures students internalize this essential element of sentence structure.

Capitalizing Proper Nouns

Proper nouns, unlike common nouns, denote specific people, places, organizations, or things, and always require capitalization. Mastering this rule is crucial for clear and accurate writing. Worksheets focusing on proper nouns help students distinguish them from their common noun counterparts.

These PDF exercises often present lists of nouns, challenging students to identify which ones are proper and should be capitalized. Another common format involves sentences with missing capitalization, requiring students to apply the rule correctly.

Effective worksheets categorize proper nouns – people (Amelia), locations (Paris), and entities (United Nations) – providing focused practice. Recognizing these categories aids comprehension and retention. Consistent practice builds confidence in identifying and capitalizing proper nouns.

Understanding Proper Nouns

Proper nouns are fundamental to correct capitalization, representing unique entities and demanding a capital letter at the beginning. Unlike general nouns, they specify who or what, setting them apart. PDF worksheets dedicated to proper nouns are invaluable for solidifying this concept.

These resources often emphasize that proper nouns name specific individuals, locations, and organizations. For example, “Amelia,” “Paris,” and “United Nations” are all proper nouns. Understanding this distinction is key to accurate writing.

Worksheets frequently include exercises where students identify proper nouns within sentences or paragraphs, reinforcing their ability to recognize these unique identifiers. This targeted practice builds a strong foundation for grammatical accuracy and clarity.

People’s Names

Capitalizing people’s names is a cornerstone of proper grammar, and PDF worksheets offer focused practice in this area. Students learn that every part of a person’s name – first, middle, and last – requires initial capitalization. This includes titles used with names, like “Dr. Smith” or “Professor Jones.”

Worksheets often present exercises where students correct sentences with improperly capitalized names, or identify correctly capitalized names within a text. These activities reinforce the rule and build confidence.

Furthermore, some worksheets extend this concept to include nicknames and initials, ensuring a comprehensive understanding. Recognizing the importance of respecting individuals through correct name capitalization is also subtly emphasized, fostering good writing habits.

Place Names (Cities, Countries, etc.)

Capitalizing place names – cities, countries, continents, rivers, mountains, and more – is crucial for clarity and correctness. PDF worksheets dedicated to this skill provide targeted practice, helping students master this essential grammar rule. Exercises commonly involve identifying and correcting capitalization errors in sentences featuring geographical locations.

Worksheets often differentiate between common nouns (like “city” or “river”) and proper nouns (like “London” or “Amazon River”), reinforcing the concept of specificity. Students learn that even directional terms, when part of a place name (like “North America”), require capitalization.

Advanced worksheets may include maps where students label locations with correct capitalization, blending geography with grammar practice.

Organizations and Brands

Capitalizing organizations and brands demonstrates respect and adheres to established writing conventions. PDF worksheets focusing on this area present students with a variety of exercises designed to solidify their understanding. These often include identifying correctly capitalized names of companies, schools, government bodies, and other institutions.

Worksheets frequently challenge students to differentiate between generic terms (like “university”) and specific organizational names (like “Harvard University”). They also cover acronyms and abbreviations, ensuring students know when and how to capitalize them (e.g., “NASA” vs. “national aeronautics and space administration”).

Practice may involve rewriting sentences with corrected capitalization, or completing sentences with appropriate organizational or brand names.

Common Punctuation Marks Explained

Punctuation provides structure and clarity to writing, guiding readers through the intended meaning. PDF worksheets dedicated to punctuation offer targeted practice with essential marks. Understanding the function of each mark is crucial, and worksheets often begin with explanations and examples.

Periods (.) signal the end of declarative sentences, conveying a complete thought. Question marks (?) indicate interrogative sentences, seeking information. Exclamation points (!) express strong emotion or emphasis. Worksheets commonly present sentences where students must select the correct punctuation mark.

More advanced exercises might involve rewriting passages, adding punctuation where it’s missing, or identifying errors in existing punctuation. These resources help students internalize the rules and apply them confidently.

Periods (.) ⎻ Ending Declarative Sentences

Periods are arguably the most frequently used punctuation mark, signaling the completion of a declarative sentence – a statement of fact or opinion. PDF worksheets focusing on periods typically begin with identifying sentences that are declarative in nature. Students learn to distinguish them from questions or exclamations.

Exercises often involve adding periods to sentences where they are missing, or selecting the correct sentence from a multiple-choice list. More challenging worksheets might present paragraphs lacking punctuation, requiring students to add periods appropriately.

Understanding that a period indicates a pause and a complete thought is key. Worksheets reinforce this concept, building a solid foundation for more complex sentence structures and writing skills.

Question Marks (?) ⎻ Asking Questions

Question marks clearly denote interrogative sentences – those that pose a question. PDF worksheets dedicated to question marks help students identify sentences designed to elicit information. Initial exercises often involve differentiating between statements and questions, focusing on sentence structure and intent.

Worksheets commonly present sentences where students must insert the missing question mark, or choose the correctly punctuated option. Advanced exercises might include rewriting statements as questions, requiring both punctuation and word order adjustments.

A core understanding is that question marks signal a request for a response. These worksheets reinforce this, strengthening students’ ability to both formulate and recognize questions effectively.

Exclamation Points (!) ⎼ Showing Emphasis

Exclamation points convey strong emotion or emphasis, signaling excitement, surprise, or urgency. PDF worksheets focusing on exclamation points teach students appropriate usage, preventing overuse which can diminish their impact. Initial exercises often involve identifying sentences where an exclamation point is necessary.

Worksheets present scenarios where students choose between periods and exclamation points, considering the emotional tone. More advanced activities might ask students to rewrite sentences, adding exclamation points to convey specific feelings.

Understanding that exclamation points should be reserved for impactful moments is crucial. These worksheets help students discern when to use this punctuation mark effectively, enhancing their expressive writing skills.

Types of Capitalization Worksheets

Capitalization worksheets come in diverse formats to address specific skills. Sentence capitalization practice focuses on correctly capitalizing the first word and proper nouns within sentences, building a foundational understanding. Proper noun identification worksheets challenge students to recognize and capitalize names of people, places, and organizations.

These worksheets often present lists of words or sentences with capitalization errors for students to correct. Another type, capitalization of titles worksheets, guides students through capitalizing words in book titles, movie titles, and headings, following established rules.

Printable PDF formats allow for easy distribution and practice, reinforcing these essential grammar concepts. Some worksheets include capitalization rules at the top of the page as a helpful reference.

Sentence Capitalization Practice

Sentence capitalization practice worksheets are a cornerstone of early grammar instruction. These PDF resources typically present students with a series of sentences, some correctly capitalized and others containing errors. The primary task involves identifying and correcting the capitalization of the first word in each sentence.

More advanced worksheets introduce the challenge of capitalizing proper nouns within sentences, requiring students to differentiate between common and proper nouns. Variations include rewriting entire paragraphs, focusing on consistent capitalization throughout.

These exercises reinforce the fundamental rule that every sentence begins with a capital letter, establishing a clear visual cue for readers. They build confidence and accuracy in written communication.

Proper Noun Identification Worksheets

Proper noun identification worksheets, available as PDF downloads, focus on distinguishing specific names from general nouns. Students are presented with lists of nouns or sentences and tasked with identifying those that require capitalization – people (Amelia), places (Paris), organizations (United Nations), and brands (Google).

These worksheets often include exercises where students rewrite sentences, correctly capitalizing all proper nouns. Some variations ask students to categorize nouns as either common or proper, solidifying their understanding of the distinction.

Mastering proper noun capitalization is crucial for clear and accurate writing. These resources help students recognize the unique identifiers that demand capitalization, improving their overall grammatical proficiency.

Capitalization of Titles Worksheets

Capitalization of titles worksheets, often in PDF format, present a unique challenge, requiring students to apply specific rules to book titles, movie titles, song titles, and more. These resources typically guide students through the correct capitalization of the first word, last word, and all principal words within a title.

Worksheets may include exercises where students rewrite titles, correcting capitalization errors, or identify correctly capitalized titles from a list. Some focus on differentiating between major and minor words, teaching students which words should be capitalized (nouns, pronouns, verbs, adjectives) and which shouldn’t (articles, prepositions, conjunctions).

These worksheets are vital for developing accurate title formatting skills, essential for academic writing and professional communication.

Types of Punctuation Worksheets

Punctuation worksheets, commonly available as PDF downloads, cover a broad spectrum of skills. Sentence ending punctuation practice focuses on correctly using periods, question marks, and exclamation points to convey different tones and sentence types. These exercises often involve completing sentences or choosing the appropriate punctuation mark.

Comma usage worksheets (often starting with basic rules) introduce students to the complexities of comma placement – in lists, with coordinating conjunctions, and to separate introductory phrases. More advanced worksheets explore comma splices and fused sentences.

Quotation mark worksheets teach proper usage for direct quotes, dialogue, and titles. These resources help students master the nuances of single and double quotation marks, and their placement relative to punctuation.

Sentence Ending Punctuation Practice

Sentence ending punctuation practice worksheets are foundational for mastering basic grammar. These PDF resources typically present students with incomplete sentences, requiring them to select the correct ending punctuation – a period (.), question mark (?), or exclamation point (!).

Exercises often include declarative statements needing periods, interrogative sentences demanding question marks, and exclamatory sentences requiring exclamation points to show emphasis. Variations involve identifying incorrectly punctuated sentences and correcting them.

Worksheets may also present scenarios where students must determine the appropriate tone and, consequently, the correct punctuation. This reinforces understanding beyond rote memorization, building a practical skill for clear communication.

Comma Usage Worksheets (Basic)

Basic comma usage worksheets, available as PDF downloads, introduce students to the fundamental rules of comma application. These resources typically focus on simple sentence structures, guiding learners to correctly separate items in a list. Exercises often involve adding commas to sentences containing three or more elements.

Worksheets also cover using commas to separate introductory phrases or clauses from the main clause. Another common focus is joining independent clauses with coordinating conjunctions (and, but, or, nor, for, so, yet) preceded by a comma.

These introductory exercises build a solid foundation for understanding more complex comma rules later on, promoting clarity and precision in writing.

Quotation Mark Worksheets

Quotation mark worksheets, often in PDF format, concentrate on the correct punctuation surrounding direct speech and quoted material. These resources typically present sentences where students must insert quotation marks to enclose dialogue, ensuring proper placement before and after spoken words.

Exercises also emphasize capitalizing the first word of a quoted sentence and using commas or periods correctly within or after the closing quotation mark. Worksheets may include scenarios requiring students to identify errors in quotation mark usage.

Advanced exercises might involve nested quotations – quotations within quotations – challenging students to apply the rules with greater accuracy and reinforcing their understanding of attribution.

Finding and Accessing PDF Worksheets

PDF worksheets for capitalization and punctuation are readily available through various online educational resource platforms. A simple web search using keywords like “capitalization worksheets PDF” or “punctuation practice PDF” yields numerous results, including websites dedicated to printable educational materials.

Teachers Pay Teachers is a popular marketplace offering both free and paid options created by educators. Websites like K5 Learning, Education.com, and Super Teacher Worksheets also provide extensive collections. Many school districts offer access to digital resources, potentially including downloadable PDFs.

Always preview the worksheets to ensure they align with your curriculum and student needs before downloading or distributing them.

Free vs. Paid Worksheets

Capitalization and punctuation worksheets come in both free and paid varieties, each offering distinct advantages. Free worksheets, abundant online, provide accessible practice, ideal for supplementing lessons or offering extra support. However, they may lack variety or detailed answer keys.

Paid worksheets, often found on platforms like Teachers Pay Teachers, generally offer higher quality, more comprehensive content, and detailed answer keys. They frequently include differentiated options to cater to diverse learning needs. These resources are created by educators, ensuring alignment with curriculum standards.

The choice depends on budget and specific requirements. Free resources are excellent for basic practice, while paid options provide a more robust and tailored learning experience.

Utilizing Worksheets for Different Grade Levels

Capitalization and punctuation worksheets must be tailored to specific grade levels for optimal learning. Elementary school worksheets focus on foundational skills – sentence capitalization, ending punctuation, and basic proper noun identification, using simple language and engaging visuals.

Middle school worksheets introduce more complex concepts like comma usage, quotation marks, and capitalization of titles. Activities become more challenging, requiring students to apply rules in varied contexts.

High school review worksheets serve as reinforcement, addressing common errors and preparing students for standardized tests. These often include editing exercises and advanced punctuation rules. Adapting the complexity ensures students are appropriately challenged and build confidence.

Elementary School Worksheets

Elementary school capitalization and punctuation worksheets prioritize building a strong foundation. These resources typically focus on two core skills: capitalizing the first word of a sentence and correctly using periods, question marks, and exclamation points. Worksheets often feature simple sentences and colorful illustrations to maintain engagement.

Proper noun identification is also introduced, starting with names of people and places. Activities might involve circling proper nouns or rewriting sentences with correct capitalization. The emphasis is on recognizing these unique identifiers.

Worksheets at this level are designed to be straightforward and reinforce basic rules, fostering confidence in young writers. They lay the groundwork for more complex grammar concepts later on.

Middle School Worksheets

Middle school capitalization and punctuation worksheets build upon elementary skills, introducing more nuanced rules; Students practice capitalizing titles (books, movies, songs), days of the week, and months. Worksheets delve into proper noun usage, including organizations, brands, and historical events.

Punctuation practice expands to include commas in simple lists and introductory phrases. Activities often involve editing paragraphs to correct capitalization and punctuation errors. More complex sentence structures are used to challenge students.

These worksheets encourage critical thinking and application of grammar rules in context. They prepare students for the writing demands of higher grades, fostering accuracy and clarity in their written communication.

High School Review Worksheets

High school review worksheets for capitalization and punctuation focus on refining skills and addressing common errors. These resources often include complex sentences and passages requiring meticulous attention to detail. Students practice advanced comma rules, including those for coordinating conjunctions, nonrestrictive clauses, and interjections.

Worksheets emphasize correct usage of semicolons, colons, and dashes. They also cover proper capitalization in various contexts, such as titles, quotations, and abbreviations. A significant portion involves identifying and correcting errors in professional writing samples.

These materials serve as excellent preparation for standardized tests and college-level writing assignments, ensuring students possess a strong command of grammar and mechanics.

Assessing Student Progress with Worksheets

Worksheets provide a tangible method for assessing student understanding of capitalization and punctuation. Teachers can quickly identify areas where students struggle, such as consistent capitalization of proper nouns or correct punctuation at sentence endings.

Analyzing completed worksheets reveals patterns of errors, informing targeted instruction. Scoring rubrics can be employed to standardize evaluation and provide clear feedback. Tracking student performance over time demonstrates growth and identifies the need for remediation.

Furthermore, worksheets can be used as formative assessments, guiding instructional adjustments in real-time. Observing common mistakes allows educators to address misconceptions and reinforce key concepts effectively, ultimately improving student writing skills.

Digital Worksheet Options & Tracking (If Available)

Digital worksheets offer enhanced tracking capabilities compared to traditional PDF formats. Many online platforms allow for automatic scoring, providing immediate feedback to students and teachers. This eliminates manual grading and streamlines the assessment process.

Some platforms enable teachers to monitor student progress in real-time, identifying areas of difficulty and offering personalized support. Data analytics can reveal class-wide trends, informing instructional adjustments. The ability to break down results by class period, with 150 students across 6 periods, is a significant advantage.

Students can often print, save, or email their scores as PDF files, facilitating communication with parents and documentation of learning. Online activities can also provide detailed reports on completion rates and individual student performance.

Printing and Distributing PDF Worksheets

PDF worksheets offer a convenient and cost-effective solution for printing and distribution. Their universal compatibility ensures accessibility across various devices and operating systems. Teachers can easily download and print multiple copies for classroom use, homework assignments, or individualized practice.

Distribution can be achieved through traditional methods like handing out physical copies or utilizing school learning management systems. Uploading PDFs to platforms allows students to access materials remotely, fostering flexibility and supporting blended learning environments.

Considerations include paper consumption and printing costs. Utilizing double-sided printing can minimize waste. PrintNPractice offers readily available, printable resources. Ensuring clear printing quality is crucial for readability and student engagement.

speer reloading manual pdf free download

Speer Reloading Manual PDF: A Comprehensive Guide

Speer reloading manuals, including the 12th Edition (1995) and Number 11 (1987), are sought after as PDF downloads, offering crucial reloading data for optimal performance.

Understanding the Demand for Free Downloads

Demand for Speer reloading manual PDFs stems from their comprehensive reloading data, essential for accurate and safe ammunition creation. Reloading offers cost savings compared to purchasing factory-loaded ammunition, attracting budget-conscious shooters and hunters.

These manuals, like the 12th Edition and Number 6, contain vital information on powder charges, bullet seating depths, and other critical parameters. The desire for free downloads arises from the manuals’ historical value and the expense of acquiring physical copies, especially older editions.

Access to this data empowers handloaders to tailor ammunition to their specific firearms and shooting needs, enhancing precision and performance. The internet provides a convenient avenue for seeking these resources.

Legality and Safety Concerns of Free Manuals

Downloading Speer reloading manuals as free PDFs raises legal and safety issues. Copyright infringement is a concern, as distributing copyrighted material without permission is illegal. More critically, unofficial sources may offer outdated or corrupted data, leading to dangerous reloading practices.

Using incorrect reloading data can result in overpressure situations, potentially damaging firearms and causing severe injury. Always verify data from multiple, reputable sources.

Reliance on unverified PDFs bypasses the rigorous testing and quality control inherent in official publications. Prioritize safety by obtaining manuals from authorized vendors or subscribing to legitimate reloading resources.

Available Speer Reloading Manuals (PDF Format)

Several Speer reloading manuals are available online, though finding legitimate PDF versions can be challenging. Speer Reloading Manual Number 6 (1964) and the 12th Edition (1995) are frequently sought. Speer Reloading Manual Number 11 (1987) also appears in online archives.

The Internet Archive hosts some older editions, but verifying their completeness and accuracy is crucial. Vendor websites may offer manuals for purchase as PDFs, ensuring updated and reliable reloading data. Be cautious of unofficial download sites, as they may contain compromised files.

Always cross-reference data with other trusted sources before reloading.

Historical Speer Reloading Manuals

Speer released numerous manuals over the years, with editions like Number 6 (1964), the 11th (1987), and the 12th (1995) becoming collector’s items.

Speer Reloading Manual Number 6 (1964)

Speer Manual for Reloading Ammunition – Number 6, published in 1964, represents a foundational resource for early modern reloaders. This manual, now a historical document, contains reloading data specific to the ammunition and firearms prevalent during that era. Finding a PDF version allows access to these vintage load recipes, offering insights into ballistic performance of older bullet designs.

While modern powders and bullets have evolved, this manual provides a glimpse into the past, showcasing the development of reloading techniques. It’s a valuable resource for enthusiasts interested in historical accuracy or replicating original loads. However, users must exercise extreme caution and verify data with current resources before attempting to recreate any loads.

Speer Reloading Manual ─ 12th Edition (1995)

The Speer Reloading Manual – 12th Edition (1995) is a highly sought-after resource for reloaders, offering comprehensive data for a wide range of calibers and bullet types. A PDF version of this manual provides convenient access to detailed load recipes, covering various powders and components available during that period. It represents a significant step in reloading technology compared to earlier editions.

This edition includes valuable information on bullet construction, internal ballistics, and external ballistics. While newer manuals incorporate more recent advancements, the 12th Edition remains a reliable source for established loads. Always cross-reference with current data and prioritize safety when utilizing older reloading information.

Speer Reloading Manual Number 11 (1987)

Speer Reloading Manual Number 11, published in 1987 by Omark Industries, Inc., is a valuable historical document for handloaders. Finding a PDF copy allows access to reloading data relevant to components commonly available during that era. This manual provides detailed load information for numerous calibers, offering insights into reloading practices of the late 1980s.

While it’s a useful resource, remember that powder and bullet manufacturing can change over time. Therefore, always verify loads with modern data and exercise extreme caution. It’s crucial to understand that older manuals may not reflect current safety standards or component variations. Prioritize safety and cross-reference information.

Modern Reloading Resources & Alternatives

Modern Reloading by Richard Lee and guides from Hodgdon and Shooters World offer current reloading data and serve as excellent Speer manual alternatives.

Richard Lee’s “Modern Reloading” (2nd Edition)

Richard Lee’s “Modern Reloading” (2nd Edition), available as a downloadable PDF, presents a comprehensive approach to the art of ammunition reloading. This resource is frequently mentioned alongside searches for a Speer reloading manual PDF, offering a robust alternative with detailed guidance.

The book covers essential topics, from selecting components and understanding powder characteristics to advanced techniques for achieving precision accuracy. It’s praised for its clear explanations and practical advice, making it suitable for both beginners and experienced reloaders.

Users seeking a free download often find this manual a valuable substitute, providing extensive reloading data and insights into optimizing cartridge performance. It’s a well-regarded source within the reloading community.

Hodgdon Basic Reloading Manual (2015)

The Hodgdon Basic Reloading Manual (2015), often found as a PDF, serves as a widely respected resource for reloaders, frequently appearing in searches related to a Speer reloading manual PDF free download. It provides extensive reloading data for various calibers and bullet types, including those compatible with Speer components.

This manual is known for its clear, concise presentation of information, making it accessible to both novice and experienced reloaders. It details safe loading practices, powder selection guidelines, and essential techniques for achieving consistent accuracy.

Many users consider it a reliable alternative, offering a broad range of data and valuable insights into the reloading process, complementing or substituting Speer’s published data.

Shooters World Reloading Guide

The Shooters World Reloading Guide, often available as a PDF, emerges as a valuable resource when seeking a Speer reloading manual PDF free download alternative. It contains comprehensive reloading data, covering a diverse selection of calibers and bullet weights, including those suitable for use with Speer projectiles.

This guide distinguishes itself through its focus on modern powders and their performance characteristics. It provides detailed load recipes, ballistic coefficients, and safety guidelines, empowering reloaders to optimize their ammunition for accuracy and consistency.

Users frequently appreciate its clear formatting and practical approach, making it a dependable source for informed reloading decisions.

Speer Bullet Specific Information

Speer offers detailed data for Gold Dot and DeepCurl bullets; accessing a Speer reloading manual PDF ensures correct data for optimal results.

Gold Dot Bullet Construction & Performance

Speer’s Gold Dot bullets are renowned for their exceptional bonding process, creating an incredibly uniform jacket-to-core adhesion. This construction ensures significant weight retention, even during extreme penetration, making them ideal for self-defense and hunting applications.

Accessing a Speer reloading manual PDF is vital for obtaining precise reloading data tailored to Gold Dot bullets. These manuals detail specific powder charges and overall cartridge lengths to achieve optimal velocity and accuracy. The bonded construction minimizes jacket separation, contributing to deep, reliable penetration and consistent terminal performance.

Understanding the nuances of Gold Dot bullet performance requires consulting verified reloading information, readily available within official Speer publications, often found as downloadable PDF files.

DeepCurl Bullet Reloading Data

Speer’s DeepCurl bullets feature a unique cannelure design, promoting consistent seating and reducing the risk of bullet creep during chambering and firing. Obtaining accurate reloading data specifically for DeepCurl bullets is paramount for safe and effective handloading.

A Speer reloading manual PDF provides essential load data, including powder recommendations, starting and maximum charges, and suggested overall cartridge lengths. It’s crucial to utilize only DeepCurl-specific data or Gold Dot data from Speer for the same part number.

Downloading a PDF version of a Speer manual ensures access to this critical information, enabling reloaders to achieve optimal accuracy and performance with DeepCurl projectiles.

Speer Bullet Catalog (2011)

The Speer Bullet Catalog from 2011 serves as a valuable resource for reloaders, detailing various bullet offerings and their intended applications. While not a reloading manual itself, it complements Speer reloading manuals PDF downloads by providing comprehensive bullet specifications.

This catalog showcases Speer’s commitment to quality, highlighting features like Gold Dot construction and precise manufacturing tolerances. Accessing this information aids in selecting the appropriate bullet for specific reloading projects.

Finding a PDF copy of the 2011 catalog, alongside a Speer reloading manual PDF, empowers reloaders with a complete understanding of Speer products and their potential.

Reloading Data Considerations

Reloading data requires verification, caliber-specific information, and careful powder selection with appropriate ballistic coefficients, found within Speer reloading manual PDF resources.

Importance of Using Verified Data

Utilizing verified reloading data is paramount for safety and accuracy. Speer reloading manuals, often sought in PDF format, provide meticulously tested load data, ensuring optimal performance and preventing dangerous overpressures.

Relying on unverified sources, like internet forums without rigorous testing, can lead to catastrophic failures. Speer’s published data, derived from extensive testing with specific components, offers a reliable foundation for handloading.

Always cross-reference data, but prioritize information directly from Speer or reputable sources like Hodgdon. Remember, even slight variations in components can impact pressures, making verified data absolutely essential for responsible reloading practices.

Caliber-Specific Reloading Data

Speer reloading manuals, available as PDF downloads, meticulously detail caliber-specific reloading data. This data isn’t universal; loads optimized for one cartridge won’t necessarily work—or be safe—in another.

Each Speer manual organizes loads by caliber, listing specific powder charges, bullet types (like Gold Dot or DeepCurl), and expected velocities. This granular approach accounts for variations in case capacity, bullet weight, and powder burn rates.

When seeking Speer reloading data, always confirm it corresponds to your exact caliber and bullet combination. Ignoring this specificity can lead to inaccurate loads or, more critically, dangerous pressure build-ups. Prioritize data tailored to your setup.

Powder Selection and Ballistic Coefficients

Speer reloading manuals, often found as PDF downloads, emphasize the importance of careful powder selection. Different powders burn at varying rates, impacting velocity, pressure, and accuracy. The manual provides guidance on choosing powders suitable for specific calibers and bullet weights.

Furthermore, Speer data incorporates ballistic coefficients (BC) for their bullets. BC measures a bullet’s ability to overcome air resistance, crucial for long-range shooting. Higher BC values indicate less drag and retained velocity.

Understanding both powder characteristics and ballistic coefficients allows reloaders to fine-tune their loads for optimal performance, maximizing accuracy and minimizing trajectory drop. Always consult Speer’s published data.

Safety Precautions in Reloading

Speer reloading manuals, even in PDF format, consistently stress adherence to safety guidelines, including understanding maximum loads and component compatibility for safe reloading.

Understanding Maximum Loads

Speer reloading manuals, readily available as PDF downloads, meticulously detail maximum load data for each cartridge and powder combination. Crucially, these maximums represent starting points for careful testing, not absolute limits.

Exceeding these published maximums can lead to dangerous pressure build-ups, potentially causing firearm damage or serious injury. Speer emphasizes the importance of reducing loads initially and carefully observing for pressure signs.

PDF versions of manuals like the 12th Edition (1995) provide detailed charts and warnings regarding pressure indicators. Always prioritize safety and never surpass recommended maximums without thorough testing and understanding.

The Role of Reloading Guides

Speer reloading guides, often sought in PDF format, serve as foundational resources for handloaders, providing comprehensive reloading data and safety instructions. These manuals, like the 12th Edition (1995) and Number 11 (1987), detail powder charges, bullet seating depths, and overall cartridge lengths.

They aren’t simply data repositories; they educate reloaders on the principles of internal ballistics and safe practices. Speer emphasizes careful adherence to published data and the importance of understanding pressure signs.

PDF access allows for convenient reference during the reloading process, ensuring accuracy and promoting responsible handloading habits.

Component Compatibility

Speer reloading manuals, available as PDF downloads, stress the critical importance of component compatibility. Utilizing reloading data specifically tailored to your chosen bullets, powder, and primers is paramount for safety and accuracy.

Mixing components not listed in Speer’s published loads can lead to unpredictable pressure curves and potentially dangerous situations. The manuals detail which powders harmonize with specific Speer bullets, like Gold Dot or DeepCurl, ensuring optimal performance.

PDF access facilitates quick cross-referencing of components, reinforcing the need for strict adherence to tested and approved combinations.

Finding Reliable Reloading Information Online

Speer reloading manuals, including PDF versions, can be found on the Internet Archive and vendor websites, but always cross-reference data sources.

Internet Archive Resources

The Internet Archive serves as a valuable repository for historical Speer Reloading Manuals in PDF format, offering access to editions like Speer Reloading Manual Number 11 (1987). This digital library provides a means to obtain older manuals that may no longer be readily available through commercial channels.

Users can locate these resources through targeted searches, utilizing keywords such as “Speer Reloading Manual PDF” or specific edition numbers. However, it’s crucial to remember that older data should be approached with caution and verified against more current sources. Always prioritize safety and accuracy when utilizing reloading information found online, and consider it supplemental to modern, verified guides.

Vendor Websites and Forums

Many ammunition component vendors and online shooting forums often host or link to Speer Reloading Manuals, sometimes in PDF format. These platforms can be valuable resources for locating specific reloading data and engaging with experienced reloaders. However, exercise caution when downloading files from unofficial sources to avoid potential malware or inaccurate information.

Dedicated shooting forums frequently feature discussions about Speer bullets and reloading techniques, where users may share links to available manuals or data. Always cross-reference any PDF found on forums with official Speer publications or reputable reloading guides to ensure accuracy and safety.

Cross-Referencing Data Sources

When utilizing Speer Reloading Manuals, especially PDF versions obtained online, meticulous cross-referencing is paramount for safe and accurate reloading. Compare data with other established reloading guides like Hodgdon or Lyman to identify any discrepancies. Verify powder charges and bullet seating depths across multiple sources.

Always prioritize official Speer publications when available. If relying on forum posts or unofficial PDFs, confirm the data aligns with known ballistics and established reloading principles. Discard any information that appears inconsistent or lacks a clear origin. Safety relies on confirming reloading data.

Advanced Reloading Techniques

Speer manuals support precision reloading for Matchking bullets, utilizing ballistic charts for optimal accuracy, and refining loads for superior performance.

Handloading for Matchking Bullets

Handloading specifically for Matchking bullets demands meticulous attention to detail, and Speer reloading manuals provide essential data for achieving peak accuracy. These manuals outline specific powder charges, seating depths, and crimp settings tailored to Matchking bullet weights and calibers.

Utilizing data from sources like the Sierra Reloading Manual (referenced within Speer guides) is crucial. Speer’s resources emphasize the importance of consistent component selection and precise measurements. PDF versions of older manuals, like those from 1987 and 1995, offer valuable starting points, but always cross-reference with modern data and prioritize safety.

Successful Matchking loads require careful consideration of ballistic coefficients and potential variations in powder lot numbers.

Understanding Ballistic Charts

Ballistic charts, often referenced within Speer reloading manuals, are vital tools for predicting bullet trajectory and performance. These charts detail bullet drop, velocity loss, and wind drift at various distances, enabling precise shot placement. Speer’s guides emphasize the importance of understanding ballistic coefficients (BC) – a key factor in chart accuracy.

Accessing Speer reloading manual PDF versions allows for convenient study of these charts. Modern reloading resources, like Richard Lee’s “Modern Reloading,” complement Speer’s data, offering expanded ballistic information.

Interpreting charts requires understanding factors like air density and atmospheric conditions. Accurate data, combined with practical application, maximizes long-range shooting precision.

Precision Reloading for Accuracy

Achieving exceptional accuracy demands meticulous attention to detail during the reloading process. Speer reloading manuals, available as PDF downloads, provide crucial data for consistent handloads. Factors like precise powder measurement, consistent bullet seating depth, and proper case preparation are paramount.

Speer’s guides, alongside resources like Sierra’s reloading manuals, emphasize the importance of minimizing variables. Utilizing high-quality components and carefully cross-referencing data sources further enhances precision.

PDF access allows for easy reference to Speer’s load data, specifically for Gold Dot and DeepCurl bullets, ensuring optimal performance and tight groupings at the range.

Alternatives to Speer Manuals

Lyman and Nosler reloading guides offer comprehensive data, while Sierra manuals provide valuable alternatives when seeking PDF resources for handloading information.

Lyman Shotshell Reloading Guides

Lyman offers a long-standing reputation within the reloading community, providing extensive guides that cover a broad spectrum of cartridges and reloading data. While primarily known for shotshell reloading, Lyman’s manuals also include valuable information applicable to centerfire rifle and pistol cartridges.

These guides often feature detailed load tables, component information, and safety guidelines, making them a reliable alternative to Speer reloading manuals. Finding Lyman guides in PDF format can be challenging, but resources like the Internet Archive sometimes host digitized versions.

Lyman’s commitment to accuracy and thoroughness makes their publications a trusted resource for reloaders of all experience levels, offering a robust alternative when seeking specific reloading data.

Nosler Reloading Guides

Nosler is highly regarded for its premium bullets and comprehensive reloading guides, offering detailed data for achieving exceptional accuracy and performance. Nosler’s manuals, like the 7th edition, are frequently sought after by serious reloaders, providing specific load recipes tailored to Nosler bullet designs.

While a direct substitute for a Speer reloading manual PDF, Nosler guides present a valuable alternative, particularly when utilizing Nosler projectiles. Locating Nosler manuals as free PDF downloads can be difficult, but online forums and archive sites may offer access.

Nosler’s dedication to quality and precision makes their reloading information a trusted resource for those seeking top-tier performance from their handloads.

Sierra Reloading Manuals

Sierra Reloading Manuals are a cornerstone for precision reloaders, renowned for their extensive data and focus on match-grade bullets. The 50th Anniversary edition, mentioned in relation to Matchking bullets, is particularly valued. While searching for a Speer reloading manual PDF, considering Sierra provides a robust alternative.

Sierra offers detailed reloading information, including ballistic coefficients and load recipes, crucial for achieving optimal accuracy. Finding free PDF versions can be challenging, but diligent searching of internet archives and enthusiast forums may yield results.

Sierra’s commitment to accuracy and comprehensive data makes their manuals a highly respected resource within the reloading community.