Category Archives: Manuals

heat surge electric fireplace manual

Heat Surge Electric Fireplace Manual: Overview & Safety

Heat transfer coefficients dictate rates, while heat versus thermal energy are often synonymous. Safety is paramount; ensure proper voltage and avoid overheating.

Model Identification & Included Components

Identifying your Heat Surge Electric Fireplace model is crucial for accessing specific support and replacement parts. Locate the model number on the unit’s rear panel or original packaging; Typically, included components encompass the fireplace unit itself, a detailed instruction manual – covering operation and safety – and a remote control for convenient functionality.

Additional items may include mounting brackets (if wall-mountable), decorative elements, and potentially a toolkit for minor assembly. Verify all listed components are present upon unboxing; contact customer support immediately if anything is missing or damaged.

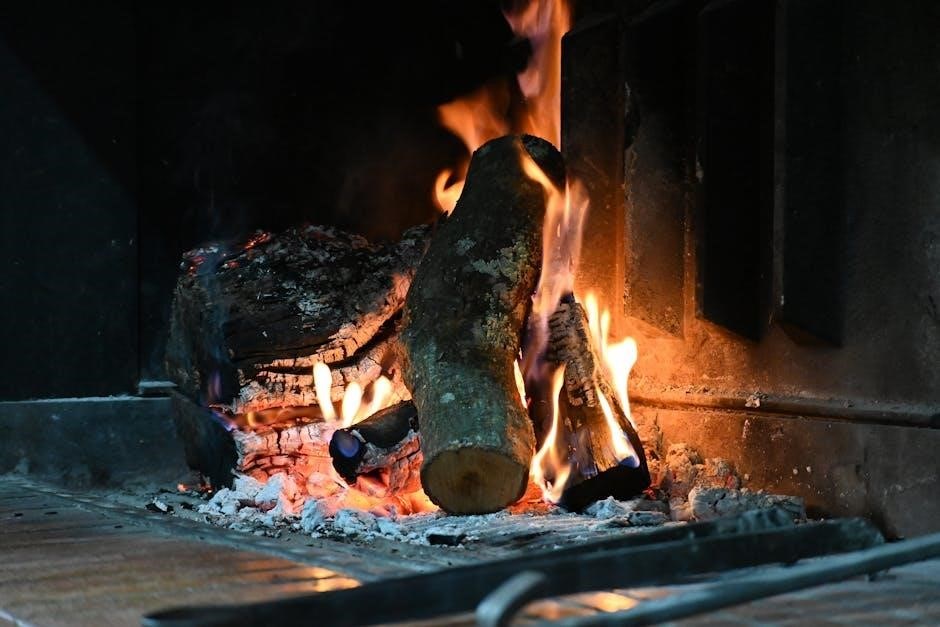
Initial Setup & Placement Guidelines

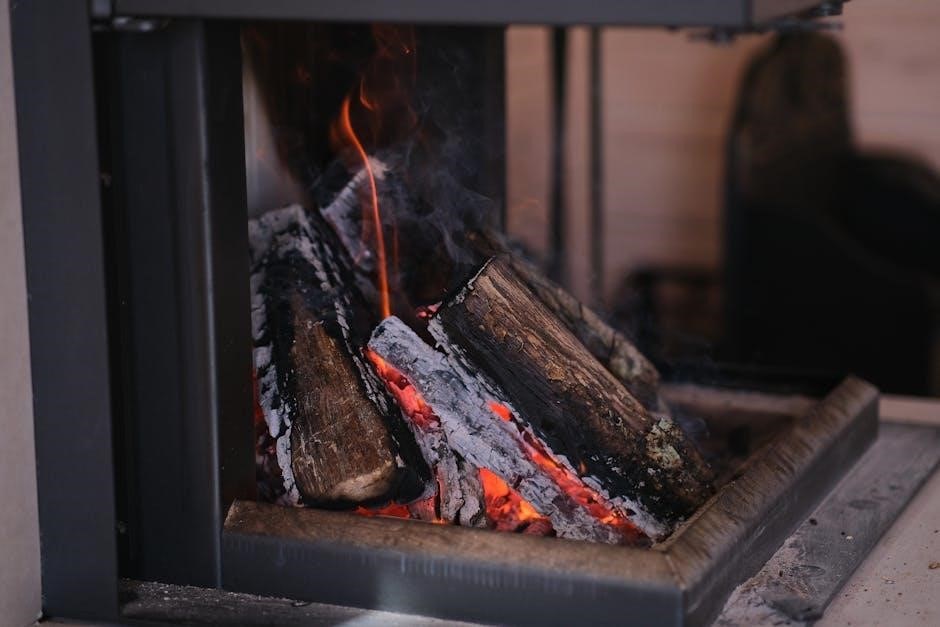
Before operating your Heat Surge Electric Fireplace, carefully select a suitable location. Ensure ample clearance – at least 18 inches – from walls and furniture to prevent overheating and allow for proper ventilation. Place the unit on a level, stable surface. Avoid damp or excessively dusty environments.

Inspect the power cord for damage before plugging it into a grounded outlet matching the voltage requirements. Do not use extension cords or adapters. Confirm the surrounding area is free from flammable materials. Proper placement maximizes both safety and heating efficiency.

Operation & Control Features

Control features include powering on/off, flame effect customization, and adjustable heat settings with thermostat control for optimal comfort and efficient energy usage.

Powering On/Off & Basic Operation

To initiate operation, connect the Heat Surge fireplace to a grounded outlet matching its voltage requirements. The power switch, typically located on the unit’s rear or side, must be in the ‘on’ position. Basic operation involves utilizing the control panel or remote to activate the heating element and flame effects independently. Ensure the unit is placed on a level surface and clear of obstructions.

Initial startup may involve a brief warm-up period before full heat output is achieved. Always supervise the fireplace during operation and never leave it unattended. For complete shutdown, turn off both the main power switch and any activated settings on the control panel.

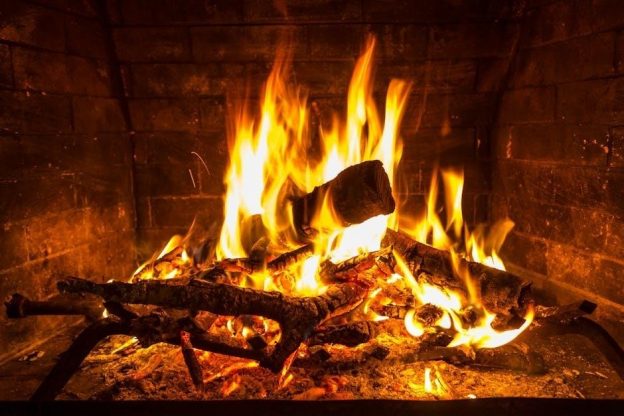
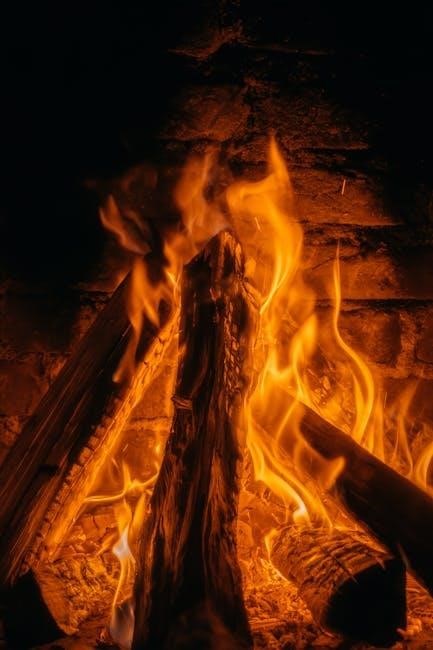
Flame Effect Customization

The Heat Surge fireplace offers adjustable flame effects for personalized ambiance. Utilize the control panel or remote to cycle through various flame colors, brightness levels, and speed settings. Some models feature realistic log ember glow simulations, enhancing the visual experience. Experiment with different combinations to achieve your desired aesthetic.

Advanced features, if equipped, may include programmable flame patterns or integration with smart home systems for voice control. Regularly check the manual for specific customization options available on your model. Remember to adjust settings gradually for optimal viewing.

Heat Settings & Thermostat Control

Your Heat Surge fireplace provides adjustable heat settings, typically ranging from low to high, controlled via the unit’s panel or remote. The integrated thermostat allows for precise temperature maintenance. Set your desired room temperature, and the fireplace will automatically cycle on and off to maintain it.

Understanding heat transfer is key; the unit’s heating capacity covers a specific area. Ensure proper placement for efficient warmth distribution. Regularly check the thermostat’s accuracy for optimal performance and energy savings.

Maintenance & Care

Regular cleaning and filter maintenance are crucial for optimal performance. Address issues promptly; overheating protection ensures safety, but prevention is best!

Cleaning Procedures & Recommended Frequency

To maintain your Heat Surge fireplace, unplug it and allow it to cool completely. Dust the exterior with a soft, dry cloth weekly to prevent buildup. For stubborn marks, a slightly damp cloth (water only!) can be used, ensuring no moisture enters vents. Inspect the viewing area regularly; clean with a glass cleaner specifically designed for fireplaces. The filter, if applicable, should be checked monthly and cleaned or replaced as needed – a clogged filter reduces efficiency and can cause overheating. A thorough cleaning, including the interior components (if accessible), is recommended at least twice yearly, or before storing for extended periods.

Filter Maintenance & Replacement

Regular filter maintenance is crucial for optimal performance and safety. Check the filter monthly for dust and debris accumulation. A clogged filter restricts airflow, potentially leading to overheating and reduced heating efficiency. Cleaning involves gently vacuuming the filter; avoid washing with water unless specifically instructed in your model’s documentation. Replacement filters should be purchased from authorized retailers, ensuring compatibility. The frequency of replacement depends on usage, but generally, every 3-6 months is recommended. Always unplug the fireplace before accessing or replacing the filter.

Troubleshooting Common Issues

If the fireplace fails to power on, check the power cord and outlet. Ensure the thermostat is set to a desired temperature and isn’t in ‘off’ mode. For flame effect issues, verify the settings are adjusted correctly via the control panel or remote. If overheating occurs, immediately unplug the unit and allow it to cool before inspecting the filter. A lack of heat may indicate a faulty heating element; contact customer support. Always refer to the safety precautions before attempting any repairs.

Technical Specifications

Voltage and wattage requirements are crucial for operation. Heating capacity covers a specific area, while dimensions and weight impact placement and portability.

Voltage & Wattage Requirements

Ensure your household electrical system meets the fireplace’s specifications. Typically, these units operate on standard 120V AC power. Wattage varies by model, ranging from 1400W to 1500W, influencing heating output. Always verify the label on the unit itself for precise requirements.

Using an incorrect voltage can cause malfunction or pose a safety hazard. Avoid extension cords if possible; if necessary, use a heavy-duty cord rated for the fireplace’s wattage. Improper electrical connections void the warranty and increase fire risk. Prioritize electrical safety!

Heating Capacity & Coverage Area

Heat output, measured in BTUs (British Thermal Units), determines the fireplace’s heating capacity. Most Heat Surge models provide between 4,600 and 5,100 BTUs. This typically heats a room up to 400-500 square feet effectively. Coverage depends on insulation, ceiling height, and external temperature.

Consider the room size when selecting a model. Larger spaces may require supplemental heating. The heat transfer coefficient impacts efficiency. Proper placement maximizes warmth distribution. Remember, these are estimates; individual experiences may vary based on environmental factors.

Dimensions & Weight

Heat Surge fireplaces vary in size depending on the model. Typical dimensions range from 23 to 30 inches in width, 11 to 18 inches in depth, and 25 to 32 inches in height. Weight generally falls between 25 and 35 pounds, making them relatively portable.

These dimensions allow for flexible placement within a room. Always verify available space before purchasing. The weight facilitates easy movement for cleaning or relocation. Consider these factors alongside heating capacity when choosing the optimal unit for your needs. Accurate measurements are crucial for a proper fit.

Safety Precautions

Electrical safety is key; avoid water exposure. Heat surge units have overheat protection, but never leave unattended. Ensure proper ventilation always.

General Safety Warnings

Always inspect the fireplace for damage before each use, and never operate if damaged. Keep flammable materials a safe distance away – at least three feet – from the front, sides, and rear of the unit. Do not use outdoors, in bathrooms, or any area with high humidity.

Never cover the fireplace while in operation. Ensure the power cord is not pinched or damaged, and always plug directly into a wall outlet; avoid extension cords. Supervise children and pets closely when the fireplace is on, as surfaces can become hot. Disconnect the unit when not in use for extended periods.

Electrical Safety Guidelines

Verify your household voltage matches the fireplace’s requirements – check the specifications plate. Never operate with a damaged cord or plug; replace immediately. Avoid using this appliance on the same circuit as other high-wattage devices to prevent overloading.

Ensure the outlet is properly grounded. Do not use in damp environments or near water sources. Always unplug the fireplace before cleaning or performing any maintenance. If the fireplace experiences an electrical malfunction, discontinue use and consult a qualified electrician.

Overheat Protection System

Your Heat Surge fireplace is equipped with a crucial overheat protection system designed for safety. This system continuously monitors the internal temperature, automatically shutting off the heating element if it exceeds safe limits. Regular filter maintenance is vital to prevent airflow obstruction, a common cause of overheating.

If the unit shuts off unexpectedly, unplug it and allow it to cool completely before restarting. Do not attempt to bypass or disable this safety feature. Consistent operation within specified guidelines ensures the system functions optimally, providing peace of mind.

Remote Control Functionality

The remote enables convenient operation, including power, flame effects, and heat settings. Ensure proper pairing and replace batteries promptly for optimal performance and control.

Remote Control Pairing

To initially pair the remote, ensure the fireplace is powered off, then on. Within three minutes, press and hold the power button on the remote for five seconds. A successful pairing is indicated by a confirmation signal – often a beep or a change in the fireplace display.

If pairing fails, repeat the process, ensuring no other infrared devices interfere. Replace the remote’s batteries with fresh ones, as low battery power can hinder the pairing process. Consult the troubleshooting section if issues persist, as interference or a faulty remote may be the cause.

Button Functions & Descriptions

The power button initiates on/off functionality. Flame control adjusts the visual flame intensity, offering various ambiance settings. Heat settings allow selection between low, high, and off modes, managed by the integrated thermostat. The timer button sets automatic shut-off durations for convenience and energy conservation.

Additional buttons may control color options or programmable features. Refer to the detailed diagram within this manual for precise button locations and their corresponding actions. Incorrect button presses won’t damage the unit, but may not yield the desired result.

Battery Replacement

To replace the remote control batteries, locate the battery compartment, typically on the remote’s underside. Gently slide open the compartment cover. Remove the old batteries, noting the correct polarity (+ and -) as indicated inside the compartment. Insert new batteries of the same type – usually AAA or AA – ensuring proper alignment.

Securely close the battery compartment cover. Dispose of used batteries responsibly, following local regulations. Weak batteries can cause erratic remote function or reduced range. Regularly check battery levels for optimal performance.

Understanding Heat Transfer Concepts

Heat transfer coefficients define rates, while latent heat impacts phase changes. Distinguishing between heat and thermal energy is crucial for fireplace operation.

Heat vs. Thermal Energy

Heat and thermal energy are frequently used interchangeably, leading to confusion, but they represent distinct concepts. Heat is energy in transit, a process of transfer due to a temperature difference, while thermal energy is the total kinetic energy of the particles within a system.

The Heat Surge fireplace utilizes electrical energy converted into thermal energy, manifesting as warmth. Understanding this distinction is vital for comprehending how the unit functions and efficiently manages temperature. Essentially, the fireplace doesn’t contain heat; it generates thermal energy and transfers it to the surrounding environment.

Heat Transfer Coefficient Explained

The heat transfer coefficient (h) in the Heat Surge fireplace dictates the rate of heat exchange between the heating element and the surrounding air. It measures the thermal resistance, expressed in W/(m²K). A higher coefficient signifies more efficient heat transfer.

Factors influencing ‘h’ include fan speed and the fireplace’s surface area. Understanding this coefficient is crucial for optimizing heating performance and ensuring the unit effectively warms the desired space. Proper airflow maximizes ‘h’, contributing to faster and more consistent heating.

Latent Heat & Phase Changes

While the Heat Surge fireplace primarily deals with sensible heat – altering air temperature – understanding latent heat is beneficial. Latent heat involves phase changes, like melting (solid to liquid) or vaporization (liquid to gas), without temperature alteration.

Though not directly applicable to the fireplace’s operation, recognizing this concept clarifies overall heat dynamics. The fireplace doesn’t induce phase changes in materials, focusing instead on directly warming the air through resistive heating. This distinction highlights the unit’s efficient heat delivery method.

Advanced Features (If Applicable)

Heat Surge fireplaces may offer programmable timers for automated operation. Smart home integration and adjustable flame colors enhance user experience and customization options.

Programmable Timer Settings

Heat Surge fireplaces with timer functionality allow for convenient, automated operation. Users can set specific start and end times for the fireplace to turn on and off, optimizing comfort and energy efficiency. Programming is typically done through the remote control or directly on the unit’s control panel.

These settings can be customized daily or weekly, providing flexibility to match your schedule. Utilizing the timer feature reduces energy consumption by preventing the fireplace from running unnecessarily. Refer to the remote control section for detailed instructions on programming and adjusting timer settings. Always double-check the programmed times to ensure accurate operation.

Smart Home Integration

Certain Heat Surge models offer smart home integration capabilities, allowing control via voice assistants like Amazon Alexa or Google Assistant. This connectivity enables hands-free operation – simply use voice commands to adjust temperature, flame effects, or power the fireplace on/off.

Setup typically involves connecting the fireplace to your home’s Wi-Fi network and linking it to your preferred smart home platform through a dedicated mobile app. Check your specific model’s documentation for detailed integration instructions and compatibility information. Enjoy enhanced convenience and control with seamless smart home functionality.
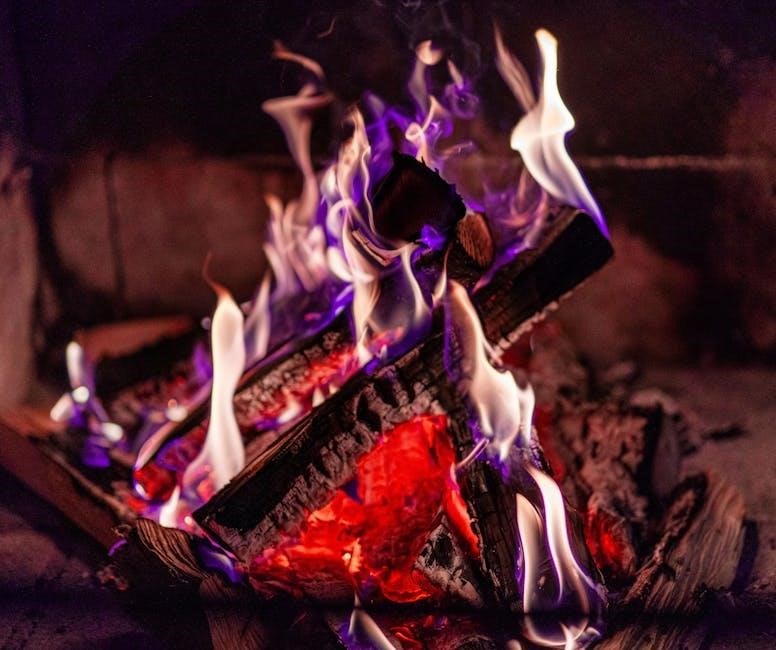
Flame Color Options

Many Heat Surge fireplaces feature customizable flame color options, enhancing the ambiance to suit your preferences. Typically, you can cycle through a spectrum of colors – including traditional orange/red, cool blue, vibrant purple, and even a multi-color rotating mode – using the remote control or the unit’s control panel.

Experiment with different color combinations to create the perfect atmosphere for any occasion. Some models offer adjustable brightness levels for the flames, providing further control over the visual effect. Refer to your model’s specific instructions for detailed color customization options.

Warranty Information

Heat Surge fireplaces come with a limited warranty covering defects in materials and workmanship. Claim procedures and contact details are outlined in the manual.

Warranty Coverage Details

Heat Surge electric fireplaces are warranted against manufacturing defects for a specified period from the original purchase date. This coverage encompasses issues with the heating element, flame effect mechanism, and factory-installed components. The warranty does not cover damage resulting from misuse, accidents, modifications, or normal wear and tear.

Specifically excluded are damages caused by improper voltage, inadequate ventilation, or failure to follow the outlined safety precautions. Maintaining proof of purchase is crucial for any warranty claim. The warranty is non-transferable and applies only to the original purchaser.

Claim Procedures

To initiate a warranty claim for your Heat Surge fireplace, contact our customer support team with your original proof of purchase and a detailed description of the defect. Include photos or videos illustrating the issue, if possible. A representative will assess the claim and, if approved, provide instructions for returning the unit or authorized repair.

Shipping costs for warranty returns are the responsibility of the customer, unless otherwise specified. We reserve the right to repair or replace the defective component or entire unit at our discretion.

Contact Information

For any inquiries regarding your Heat Surge electric fireplace, or to report issues, please reach out to our dedicated customer support team. You can contact us via email at support@heatsurge.com, or by phone at 1-800-HEAT-SURGE (1-800-432-8787) during business hours, Monday through Friday, 9 AM to 5 PM EST.

Please have your model number and purchase date readily available when contacting us to expedite the assistance process. Visit our website at www.heatsurge.com for FAQs and additional resources.

Frequently Asked Questions (FAQ)

Common queries address overheating, remote pairing, and flame effect customization. Troubleshooting tips and support resources are available online and via customer service.

Common User Queries & Answers

Q: My fireplace isn’t heating. Ensure it’s plugged in and the thermostat is set correctly. Check the overheat protection hasn’t activated. Q: Remote isn’t working? Replace the batteries and re-pair it with the unit. Q: Flame effect seems unrealistic? Customize settings for desired ambiance. Q: What’s the difference between heat and thermal energy? They are often used interchangeably. Q: Is HEAT a good shell type? HEAT shells excel at penetrating armor, but struggle against spaced armor. Contact support if issues persist; warranty details are available online.

Troubleshooting Tips

Problem: No power. Solution: Verify the power cord is securely connected and the outlet is functioning. Problem: Weak heat output. Solution: Confirm thermostat settings and ensure the filter is clean. Problem: Remote unresponsive. Solution: Replace batteries and attempt re-pairing. Remember, latent heat values must be positive. If overheating occurs, the protection system activates. Check heat transfer coefficients if issues persist. Contact customer support for advanced assistance and warranty claims.

Support Resources

For immediate assistance, consult the comprehensive FAQ section addressing common user queries. Detailed troubleshooting guides are available online, covering issues from power failures to remote control problems. Our dedicated customer support team can be reached via phone or email – contact details are listed in the warranty information. Remember proper heat transfer is key. Explore online forums for peer-to-peer support and shared solutions. Ensure correct voltage and wattage requirements are met for optimal performance.

auto drive fm transmitter manual

Auto Drive FM Transmitter Manual: A Comprehensive Guide

This manual provides detailed instructions for the Auto Drive FM Transmitter, a versatile device for wireless audio streaming in your vehicle․ It covers setup, Bluetooth pairing, operation, troubleshooting, and safety guidelines․ Explore features like hands-free calling and music playback from USB drives or TF cards․

Auto Drive FM transmitters represent a convenient solution for wirelessly connecting your smartphone or other Bluetooth-enabled devices to your car’s stereo system․ These devices bypass the limitations of older car stereos lacking Bluetooth connectivity or auxiliary input jacks, enabling seamless audio streaming of music, podcasts, and audiobooks․ The core function involves modulating audio signals onto an FM radio frequency, transmitting them over a short range to your car radio․

Modern Auto Drive FM transmitters, like the IMDEN Bluetooth FM Transmitter and models from VicTsing (B01DDPUQTS-VD), often incorporate additional features such as hands-free calling via a built-in microphone, USB charging ports for your devices (often 3․1A/1A dual USB), and support for playing audio directly from USB drives or TF cards․ Some models, like the FM02, even include a display for easy operation and frequency selection․ They are designed for ease of use, typically pairing with your phone via Bluetooth using a standard password like ‘0000’․

These transmitters offer a cost-effective upgrade to your in-car entertainment system, transforming your driving experience with enhanced audio capabilities․

Understanding FM Transmitter Technology

FM (Frequency Modulation) transmission relies on encoding audio signals onto carrier waves within the 87․5 – 108․0 MHz frequency band, the same band used by commercial FM radio stations․ An FM transmitter takes an audio input – from Bluetooth, USB, or TF card – and varies the frequency of the carrier wave in proportion to the audio signal’s amplitude․ This modulation process allows the audio to be transmitted wirelessly․

Auto Drive FM transmitters operate at low power, typically under 100mW, to comply with regulatory limits and minimize interference․ Selecting an unused or weakly used FM frequency is crucial for clear audio reception․ Interference can occur from nearby radio stations, other electronic devices, or even environmental factors․ Modern transmitters often include features like automatic frequency searching to identify optimal channels․

The quality of the transmission depends on several factors, including the transmitter’s circuitry, antenna design, and the receiver’s sensitivity․ Bluetooth connectivity utilizes a separate wireless protocol to initially transfer audio to the transmitter, before FM modulation occurs․ Understanding these principles helps optimize performance and troubleshoot potential issues․

Key Features of the Auto Drive FM Transmitter

The Auto Drive FM Transmitter boasts a comprehensive suite of features designed for seamless in-car entertainment and communication․ Core functionality includes wireless audio streaming via Bluetooth, enabling hands-free calling and music playback from smartphones or other Bluetooth-enabled devices․ It also supports direct audio playback from USB flash drives and Micro SD (TF) cards, offering versatile media source options․

A built-in microphone facilitates clear hands-free calling, while integrated controls allow for easy volume adjustment and track/frequency selection․ The transmitter features a digital display screen for showing the current FM frequency and Bluetooth connection status․ Dual USB charging ports (3․1A + 1A) provide convenient power for smartphones and other devices․

Furthermore, many models include noise cancellation technology for improved call quality and a wide FM frequency range for optimal signal clarity; Some versions offer fast charging capabilities (Type-C) and customizable LED backlighting for enhanced visibility․ Its compact design ensures it fits discreetly within most vehicle interiors․

Package Contents and Initial Setup

Upon opening the package, verify that all components are present․ You should find the Auto Drive FM Transmitter unit itself, a user manual detailing operation and troubleshooting, and potentially an auxiliary audio cable for non-Bluetooth devices․ Some packages may include an additional air vent mount or a DC car charger adapter․

Initial setup is straightforward․ Begin by inserting a Micro SD card (TF card) if you intend to use this feature, ensuring it’s properly seated in the designated slot․ Next, securely attach the transmitter to your vehicle’s air vent using the provided clip or mount․ Ensure it’s firmly in place to prevent movement during driving․

Plug the transmitter into your car’s 12V/24V cigarette lighter socket․ The unit should power on automatically․ If not, check the connection and ensure your vehicle’s ignition is switched on․ Familiarize yourself with the button layout and the digital display before proceeding to the next step – powering on and basic operation․

Powering On and Basic Operation

To power on the Auto Drive FM Transmitter, simply ensure it’s plugged into your vehicle’s 12V/24V cigarette lighter socket and your car’s ignition is turned on․ The unit will typically activate automatically, displaying the current FM frequency on the digital screen․ If it doesn’t, a dedicated power button may be present – consult the quick start guide․

Basic operation revolves around the multifunction button or a combination of buttons․ These control power, volume adjustment, and frequency selection․ Short presses often cycle through preset FM frequencies, while a long press might initiate Bluetooth pairing․ The display will indicate the currently selected frequency․

Volume control is usually managed via dedicated ‘+’ and ‘-’ buttons, or by rotating a dial․ Start with a low volume level and gradually increase it to a comfortable listening level․ Before connecting your smartphone, familiarize yourself with the frequency selection process, as you’ll need to choose an unused frequency to avoid interference․

Bluetooth Pairing Instructions

To pair your smartphone with the Auto Drive FM Transmitter, first ensure the transmitter is in Bluetooth pairing mode․ This is often activated by a long press of the multifunction button, indicated by a flashing blue light․ On your smartphone, navigate to the Bluetooth settings menu and initiate a device search․

The transmitter should appear in the list of available devices, typically identified as “TF-FMT22BT” or a similar designation․ Select this device to begin the pairing process․ You may be prompted to enter a pairing code; the default code is commonly “0000”․ Enter this code if requested, and confirm the pairing on both devices․

Once successfully paired, the transmitter’s indicator light will usually turn solid blue, signifying a stable connection․ Subsequent connections will typically occur automatically when both devices are within range and Bluetooth is enabled․ If pairing fails, try restarting both the transmitter and your smartphone, and repeat the process․

Connecting to Your Smartphone

After successful Bluetooth pairing, the Auto Drive FM Transmitter seamlessly integrates with your smartphone for audio streaming and hands-free calling․ Ensure your smartphone’s volume is at a reasonable level before initiating playback․ Once connected, open your preferred music application – Spotify, Apple Music, or others – and begin playing your desired audio․

The transmitter will automatically switch to audio playback mode, transmitting the sound wirelessly to your car’s stereo system via FM radio; For optimal sound quality, refer to the ‘Frequency Selection and Tuning’ section to find a clear FM frequency with minimal interference․ The transmitter also supports hands-free calling; incoming calls will automatically pause music playback․

Answer calls by pressing the multifunction button on the transmitter․ The built-in microphone allows for clear voice transmission․ To end a call, press the button again․ Some models feature voice assistant integration, allowing you to activate Siri or Google Assistant with a simple press․ Enjoy a safer and more convenient driving experience!

Frequency Selection and Tuning

Achieving optimal audio quality relies on selecting a clear FM frequency․ Begin by turning on your car’s radio and scanning for unoccupied frequencies – those with minimal static or broadcasting signals․ The Auto Drive FM Transmitter allows you to manually select a frequency using the dedicated buttons or dial․

Once you’ve chosen a frequency on the transmitter, tune your car’s radio to exactly the same frequency․ Slight adjustments may be necessary on either the transmitter or your car radio to achieve the clearest possible signal․ Static interference is common, especially in urban areas; experiment with different frequencies until you find one with minimal disruption․

Avoid frequencies used by local radio stations to prevent interference․ Some transmitters offer a ‘scan’ function that automatically searches for the best available frequency․ Remember to re-tune if you travel to a different location, as available frequencies vary geographically․ A stable, clear frequency ensures an enjoyable listening experience․

Adjusting Volume Levels

Controlling the audio output involves adjusting volume levels on both the Auto Drive FM Transmitter and your car’s radio․ Start by setting the volume on the transmitter to a moderate level – approximately 70-80% of its maximum․ This provides a good baseline for fine-tuning․

Next, use your car’s radio volume control to increase the sound to your desired listening level․ Avoid maxing out the volume on either device, as this can introduce distortion and reduce audio quality․ If you experience static or crackling, slightly reduce the transmitter’s volume first․

The ideal volume balance depends on your car’s audio system and your personal preference․ Experiment with different combinations until you achieve a clear, balanced sound․ Some transmitters feature a volume limiter to prevent sudden loud noises․ Ensure the volume is set at a safe level to avoid distracting you while driving and to protect your hearing․

Hands-Free Calling Functionality

The Auto Drive FM Transmitter offers a convenient hands-free calling feature, enhancing safety while driving․ Once paired with your smartphone via Bluetooth, incoming calls are automatically routed through the car’s speakers․ Answering or ending a call is typically done using a multi-function button on the transmitter itself․

To answer an incoming call, simply press the designated button․ To end a call, press the same button again․ Some models support voice commands, allowing you to answer or reject calls without physically interacting with the device․ The built-in microphone ensures clear voice transmission during calls․

For optimal call quality, position the transmitter’s microphone towards you․ Ensure there’s minimal background noise in the vehicle․ The transmitter automatically switches back to music playback once the call ends․ Prioritize safe driving; use this feature responsibly and adhere to local traffic laws regarding phone use while operating a vehicle․

Music Playback from USB Drives

The Auto Drive FM Transmitter allows seamless music playback directly from USB flash drives․ Simply plug your USB drive, containing MP3 or other compatible audio files, into the designated USB port on the transmitter․ The device will automatically detect the drive and begin playing the music files․

Navigation through your music library is typically controlled using buttons on the transmitter․ These buttons usually include functions for play/pause, skip forward, skip backward, and volume adjustment․ Some models may also offer folder selection, allowing you to browse through different directories on your USB drive․

Ensure your USB drive is formatted with a compatible file system, such as FAT32 or exFAT․ The transmitter supports a wide range of USB drive capacities․ For optimal performance, use a USB 2․0 or 3․0 drive․ Enjoy your favorite tunes on the road with this convenient feature, providing a diverse audio experience during your commute․

Using the TF Card Slot for Music

The Auto Drive FM Transmitter features a built-in TF (MicroSD) card slot, offering another convenient way to enjoy your music collection while driving․ Insert a TF card loaded with MP3 or compatible audio files into the designated slot on the transmitter․ The device will automatically recognize the card and initiate music playback․

Similar to USB drive playback, navigation through your music library on the TF card is managed using the transmitter’s control buttons․ These buttons typically include play/pause, next track, previous track, and volume controls․ Some models may also support folder browsing, enabling you to select specific directories on the TF card․

Ensure your TF card is formatted with a compatible file system, commonly FAT32․ The transmitter supports various TF card capacities, allowing you to store a substantial music library․ This feature provides a flexible and portable solution for accessing your favorite songs on the go, enhancing your driving experience․

Troubleshooting Common Issues: No Sound

Experiencing no sound from your Auto Drive FM Transmitter? Several factors could be at play․ First, verify the volume level on both the transmitter and your car radio․ Ensure neither is muted or set to a minimum volume․ Confirm the transmitter is correctly tuned to a clear FM frequency not occupied by a broadcasting station – try scanning for an open frequency․

Next, check the audio source․ If using Bluetooth, ensure your smartphone is properly paired and the volume is audible on the phone itself․ For USB or TF card playback, confirm the files are compatible (MP3 is generally supported) and the card is securely inserted․ A faulty cable connection can also cause issues; try a different USB cable․

Finally, power cycle the transmitter and your car radio․ If the problem persists, test the transmitter in another vehicle to isolate whether the issue lies with the transmitter or your car’s audio system․ If still no sound, consult the warranty information for support․

Troubleshooting Common Issues: Bluetooth Connection Problems

Encountering difficulties pairing or maintaining a Bluetooth connection with your Auto Drive FM Transmitter? Begin by ensuring Bluetooth is enabled on your smartphone and that the transmitter is in pairing mode – typically indicated by a flashing light․ If prompted, enter the pairing code “0000” as a default, as some devices require it․

If pairing fails, try deleting the transmitter from your phone’s Bluetooth list and re-initiating the pairing process․ Ensure no other Bluetooth devices are actively attempting to connect, as interference can occur․ Move your smartphone closer to the transmitter during pairing for a stronger signal․

For intermittent disconnections, check for obstructions between your phone and the transmitter․ Update your phone’s operating system, as Bluetooth compatibility improves with updates; A full reset of both the transmitter and your phone’s Bluetooth settings can sometimes resolve persistent connection issues․ If problems continue, refer to the FAQ section or warranty details․

Troubleshooting Common Issues: Static Interference

Experiencing static or crackling sounds during audio playback with your Auto Drive FM Transmitter? This is often due to radio frequency (RF) interference․ Begin by changing the transmission frequency on the transmitter․ Scan for a clear frequency with minimal static – a quieter channel will provide better audio quality․

External sources can also cause interference․ Move away from tall buildings, power lines, or other electronic devices that may emit RF signals․ Ensure the transmitter’s antenna is fully extended and positioned for optimal reception․ Check the car’s electrical system; a faulty component could be generating noise․

Try a different USB cable or TF card, as a damaged cable or card can introduce static․ Lowering the volume on both the transmitter and your smartphone can sometimes reduce the perceived static․ If the issue persists, consult the FAQ section or contact customer support for further assistance․ A reset of the device may also help․

Safety Precautions and Warnings

To ensure safe operation of your Auto Drive FM Transmitter, please adhere to the following precautions․ Do not use the device while driving if it distracts you from the road․ Prioritize safe driving practices at all times․ Avoid exposing the transmitter to extreme temperatures, humidity, or direct sunlight for prolonged periods․

Do not disassemble or attempt to repair the device yourself․ This will void the warranty and may pose a safety hazard․ Keep the transmitter away from liquids and flammable materials․ Use only the provided USB cable or a certified equivalent for power․ Ensure proper ventilation around the device during operation to prevent overheating․

Avoid dropping or subjecting the transmitter to strong impacts․ Disconnect the device from the car’s power outlet when not in use for extended periods․ Follow all local traffic laws and regulations regarding the use of electronic devices while driving․ Improper use may result in damage to the device or your vehicle․

Cleaning and Maintenance

To maintain the optimal performance and longevity of your Auto Drive FM Transmitter, regular cleaning and proper maintenance are essential․ Always disconnect the device from the power source before cleaning․ Use a soft, dry cloth to gently wipe the exterior surfaces, removing dust and fingerprints․ Avoid using abrasive cleaners, solvents, or excessive moisture, as these can damage the finish․

For stubborn dirt or grime, lightly dampen the cloth with a mild detergent solution and wipe carefully․ Ensure the cloth is only slightly damp, not wet․ Clean the USB and TF card slots periodically with a soft brush or compressed air to remove any accumulated debris; Inspect the cable for any signs of damage, such as fraying or exposed wires․

If the cable is damaged, replace it immediately with a certified equivalent․ Store the transmitter in a cool, dry place when not in use, away from direct sunlight and extreme temperatures․ Regular maintenance will help ensure your Auto Drive FM Transmitter continues to provide reliable performance for years to come․

Technical Specifications

The Auto Drive FM Transmitter boasts a range of technical features designed for optimal performance․ It operates within a frequency range of 87․5 – 108․0 MHz, covering standard FM radio bands․ Bluetooth connectivity is provided via version 5․0, ensuring a stable and efficient wireless connection with smartphones and other devices․ The transmitter supports MP3 and WAV audio formats for versatile music playback․

Power input is 12-24V DC, compatible with most vehicle cigarette lighter sockets․ It features dual USB charging ports, delivering 3․1A and 1A output for simultaneous device charging․ The built-in microphone enables hands-free calling functionality․ The device supports TF cards up to 32GB for extended music storage․

Dimensions are approximately 4․5 x 1․8 x 0․8 inches, making it compact and unobtrusive․ Signal-to-noise ratio exceeds 60dB, providing clear audio transmission․ Operating temperature ranges from -10°C to 60°C․ The transmitter includes an integrated noise reduction system for enhanced sound quality and minimizes static interference․

Frequently Asked Questions (FAQ)

Q: Why is there no sound? Ensure the FM transmitter is powered on and correctly paired with your smartphone via Bluetooth․ Verify the selected FM frequency doesn’t overlap with a local radio station․ Adjust the volume on both the transmitter and your phone․

Q: How do I fix Bluetooth connection issues? Delete previous pairings on your phone and the transmitter․ Restart both devices and attempt pairing again, using the default password “0000” if prompted․ Ensure Bluetooth is enabled on your phone․

Q: What causes static interference? Try changing the FM frequency to a clearer channel․ Move the transmitter away from other electronic devices․ Check the cigarette lighter socket for a secure connection․ A faulty or low-quality audio source can also cause static․

Q: Can I charge two devices simultaneously? Yes, the transmitter features dual USB ports – one for fast charging (3․1A) and another for standard charging (1A)․

Q: What file formats are supported? The transmitter supports MP3 and WAV audio files stored on USB drives or TF cards․

Warranty Information

Our Auto Drive FM Transmitter is covered by a one-year limited warranty, commencing from the original date of purchase; This warranty protects against defects in materials and workmanship under normal use․ We will, at our discretion, repair or replace the defective unit, free of charge․

This warranty does not cover damage resulting from misuse, accidents, unauthorized modifications, or natural disasters․ It also excludes normal wear and tear․ Proof of purchase (receipt or invoice) is required for all warranty claims․

To initiate a warranty claim, please contact our customer support team with a detailed description of the issue and your proof of purchase․ We will provide instructions for returning the unit for inspection․ Shipping costs for warranty returns are the responsibility of the customer․

This warranty is non-transferable and applies only to the original purchaser․ Any implied warranties, including merchantability and fitness for a particular purpose, are limited to the duration of this express warranty․ We are not liable for any incidental or consequential damages․

Disposal and Recycling

Responsible disposal of your Auto Drive FM Transmitter is crucial for environmental protection․ This device contains electronic components that should not be discarded with household waste․ Improper disposal can harm the environment and human health․

Please do not throw this product into regular trash bins․ Instead, utilize designated electronic waste (e-waste) collection points in your community․ Many retailers offer e-waste recycling programs, providing a convenient and environmentally sound disposal option․

You can also check with your local municipal waste management authorities for information on e-waste recycling facilities in your area․ Proper recycling ensures that valuable materials are recovered and reused, reducing the need for new resource extraction․

By participating in e-waste recycling, you contribute to a sustainable future and help minimize the environmental impact of electronic devices․ Adhering to local regulations regarding electronic waste disposal is essential for responsible ownership․ Let’s work together to protect our planet․

overhead door model 2026 manual

Overhead Door Model 2026 Manual: A Comprehensive Guide

This guide provides detailed instructions for the Overhead Door Model 2026‚ covering installation‚ operation‚ maintenance‚ and troubleshooting‚ alongside downloadable PDF resources.

The Overhead Door Model 2026 represents a significant advancement in garage door opener technology‚ offering reliability and convenience for residential use. This manual serves as a comprehensive resource for owners and installers‚ detailing every aspect of the unit.

Understanding the features and proper operation of your Model 2026 ensures optimal performance and longevity. Access to the official PDF manual‚ available through the Overhead Door website‚ is crucial for detailed diagrams and safety information. This opener is designed for easy integration with smart home systems‚ enhancing accessibility and control.

Proper installation and regular maintenance‚ as outlined within‚ are key to a safe and efficient operating experience.

Understanding the 2026 Model Features

The Overhead Door Model 2026 boasts several key features designed for enhanced performance and user experience. These include a robust motor for reliable operation‚ safety sensors to prevent door closure on obstructions‚ and adjustable travel limits for customized operation.

Compatibility with remote controls and potential smart home integration adds convenience. The Model 2026 is engineered for quiet operation‚ minimizing disturbance. Detailed specifications‚ including dimensions and power requirements‚ are available in the official PDF manual.

Understanding these features‚ as detailed in the owner’s manual‚ allows for optimal utilization and troubleshooting.

Safety Precautions & Warnings

Always disconnect power before maintenance. Never operate a damaged door. Review the manual for crucial safety guidelines and specific warnings for Model 2026.

General Safety Guidelines

Prior to any installation‚ operation‚ or maintenance of your Overhead Door Model 2026‚ carefully read and fully understand this manual. Always disconnect the power supply to the opener before performing any adjustments or repairs to prevent accidental operation and potential injury. Never attempt to modify or alter the system beyond the instructions provided.

Keep children and bystanders away from the door during operation and maintenance. Regularly inspect the door‚ springs‚ cables‚ and all hardware for signs of wear or damage. Do not operate the door if any parts are damaged or malfunctioning. Ensure the safety reversal system is functioning correctly through monthly testing. Professional assistance is recommended for complex repairs.

Specific Warnings for Model 2026

The Overhead Door Model 2026 incorporates advanced features; however‚ specific cautions apply. Ensure proper grounding to prevent electrical hazards. Avoid operating the door in high winds or severe weather conditions. Be mindful of the door’s travel path‚ ensuring it’s clear of obstructions.

Do not attempt to lubricate the system with flammable substances. Regularly check the force settings to prevent excessive pressure. If the door exhibits erratic behavior‚ immediately discontinue use and contact qualified service personnel. Never bypass or disable safety features. Improper installation or modification can void the warranty and create dangerous conditions.

Installation Guide

Proper installation requires careful preparation‚ secure mounting‚ precise door connection‚ and accurate travel limit adjustments for optimal Model 2026 performance.

Preparing for Installation

Before beginning the installation of your Overhead Door Model 2026‚ ensure you have thoroughly reviewed all safety precautions outlined in this manual. Verify all necessary components are present and undamaged. Clear the garage area of any obstructions‚ providing ample workspace;

Confirm the garage door itself is balanced and moves smoothly by hand; any binding or resistance must be addressed before proceeding. Gather the required tools‚ including a ladder‚ wrenches‚ screwdrivers‚ and a level. Disconnect the power supply to the garage door circuit to prevent electrical shock during installation.

Finally‚ familiarize yourself with the wiring diagram and mounting hardware included with the opener unit.

Mounting the Opener Unit

Securely mount the Overhead Door Model 2026 opener unit to the header bracket‚ ensuring it’s centered above the garage door opening. Utilize the provided mounting hardware and follow the specified torque settings to guarantee a stable installation. Double-check the header bracket’s attachment to the building structure for adequate support.

Employ a level to confirm the opener unit is perfectly horizontal‚ preventing operational issues. Carefully align the rail sections‚ connecting them according to the diagram‚ and ensure smooth gliding.

Avoid over-tightening bolts‚ which could damage the unit or mounting surface. Verify all connections are firm before proceeding to the next step.

Connecting the Opener to the Door

Attach the door bracket to the top section of the garage door‚ centering it for balanced operation. Connect the opener arm to both the door bracket and the trolley on the rail‚ ensuring a secure linkage. Verify proper alignment to prevent binding or uneven movement during operation.

Carefully adjust the arm’s length to achieve the correct arc and travel range. Confirm the door moves freely through its entire cycle without obstruction.

Double-check all connections are tight and secure before proceeding to adjust travel limits and safety features.

Adjusting Travel Limits

Precisely set the up and down travel limits using the adjustment screws located on the opener unit. Begin by loosening the screws and incrementally adjusting until the door reaches the desired fully open and fully closed positions.

Ensure the door doesn’t overtravel‚ potentially damaging the door or opener. Test the limits multiple times‚ making small adjustments as needed for smooth and accurate operation.

Properly adjusted limits are crucial for safety and prevent strain on the opener’s motor and components.

Operating the Overhead Door 2026

This section details how to use the wall control‚ remote‚ and potential smart home features for seamless operation of your Overhead Door 2026.

Using the Wall Control

The wall control serves as the primary method for operating your Overhead Door Model 2026. Typically‚ a single button press initiates the door’s movement – either opening or closing. Pay attention to the indicator lights; they provide crucial feedback on the door’s status and any potential safety concerns.

For safety‚ the wall control often features a “stop” function‚ immediately halting the door’s operation. Ensure the area is clear of obstructions before activating the control. If the door reverses unexpectedly‚ consult the troubleshooting section of this manual. Regularly test the wall control to confirm its functionality and responsiveness. Proper use ensures safe and reliable operation.

Remote Control Operation

Your Overhead Door Model 2026 remote control offers convenient‚ keyless operation. To activate‚ simply press the appropriately programmed button. Ensure a clear line of sight between the remote and the opener unit for optimal performance. If the remote’s range seems diminished‚ check the battery – replacement is straightforward.

Programming additional remotes or re-pairing existing ones is detailed in the installation section of this manual. Keep remotes secure to prevent unauthorized access. If a remote is lost‚ immediately reprogram the remaining remotes to disable the lost one. Regular testing ensures reliable operation.

Smart Home Integration (if applicable)

The Overhead Door Model 2026 may be compatible with select smart home systems‚ offering control via smartphone or voice assistants. Check the product packaging or Overhead Door’s website for confirmed integrations‚ such as compatibility with popular platforms.

Setup typically involves connecting the opener to your home’s Wi-Fi network and linking it within your smart home app. Detailed instructions are available on the Overhead Door website. Enjoy features like remote monitoring‚ scheduled operation‚ and integration with other smart devices for enhanced convenience and security.

Maintenance & Troubleshooting

Regular upkeep ensures optimal performance of your Overhead Door Model 2026; this section details maintenance schedules and solutions for common operational issues.

Regular Maintenance Schedule

To maintain peak performance and longevity of your Overhead Door Model 2026‚ adhere to a consistent maintenance schedule. Monthly‚ visually inspect the door for any signs of damage‚ including bent tracks or loose hardware. Lubricate moving parts – rollers‚ hinges‚ and springs – with a silicone-based lubricant.

Quarterly‚ check the balance of the door by disconnecting the opener and manually lifting it halfway; it should remain stationary. Annually‚ a professional inspection is recommended to assess the entire system‚ including safety features and the opener unit. Addressing minor issues promptly prevents costly repairs and ensures continued safe operation.

Troubleshooting Common Issues

Encountering problems with your Overhead Door Model 2026? Here’s a quick guide. If the door doesn’t open/close‚ check the power supply‚ safety sensors‚ and ensure the lock isn’t engaged. For a non-responsive remote‚ replace the battery and reprogram it to the opener.

Unusual noises often indicate lubrication needs or loose components; inspect and address accordingly. Verify travel limits are correctly adjusted. If issues persist‚ consult the full manual or contact Overhead Door support for professional assistance. Always prioritize safety and disconnect power before attempting repairs.

Door Doesn’t Open/Close

If your Overhead Door Model 2026 fails to open or close‚ begin by verifying the power supply to the opener unit. Check for tripped breakers or blown fuses. Next‚ inspect the safety sensors aligned near the door’s path; ensure they are clean and properly aligned. Confirm the door isn’t locked‚ and the wall control’s release cord isn’t engaged.

Also‚ examine the travel limits – incorrect settings can prevent full operation. If these steps don’t resolve the issue‚ consult the complete manual for detailed diagnostics or contact a qualified technician.

Remote Control Not Working

When your Overhead Door Model 2026’s remote control malfunctions‚ first replace the batteries with fresh ones. Then‚ ensure there’s no obstruction hindering the signal between the remote and the opener unit. Try reprogramming the remote to the opener; refer to the manual for specific instructions on entering programming mode.

If multiple remotes aren’t functioning‚ the receiver within the opener unit might be the issue. Check for any interference from other electronic devices. For persistent problems‚ consult the full manual or contact Overhead Door support for assistance.

Opener Making Unusual Noises

If your Overhead Door Model 2026 opener emits grinding‚ squeaking‚ or clicking sounds‚ immediate investigation is crucial. First‚ inspect the chain or belt for proper tension and lubrication – a dry or loose drive can cause noise. Check the rollers and tracks for obstructions or damage‚ as these contribute to operational sounds.

A humming sound with no movement suggests a potential motor issue. For loud clanging‚ examine the door’s springs. Always disconnect power before inspecting internal components; consult the manual or a professional if unsure.

Lubrication Guide

Regular lubrication is vital for the Overhead Door Model 2026’s smooth operation and longevity. Apply a silicone-based lubricant to the rollers‚ tracks‚ and springs every six months. Avoid using oil-based lubricants‚ as they attract dust and grime. The chain or belt drive requires periodic lubrication – consult the manual for specific product recommendations.

Lubricate the hinges and any moving parts. Ensure the lubricant is evenly distributed. Wipe away any excess to prevent buildup. Proper lubrication minimizes friction‚ reduces noise‚ and extends the lifespan of your garage door system.

Parts & Components

The Model 2026 utilizes a motor unit‚ rail system‚ door brackets‚ a wall control‚ and safety sensors; replacement parts are readily available online and through dealers.

Identifying Key Components

Understanding the core parts of your Overhead Door Model 2026 is crucial for maintenance and repair. The opener unit houses the motor‚ gears‚ and logic board‚ powering the entire system. The rail system guides the door’s movement‚ ensuring smooth operation. Door brackets securely connect the door to the opener.

Essential components include the wall control for manual operation and safety sensors preventing accidental closure. The remote control offers convenient access. Inspect these regularly for wear and tear. Familiarizing yourself with each part simplifies troubleshooting and ensures optimal performance. Refer to diagrams within the full manual for detailed illustrations and part numbers.

Replacement Parts Information

Genuine Overhead Door parts are recommended to maintain the integrity and safety of your Model 2026 opener. Replacements can be sourced through authorized Overhead Door distributors or directly from the Overhead Door website. When ordering‚ have your model number readily available for accurate part selection.

Commonly replaced parts include rollers‚ springs‚ brackets‚ and the logic board. Always prioritize safety; some repairs require professional assistance. The official manual lists part numbers for easy identification. Ensure compatibility before purchasing‚ and follow installation instructions carefully. Using non-genuine parts may void your warranty.

Technical Specifications

The Model 2026 boasts specific dimensions‚ weight‚ and power requirements crucial for installation and compatibility; detailed information is available in the official manual.

Dimensions & Weight

Understanding the physical characteristics of the Overhead Door Model 2026 is vital for proper installation and ensuring compatibility with your garage space. While precise figures vary based on configuration‚ the opener unit generally measures approximately 10.5 inches in height‚ 12 inches in width‚ and 15 inches in depth.

The total weight of the unit‚ including all components‚ typically falls between 30 and 35 pounds. These dimensions and weight are crucial for assessing mounting requirements and ensuring sufficient structural support. Refer to the official manual for detailed specifications pertaining to your specific Model 2026 configuration‚ as variations may exist.

Power Requirements

The Overhead Door Model 2026 operates on a standard 120-volt AC power supply‚ utilizing a 60Hz frequency. It’s essential to have a dedicated 15-amp circuit for optimal performance and to prevent overloading. The opener requires a grounded outlet‚ and a GFCI (Ground Fault Circuit Interrupter) outlet is highly recommended for enhanced safety.

Ensure the power supply meets these specifications before installation. Improper voltage or wiring can damage the unit and void the warranty. Always consult a qualified electrician if you are unsure about your electrical system’s compatibility with the Model 2026’s power needs.

Downloading the Official Manual (PDF)

Access the official Overhead Door Model 2026 manual in PDF format directly from the Overhead Door website for comprehensive guidance and support.

Accessing the Overhead Door Website

To locate the official Model 2026 manual‚ begin by navigating to the Overhead Door corporate website. A quick internet search for “Overhead Door” will direct you to their homepage. From there‚ explore the “Support” or “Resources” section – these areas typically house downloadable manuals and documentation.

Look for a dedicated area for “Owners Manuals” or “Product Manuals.” You may need to filter by product type (garage door openers) and then specifically search for the Model 2026. The website often provides a search bar for quick access to specific documents. Ensure you are downloading the correct PDF version for your specific opener.

Locating the Model 2026 Manual

Once on the Overhead Door website‚ utilize the search function‚ entering “Model 2026 manual” or “Legacy 800 2026 manual” as search terms. The Legacy 800 series is closely related. Browse the search results for a PDF document specifically labeled for the Model 2026 opener.

Alternatively‚ navigate through the product categories‚ selecting “Garage Door Openers” and then filtering by model number. Direct links to manuals‚ like the Legacy 800 manual‚ may also be available on third-party sites‚ but always verify the source’s legitimacy before downloading. Confirm the manual covers the 2026 features.

Warranty Information

The warranty for the Model 2026 covers defects in materials and workmanship‚ with specific durations for parts and labor; claim details are available online.

Warranty Coverage Details

The Overhead Door Model 2026 warranty provides coverage against defects in materials and workmanship under normal use. Typically‚ the opener motor itself is covered for a longer period‚ often lifetime‚ while parts like belts‚ chains‚ and electronic components have a shorter coverage duration‚ usually several years. Labor costs for repair or replacement are generally covered for a limited time‚ typically one year from the installation date.

This warranty does not cover damage resulting from improper installation‚ misuse‚ accidents‚ or unauthorized modifications. Proof of purchase is required to validate any warranty claim. Full warranty terms and conditions are detailed in the official product manual‚ accessible through the Overhead Door website.

How to File a Warranty Claim

To initiate a warranty claim for your Overhead Door Model 2026‚ first gather your proof of purchase‚ including the date and place of installation. Contact Overhead Door customer support via phone or through their online support portal‚ detailing the issue and providing your product’s model number.

A representative will guide you through the claim process‚ potentially requesting photos or videos of the defect. If the issue is covered under warranty‚ Overhead Door will authorize a repair or replacement‚ either through a local authorized dealer or direct shipment of parts. Ensure you retain all documentation related to your claim.

Contacting Overhead Door Support

For assistance‚ reach out to Overhead Door’s customer service team by phone or explore their comprehensive online resources for troubleshooting and support.

Customer Service Phone Number

To directly connect with Overhead Door’s dedicated support team regarding your Model 2026‚ or for any inquiries related to installation‚ operation‚ or troubleshooting‚ please utilize their customer service phone number. While a universally listed number isn’t prominently displayed in the provided snippets‚ reaching out through their official website is recommended to obtain the most current and accurate contact information.

Alternatively‚ referencing your purchase documentation or warranty information may reveal a specific support line. Overhead Door prioritizes customer satisfaction and aims to provide prompt assistance‚ ensuring a seamless experience with their products. Expect knowledgeable representatives ready to address your concerns efficiently.

Online Support Resources

Overhead Door provides extensive online resources to assist Model 2026 owners. The official Overhead Door website (overheaddoor.com) is a central hub for accessing downloadable manuals‚ including PDF versions for the Legacy 800 2026 and related models. These manuals cover installation‚ operation‚ and maintenance procedures.

Furthermore‚ the website likely hosts FAQs‚ troubleshooting guides‚ and potentially video tutorials to address common issues. Exploring these resources can often resolve problems independently. Searching for “Overhead Door support” online will also yield relevant articles and forum discussions from other users‚ offering additional insights and solutions.

owners manual for troy bilt bronco tiller

Welcome! This comprehensive guide unlocks the full potential of your Troy-Bilt Bronco tiller‚ offering detailed instructions and insights for optimal garden preparation.

Refer to the engine operator’s manual for complete details‚ and explore the lifetime limited warranty covering gear-drive transmissions on Troy-Bilt tillers.

This manual serves as your roadmap‚ ensuring confident operation and maintenance‚ while troubleshooting guides assist with common issues encountered during use.

Overview of the Bronco Model

The Troy-Bilt Bronco CRT is a robust rear-tine walk-behind tiller‚ uniquely positioned within the Troy-Bilt lineup. Designed for effective soil preparation‚ it excels at breaking up ground for gardens and landscaping projects.

This model features a gear-drive transmission‚ covered by a lifetime limited warranty‚ ensuring durability and reliable performance. Owners manuals provide detailed instructions for safe operation‚ maintenance‚ and troubleshooting‚ maximizing the tiller’s lifespan and efficiency.

Safety Precautions

Prioritize safety! Always inspect the tiller before each use‚ ensuring all components are securely attached. Never operate a damaged machine and consult an authorized dealer for repairs.

Refer to the engine operator’s manual for comprehensive safety guidelines. Be aware of rotating blades and maintain a safe distance during operation. Understand safety switches and protective guards to prevent accidental injury while tilling.

Understanding Your Tiller

Familiarize yourself! The Troy-Bilt Bronco CRT is a specialized garden tiller designed for effective soil preparation‚ differing from other models in the lineup.

This section details key components and specifications‚ ensuring you grasp the tiller’s functionality and capabilities.

Key Components and Their Functions

Essential parts include the engine‚ providing power for tilling; the gearbox‚ transmitting power to the blades; and the tilling blades themselves‚ breaking up the soil.

Handles control direction and speed‚ while the clutch engages or disengages the tilling action. Safety switches prevent accidental starting‚ and protective guards shield operators.

Understanding each component’s role is crucial for safe and efficient operation‚ ensuring optimal performance in your garden. Refer to diagrams for visual identification.

Tiller Specifications (Engine‚ Dimensions‚ Weight)

Engine details vary by model year‚ but typically feature a Briggs & Stratton or similar gasoline engine. Dimensions are approximately 68 inches long‚ 28 inches wide‚ and 42 inches high.

Weight generally ranges between 180 to 220 pounds‚ depending on attachments. These specifications are crucial for storage‚ transport‚ and assessing suitability for your gardening needs.

Always consult your specific model’s documentation for precise measurements and engine horsepower information.

Assembly and Preparation

Begin by carefully unboxing your Troy-Bilt Bronco tiller and inspecting all components. Attach handles securely‚ then verify proper fluid levels—oil and fuel—before operation.

Unboxing and Initial Inspection

Carefully remove the Troy-Bilt Bronco tiller from its packaging‚ taking inventory of all included parts. Inspect for any shipping damage—report issues immediately to your dealer.

Confirm the presence of handles‚ tilling blades‚ and the engine operator’s manual. Ensure all protective guards and shields are securely attached. A thorough initial inspection prevents potential issues and ensures safe‚ efficient operation. Retain the packaging for potential warranty claims.

Attaching Handles and Components

Securely attach the handles to the tiller chassis‚ ensuring proper alignment and tightening all bolts firmly. Refer to the parts diagram within the owner’s manual for correct placement.

Install any additional components‚ like protective shields‚ following the illustrated steps. Double-check all connections before operation. Proper assembly is crucial for safe and effective tilling‚ preventing vibrations and ensuring optimal control during use.

Fluid Level Checks (Oil‚ Fuel)

Before each use‚ meticulously check the engine oil level using the dipstick‚ adding oil as needed to maintain the recommended level specified in the engine manual.

Verify the fuel tank contains fresh gasoline‚ free from debris. Never operate with low fluid levels. Consistent fluid checks are vital for engine longevity and optimal tiller performance‚ preventing damage and ensuring reliable operation throughout your gardening tasks.

Operating Instructions

Begin with a thorough review of all safety precautions before starting the engine. Adjust tilling depth and speed based on soil conditions for effective garden preparation.

Starting the Engine

Before attempting to start‚ ensure the fuel valve is open and the throttle is set to the appropriate starting position. Engage the safety bail – the tiller will not run without it!

Prime the engine as directed in the separate engine manual‚ then firmly pull the starter rope. If the engine fails to start‚ consult the troubleshooting section or your authorized dealer for assistance.

Never attempt to start a flooded engine‚ and always disconnect the spark plug wire before performing any maintenance.

Adjusting Tilling Depth and Speed

Depth adjustment is achieved via the depth stake located at the rear of the tiller; lowering the stake increases tilling depth. For initial passes‚ a shallower depth is recommended‚ gradually increasing with subsequent passes.

Speed is controlled by the forward/reverse lever on the handle. Start with a slower speed for heavier soils and increase as conditions allow. Always prioritize control and safety.

Adjust settings based on soil type and desired results‚ ensuring consistent tilling for optimal garden preparation.

Tilling Techniques for Different Soil Types

For hard‚ compacted soil‚ make multiple passes at increasing depths. Begin with a shallow pass‚ then gradually lower the depth stake with each subsequent run.

In loose or sandy soil‚ a shallower depth and faster speed are generally sufficient. Avoid over-tilling‚ which can create a powdery texture.

Clay soils benefit from thorough tilling‚ but may require more power and multiple passes to break up clumps effectively.

Maintenance and Service

Regular upkeep is crucial! Inspect blades frequently‚ perform oil changes‚ and maintain the gearbox for peak performance and longevity of your Troy-Bilt Bronco.

Follow the schedule outlined in this manual for optimal results and to uphold warranty validity.

Regular Maintenance Schedule

Prioritize consistent care! After each use‚ inspect for loose fasteners and debris. Every 25 hours‚ check and clean the air filter‚ and verify fluid levels (oil & fuel).

Annually‚ change the engine oil‚ inspect the spark plug‚ and thoroughly grease all moving parts. Blade inspection and sharpening should also occur annually. Adhering to this schedule ensures reliable operation and extends the life of your Troy-Bilt Bronco tiller.

Blade Inspection and Replacement

Safety first! Always disconnect the spark plug before inspecting or replacing blades. Regularly check blades for wear‚ cracks‚ or damage. Sharpen dull blades to maintain optimal tilling performance.

If blades are severely damaged or worn‚ replace them as a set to ensure balanced operation. Consult your parts diagram for correct blade identification and follow proper installation procedures. A damaged blade can cause excessive vibration.

Gearbox Maintenance

Crucially‚ maintain the gearbox for reliable performance. Periodically check the gearbox oil level and condition. If the oil appears dirty or low‚ drain and replace it with the recommended type‚ as specified in your engine manual.

Ensure proper lubrication prevents wear and tear. Listen for unusual noises during operation‚ which could indicate gearbox issues. Contact an authorized dealer for complex repairs or concerns.

Engine Maintenance (Oil Changes‚ Spark Plug)

Regular engine maintenance is vital for longevity. Consult your engine operator’s manual for oil change intervals and recommended oil type. Always check the spark plug condition periodically; clean or replace as needed to ensure optimal ignition.

Proper maintenance prevents engine issues. Adhere to the schedule outlined in the manual‚ and address any concerns promptly. Refer to authorized channels for export distribution information.

Troubleshooting Common Issues

Facing problems? This section addresses typical concerns like engine failure‚ excessive vibration‚ or difficulty moving the tiller‚ guiding you towards solutions.

Contact your local dealer or the Troy-Bilt Technical Service Department for further assistance and specific instructions.

Engine Won’t Start

Troubleshooting a non-starting engine: First‚ verify the fuel valve is open and the fuel tank contains fresh gasoline. Check the spark plug connection and condition – a faulty plug prevents ignition.

Ensure the engine’s kill switch is in the ‘run’ position. If issues persist‚ consult the engine operator’s manual for detailed starting procedures and potential carburetor problems.

Contact an authorized dealer if you cannot resolve the starting issue independently.

Tiller Vibrates Excessively

Excessive vibration indicates a potential issue: Immediately stop the tiller and inspect the tilling blades for damage‚ looseness‚ or imbalance. Ensure all bolts and fasteners are securely tightened‚ particularly those connecting the blades and gearbox.

Check for debris lodged within the blade housing. If vibration continues after inspection‚ contact your authorized Troy-Bilt dealer for professional assistance.

Do not operate the tiller with persistent‚ strong vibrations.

Difficulty Moving the Tiller

Struggling to maneuver your Troy-Bilt Bronco? First‚ verify the tilling depth isn’t set too low‚ creating excessive resistance. Ensure the tiller is operating on a relatively level surface‚ avoiding steep inclines.

Inspect the drive system for obstructions or tangled debris. If issues persist‚ consult your local authorized Troy-Bilt dealer for guidance and potential repairs.

Avoid forcing the tiller; this could cause damage.

Warranty Information

Rest assured! Your Troy-Bilt Bronco is protected by a Lifetime Limited Warranty‚ specifically covering rear tine‚ walk-behind tillers with gear drive transmissions.

Contact Troy-Bilt for claim processes and authorized export distribution details.

Lifetime Limited Warranty Details

Exceptional Coverage: The Troy-Bilt Bronco tiller boasts a Lifetime Limited Warranty‚ a testament to its durable design and quality construction. This warranty specifically applies to all Troy-Bilt branded rear tine‚ walk-behind tillers equipped with gear drive transmissions.

This warranty provides peace of mind‚ safeguarding against defects in materials and workmanship for the lifetime of the tiller‚ under normal residential use. Refer to the full warranty statement for complete terms‚ conditions‚ and exclusions.

Warranty Claim Process

Initiating a Claim: To initiate a warranty claim for your Troy-Bilt Bronco tiller‚ first contact your local authorized Troy-Bilt dealer. They will guide you through the necessary steps and documentation required for processing your request.

Alternatively‚ you can reach the Troy-Bilt Technical Service Department directly for instructions. Be prepared to provide proof of purchase and a detailed description of the defect or issue encountered.

Parts Diagrams and Ordering

Locate diagrams to identify components‚ then order replacements through authorized dealers or online. Ensure correct part numbers for your Troy-Bilt Bronco model.

Accessing these resources simplifies maintenance and repairs‚ keeping your tiller operating efficiently for years to come.

Locating Parts Diagrams

Accessing detailed parts diagrams is crucial for maintaining your Troy-Bilt Bronco tiller. Begin by consulting your owner’s manual‚ which often includes exploded views of key components.

Alternatively‚ visit the official Troy-Bilt website; their online parts lookup tool allows you to search by model number‚ providing interactive diagrams. These diagrams clearly illustrate each part’s location and identification number‚ simplifying repairs and ensuring you order the correct replacements.

Authorized dealers can also provide physical copies of parts diagrams.

Ordering Replacement Parts

Securing replacement parts for your Troy-Bilt Bronco tiller is straightforward. Utilize the parts diagrams (found online or in your manual) to identify the correct component number.

You can order directly through the Troy-Bilt website‚ leveraging their online store. Alternatively‚ authorized Troy-Bilt dealers stock a wide range of parts and can assist with ordering. When placing your order‚ always verify the part number and model compatibility.

Keep your model number handy!

Storage and Off-Season Care

Proper storage extends your tiller’s life. Prepare it by draining fuel‚ checking for loose parts‚ and storing it in a dry‚ sheltered location.

Protect against corrosion and ensure it’s ready for the next gardening season!

Preparing the Tiller for Storage

Before long-term storage‚ thoroughly clean the Troy-Bilt Bronco tiller‚ removing all dirt and debris. Drain the fuel tank completely to prevent carburetor issues during inactivity.

Check for any loose components and tighten them accordingly. Apply a corrosion protectant to metal surfaces. Disconnect the spark plug wire for added safety. Store in a dry‚ covered area‚ protected from the elements.

This ensures optimal performance when you’re ready to garden again!

Proper Storage Location

Select a dry‚ sheltered location for storing your Troy-Bilt Bronco tiller‚ such as a garage‚ shed‚ or covered porch. Avoid damp areas to prevent rust and corrosion.

Ensure the location is protected from direct sunlight and extreme temperatures. A level surface is ideal. Keep the tiller away from flammable materials.

Proper storage safeguards your investment‚ maintaining the tiller’s functionality and extending its lifespan for years of reliable garden service.

Technical Specifications

Detailed engine specs and drive system details are crucial for understanding your Bronco tiller’s performance. Consult the engine manual for comprehensive information.

These specifications ensure proper maintenance and optimal operation‚ maximizing the tiller’s efficiency in your gardening tasks.

Detailed Engine Specifications

Engine details are found within the separate engine operator’s manual‚ packed alongside your Troy-Bilt Bronco tiller. This manual provides crucial information regarding horsepower‚ displacement‚ and fuel requirements.

Specifically‚ it outlines recommended oil types‚ spark plug specifications‚ and optimal operating speeds. Understanding these details ensures peak engine performance and longevity‚ preventing potential issues. Refer to it for troubleshooting engine-related concerns.

Drive System Details

The Bronco’s drive system features a robust gear-drive transmission‚ covered by the Troy-Bilt Lifetime Limited Warranty for rear tine walk-behind tillers. This system delivers reliable power to the tines‚ enabling efficient soil preparation.

The manual details proper engagement and disengagement procedures‚ alongside maintenance recommendations for optimal performance. Understanding the drive system ensures effective tilling and extends the tiller’s operational lifespan.

Safety Features

Prioritize safety! The Bronco includes crucial safety switches and protective guards‚ detailed in the manual‚ to prevent accidental starting and shield operators during operation.

Understanding Safety Switches

Critical safety features are integrated into the Troy-Bilt Bronco tiller‚ notably the safety switches. These switches are designed to immediately halt engine operation if certain conditions aren’t met‚ preventing accidental starts or operation.

Always ensure the operator is properly positioned and controls are engaged before starting. If a switch malfunctions‚ do not operate the tiller; consult an authorized dealer for immediate repair and instructions.

Protective Guards and Shields

Essential for safe operation‚ the Troy-Bilt Bronco tiller incorporates robust protective guards and shields. These components are strategically positioned to deflect debris‚ preventing potential injury from thrown objects during tilling.

Never remove or disable these guards. Regularly inspect them for damage‚ and replace any compromised parts immediately through authorized channels. Maintaining these shields ensures a secure tilling experience.

Optional Attachments

Expand your tiller’s versatility! Explore available accessories to enhance functionality‚ from furrowers to aerators. Installation guides ensure proper attachment and safe operation.

Available Accessories

Unlock even greater gardening potential with a range of optional attachments designed specifically for your Troy-Bilt Bronco tiller. These accessories broaden its capabilities beyond standard tilling‚ allowing for specialized tasks like creating perfectly formed rows with a furrower‚ or efficiently aerating your lawn for improved health.

Consider a planting attachment for seed distribution‚ or a dethatching blade to revitalize your turf. Explore the full catalog at your authorized Troy-Bilt dealer or online to discover the perfect additions for your gardening needs!

Attachment Installation Guide

Proper attachment installation is crucial for safe and effective operation of your Troy-Bilt Bronco tiller; Always refer to the specific instructions included with each accessory‚ as procedures vary depending on the attachment type.

Ensure the tiller engine is completely off and cooled before beginning installation. Securely fasten all components‚ verifying proper alignment and tightening all bolts to the manufacturer’s specifications. If unsure‚ consult an authorized dealer.

Frequently Asked Questions (FAQ)

Common questions regarding operation‚ maintenance‚ and warranty coverage are addressed here. Refer to the engine manual for detailed troubleshooting and support information.

Contact Troy-Bilt customer support or locate an authorized dealer for further assistance with your Bronco tiller’s specific needs.

Common User Questions and Answers

Q: Where can I find detailed parts diagrams?

A: Locate parts diagrams through Troy-Bilt’s official website or by contacting an authorized dealer. These diagrams are essential for identifying replacement parts needed for maintenance.

Q: What does the lifetime limited warranty cover?

A: The warranty covers rear tine‚ walk-behind tillers with gear drive transmissions. Refer to the warranty documentation for specific terms and claim processes.

Q: What if my tiller won’t start?

A: Consult the engine operator’s manual for troubleshooting steps. Ensure proper fuel levels and spark plug functionality before seeking professional assistance.

Contact Information

For support‚ reach out to Troy-Bilt customer service or locate an authorized dealer for assistance with your Bronco tiller and manual inquiries.

Access expert guidance and parts information through their official channels for a seamless experience.

Troy-Bilt Customer Support

Need assistance with your Bronco tiller? Troy-Bilt provides dedicated customer support to address your questions and concerns regarding operation‚ maintenance‚ or parts replacement.

For immediate help‚ consult the comprehensive owner’s manual packed with your tiller‚ or visit the official Troy-Bilt website for FAQs and troubleshooting guides.

You can also connect with their technical service department for expert advice and warranty claim assistance‚ ensuring a smooth and productive gardening experience.

Authorized Dealer Locator

Locate a trusted expert near you! Troy-Bilt maintains a network of authorized dealers equipped to provide specialized service‚ genuine parts‚ and valuable advice for your Bronco tiller.

Utilize the official Troy-Bilt website’s dealer locator tool to find the nearest authorized retailer‚ ensuring access to qualified technicians and authentic components.

These dealers can assist with assembly‚ maintenance‚ repairs‚ and warranty claims‚ maximizing the lifespan and performance of your gardening equipment.

canon t3 manual

The Canon EOS Rebel T3, also known as the EOS 1100D, offers a 9․1-rated, 292-page PDF manual․ It’s a gateway to photographic exploration, detailed in readily available guides․

What is the Canon EOS Rebel T3?

The Canon EOS Rebel T3 (or EOS 1100D) represents an accessible entry point into DSLR photography․ This camera, extensively documented in a comprehensive 292-page PDF manual, is designed for beginners eager to explore beyond point-and-shoot limitations․ The readily available guide, scoring a solid 9․1 from users, details every aspect of operation․

It’s a camera that bridges the gap, offering manual controls alongside user-friendly automatic modes․ Resources like the downloadable manual and Canon’s support website empower users to learn and grow their photographic skills․ It’s a solid foundation for aspiring photographers․

Key Features and Specifications

The Canon EOS Rebel T3 boasts features detailed within its extensive PDF manual․ Key specs include compatibility with Canon EF and EF-S lenses, like the Canon EF 50mm f/1․2L USM․ The camera supports various gamma curves, including Canon Log and Canon Log 3, accessible via Canon XF Utility for transfer․

It utilizes standard 4GB cards for storage, as per Canon’s testing conditions․ The 292-page manual covers image quality settings (RAW vs․ JPEG) and video recording basics․ It’s a feature-rich camera, thoroughly explained in its documentation․

Target Audience for this Manual

This Canon EOS Rebel T3 manual is designed for both beginner and intermediate photographers; It caters to those new to DSLR cameras, offering a comprehensive guide from initial setup to advanced features․ The manual assists users in understanding shooting modes, focus, and exposure settings․

It also benefits users exploring Canon Log and utilizing Canon XF Utility․ The PDF version, available online, supports those seeking detailed instructions for customization and troubleshooting․ It’s a resource for anyone wanting to maximize their T3’s potential․

Getting Started with Your Camera

Begin with unboxing, battery and memory card insertion, and familiarizing yourself with the camera’s buttons and dials, as detailed in the manual․

Unboxing and Initial Setup

Upon receiving your Canon EOS Rebel T3, carefully unpack the box, ensuring all components are present․ These typically include the camera body, kit lens (often an 18-55mm), battery, battery charger, neck strap, and essential documentation – crucially, the comprehensive manual․ Before proceeding, inspect each item for any physical damage sustained during shipping․

Initial setup involves connecting the battery charger to a power source and fully charging the battery․ Simultaneously, locate the slot for the memory card (SD card) and gently insert a compatible card․ Refer to the manual for proper insertion orientation․ This initial preparation ensures a smooth and uninterrupted start to your photographic journey with the Canon EOS Rebel T3․

Inserting the Battery and Memory Card

The Canon EOS Rebel T3 requires a charged battery and a compatible SD memory card to operate․ Locate the battery compartment, usually at the bottom of the camera, and follow the manual’s instructions for unlocking and opening it․ Insert the battery, ensuring correct polarity, until it clicks into place․ Securely close the compartment door․

Next, find the SD card slot, often alongside the battery compartment․ Gently insert the SD card until it clicks․ Avoid forcing it! The manual details the correct orientation․ Proper insertion is vital for image storage․ Always eject the card safely through the camera’s menu before removal to prevent data corruption․

Understanding the Camera Buttons and Dials

The Canon EOS Rebel T3 features various buttons and dials controlling its functions․ The manual provides a detailed diagram identifying each control; The power button initiates camera operation, while the shutter button captures images․ Dials adjust settings like shooting mode and exposure compensation․

The directional buttons navigate menus, and the ‘Set’ button confirms selections․ Familiarize yourself with the ‘Q’ button for quick access to frequently used settings․ The manual explains each button’s purpose, enabling efficient camera control․ Mastering these controls unlocks the camera’s full potential for creative photography․

Basic Camera Operations

Canon’s manual guides users through powering the T3 on/off, setting the date and time, and navigating the menu system for fundamental operation․

Powering On and Off

The Canon EOS Rebel T3’s operation begins with a simple process․ To power on, locate the camera’s power switch, typically positioned around the shutter button․ Sliding this switch to the “ON” position activates the camera, initiating the startup sequence and displaying the live view on the LCD screen․

Conversely, to power off, return the switch to the “OFF” position․ This ensures the camera conserves battery life when not in use․ The manual emphasizes that proper powering down prevents accidental image capture or settings alterations․ Always confirm the LCD screen is dark before storing the camera․

Setting the Date and Time

Accurate date and time settings are crucial for proper image organization and metadata․ The Canon EOS Rebel T3 manual guides users through this process via the camera’s menu system․ Navigate to the “Settings” menu, then locate the “Date/Time” option․

Here, you can input the current date and time, ensuring they are correctly formatted․ The manual details how to adjust the year, month, day, hour, and minute․ Correct settings are vital for chronological sorting of photos and accurate timestamping, enhancing your workflow and image management․

Navigating the Menu System

The Canon EOS Rebel T3’s manual emphasizes mastering the menu system for full camera control․ Accessed via the ‘MENU’ button, it’s organized into distinct tabs – Shooting, AF, Setup, and more․ Use the directional buttons to highlight desired options and press ‘SET’ to confirm selections․

The manual details each menu item’s function, from image quality settings to custom functions․ Familiarity with this system unlocks advanced features․ Understanding the layout and terminology, as explained in the 292-page PDF, is key to customizing your camera experience․

Shooting Modes Explained

The Canon T3 manual details various shooting modes, including Auto, Program (P), Aperture Priority (Av), Shutter Priority (Tv), and full Manual (M) control․

Auto Mode for Beginners

Auto mode on the Canon EOS Rebel T3 is designed for simplicity, making it perfect for those new to DSLR photography․ The camera automatically handles all settings – aperture, shutter speed, ISO, and white balance – allowing users to focus solely on composition and capturing the moment․

This mode is ideal for everyday snapshots and situations where quick, hassle-free shooting is desired․ While offering minimal creative control, Auto mode ensures properly exposed images in a wide range of lighting conditions․ The Canon T3 manual emphasizes this mode’s ease of use, encouraging beginners to build confidence before exploring more advanced settings․

Program Mode (P) for More Control

Program (P) mode on the Canon EOS Rebel T3 offers a step up from Auto, providing more creative control while still assisting the photographer․ The camera automatically sets the aperture and shutter speed, but allows adjustments to other settings like ISO, white balance, and exposure compensation․

This mode is excellent for situations where you want some influence over the image’s look without fully manual control․ The Canon T3 manual highlights Program mode as a good starting point for learning about exposure, enabling users to experiment with different settings and observe their effects on the final image․

Aperture Priority (Av) Mode

Aperture Priority (Av) mode on the Canon EOS Rebel T3 empowers photographers to control the depth of field․ You select the aperture (f-stop), influencing how much of the image is in focus, while the camera automatically determines the appropriate shutter speed for correct exposure․

A wider aperture (lower f-number) creates a shallow depth of field, ideal for portraits with blurred backgrounds․ Conversely, a narrower aperture (higher f-number) maximizes depth of field, suitable for landscapes․ The Canon T3 manual details how mastering Av mode unlocks creative possibilities, allowing precise control over image aesthetics․

Shutter Priority (Tv) Mode

Shutter Priority (Tv) mode on the Canon EOS Rebel T3 grants control over motion blur․ You choose the shutter speed, dictating how long the camera’s sensor is exposed to light, while the camera adjusts the aperture for proper exposure․ Faster shutter speeds freeze action, perfect for sports or wildlife photography․

Slower shutter speeds create motion blur, ideal for conveying a sense of movement, like flowing water․ The Canon T3 manual explains how Tv mode is crucial for capturing dynamic scenes․ Understanding this mode, as detailed in the provided guides, allows photographers to creatively manipulate time and motion within their images․

Manual Mode (M) for Full Control

Manual Mode (M) on the Canon EOS Rebel T3 provides complete photographic control․ You independently set both the aperture and shutter speed, allowing precise exposure adjustments․ This mode demands a strong understanding of the exposure triangle – aperture, shutter speed, and ISO – as detailed within the Canon T3 manual․

While challenging for beginners, Manual mode unlocks creative potential․ It’s essential for consistent results in complex lighting situations․ Mastering this mode, as the guides explain, allows photographers to override the camera’s automatic settings and achieve their desired artistic vision, offering ultimate flexibility․

Understanding Focus and Exposure

The Canon T3 manual details autofocus modes and exposure compensation, alongside ISO sensitivity settings, crucial for achieving sharp, well-lit images consistently․

Autofocus Modes and Selection

The Canon EOS Rebel T3 manual comprehensively explains the available autofocus (AF) modes, empowering users to capture sharp images in diverse scenarios․ One-Shot AF is ideal for stationary subjects, locking focus when the shutter button is half-pressed․ AI Servo AF continuously tracks moving subjects, maintaining focus as they change position․ Automatic selection allows the camera to intelligently choose the appropriate mode․

Understanding AF point selection is also vital․ The T3 offers various AF area modes, including a single AF point, allowing precise focus control․ Zone AF utilizes a cluster of points, useful for subjects within a defined area․ The manual guides users through customizing these settings for optimal performance, ensuring consistently focused photographs, regardless of the shooting situation․

Exposure Compensation

The Canon EOS Rebel T3 manual details exposure compensation, a crucial tool for adjusting image brightness․ When the camera’s automatic metering doesn’t yield desired results, exposure compensation allows manual overrides․ Users can brighten or darken images by adjusting the compensation value, measured in stops (+/- EV)․

Positive values increase brightness, useful for dark subjects, while negative values decrease it, ideal for bright scenes․ The manual explains how to access and modify exposure compensation through the camera’s menu system․ Mastering this feature ensures accurate exposures, preventing underexposed or overexposed images, and achieving creative control over the final photograph’s look and feel․

ISO Sensitivity Settings

The Canon EOS Rebel T3 manual thoroughly explains ISO sensitivity, a key setting impacting image brightness and noise․ ISO determines the camera sensor’s sensitivity to light; higher ISO values are beneficial in low-light conditions, allowing for faster shutter speeds․ However, increasing ISO also introduces more digital noise, potentially reducing image quality․

The manual details available ISO settings, ranging from lower values for bright conditions to higher values for dimly lit environments․ Understanding the trade-off between brightness and noise is crucial․ Users learn to select the optimal ISO setting based on the shooting scenario, balancing image clarity with the need for sufficient light․

Working with Images and Video

The Canon T3 manual details image quality choices – RAW versus JPEG – and basic video recording․ It also covers viewing and deleting captured content efficiently․

Image Quality Settings (RAW vs․ JPEG)

Understanding image quality settings is crucial for Canon EOS Rebel T3 users․ The manual explains the difference between shooting in RAW and JPEG formats․ JPEG files are compressed, resulting in smaller file sizes, ideal for immediate sharing and requiring less storage space․ However, this compression sacrifices some image data․

RAW files, conversely, contain all the data captured by the camera’s sensor, offering significantly greater flexibility during post-processing․ This allows for extensive adjustments to exposure, white balance, and other parameters without degrading image quality․ While RAW files are larger and require dedicated software for editing, they are preferred by photographers seeking maximum control and archival quality․ The Canon T3 manual guides users in selecting the appropriate format based on their needs and workflow․

Video Recording Basics

The Canon EOS Rebel T3 manual details fundamental video recording features․ Users can initiate video recording by switching to Movie mode on the camera’s mode dial․ The T3 supports standard definition video recording, offering a straightforward entry point into videography․ Understanding the limitations of the camera’s video capabilities, such as resolution and frame rates, is essential․

The manual explains how to control recording start/stop, zoom functionality during recording, and basic audio settings․ Proper lighting and stable camera support (tripod recommended) are highlighted for optimal video quality․ Reviewing recorded footage is done through the camera’s playback function, allowing immediate assessment of results․

Viewing and Deleting Images

The Canon EOS Rebel T3 manual guides users through image playback․ Pressing the playback button allows reviewing captured photos and videos on the camera’s LCD screen․ Navigation is achieved using the directional buttons, enabling zooming and scrolling through images․ The manual details how to display shooting information like date, time, and camera settings alongside each image․

Deleting unwanted images is straightforward, with options for single or multiple selections․ A confirmation prompt appears to prevent accidental deletion․ The manual emphasizes the permanence of deletion, advising caution․ Images can also be protected from accidental deletion using the protect function, ensuring valuable photos remain safe;

Advanced Features and Settings

The Canon T3 manual details Canon Log and Canon Log 3 (gamma curves) alongside Canon XF Utility for efficient file transfer and management․

Canon Log and Gamma Curves

Delving into advanced color grading, the Canon EOS Rebel T3 manual explains Canon Log, Canon Log 2, and Canon Log 3․ These gamma curves expand dynamic range, crucial for post-production flexibility․ Utilizing these settings allows for greater control over highlights and shadows during editing, preserving detail in challenging lighting conditions․

The manual clarifies how to select between Canon Log options, alongside Wide DR and Normal 1 (Standard), tailoring image capture to specific shooting scenarios․ Understanding these curves unlocks professional-level color manipulation capabilities, enhancing the visual storytelling potential of your footage․ Refer to the PDF “Read This First” document for detailed guidance․

Using Canon XF Utility for Transfer

The Canon EOS Rebel T3 manual references Canon XF Utility as a tool for efficient file transfer and management․ While primarily associated with professional cinema cameras like the EOS C300 Mark II, understanding its capabilities can streamline workflow․ The manual directs users to download Canon XF Utility from Canon’s website and follow provided instructions for proper setup․

This software facilitates importing footage, organizing files, and performing basic editing tasks․ It’s particularly useful when working with large volumes of data or requiring precise control over file naming and organization․ Consult the PDF documentation for detailed guidance on utilizing Canon XF Utility with your T3 camera․

Customizing Camera Settings

The Canon EOS Rebel T3 manual details extensive customization options to tailor the camera to your shooting style․ Users can adjust image quality settings, choosing between RAW and JPEG formats for varying levels of editing flexibility․ Gamma curves, including Canon Log and Canon Log 3, are available for advanced color grading control, enhancing dynamic range․

Further personalization includes configuring autofocus modes, exposure compensation, and ISO sensitivity․ The manual guides users through menu navigation to access these settings, allowing for precise adjustments to achieve desired photographic results․ Explore the options to unlock the full potential of your T3․

Troubleshooting Common Issues

The Canon T3 manual addresses problems like the camera not powering on, focusing difficulties, and deciphering error messages, offering clear solutions for users․

Camera Not Turning On

If your Canon EOS Rebel T3 fails to power on, consult the manual for systematic troubleshooting; First, ensure the battery is fully charged and correctly inserted, checking the compartment latch․ Verify the battery contacts are clean and free of corrosion․

Next, try a different, known-working battery if available․ Also, confirm the memory card is properly seated, as a faulty card can sometimes prevent startup․ If these steps don’t resolve the issue, the manual suggests checking the power switch position and potentially seeking professional repair, as internal component failure might be the cause․

Focusing Problems

Experiencing focusing issues with your Canon EOS Rebel T3? The manual details several solutions․ First, ensure you’ve selected the appropriate autofocus (AF) mode for your subject – One-Shot for static subjects, and AI Servo for moving ones․ Confirm sufficient light is available, as low light hinders autofocus performance․

Check the lens for cleanliness, as smudges can interfere with focusing accuracy․ Also, verify the focus point is correctly positioned over your intended subject․ If problems persist, the manual recommends trying manual focus to determine if the issue lies with the autofocus system itself․

Error Messages and Solutions

The Canon EOS Rebel T3 manual provides a comprehensive list of error messages and their corresponding solutions․ Common errors include card errors (ensure card is compatible and properly inserted) and lens errors (verify lens is securely attached)․ If an error occurs during shooting, the manual advises restarting the camera and re-attempting the operation․

For persistent errors, consult the detailed troubleshooting section within the PDF․ It suggests checking battery levels and, if necessary, performing a factory reset․ Remember to note the specific error code displayed for accurate diagnosis and resolution, as detailed in the user guide․

Maintaining Your Canon T3

The Canon T3 manual details sensor cleaning, battery care, and firmware updates for optimal performance and longevity of your camera, ensuring lasting quality․

Cleaning the Sensor

Maintaining a clean sensor is crucial for image quality with your Canon EOS Rebel T3․ The official manual doesn’t extensively detail sensor cleaning, but recommends professional servicing․ Dust accumulation impacts photos, appearing as spots․ Carefully use a blower to dislodge loose particles; avoid touching the sensor directly․

If professional cleaning isn’t immediately accessible, specialized sensor cleaning kits are available․ These typically include swabs and cleaning fluid designed for delicate sensor surfaces․ Always follow kit instructions precisely to prevent damage․ Improper cleaning can scratch the sensor, requiring costly repairs․ Regular preventative measures, like lens changes in clean environments, minimize dust buildup․

Battery Care and Storage

Proper battery care extends the life of your Canon EOS Rebel T3’s power source․ The manual advises against exposing the battery to extreme temperatures – both heat and cold can diminish performance․ Avoid short-circuiting by keeping the terminals free from conductive materials․

When storing for extended periods, charge the battery to approximately 40-60% to prevent over-discharge․ Store in a cool, dry place․ Don’t leave a fully charged or fully discharged battery unused for long durations․ Canon recommends using only Canon-branded chargers and batteries for optimal safety and performance, safeguarding your camera and battery health․

Firmware Updates

Keeping your Canon EOS Rebel T3’s firmware current ensures optimal performance and compatibility․ The manual doesn’t detail the update process directly, but Canon provides updates via their support website․ Regularly check for new versions, as they often address bugs and add new features․

Firmware updates typically involve downloading a file to an SD card, inserting the card into the camera, and following on-screen prompts․ Crucially, do not interrupt the update process, as this could damage your camera․ Always follow Canon’s official instructions carefully to avoid any issues during the firmware update procedure․

Resources and Further Learning

Explore Canon’s support website for the complete PDF manual and tutorials․ Online communities offer additional learning and assistance for your Canon T3․

Downloading the Complete User Manual (PDF)

Accessing the comprehensive 292-page PDF manual for your Canon EOS Rebel T3 (or EOS 1100D) is straightforward․ Numerous online resources provide free downloads, ensuring you have detailed guidance at your fingertips․ This manual, consistently rated around 9․1 by users, covers every aspect of your camera’s operation, from initial setup to advanced features․

It’s an invaluable tool for both beginners and experienced photographers seeking to maximize their Canon T3’s potential․ Look for official Canon websites or reputable photography resource sites to ensure you obtain a legitimate and up-to-date version of the PDF document․

Canon Support Website

Canon’s official support website is a crucial resource for Canon EOS Rebel T3 owners․ Here, you’ll find the complete PDF manual available for download, alongside frequently asked questions, troubleshooting guides, and driver updates․ The website provides direct access to Canon’s expertise, ensuring you can resolve any issues or learn more about your camera’s capabilities․

Furthermore, Canon often posts firmware updates to improve performance and add features․ Regularly checking the support site guarantees your T3 operates optimally․ It’s a central hub for all things Canon, offering reliable and official assistance․

Online Tutorials and Communities

Beyond the official manual, a wealth of learning resources exists online for the Canon EOS Rebel T3․ Numerous websites and YouTube channels offer tutorials covering everything from basic operation to advanced techniques․ These resources often present information in a visual and easily digestible format․

Active online communities and forums dedicated to Canon cameras provide a space to ask questions, share experiences, and learn from fellow photographers․ Engaging with these communities can accelerate your learning curve and offer practical solutions to common challenges․