Category Archives: Manuals

regal bread machine manual

Regal Bread Machine Manual: A Comprehensive Guide

Welcome! This manual provides detailed instructions for Regal bread machines‚ covering models K6722 through K6783‚ ensuring delightful homemade bread experiences.

Congratulations on choosing a Regal bread machine! These appliances bring the joy of freshly baked bread into your home with convenience and ease. Regal offers a diverse range of models – including the K6722‚ K6723‚ K6726‚ K6727‚ K6730‚ K6731‚ K6743‚ and K6783 – designed to cater to various baking needs and preferences.

This manual serves as your comprehensive guide‚ walking you through each step of the bread-making process. Whether you’re a seasoned baker or a beginner‚ you’ll discover how to utilize your Regal machine to create a wide array of delicious loaves. From basic white bread to more complex recipes‚ prepare to enjoy the aroma and taste of homemade goodness!

Understanding Regal Bread Machine Models

Regal offers several bread machine models‚ each with slightly varying features. Popular choices include the K6722‚ K6723‚ K6726‚ K6727‚ K6730‚ K6731‚ K6743‚ and K6783. While core functionality remains consistent across the line – automated kneading‚ rising‚ and baking – differences exist in programmable settings and loaf capacity (1lb or 2lb).

The Kitchen Pro K6743‚ released in September 2025‚ is a recent addition. Model K6731 is frequently found as a pre-owned unit. Understanding your specific model number‚ often found on the machine’s base‚ is crucial for accessing the correct settings and troubleshooting information. Refer to your model’s specific documentation for detailed features.

Popular Regal Bread Machine Models (K6722‚ K6723‚ K6726‚ K6727‚ K6730‚ K6731‚ K6743‚ K6783)

Regal’s frequently used models‚ like the K6722 and K6723‚ are known for their reliability and ease of use. The K6726‚ K6727‚ K6730‚ and K6731 offer similar functionality‚ often differing in minor control panel layouts. The newer K6743 (released 2025) boasts updated features‚ while the K6783 is a widely recognized model.

Finding a recipe book can be challenging for older models like the K6731‚ often requiring online searches. Replacement paddles‚ such as those for the K6730‚ are readily available. Each model supports 1-2 pound loaves‚ making them versatile for various household sizes.

Key Components of Your Regal Bread Machine

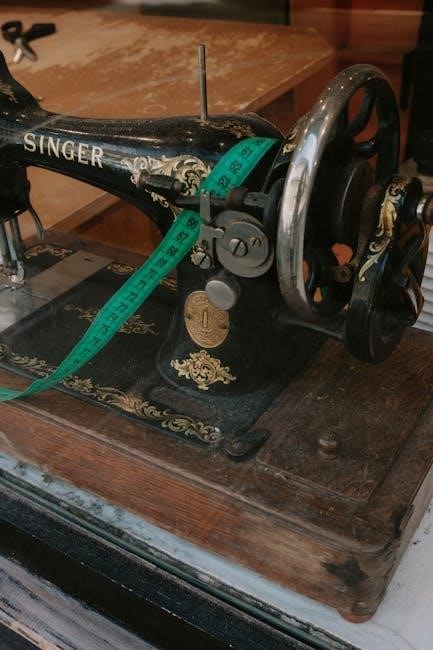
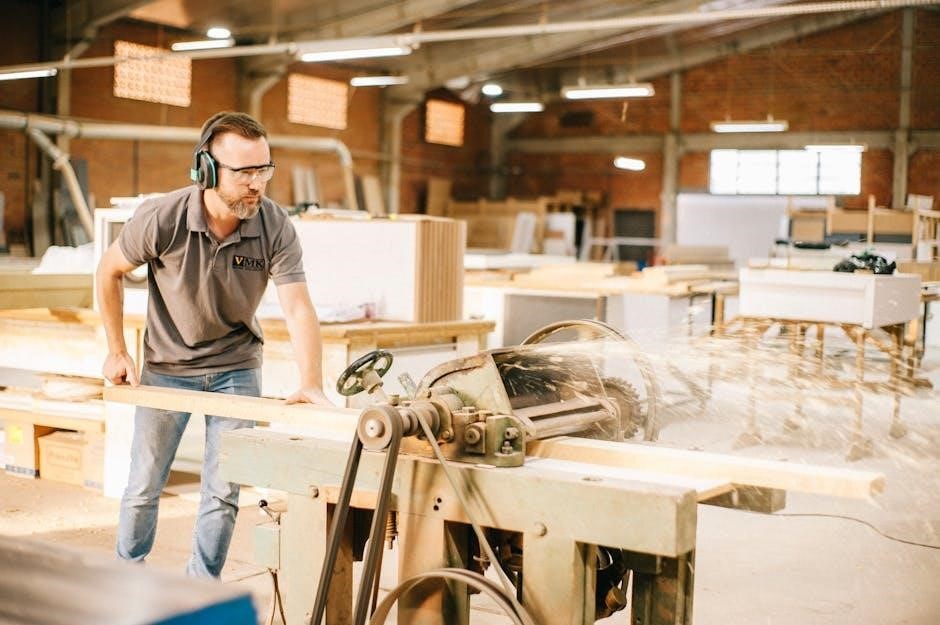
Your Regal bread machine consists of several crucial parts. The bread pan securely holds ingredients during mixing and baking‚ while the paddle kneads the dough to develop gluten. The control panel allows you to select settings for various bread types and crust colors.

Understanding these components is vital for successful baking. Ensure the bread pan and paddle are properly inserted before operation. Familiarize yourself with the control panel’s functions to customize your baking process. Regular cleaning of these parts ensures optimal performance and longevity.

Bread Pan and Paddle

The bread pan‚ typically non-stick coated‚ is essential for containing ingredients and shaping the loaf. Ensure it’s securely locked into place before starting the machine. The paddle‚ often made of metal‚ is responsible for kneading the dough‚ mimicking manual bread making.

Proper paddle attachment is crucial; it should click firmly onto the base. Regularly inspect both for wear and tear. Cleaning after each use prevents dough buildup. Replacement paddles (like model K6730) are available if needed‚ ensuring continued optimal mixing and baking performance.

Control Panel Overview

The control panel is your interface for operating the Regal bread machine. It features buttons for selecting loaf size (1lb/2lb)‚ crust color‚ and pre-programmed settings. A digital display shows cycle time and selected functions.

The ‘Start/Stop’ button initiates or halts operation. Some models‚ like K6783‚ may present challenges with setting adjustments; The ‘Delay Timer’ allows for scheduled baking. Familiarize yourself with each button’s function for seamless operation and to unlock the full potential of your bread maker.

Setting Up Your Regal Bread Machine

Before first use‚ carefully unpack your Regal bread machine and remove all packaging materials. Place the machine on a stable‚ level surface‚ away from water sources. Ensure adequate ventilation around the unit.

Wash the bread pan and kneading paddle with warm‚ soapy water and dry thoroughly. Insert the paddle securely onto the drive shaft inside the bread pan; Place the pan into the machine. Plug the power cord into a grounded outlet. Your Regal bread machine is now ready for its inaugural bake!

Basic Bread Making with Your Regal Machine

Embark on your baking journey! Begin by adding ingredients directly into the bread pan – liquids first‚ followed by dry ingredients‚ with yeast last. Precise measurements are crucial for optimal results; refer to the recipe for specific quantities.

Select the appropriate cycle (usually “Basic” or “White Bread”) and crust color. Press “Start” to initiate the kneading‚ rising‚ and baking process. Avoid opening the lid during baking to maintain consistent temperature. Once complete‚ carefully remove the loaf and enjoy fresh‚ homemade bread!

Ingredients and Measurements

Accuracy is key! Typically‚ a basic bread recipe requires bread flour‚ water‚ sugar‚ salt‚ and yeast. Precise measurements are vital; use measuring cups and spoons specifically designed for baking.

Generally‚ 1 cup of flour weighs approximately 120-125 grams. Liquid measurements should be exact – use a liquid measuring cup. Yeast quantity is critical; ensure it’s fresh for proper rising. A slight variation in ingredient amounts can affect the final product’s texture and taste‚ so follow recipes closely for best results.

Step-by-Step Basic Bread Recipe

Let’s bake! First‚ add wet ingredients (water‚ oil) to the bread pan‚ followed by dry ingredients (flour‚ sugar‚ salt). Create a small well for the yeast‚ ensuring it doesn’t directly contact liquids initially. Select the “Basic” cycle on your Regal machine.

Press start. The machine will knead‚ rise‚ and bake automatically. Monitor the first few minutes to ensure proper mixing. Once finished‚ carefully remove the bread pan using oven mitts. Let the loaf cool completely on a wire rack before slicing and enjoying your freshly baked bread!

Advanced Bread Making Techniques

Expand your baking! Regal machines excel beyond basic loaves. Experiment with diverse flour types – whole wheat‚ rye‚ or bread flour – adjusting liquid levels as needed. Enhance flavor by incorporating fruits (raisins‚ cranberries)‚ nuts (walnuts‚ pecans)‚ or seeds (sunflower‚ flax).

Utilize the “Dough” cycle for shaping breads manually‚ or explore specialty cycles like “Sweet” for enriched doughs. Remember‚ precise measurements are key for consistent results. Don’t be afraid to experiment and personalize your recipes!

Using Different Flour Types

Flour impacts texture! While all-purpose works‚ Regal machines thrive with variety. Whole wheat flour creates denser‚ nuttier loaves; reduce liquid slightly. Rye flour adds a distinctive flavor‚ but use sparingly as it lacks gluten. Bread flour‚ with higher protein‚ yields a chewier texture and better rise.

Experimenting is encouraged! Combine flours for unique results. Adjust liquid amounts based on flour absorption. Remember‚ different flours require different handling – observe dough consistency closely during kneading.

Adding Fruits‚ Nuts‚ and Seeds

Enhance your loaves! Regal bread machines allow delightful additions. Add fruits (raisins‚ cranberries) and nuts (walnuts‚ pecans) during the second kneading cycle – the signal will sound. Seeds (sunflower‚ flax) can be added at the beginning with dry ingredients.

Avoid overloading; approximately 1 to 1.5 cups total is ideal for a 1.5lb loaf. Chopped ingredients distribute better. Be mindful that additions can slightly increase baking time. Adjustments may be needed for optimal texture and rise.

Understanding the Control Panel Settings

Mastering your Regal machine! The control panel dictates baking parameters. Key settings include crust color (light‚ medium‚ dark) influencing the final browning. Loaf size selection (1lb or 2lb) adjusts ingredient proportions and baking duration. The delay timer allows convenient‚ pre-programmed baking – perfect for fresh bread in the morning!

Familiarize yourself with program options (basic‚ whole wheat‚ sweet). Refer to your model’s specific guide for detailed setting explanations. Incorrect settings can impact bread quality‚ so careful review is essential.

Crust Color Settings

Achieve your perfect crust! Regal bread machines offer adjustable crust color settings – typically light‚ medium‚ and dark. A ‘light’ setting yields a pale‚ soft crust‚ ideal for sandwiches. ‘Medium’ provides a balanced color and texture‚ suitable for everyday use. The ‘dark’ setting delivers a robust‚ deeply browned crust‚ enhancing flavor and providing a satisfying crunch.

Experiment to find your preference! Note that humidity and ingredient types can influence the final result. Consistent use of a chosen setting ensures repeatable baking outcomes.

Loaf Size Selection (1lb/2lb)

Bake the perfect amount! Regal bread machines commonly feature a loaf size selection‚ allowing you to choose between a 1-pound and a 2-pound loaf. Selecting the correct size is crucial for optimal baking results. Using the 1lb setting with a full 2lb recipe will cause overflow.

Always adjust ingredient quantities proportionally to the chosen loaf size. Refer to your recipe for guidance. Smaller loaves bake faster‚ while larger loaves require extended baking times. Proper loaf size selection ensures even cooking and a beautifully formed bread.

Delay Timer Function

Wake up to fresh bread! The delay timer allows you to conveniently schedule bread baking up to 13 hours in advance. This feature is perfect for enjoying warm bread with breakfast or upon arriving home. Ensure perishable ingredients‚ like milk or eggs‚ are kept cool during the delay.

To use the delay timer‚ first select your desired program and loaf size. Then‚ set the delay time‚ representing the hours until you want the bread to finish baking. Avoid using the delay timer with quick bread recipes.

Troubleshooting Common Issues

Don’t panic! Most bread machine problems are easily solved. If your Regal machine won’t turn on‚ check the power cord and outlet. A paddle failing to knead often indicates too much or too little liquid; adjust accordingly. If your loaf collapses‚ it might be due to excess yeast or an incorrect flour type.

For settings issues‚ like being unable to change programs (model K6783)‚ consult the full manual or Regal’s support. Always ensure proper ingredient measurements and follow recipe instructions carefully for optimal results.

Bread Machine Not Turning On

Is your Regal bread machine unresponsive? First‚ verify the power cord is securely plugged into both the machine and a functioning wall outlet. Test the outlet with another appliance to confirm it’s providing power. Check the machine’s on/off switch – ensure it’s in the ‘on’ position.

If these steps don’t resolve the issue‚ examine the power cord for any visible damage. A damaged cord requires replacement. Contact Regal’s customer support if the problem persists‚ as it could indicate an internal electrical fault.

Paddle Not Kneading Properly

Is the kneading paddle failing to mix ingredients effectively? Ensure the paddle is correctly attached to the drive shaft inside the bread pan. A loose connection prevents proper kneading. Verify the paddle isn’t obstructed by excessive flour clinging to it or the sides of the pan.

Overloading the pan with ingredients can also hinder kneading. Reduce the ingredient quantity slightly. If the paddle appears damaged‚ a replacement (like model K6730) may be necessary. Contact Regal support if issues continue.

Loaf Collapsing

Experiencing a sunken or collapsed loaf? This often indicates too much liquid in the recipe. Carefully measure ingredients‚ especially liquids‚ using accurate measuring tools. Excessive yeast can also cause a rapid rise and subsequent collapse. Ensure you’re using the correct amount specified in your recipe.

Additionally‚ interrupting the baking cycle prematurely can lead to collapse. Avoid opening the lid during baking unless absolutely necessary. A weak gluten structure‚ potentially from using low-protein flour‚ can also contribute to this issue.

Cleaning and Maintenance

Regular cleaning ensures optimal performance and longevity. Always unplug your Regal bread machine before cleaning. The bread pan and paddle are typically non-stick coated; hand wash them with warm‚ soapy water after each use. Avoid abrasive cleaners that could damage the coating.

The machine housing can be wiped down with a damp cloth. Never immerse the machine in water! Ensure all parts are thoroughly dry before reassembling. Periodic inspection of the kneading paddle for wear is recommended‚ and replacements are readily available.

Cleaning the Bread Pan and Paddle

Proper cleaning of the bread pan and paddle is crucial. After each baking cycle‚ promptly remove the pan and paddle. Hand wash them in warm‚ soapy water; avoid harsh detergents or abrasive scrubbers that can strip the non-stick coating. For stubborn residue‚ soak the pan in warm water before washing.

Ensure both are completely dry before reinserting into the machine. Dishwasher use is generally not recommended as it may shorten the lifespan of the non-stick surface. Regularly inspect the paddle for any damage or wear.

Cleaning the Machine Housing

Maintaining a clean machine exterior is essential for longevity. Always unplug the bread machine before cleaning the housing. Wipe down the exterior with a damp‚ soft cloth. Avoid getting water inside the unit‚ especially near the control panel or heating element.

For stubborn stains‚ a mild‚ non-abrasive cleaner can be used sparingly. Never immerse the machine in water or any other liquid. Ensure the housing is completely dry before plugging it back in. Regular dusting will prevent buildup and keep your Regal bread machine looking its best.

Recipe Ideas for Your Regal Bread Machine

Expand your baking horizons with these delicious recipes! Start with our classic Whole Wheat Bread Recipe‚ utilizing hearty whole wheat flour for a nutritious loaf. For a sweeter treat‚ try the Sweet Bread Recipe‚ perfect for French toast or a delightful snack.

Experiment with different ingredients – add raisins‚ cranberries‚ or chocolate chips to customize your creations. Remember to adjust liquid levels based on flour type. Your Regal bread machine unlocks a world of baking possibilities‚ so don’t be afraid to explore and create your signature loaves!

Whole Wheat Bread Recipe

Yields: 1 (1.5 lb) loaf

Ingredients: 1 ¼ cups warm water‚ 2 tbsp honey‚ 2 tbsp vegetable oil‚ 1 ½ tsp salt‚ 3 ½ cups whole wheat flour‚ 1 ½ tsp bread machine yeast.

Instructions: Add ingredients to the bread pan in the order listed. Select the ‘Whole Wheat’ cycle and a 1.5 lb loaf size. Choose your desired crust color. Press start and enjoy the aroma of freshly baked‚ wholesome bread! This recipe provides a nutritious and flavorful loaf‚ perfect for sandwiches or toast.

Sweet Bread Recipe

Yields: 1 (1.5 lb) loaf

Ingredients: 1 cup milk‚ ¼ cup sugar‚ 2 tbsp butter (softened)‚ 1 egg‚ 3 ¼ cups bread flour‚ 1 ½ tsp salt‚ 2 ¼ tsp bread machine yeast‚ ¼ cup raisins (optional).

Instructions: Add ingredients to the bread pan in the order listed‚ ensuring yeast doesn’t touch liquid directly. Select the ‘Sweet’ cycle and a 1.5 lb loaf size. Choose your preferred crust color. Press start and anticipate a delicious‚ slightly sweet loaf! Perfect with jam or enjoyed on its own‚ this recipe offers a delightful treat.

Safety Precautions

Important: Always unplug the bread machine before cleaning or when not in use. Never immerse the machine housing in water or other liquids. Allow the bread pan and paddle to cool completely before handling. Avoid touching the heating element during or immediately after baking – it’s extremely hot!

Keep the power cord away from hot surfaces. Do not operate the appliance with a damaged cord or plug. Supervise children when the machine is in operation. Ensure proper ventilation during use. Never attempt to repair the machine yourself; contact qualified personnel for assistance.

Warranty Information

Regal Bread Machine Warranty: Your Regal bread machine is warranted against defects in materials and workmanship for a period of one year from the date of original purchase. This warranty covers normal household use. Damage resulting from misuse‚ abuse‚ accidents‚ or unauthorized repairs is not covered.

To obtain warranty service‚ please contact Regal customer support with proof of purchase. The warranty does not cover normal wear and tear of parts like the bread pan or paddle. Regal reserves the right to repair or replace the defective product.

Finding Replacement Parts

Locating Regal Bread Machine Parts: Replacement parts‚ such as bread machine paddles‚ can often be found online through various retailers. Specifically‚ Regal Bread Maker Machine Replacement Paddles (Model No. K6730) are frequently available for purchase. Checking online marketplaces and appliance parts websites is recommended.

If you require parts not readily available‚ contacting Regal customer support directly is advised. Providing your model number (e.g.‚ K6783) will expedite the process. Ensure compatibility before ordering any replacement part for optimal performance.

Regal Bread Machine Paddle Replacements (Model No. K6730)

Paddle Replacements for Model K6730: Finding a replacement paddle for your Regal bread machine‚ specifically model K6730‚ is crucial for consistent kneading and optimal bread texture. These paddles are designed to withstand regular use‚ but may eventually wear out.

Pre-owned Regal K6730 paddles are sometimes available‚ offering a cost-effective solution. When purchasing‚ verify the paddle’s condition and compatibility with your machine. New replacement paddles ensure peak performance and longevity‚ guaranteeing perfectly kneaded dough every time.

Where to Find Additional Resources

Expanding Your Bread-Making Knowledge: While this manual provides a solid foundation‚ numerous resources are available to enhance your Regal bread machine experience. Online forums and communities dedicated to bread making often feature Regal machine-specific discussions and troubleshooting tips.

Searching online marketplaces can yield used manuals or recipe books for various Regal models (K6722‚ K6731‚ etc.). Regal’s customer support may also offer assistance. Remember to explore recipe websites and cookbooks for inspiration beyond the included recipes‚ unlocking a world of baking possibilities!

Regal Bread Machine Recipes & Cookbook

Unlock a World of Flavor! This cookbook complements your Regal bread machine‚ offering a diverse collection of recipes to inspire your baking journey. From classic whole wheat loaves to decadent sweet breads‚ discover new tastes and textures.

Many users have sought recipes online due to missing manuals (like for model K6731). Experiment with additions like fruits‚ nuts‚ and seeds to personalize each loaf. Remember‚ consistent measurements are key to success. Enjoy the convenience and satisfaction of freshly baked bread!

handle manual

Handle Manual: A Comprehensive Guide

This manual details handle design, materials, ergonomics, and applications for various tools, ensuring safety and efficiency.
It covers screwdriver, hammer, pliers, and wrench handles, alongside specialized features like insulation and T-handle variations.

What is a Handle?

A handle is the gripping component of a tool, facilitating control and the application of force. It’s the interface between the user and the tool’s functional end, crucial for both efficiency and safety. Typically, handles are crafted from materials like plastic, wood, metal, or composites, each offering unique properties.

Ergonomically designed handles prioritize comfort during prolonged use, minimizing hand fatigue and maximizing leverage. They aren’t merely attachments; they’re integral to a tool’s performance. The shape, texture, and material all contribute to a secure and comfortable grip.

Consider the screwdriver: its handle provides the torque needed to drive screws, while a hammer handle absorbs shock. Handles can also incorporate specialized features like insulation for electrical safety (VDE screwdrivers) or T-shapes for increased control. Ultimately, a handle transforms raw power into precise action.

The Importance of Handle Design

Handle design is paramount for tool effectiveness and user well-being. Ergonomics, comfort, and operator safety are driving factors, redefining tool use. A poorly designed handle can lead to hand fatigue, reduced control, and even injury during repetitive tasks. Constant use and wear are common problems addressed through thoughtful design.

Effective handle design considers grip, leverage, and shock absorption. For instance, hammer handles must mitigate impact, while screwdriver handles need to maximize torque application. The shape directly influences how force is transferred, impacting efficiency.

Furthermore, handle design impacts accessibility. A well-contoured handle allows for a secure grip in various positions, crucial for tasks in confined spaces. Ultimately, a superior handle isn’t just about comfort; it’s about enhancing performance and preventing strain, enabling operators to work longer and more effectively.

Handle Materials: An Overview

Handle materials significantly impact a tool’s durability, performance, and cost. Traditional wood handles offer a classic feel and robust construction, suitable for various applications. However, plastic handles provide versatility and cost-effectiveness, becoming increasingly common due to their moldability and resistance to wear.

Metal handles excel in strength and conductivity, often used in tools requiring high force or electrical grounding. Composite handles represent a modern approach, combining the benefits of multiple materials – for example, enhanced grip with shock absorption.

The choice depends on the tool’s intended use. Insulated handles, often made of specialized plastics, prioritize electrical safety (VDE standards). Material selection also considers factors like chemical resistance and temperature tolerance, ensuring longevity and reliable performance in diverse working conditions.

Wood Handles: Traditional and Durable

Wood handles represent a time-honored choice, valued for their natural grip and inherent durability. Historically, wood was the primary material, offering a comfortable feel even during prolonged use. Different wood species provide varying levels of strength and resistance to wear; hardwoods like oak and maple are particularly favored for demanding applications.

While requiring occasional maintenance – such as oiling to prevent drying and cracking – wood handles can last for generations with proper care. They offer a tactile experience often preferred by skilled tradespeople. However, wood is susceptible to moisture absorption and potential splintering.

Despite advancements in synthetic materials, wood remains a popular option, especially for tools where a classic aesthetic and comfortable grip are prioritized. Their inherent properties contribute to a balanced and reliable tool experience.

Plastic Handles: Versatility and Cost-Effectiveness

Plastic handles have become ubiquitous in modern hand tools, prized for their versatility, affordability, and resistance to many environmental factors. A wide range of polymers are employed, each offering unique properties – from rigid polypropylene to softer, more grippy materials like thermoplastic elastomers (TPE).

Plastic’s moldability allows for complex ergonomic designs, enhancing comfort and reducing hand fatigue. They are generally resistant to moisture, chemicals, and electrical conductivity (though specialized insulated plastics exist). Cost-effectiveness is a significant advantage, making plastic handles ideal for mass-produced tools.

However, plastic can be less durable than wood or metal, susceptible to cracking or deformation under extreme stress or prolonged UV exposure. Despite this, advancements in plastic technology continue to improve their strength and longevity, solidifying their position as a dominant handle material.

Metal Handles: Strength and Conductivity

Metal handles, traditionally forged from steel or alloys, offer unparalleled strength and durability, making them suitable for heavy-duty applications. Their robust construction withstands significant impact and torque, ensuring longevity even under harsh conditions. Metals like stainless steel provide corrosion resistance, extending the handle’s lifespan.

A key characteristic of metal handles is their thermal and electrical conductivity. While advantageous in certain applications – like dissipating heat – it necessitates insulation for electrical work, as highlighted by VDE screwdrivers. Metal allows for precise shaping and often features textured surfaces for improved grip.

However, metal handles can be heavier than plastic or wood alternatives and may become uncomfortably cold or hot to the touch depending on the ambient temperature. Despite these drawbacks, their inherent strength continues to make them a preferred choice for demanding tasks.

Composite Handles: Combining the Best of Both Worlds

Composite handles represent a modern advancement in tool design, skillfully blending the advantages of various materials to overcome individual limitations. Typically, these handles incorporate a core of materials like fiberglass or polymers, overmolded with a softer, more ergonomic grip – often rubber or thermoplastic elastomers (TPE).

This construction delivers a superior balance of strength, lightweight properties, and comfort. The core provides structural integrity and resistance to impact, while the outer layer enhances grip and reduces hand fatigue during prolonged use. Ergonomics, comfort, and operator safety are driving factors in composite handle design.

Composite materials also offer excellent vibration dampening, minimizing strain on the user’s hand and wrist. They are resistant to many chemicals and environmental factors, making them versatile for diverse applications. This combination of features makes composite handles increasingly popular across a wide range of tools.

Handle Ergonomics: Comfort and Safety

Handle ergonomics are paramount for user comfort, safety, and efficiency, especially during repetitive tasks. A well-designed handle minimizes strain, reduces the risk of musculoskeletal disorders, and enhances control. Ergonomics redefine tool use, prioritizing prolonged comfort and operator safety.

Key considerations include grip design to minimize hand fatigue, and shape to optimize torque application. Handles should conform naturally to the hand’s contours, distributing pressure evenly. Textured surfaces or overmolds improve grip, even in wet or oily conditions.

Vibration dampening is crucial, particularly with impact tools, to reduce hand-arm vibration syndrome (HAVS). The material composition and internal structure of the handle play a significant role in absorbing vibrations. Proper ergonomic design allows unskilled operators to perform tasks effectively, reducing wear and tear.

Grip Design and Hand Fatigue

Effective grip design is central to minimizing hand fatigue during tool use. Handles should conform to the natural contours of the hand, distributing pressure evenly to prevent localized stress points. A poorly designed grip forces users to exert excessive force, leading to quicker fatigue and potential injury.

Textured surfaces, often achieved through molded patterns or overmolds, significantly enhance grip security, reducing the need for a tight, fatiguing hold. Materials like soft-grip polymers provide cushioning and absorb vibrations, further lessening strain. The diameter of the grip must also be appropriate for the user’s hand size.

Ergonomic considerations extend to the shape of the grip; designs that promote a neutral wrist position are crucial. Avoiding sharp edges or awkward angles minimizes pressure on tendons and nerves, contributing to prolonged comfort and reduced fatigue during repetitive tasks.

Handle Shape and Torque Application

The shape of a handle profoundly impacts the user’s ability to apply torque effectively and safely. Straight handles generally offer consistent leverage, suitable for tasks requiring sustained force. However, angled or offset handles can provide improved access in confined spaces and alter the force vector for specific applications.

T-handles, for instance, maximize torque potential by allowing a two-handed grip and a longer lever arm. Their design facilitates applying significant rotational force with reduced effort; Conversely, pistol-grip handles offer enhanced control and maneuverability, particularly useful for tasks demanding precision.

Handle geometry must also account for the potential for twisting or slippage under load. Features like flared ends or contoured surfaces enhance grip security, preventing unintended movements and ensuring efficient torque transfer. Proper shape selection is vital for optimizing performance and minimizing strain.

Vibration Dampening in Handles

Prolonged exposure to tool vibration can lead to hand-arm vibration syndrome (HAVS), making vibration dampening a critical handle feature. Materials like rubber, gel, or specialized polymers are integrated into handle construction to absorb and dissipate vibrational energy.

Dual-material handles, combining rigid and flexible components, are common. The rigid portion provides structural integrity, while the softer material cushions the hand. Internal dampening systems, utilizing air pockets or viscous fluids, further reduce vibration transmission.

Effective dampening minimizes fatigue, improves control, and protects the user’s health. The level of dampening required depends on the tool’s application and the intensity of vibration generated. Ergonomic handle designs also contribute by promoting a relaxed grip, reducing the body’s natural tendency to amplify vibrations.

Types of Handles Based on Tool Application

Handle design is intrinsically linked to the tool’s intended use, dictating shape, material, and features. Screwdrivers, for instance, require handles optimized for torque and precision, varying between slotted, Phillips head, and Torx types.

Hammer handles prioritize shock absorption and control, often incorporating rubber grips or wood for dampening. Pliers handles emphasize grip and leverage, frequently featuring textured surfaces and ergonomic contours. Wrenches demand handles capable of transmitting high torque, with designs focusing on accessibility in confined spaces.

Specialized tools necessitate unique handle solutions. Insulated handles (VDE) ensure electrical safety, while T-handles provide increased torque for stubborn fasteners. Interchangeable handle systems offer adaptability, allowing users to customize tools for specific tasks.

Screwdriver Handles: Types and Features

Screwdriver handles are engineered for optimal grip and torque application, differing based on the screw head type. Ergonomically designed plastic or wood handles are typical, providing comfort and leverage.

Slotted screwdriver handles often feature a straightforward, cylindrical shape, prioritizing a firm hold during rotation. Phillips head screwdriver handle design incorporates contours to fit the hand securely, preventing slippage during application of force. Torx screwdriver handle specifications demand precision, with handles designed to minimize cam-out and maximize contact surface.

Beyond basic shapes, features like textured grips, bi-material construction (soft grip over hard plastic), and rotating end caps enhance usability. Insulated screwdrivers offer vital electrical safety, while bit-holding handles provide versatility.

Slotted Screwdriver Handle Considerations

Slotted screwdriver handles prioritize a secure and direct transfer of rotational force. Due to the simpler head design, handle ergonomics focus on maximizing grip strength and minimizing slippage during use. A cylindrical shape is common, offering a consistent feel and allowing for multiple hand positions.

Handle material is crucial; durable plastics or wood provide a robust foundation. Textured surfaces enhance grip, particularly when working in oily or wet conditions. The handle’s diameter must be comfortable for prolonged use, preventing hand fatigue.

Considerations extend to handle length, influencing leverage. Longer handles offer increased torque but may reduce maneuverability in tight spaces. A well-designed slotted screwdriver handle ensures efficient screw driving and minimizes the risk of damage to both the screw and the tool.

Phillips Head Screwdriver Handle Design

Phillips head screwdriver handles differ from slotted designs, demanding features that accommodate cam-out tendencies. Ergonomics prioritize maintaining consistent downward pressure alongside rotation, often incorporating larger handle diameters for enhanced control.

Handle materials frequently include textured plastics offering a comfortable and secure grip, even with significant force applied. The shape often features a slight bulge or contour to fit the palm naturally, reducing strain during extended use.

A key consideration is the handle’s ability to prevent slippage, as cam-out can lead to hand injuries. Some designs incorporate softer, overmolded grips for improved comfort and torque transmission. Length impacts leverage, but the focus remains on maintaining consistent contact with the screw head to avoid stripping.

Torx Screwdriver Handle Specifications

Torx screwdriver handles require precise design considerations due to the star-shaped bit’s unique engagement. Handles often feature a hexagonal bolster preventing rotation during high-torque applications, a crucial element for preventing hand fatigue and ensuring efficient fastening.

Material selection leans towards durable plastics or composite materials capable of withstanding substantial force without cracking or deforming. Textured grips are paramount, providing a secure hold even when dealing with stubborn or corroded fasteners.

Handle length is a significant specification; longer handles offer increased leverage, ideal for larger Torx screws, while shorter handles provide greater maneuverability in confined spaces. Interchangeable handle systems are common, allowing users to adapt to various Torx sizes and applications. VDE-insulated options are available for electrical safety.

Hammer Handles: Shock Absorption and Control

Hammer handle design prioritizes shock absorption to minimize strain on the user’s arm and hand. Traditional wood handles, like hickory, possess natural shock-absorbing qualities, while modern fiberglass and composite handles are engineered for superior vibration dampening.

Handle shape and weight distribution are critical for control and balance. A well-balanced hammer reduces swing effort and improves accuracy. Ergonomic contours enhance grip comfort, preventing blisters and fatigue during prolonged use. Textured surfaces, often incorporating rubber overmolds, further improve grip security.

Secure attachment of the hammer head to the handle is paramount for safety. Steel wedges and epoxy adhesives are commonly employed to create a robust and lasting connection. Regular inspection of the handle for cracks or looseness is essential to prevent accidental separation during use.

Pliers Handle: Grip and Leverage

Pliers handles are designed to maximize grip strength and leverage for manipulating objects. Ergonomic designs are crucial, as pliers often require significant hand force. Comfort grips, frequently made of rubber or plastic over steel, reduce fatigue during extended use and provide a secure hold, even with wet or oily hands.

Handle length directly impacts leverage; longer handles provide greater mechanical advantage, useful for tasks requiring substantial force. However, excessively long handles can reduce precision. Handle shape also plays a role, with contoured grips fitting comfortably within the hand’s natural curves.

Some pliers feature adjustable handles or locking mechanisms to maintain grip pressure without constant squeezing. Insulated handles are vital for electrical work, providing protection against shocks; Regular inspection for cracks or damage is essential for safe operation.

Wrench Handles: Torque and Accessibility

Wrench handles are engineered to deliver maximum torque while allowing access to fasteners in confined spaces. Handle length is a primary factor; longer handles increase leverage, enabling tighter fastening or loosening of stubborn bolts. However, extended lengths can compromise maneuverability in tight areas.

Handle shape significantly impacts usability. Straight handles offer direct force application, while angled or offset handles improve access around obstructions. Ergonomic designs, often featuring cushioned grips, minimize hand fatigue during prolonged use. Material selection is crucial – steel handles provide durability, while composite materials can reduce weight.

Specialized wrench handles include T-handles for increased torque and control, and ratcheting handles for continuous tightening without repositioning. Insulated handles are essential for electrical safety. Regular inspection for cracks or wear is vital to maintain safe and effective operation.

Specialized Handle Features

Certain applications demand handles with unique characteristics beyond standard grip and leverage. Insulated handles (VDE) are paramount for electrical work, providing a protective barrier against shocks when working on live circuits – a critical safety feature. These handles undergo rigorous testing to meet stringent safety standards.

T-Handles offer enhanced torque and control, particularly useful for tasks requiring significant rotational force. Studded T-Handles provide a secure fastening point, while tapped T-Handles allow for versatile mounting options. Interchangeable handle systems represent a modern approach, allowing users to adapt a single handle to various tool bits or blades.

These systems maximize adaptability and reduce tool clutter. Ergonomic considerations remain vital even in specialized designs, ensuring comfort and minimizing strain. The choice of feature depends heavily on the specific task and safety requirements.

Insulated Handles (VDE): Electrical Safety

Insulated handles, often marked with VDE certification, are crucial for safeguarding users working with electricity. VDE (Verband der Elektrotechnik) signifies that the handle has undergone rigorous testing to ensure it can withstand high voltages without conducting electricity to the user. This protection is achieved through multiple layers of non-conductive materials encasing the tool’s metal shaft.

These handles aren’t simply coated; they’re molded for complete coverage and durability. Regular inspection is vital, as any cracks or damage compromise the insulation. VDE-certified screwdrivers, pliers, and other tools are essential for electricians and anyone performing electrical repairs.

Always verify the VDE marking before using any tool near live electrical circuits. Proper insulation dramatically reduces the risk of electric shock and ensures a safe working environment.

T-Handles: Increased Torque and Control

T-handles offer a distinct advantage when significant torque and precise control are needed. Their design allows for a two-handed grip, maximizing leverage and reducing strain on the user’s wrist. This is particularly beneficial for tasks requiring substantial force, like tightening stubborn fasteners or applying consistent pressure.

Several variations exist, including studded, tapped, locking, extra-clearance, and through-hole T-handles, each suited for specific applications. Studded T-handles provide a secure fastening point, while tapped versions allow for versatile mounting options.

The extended handle length further enhances leverage, making T-handles ideal for applications where space is limited or access is difficult. They are commonly used with hex keys, screwdrivers, and wrenches, transforming them into high-torque tools. Proper selection based on the task ensures optimal performance and user comfort.

Studded T-Handles: Secure Fastening

Studded T-handles are specifically engineered for applications demanding a robust and secure fastening solution. These handles feature a protruding stud, typically threaded, that provides an additional point of contact and grip during operation. This design significantly reduces the risk of slippage, even when applying substantial force or working in challenging conditions.

The stud allows for a more positive engagement with the fastener, minimizing the chance of rounding off edges or damaging the screw head. This is particularly crucial when dealing with corroded or tightly secured components.

They are frequently utilized in assembly lines and maintenance environments where consistent, reliable fastening is paramount. The enhanced grip and control offered by studded T-handles contribute to increased efficiency and reduced operator fatigue. Choosing the correct stud size and thread pitch is essential for optimal performance and compatibility.

Tapped T-Handles: Versatile Mounting

Tapped T-handles offer exceptional versatility in mounting and application, distinguished by their internally threaded hole. This feature allows for direct attachment to threaded rods, studs, or specialized tooling, expanding their functionality beyond a simple grip. They are ideal for scenarios requiring frequent tool changes or custom configurations.

The threaded opening enables secure and rapid connection to a wide array of accessories, facilitating adaptability in diverse work environments. This mounting method eliminates the need for additional hardware like adapters or clamps, streamlining the setup process and reducing potential failure points.

Tapped T-handles are commonly found in machinery, jigs, and fixtures where precise control and adjustability are critical. Their robust construction and secure mounting capabilities ensure reliable performance even under demanding conditions. Selecting the appropriate thread size is vital for a compatible and durable connection.

Interchangeable Handle Systems: Adaptability

Interchangeable handle systems represent a significant advancement in tool versatility, allowing users to adapt a single handle to a multitude of tool heads or bits. This innovative approach minimizes the need for extensive toolsets, saving space and reducing costs. The handle functions as a central chuck, accepting various attachments for diverse tasks.

These systems typically employ a locking mechanism – often a twist-lock or button-release – to securely hold the tool head in place. This ensures stability and prevents slippage during operation, maintaining user safety and precision. The adaptability extends to different tool types, including screwdrivers, nut drivers, and even small wrenches.

Benefits include increased efficiency, portability, and customization. Users can quickly switch between tasks without searching for different tools. Interchangeable systems are particularly valuable for professionals who require a streamlined and adaptable toolkit for on-site work.

Handle Maintenance and Care

Proper handle maintenance is crucial for tool longevity and user safety. Regular cleaning prevents the buildup of grime, which can compromise grip and contribute to material degradation. Use a mild detergent and water, avoiding harsh chemicals that may damage the handle material – especially plastics. Thoroughly dry the handle after cleaning to prevent corrosion or swelling.

Inspect handles regularly for cracks, chips, or wear. Damaged handles should be repaired or replaced immediately to avoid injury. For wooden handles, occasional oiling can prevent drying and cracking. Metal handles may require rust prevention treatments.

Preventative measures include proper storage – avoiding extreme temperatures and humidity – and careful handling to minimize impacts. Storing tools in a dry environment extends handle life. Addressing minor damage promptly prevents it from escalating into more significant issues, ensuring continued safe and effective tool use.

Cleaning and Storage

Consistent cleaning is paramount for maintaining handle integrity and hygiene. After each use, remove dirt, grease, and debris with a damp cloth. For stubborn residue, a mild soap solution is recommended, ensuring thorough rinsing and drying afterward. Avoid abrasive cleaners that can scratch or damage handle surfaces, particularly plastic or coated metal.

Proper storage significantly extends handle lifespan. Tools should be stored in a dry, climate-controlled environment, away from direct sunlight and extreme temperatures. A tool chest or rack is ideal, preventing handles from rubbing against each other and sustaining damage. Avoid storing tools in damp basements or exposed outdoor areas, as this can lead to rust or material degradation.

Regularly inspect storage areas for pests that could damage wooden handles. Consider using desiccant packs to absorb moisture and maintain a dry storage environment, preserving handle quality for years to come.

Handle Repair and Replacement

Minor handle damage, like small cracks in wood or plastic, can sometimes be repaired using appropriate adhesives. Epoxy resins are often effective for wood, while specialized plastic adhesives work best for synthetic materials. Ensure the repaired area is thoroughly clamped during the curing process for optimal strength.

However, severely damaged handles – those with significant cracks, breaks, or material degradation – should be replaced entirely. Attempting to repair extensively damaged handles compromises safety and tool performance. Interchangeable handle systems simplify replacement, allowing for quick and easy swapping of damaged handles.

When replacing a handle, ensure the new handle is compatible with the tool’s shaft and intended application. Always prioritize safety; a faulty handle can lead to injury. If unsure about repair or replacement, consult a qualified tool technician for professional assistance.

Preventative Measures to Extend Handle Life

Regular cleaning is paramount for handle longevity. Remove dirt, grime, and residue after each use with a mild detergent and water, then thoroughly dry the handle. For wood handles, occasional oiling prevents drying and cracking, maintaining flexibility and strength. Avoid prolonged exposure to extreme temperatures and direct sunlight, which can degrade materials.

Proper storage is crucial. Store tools in a dry environment, preventing moisture absorption that can lead to corrosion or material breakdown. Avoid dropping or subjecting handles to unnecessary impact, as this can cause cracks or fractures. Inspect handles regularly for signs of wear and tear, addressing minor issues before they escalate.

Using tools for their intended purpose also extends handle life. Avoid using screwdrivers as chisels or hammers, as this stresses the handle beyond its design limits. Ergonomic considerations, like proper grip and technique, reduce strain and wear.

tactacam 5.0 manual

Tactacam 5․0 Manual: A Comprehensive Guide

Welcome! This comprehensive guide details operation for Tactacam 5․0‚ 4․0‚ and Solo models‚ covering everything from initial setup to advanced features and troubleshooting․

Congratulations on purchasing your new Tactacam 5․0! This action camera is engineered for capturing high-quality video and still images in the field‚ specifically designed for hunters‚ outdoor enthusiasts‚ and anyone needing a rugged‚ reliable recording device․ The Tactacam 5․0 boasts impressive features‚ offering a user-friendly experience alongside professional-grade performance․

This manual serves as a complete resource‚ guiding you through every aspect of your camera – from initial setup and basic operation to exploring advanced settings and troubleshooting potential issues․ Whether you’re a first-time user or an experienced action camera operator‚ this guide will help you unlock the full potential of your Tactacam 5․0․ Remember to always utilize a UHS Speed Class 3 (U3) SD card for optimal performance and reliable recording․

What’s in the Box?

Upon opening your Tactacam 5․0 package‚ please verify that all the following components are present․ Your Tactacam 5․0 camera itself is‚ of course‚ the primary item․ You should also find a USB-C charging cable‚ essential for powering and transferring data․ A quick start guide is included to get you up and running quickly with the basic functions․

Additionally‚ the box contains important documentation‚ including this comprehensive user manual‚ providing detailed instructions and troubleshooting tips․ Depending on the bundle purchased‚ you may also receive a lens cap to protect the camera’s optics and a mounting accessory‚ such as a rail mount or tripod adapter․ Please retain all packaging and components for potential warranty claims or future use․ If any items are missing‚ contact customer support immediately․

Key Features of the Tactacam 5․0

The Tactacam 5․0 boasts several impressive features designed for capturing high-quality footage․ It offers stunning 4K video recording at 30fps‚ ensuring crisp and detailed visuals․ A standout capability is its 4x digital zoom‚ allowing for closer shots without sacrificing clarity․ The camera supports UHS Speed Class 3 (U3) SD cards‚ crucial for handling the high data rates of 4K video;

Connectivity is enhanced through Bluetooth pairing and Wi-Fi‚ enabling seamless control via the Tactacam App and live streaming capabilities․ The app allows for remote operation and easy file transfer․ Furthermore‚ the 5․0 model features a user-friendly interface and extended battery life․ Its compatibility with various mounts and tripods expands its versatility‚ and integration with platforms like Hollywoodbets adds unique functionality for certain users․

Getting Started with Your Tactacam 5․0

Let’s begin! This section guides you through the initial steps: charging‚ powering on/off‚ and properly inserting a UHS-I U3 SD card for optimal performance․

Charging the Camera

Powering Up: Your Tactacam 5․0 utilizes a USB-C charging port for convenient power replenishment․ To charge‚ connect the provided USB-C cable to the camera’s port and a suitable power source‚ such as a computer USB port or a USB wall adapter․ During charging‚ a visual indicator will display the charging status – typically a red light indicating charging in progress and a green or blue light signifying a full charge․

Charging Time: The time required to fully charge the camera varies depending on the power source and the camera’s current battery level․ Generally‚ a full charge takes approximately 2-3 hours․ It’s recommended to fully charge the camera before its initial use and after extended periods of inactivity to ensure optimal performance and recording time․ Avoid using damaged or non-certified USB cables‚ as they may impede the charging process or potentially damage the device․

Important Note: While charging‚ the camera may still function‚ but recording while charging is not generally recommended as it can slow down the charging process and potentially impact battery health․

Powering On/Off

Initiating Operation: To power on your Tactacam 5․0‚ simply press and hold the Rec/Power button for approximately one second․ The camera will indicate it’s powering on through a visual cue‚ such as the screen illuminating or a startup animation․ Once fully booted‚ the camera will be ready for recording or still image capture․

Conserving Battery: To completely power off the camera and conserve battery life‚ press and hold the Rec/Power button for approximately five seconds․ The camera will display a shutdown sequence or confirmation before turning off․ The camera also features an automatic power-off function; if left idle for a predetermined period‚ it will automatically shut down to preserve battery․

Quick Access: A short press of the Rec/Power button will not turn the camera off‚ but will likely initiate recording or access quick settings․ Remember to hold the button for the full five seconds to ensure complete power down․

Inserting and Formatting the SD Card (UHS Speed Class 3 (U3) Recommended)

SD Card Compatibility: The Tactacam 5․0 requires a microSD card for storing recorded video and captured images․ For optimal performance‚ especially when recording in high resolution or at high frame rates‚ a UHS Speed Class 3 (U3) card is strongly recommended․ Using a slower card may result in dropped frames or recording errors․

Insertion Procedure: Locate the SD card slot on your Tactacam 5․0․ Gently insert the microSD card into the slot until it clicks into place․ Do not force the card․

Formatting the Card: Before first use‚ or periodically thereafter‚ it’s advisable to format the SD card within the camera’s settings menu․ This ensures compatibility and optimal performance․ Formatting will erase all data on the card‚ so back up any important files beforehand․ Select the “Format” option and confirm the operation․

Camera Operation

Begin recording! Easily capture life’s moments with video recording and still photos‚ utilizing diverse recording modes and adjustable settings for personalized results․

Recording Video

Initiating video recording with your Tactacam 5․0 is straightforward; Simply press the Rec/Power button once to begin capturing footage․ A red recording indicator will illuminate‚ confirming active recording․ To stop recording‚ press the Rec/Power button again․ The camera automatically saves the recorded video to the SD card․

The Tactacam 5․0 offers various recording modes‚ allowing you to tailor the video capture to your specific needs․ You can adjust resolution and frame rate within the camera settings to optimize video quality and file size․ Remember to utilize a UHS Speed Class 3 (U3) SD card to ensure sufficient write speed for smooth‚ uninterrupted recording‚ especially at higher resolutions․

The camera also features an auto-off function to conserve battery life when inactive․ Holding the Rec/Power button for five seconds will completely power down the device․ Explore the different settings to customize your recording experience and achieve optimal results․

Taking Still Photos

Capturing still images with the Tactacam 5․0 is easily achieved․ While the camera is powered on‚ press the Shutter button (if equipped‚ or utilize a designated button within the app when connected) to take a single photograph․ The captured image will be instantly saved to the SD card alongside your video recordings․

The camera allows for adjustments to photo resolution within the settings menu‚ enabling you to balance image quality and storage space․ As with video recording‚ employing a UHS Speed Class 3 (U3) SD card is crucial for optimal performance and preventing delays when capturing a series of still images․

Review your captured photos directly on the camera’s display or transfer them to your smartphone or computer for editing and sharing․ Experiment with different settings to achieve the desired photographic results‚ ensuring clear and detailed images every time․

Using the Different Recording Modes

The Tactacam 5․0 offers versatile recording modes to suit various shooting scenarios․ Standard recording captures continuous video until manually stopped‚ ideal for general use․ Another mode allows for pre-buffering‚ recording a short clip before you press the record button – perfect for capturing spontaneous action․

Loop recording overwrites the oldest footage when the SD card is full‚ useful for continuous monitoring․ Time-lapse recording compresses extended periods into shorter videos‚ showcasing events like plant growth or construction progress․

Access these modes through the camera’s settings menu or‚ conveniently‚ via the Tactacam app․ Experiment with each mode to determine which best fits your needs‚ optimizing your recording experience and ensuring you never miss a crucial moment․ Remember to check SD card capacity!

Adjusting Camera Settings (Resolution‚ Frame Rate‚ etc․)

Customize your Tactacam 5․0 experience by adjusting key settings․ Resolution determines video clarity; higher resolutions (like 4K) offer sharper images but require more storage space․ Frame rate (fps) impacts smoothness – 30fps is standard‚ while 60fps or 120fps are ideal for slow-motion playback․

Within the settings menu‚ you can also control video length‚ choosing between continuous recording or pre-set clip durations․ Adjust the white balance for accurate color representation in different lighting conditions․ Explore options for wind noise reduction to improve audio quality․

These settings are accessible both directly on the camera and through the Tactacam app‚ offering convenient control․ Always prioritize a UHS Speed Class 3 (U3) SD card to handle higher resolutions and frame rates effectively․

Connectivity and Features

Explore advanced capabilities! The Tactacam 5;0 offers Bluetooth pairing‚ Wi-Fi connectivity‚ and live streaming options via the dedicated Tactacam application․

Bluetooth Pairing and App Control

Seamless Control at Your Fingertips: The Tactacam 5․0 leverages Bluetooth technology for effortless connection to your smartphone or tablet․ This pairing unlocks a suite of control features directly within the Tactacam app․ Follow the on-screen prompts within the app to discover and connect to your camera․

Once connected‚ you can remotely start and stop recordings‚ snap still photos‚ adjust camera settings like resolution and frame rate‚ and even preview live footage․ The app provides a user-friendly interface for managing your camera and reviewing captured content․ Granting camera access to the app is crucial for full functionality․

Bluetooth connectivity also facilitates firmware updates‚ ensuring your Tactacam 5․0 always has the latest features and performance enhancements․ Regularly check the app for available updates to maintain optimal camera operation․ The app streamlines the entire user experience‚ offering convenience and control․

Wi-Fi Connectivity

Expanding Your Sharing Options: The Tactacam 5․0 incorporates Wi-Fi connectivity‚ enabling direct transfer of photos and videos to your smartphone or tablet without needing to remove the SD card․ This feature simplifies content sharing and backup procedures․ Access the Wi-Fi settings through the camera’s menu‚ and connect to a local network․

Once connected‚ utilize the Tactacam app to browse the camera’s internal storage and selectively download desired files․ Wi-Fi also supports live streaming capabilities‚ allowing you to broadcast your adventures in real-time․ Ensure a stable Wi-Fi signal for optimal streaming performance․

The app guides you through the Wi-Fi setup process‚ making it straightforward to establish a connection․ Regularly check for app updates to benefit from improved Wi-Fi functionality and enhanced streaming features․ Wi-Fi connectivity provides a convenient and efficient way to manage and share your Tactacam 5․0 footage․

Live Streaming Capabilities

Share Your Moments in Real-Time: The Tactacam 5․0 boasts impressive live streaming capabilities‚ allowing you to broadcast your hunts‚ outdoor adventures‚ or other activities directly to platforms like social media․ This feature requires a stable Wi-Fi connection established through the Tactacam app․ Once connected‚ navigate to the live streaming option within the app’s interface․

Before initiating a stream‚ verify your internet bandwidth to ensure smooth transmission․ The app provides settings to adjust stream quality‚ balancing visual fidelity with data usage․ Live streaming is an excellent way to engage with your audience and share experiences as they unfold․

Remember to adhere to platform-specific guidelines and regulations when live streaming․ Regularly check for app updates to benefit from improved streaming performance and new features․ Live streaming transforms your Tactacam 5․0 into a powerful broadcasting tool․

Using the Tactacam App

Unlock Full Potential: The Tactacam app is central to maximizing your camera’s functionality․ Download it from your device’s app store and create an account‚ or log in if you already have one․ The app facilitates Wi-Fi connectivity‚ allowing for wireless file transfer‚ live streaming‚ and remote camera control․

Within the app‚ you can review recorded footage‚ adjust camera settings (resolution‚ frame rate)‚ and manage your account details․ Password updates and cell number changes are easily handled through the app’s security settings․ Ensure your password meets the minimum security requirements – at least six characters – for optimal account protection․

The app also provides access to firmware updates‚ crucial for maintaining peak performance and accessing new features․ Regularly check for updates to keep your Tactacam 5․0 running smoothly․ Explore the app’s intuitive interface to discover all its capabilities․

Advanced Settings & Troubleshooting

Fine-Tune & Resolve: Explore password changes‚ firmware updates‚ and solutions for common issues like power failures or recording errors to optimize performance;

Changing Password & Account Security

Protecting Your Access: Maintaining a strong password is crucial for the security of your Tactacam account․ To change your password‚ navigate to the account settings within the Tactacam app or website․ For your account’s safety‚ you’ll be prompted to update your password to meet specific security requirements․

Password Requirements: Your new password must be a minimum of six characters long․ It’s highly recommended to use a combination of uppercase and lowercase letters‚ numbers‚ and symbols for enhanced security․ Avoid using easily guessable information like your birthday or common words․

Cell Number Updates: You can also update the cell number associated with your account․ This is important for account recovery and receiving important notifications․ Ensure the number is current and accessible․ Regularly reviewing and updating your account security settings is a proactive step towards safeguarding your data and ensuring uninterrupted access to your Tactacam features․

Updating Firmware

Keeping Your Camera Current: Regularly updating your Tactacam 5․0’s firmware ensures optimal performance‚ stability‚ and access to the latest features․ Firmware updates often include bug fixes‚ improved compatibility‚ and enhanced functionality․ Check for updates through the Tactacam app․

The Update Process: To initiate an update‚ connect your camera to a stable Wi-Fi network․ Within the app‚ navigate to the settings menu and select “Firmware Update․” The app will automatically check for available updates․ If an update is found‚ follow the on-screen instructions carefully․

Important Considerations: Do not interrupt the update process․ Ensure your camera has sufficient battery life – a minimum of 50% is recommended – or keep it connected to a power source․ A failed update could potentially render your camera unusable․ Following these guidelines will guarantee a smooth and successful firmware update‚ maximizing your Tactacam experience․

Troubleshooting Common Issues (e․g․‚ camera not turning on‚ recording errors)

Camera Won’t Power On: If your Tactacam 5․0 fails to power on‚ first ensure it’s adequately charged․ Hold the Rec/Power button for 5 seconds․ If still unresponsive‚ try a different USB-C cable and power adapter․ A full discharge might require a longer initial charging period․

Recording Errors: Encountering recording errors? Verify you’re using a UHS Speed Class 3 (U3) SD card․ Formatting the SD card within the camera’s settings can resolve file system issues․ Insufficient storage space will also cause errors; clear space or use a larger card․

General Issues: For app connectivity problems‚ ensure Bluetooth and Wi-Fi are enabled․ If issues persist‚ restart both the camera and your mobile device․ Refer to the Tactacam website for FAQs and further support resources․

Optimizing Battery Life

Power Saving Features: The Tactacam 5․0 features automatic power-off functionality‚ activating after a period of inactivity to conserve battery․ Utilize this by allowing the camera to shut down when not actively recording․ Disable Wi-Fi and Bluetooth when not needed‚ as these consume significant power․

Recording Settings: Lowering the recording resolution and frame rate can dramatically extend battery life․ Consider using 1080p at 30fps instead of 4K at 60fps for longer recording sessions․ Avoid continuous recording if intermittent footage is sufficient․

External Power: For extended use‚ consider utilizing an external power bank connected via USB-C․ Store the camera in a cool‚ dry place when not in use to prevent battery degradation․

Accessories and Compatibility

Enhance your experience! Explore compatible mounts‚ tripods‚ and the Hollywoodbets integration for betting applications‚ expanding the Tactacam 5․0’s versatility․

Compatible Accessories

Maximize your Tactacam 5․0’s potential with a range of compatible accessories designed to enhance your recording experience․ Consider utilizing various mounting options‚ including rifle mounts‚ bow mounts‚ and helmet mounts‚ allowing for hands-free operation during your activities․

Tripods are also essential for stable footage‚ particularly for stationary recording scenarios․ Explore options ranging from lightweight travel tripods to more robust‚ professional-grade models․ Battery banks and extended battery packs can significantly prolong recording time‚ crucial for extended hunts or events․

Don’t forget about protective cases and screen protectors to safeguard your investment from the elements and accidental damage․ Finally‚ ensure compatibility with high-speed UHS-I U3 microSD cards‚ as these are essential for optimal performance and reliable recording with the Tactacam 5․0․ Regularly check the Tactacam website for the latest accessory recommendations and compatibility updates․

Hollywoodbets Integration (Betting Applications)

Please note: While the Tactacam 5․0 itself doesn’t directly integrate with Hollywoodbets or other betting applications‚ the camera’s recording capabilities can be utilized to document sporting events or personal achievements for potential betting-related content creation․

Users can record footage of horse races‚ football matches‚ or other sporting events and share this content on social media platforms or personal blogs‚ potentially alongside betting-related discussions or analyses․ Hollywoodbets offers extensive betting markets on a wide range of sports‚ including horse racing‚ football‚ tennis‚ and golf‚ providing opportunities for informed wagering․

Remember to always gamble responsibly and adhere to the terms and conditions set forth by Hollywoodbets․ New players may be eligible for sign-up bonuses and free spins‚ enhancing their initial betting experience․ All bets are subject to Hollywood Sportsbook’s prescribed trading terms; review them carefully before participating․

Using with Different Mounts and Tripods

Maximize your Tactacam 5․0’s versatility by utilizing a variety of mounts and tripods․ The camera’s compact size and design allow for seamless integration with numerous accessories‚ enhancing recording options for diverse scenarios․

Consider rifle mounts for hunting applications‚ chest mounts for immersive first-person perspectives‚ or helmet mounts for action sports․ Standard tripods provide stable footage for stationary recording‚ ideal for observing wildlife or capturing events․ Ensure compatibility by checking mount specifications and the Tactacam’s mounting interface․

Experiment with different angles and positions to achieve optimal footage․ Securely fasten the camera to prevent accidental dislodging during activity․ Remember to always prioritize safety and responsible use when mounting the Tactacam in dynamic environments․ Explore available accessories to unlock the full potential of your camera․

singer 5400 sewing machine manual

Singer 5400 Sewing Machine Manual: A Comprehensive Guide

This guide offers detailed instructions for the Singer Sew Mate 5400, a 64-page manual available as a PDF. It covers setup, operation, and maintenance.

The Singer 5400, also known as the Sew Mate 5400, is an automatic sewing machine designed for ease of use and versatility. This comprehensive sewing machine boasts a range of features suitable for both beginners and experienced sewers. A detailed instruction manual, readily available in PDF format (approximately 35.2MB in size), accompanies the machine, providing step-by-step guidance.

The manual, spanning 64 pages, covers everything from initial setup and threading to advanced techniques like buttonhole sewing and zipper insertion. It’s designed to help users quickly become proficient with their new machine. Singer emphasizes making sewing easy, and this model reflects that philosophy. Furthermore, Singer provides supplemental video instructions on their YouTube channel, offering an additional learning resource. The manual is available in English and caters to various skill levels, ensuring a smooth sewing experience.

Understanding the Machine’s Features

The Singer 5400 offers a diverse range of stitch patterns, detailed within its 64-page manual. While specific stitch details aren’t explicitly listed in the provided snippets, the manual guides users through selecting and adjusting these patterns. Key features include adjustable stitch length and width, allowing for customization based on fabric and project needs.

The machine’s capabilities extend to more complex techniques, such as reverse stitching, buttonhole creation, and zipper insertion – all thoroughly explained in the PDF instruction guide. Understanding presser foot pressure adjustment is also covered, crucial for handling different fabric types. The manual also details compatible bobbin types and available optional accessories. Singer B.R.K. electric motors power the machine, ensuring reliable performance. The manual serves as a complete reference for unlocking the full potential of the Singer 5400.

Safety Precautions

The Singer 5400 manual emphasizes crucial safety instructions to prevent injury during operation. A prominent warning within the manual stresses the importance of referring to the complete instruction booklet for detailed guidance. While specific precautions aren’t fully detailed in the provided text, the presence of “IMPORTANT SAFETY INSTRUCTIONS” highlights their significance.

Users should always disconnect the power cord before performing any maintenance, such as cleaning or changing the needle. Exercise caution when the machine is in operation, keeping fingers away from moving parts. The manual likely details safe handling of the power cord and proper machine placement to avoid electrical hazards. Singer prioritizes user safety, and the manual serves as a vital resource for understanding and adhering to these guidelines. Always consult the PDF for a comprehensive list of safety measures before operating the Singer 5400.

Setting Up Your Singer 5400

Initial setup involves unboxing, connecting the power cord, and preparing the machine for sewing – including bobbin winding and upper thread threading.

Unboxing and Initial Inspection

Carefully unpack your Singer 5400 sewing machine, ensuring all components are present. The box should contain the machine itself, the power cord, various presser feet, bobbins, needles, a screwdriver, and this instruction manual.

Inspect the machine for any visible damage that may have occurred during shipping. Check for cracks, dents, or loose parts. Verify that all accessories are included and in good condition.

Retain the original packaging for potential future transport or storage. Before proceeding, familiarize yourself with the machine’s basic parts as illustrated in the manual. A thorough initial inspection will help ensure a smooth sewing experience and identify any potential issues early on.

Confirm the model number (5400) matches the information on the machine and packaging.

Attaching the Power Cord

Before connecting the power cord, ensure the machine’s power switch is in the “OFF” position. Locate the power jack on the back of the Singer 5400. It’s typically a two-prong receptacle.

Carefully insert the power cord plug fully into the power jack. A secure connection is crucial for safe operation. Do not force the plug; it should fit snugly without excessive pressure.

Plug the other end of the power cord into a properly grounded electrical outlet. Verify the outlet’s voltage matches the machine’s requirements (refer to the machine’s label or manual).

Avoid using extension cords if possible. If an extension cord is necessary, ensure it’s appropriately rated for the machine’s power consumption. Always disconnect the power cord when the machine is not in use or during maintenance.

Winding the Bobbin

Begin by placing the spool of thread onto the spool pin, securing it with the spool cap. Then, draw the thread through the thread guide, following the path indicated in your manual. Next, thread the end of the thread through the tension disc – ensuring it ‘clicks’ into place.

Place an empty bobbin onto the bobbin winder spindle. Press the bobbin firmly against the spindle and begin winding by pressing down on the bobbin winder stem. The machine will automatically stop when the bobbin is full.

Cut the thread close to the bobbin. It’s important to wind the bobbin evenly; uneven winding can cause tension issues during sewing. Refer to the diagrams in your Singer 5400 manual for a visual guide to this process.

Threading the Upper Thread

Start by ensuring the presser foot is raised and the needle is in its highest position. Place the spool of thread on the spool pin, securing it with a spool cap. Guide the thread through the first thread guide, then down and around the tension discs – a ‘click’ confirms proper placement.

Continue threading upwards, following the numbered path indicated on the machine. This includes guiding the thread through the take-up lever, and then down through the upper thread guide. Finally, thread the needle from front to back.

Draw a sufficient length of thread through the needle eye (approximately 6 inches). Your Singer 5400 manual provides detailed diagrams illustrating this process. Always refer to the manual for the correct threading path to avoid issues.

Basic Sewing Operations

Master fundamental techniques like selecting stitch patterns, adjusting length/width, and executing straight/zigzag stitches with your Singer 5400, as detailed in the manual.

Selecting Stitch Patterns

The Singer 5400 offers a variety of stitch patterns to accommodate diverse sewing projects. Your instruction manual is crucial for understanding each stitch’s purpose and optimal settings. Typically, a stitch selection dial or electronic controls allow you to choose from straight stitches, zigzag stitches, and potentially decorative or stretch stitches.

Refer to the manual’s stitch guide for visual representations of each pattern and recommended uses – garment construction, mending, or decorative embellishments. The manual will also detail how to adjust stitch width and length for different fabric types and desired effects. Experimenting with these settings is encouraged, but always test on a scrap fabric first to ensure the desired outcome.

Proper stitch selection significantly impacts the finished project’s appearance and durability. The Singer 5400 manual provides clear guidance on matching the appropriate stitch to your specific sewing needs, ensuring professional-looking results. Don’t hesitate to consult the PDF manual for detailed diagrams and explanations.

Adjusting Stitch Length and Width

The Singer 5400 allows for precise control over stitch length and width, crucial for achieving professional results. Your instruction manual details how to use the corresponding dials or electronic controls to modify these settings. Stitch length determines the distance between each stitch, impacting durability – shorter for delicate fabrics, longer for heavier materials.

Stitch width primarily affects zigzag stitches, controlling the breadth of the zig-zag pattern. Wider stitches are suitable for stretch fabrics or decorative applications, while narrower widths are ideal for reinforcing seams. The manual provides recommended settings for various fabrics and stitch types.

Always test adjustments on a scrap piece of fabric before sewing your project. This ensures the chosen settings create the desired appearance and prevent puckering or breakage. The Singer 5400 manual, available as a PDF, offers detailed guidance and visual aids for mastering these essential adjustments.

Sewing Straight Stitches

The Singer 5400 excels at creating consistent, reliable straight stitches – the foundation of most sewing projects. Begin by selecting the straight stitch pattern on your machine, referencing your instruction manual for the specific dial or button. Ensure the presser foot is correctly installed for standard sewing.

Guide fabric gently under the presser foot, maintaining a consistent speed. Use the markings on the needle plate as a guide to ensure a straight seam allowance. Avoid pulling or pushing the fabric; let the machine feed it through. The manual emphasizes proper fabric handling for optimal results.

Practice on scrap fabric to develop a feel for the machine’s rhythm. Adjust stitch length as needed, shorter for delicate fabrics and longer for heavier materials. The Singer 5400 manual, available in PDF format, provides detailed illustrations and troubleshooting tips for achieving perfect straight stitches.

Sewing Zigzag Stitches

The Singer 5400 offers versatile zigzag stitching capabilities, ideal for finishing raw edges, creating decorative elements, and sewing stretch fabrics. To begin, select the zigzag stitch pattern using the stitch selection dial, consulting your instruction manual for precise settings. Adjust the stitch width to control the breadth of the zigzag.

Experiment with different stitch widths and lengths on scrap fabric. Wider stitches are suitable for decorative applications, while narrower stitches provide a secure edge finish. The manual details how to adjust these parameters for various fabric types and desired effects.

Guide the fabric smoothly under the presser foot, ensuring even feeding. Zigzag stitches require a slightly slower sewing speed for optimal control. Refer to the Singer 5400 manual’s PDF version for detailed diagrams and troubleshooting advice to master this essential technique.

Advanced Sewing Techniques

The Singer 5400 manual details techniques like reverse stitching, buttonholes, zipper insertion, and presser foot pressure adjustments for skilled sewing projects.

Using the Reverse Stitch

The Singer 5400’s reverse stitch function, as outlined in the manual, is crucial for securing seams at the beginning and end of a sewing line. This prevents unraveling and ensures durability. To engage the reverse stitch, locate the dedicated lever or button – the manual provides a clear diagram of its position.

Typically, depressing this lever before starting to sew will initiate the reverse function. Sew a few stitches backward, then release the lever to return to forward stitching. Repeat this process at the end of your seam. The manual emphasizes practicing this technique to achieve consistent and neat backstitching.

Adjusting the length of the reverse stitches is also possible, allowing for greater control over the seam finish. Refer to the manual’s section on stitch length adjustment for detailed instructions. Mastering the reverse stitch is fundamental for creating professional-quality garments and projects with your Singer 5400.

Buttonhole Sewing

The Singer 5400 simplifies buttonhole creation with its dedicated buttonhole foot and programmed stitch patterns. The manual details a step-by-step process, beginning with selecting the appropriate buttonhole stitch on the machine. It’s vital to measure your button accurately before starting, as the machine needs this dimension for a correctly sized buttonhole.

The manual instructs users to place the buttonhole foot onto the machine and position the fabric carefully. Typically, the machine will automatically sew the buttonhole outline, and you’ll need to stop and reposition the fabric for each side.

Pay close attention to the manual’s illustrations showing the correct fabric placement and stitch sequence. Practicing on scrap fabric is highly recommended before working on your final project. The manual also covers troubleshooting common buttonhole issues, such as uneven stitching or incorrect sizing, ensuring successful results with your Singer 5400.

Zipper Insertion

The Singer 5400 manual provides detailed guidance on inserting various zipper types, including standard, invisible, and centered zippers. It emphasizes using the correct zipper foot, which is often included with the machine’s accessories. The manual begins by outlining fabric preparation, recommending stabilizing the zipper area with interfacing for added durability.

Step-by-step illustrations demonstrate pinning the zipper tape to the fabric, ensuring even alignment. The manual stresses the importance of a consistent seam allowance throughout the process. It details specific stitch selections for zipper application, often utilizing a straight stitch or a specialized zipper stitch.

Troubleshooting tips within the manual address common issues like puckering or uneven zipper teeth. Practicing on scrap fabric is encouraged to master the technique before applying it to a garment. The Singer 5400 offers versatility in zipper insertion, and the manual unlocks these capabilities.

Adjusting Presser Foot Pressure

The Singer 5400 manual explains how adjusting presser foot pressure is crucial for achieving optimal stitch quality across different fabric weights. Lower pressure is recommended for delicate fabrics like silk or chiffon to prevent puckering and fabric damage. Conversely, higher pressure is ideal for thicker materials like denim or canvas, ensuring consistent fabric feed.

The manual details the location of the pressure adjustment dial, typically found on the back of the machine. It provides a scale indicating pressure levels and suggests starting with a medium setting before fine-tuning. Experimentation with scrap fabric is strongly advised to determine the appropriate pressure for each project.

Incorrect pressure can lead to skipped stitches, uneven seams, or fabric slippage. The Singer 5400 manual emphasizes that proper adjustment enhances sewing precision and overall project quality. Mastering this feature unlocks the machine’s full potential for handling diverse materials.

Maintenance and Troubleshooting

The Singer 5400 manual details cleaning, oiling points, and resolving common issues like skipped stitches. Regular upkeep ensures longevity and performance.

Cleaning the Machine

Regular cleaning is crucial for maintaining your Singer 5400’s optimal performance. Dust and lint buildup can cause malfunctions and affect stitch quality. Always disconnect the power cord before beginning any cleaning procedure. Use a soft brush, often included with the machine, to remove lint from the bobbin area, feed dogs, and around the needle plate.

For more stubborn lint, a small vacuum cleaner attachment can be helpful. Avoid using compressed air, as it can blow dust further into the machine. Wipe down the exterior surfaces with a slightly damp cloth. Never use abrasive cleaners or solvents, as these can damage the finish. Pay particular attention to the areas around the tension discs and the needle bar, ensuring they are free of debris. Consistent cleaning, as outlined in the Singer 5400 manual, will extend the life of your sewing machine and ensure smooth operation.

Oil Points and Lubrication

Proper lubrication is essential for the smooth operation of your Singer 5400. Refer to your instruction manual for specific oiling points, as incorrect lubrication can cause damage; Typically, key areas requiring oil include the bobbin race, the hook assembly, and the motor shaft. Use only sewing machine oil – never use oil intended for other purposes.

Apply oil sparingly, using an oiler to precisely target the designated points. Avoid over-oiling, as excess oil can attract dust and lint. After oiling, run the machine briefly to distribute the oil evenly. Regular oiling, as recommended in the manual, prevents friction and wear, ensuring the longevity of your machine. Always disconnect the power before lubricating. Consistent maintenance, including proper oiling, will keep your Singer 5400 running efficiently for years to come.

Troubleshooting Common Issues

Encountering problems with your Singer 5400? The manual provides solutions to frequent issues. Thread bunching often indicates incorrect threading or improper tension. If the needle breaks, ensure you’re using the correct needle type and size for your fabric. A skipped stitch can be caused by a dull or incorrectly inserted needle.

If the machine is noisy, check for lint buildup or the need for lubrication. Power issues may stem from a loose power cord or a tripped circuit breaker. Always refer to the manual’s troubleshooting section before attempting repairs. Remember to disconnect the power before inspecting or cleaning any internal components. For more complex problems, consult a qualified Singer service technician. Following the manual’s guidance can resolve many common issues quickly and safely.

Replacing the Needle

Regular needle replacement is crucial for optimal Singer 5400 performance. The manual details a straightforward process. First, always power off and disconnect the machine. Loosen the needle clamp screw using the screwdriver. Gently remove the old needle, noting its flat side orientation.

Insert a new needle, ensuring the flat side faces the back of the machine – this is vital for correct stitch formation. Tighten the needle clamp screw securely, but avoid over-tightening. Use only Singer-approved needles to prevent damage. Different fabrics require different needle types (universal, ballpoint, etc.), as outlined in the manual. A dull or bent needle can cause skipped stitches, fabric damage, and even machine malfunction. Replace the needle with each new project or if damage is detected.

Accessories and Their Uses

The Singer 5400 manual details various presser feet, bobbin types, and optional accessories. Understanding these enhances sewing capabilities and project versatility.

Presser Feet Guide

The Singer 5400 boasts compatibility with a range of presser feet, each designed for specific sewing tasks. The standard presser foot is ideal for everyday sewing, while the zipper foot facilitates smooth zipper insertion. A buttonhole foot ensures professional-looking buttonholes, and a satin stitch foot delivers beautiful decorative stitches.

Furthermore, specialized feet like the rolled hem foot create delicate rolled edges, perfect for lightweight fabrics. An open toe foot provides better visibility for appliqué and free-motion quilting. The manual details each foot’s function and proper installation. Utilizing the correct presser foot significantly improves stitch quality and overall sewing efficiency. Exploring these options unlocks the full potential of your Singer 5400, allowing for diverse and creative projects.

Always refer to the manual for specific foot recommendations based on fabric type and desired stitch outcome.

Bobbin Types and Compatibility

The Singer 5400 utilizes a class 15 plastic bobbin, a common type ensuring easy availability. It’s crucial to use the correct bobbin to prevent damage to the machine and maintain optimal stitch quality. Metal bobbins are not recommended for this model, as they can cause timing issues and potentially harm internal components.

The manual emphasizes the importance of winding the bobbin correctly, ensuring even distribution of thread. Incorrectly wound bobbins can lead to inconsistent stitches and thread breakage. Always test a new bobbin with scrap fabric before starting a project. Compatibility issues can arise from using low-quality or incorrectly sized bobbins, so sourcing reliable bobbins is essential.

Refer to the Singer 5400’s manual for detailed diagrams and instructions on bobbin winding and insertion for best results.

Optional Accessories Available

The Singer 5400’s versatility can be significantly expanded with a range of optional accessories. While the base model offers essential functions, additional presser feet unlock specialized sewing capabilities. These include a zipper foot for precise zipper insertion, a buttonhole foot for consistent buttonholes, and a blind hem foot for professional-looking hems.

Other useful accessories include a gathering foot, a quilting guide, and various needle sets tailored for different fabrics. Singer also offers extension tables to provide a larger work surface, particularly beneficial for quilting or handling large projects. The manual doesn’t detail every accessory, but Singer’s website and authorized dealers provide comprehensive lists.

Investing in these accessories can greatly enhance your sewing experience and allow you to tackle a wider variety of projects with greater ease and precision.

Understanding the User Manual (PDF)

The Singer 5400’s user manual, readily available as a PDF, is a crucial resource for maximizing your sewing machine’s potential. This manual, spanning 64 pages, provides detailed, step-by-step instructions covering everything from initial setup and threading to advanced sewing techniques; It includes comprehensive diagrams illustrating proper procedures, ensuring clarity for users of all skill levels.

Key sections detail safety precautions, machine features, and troubleshooting common issues. The PDF format allows for easy searching, enabling quick access to specific information. It’s recommended to download and familiarize yourself with the manual before operating the machine.

Singer also provides video tutorials on their YouTube channel, complementing the written instructions. Regularly referencing the manual will help you maintain your Singer 5400 and achieve optimal sewing results.

vermont castings defiant owners manual

Vermont Castings Defiant Owners Manual: A Comprehensive Guide

Welcome! This manual provides essential instructions for installing‚ operating‚ and maintaining your Vermont Castings Defiant wood stove‚ ensuring safe and efficient heating.

The Vermont Castings Defiant stands as a renowned wood-burning stove‚ celebrated for its robust construction‚ exceptional heating capacity‚ and classic aesthetic. Introduced in 1975‚ the Defiant quickly became a favorite among homeowners seeking a reliable and beautiful heating solution. This manual serves as a comprehensive resource for owners of both the 1975 and 1910 models‚ offering detailed guidance on all aspects of stove ownership.

Known as the largest Vermont Castings wood stove available‚ the Defiant boasts an expansive viewing area‚ allowing you to fully appreciate the warmth and ambiance of a crackling fire. Its Flexburn system‚ a key feature‚ provides efficient combustion and optimal heat output. Understanding your Defiant‚ from installation to operation and maintenance‚ is crucial for maximizing its performance and ensuring years of dependable service. This guide will help you explore all the possibilities!

Understanding Defiant Model Variations (1975 & 1910)

While both the Vermont Castings Defiant 1975 and 1910 models share the core design principles of durability and efficient heating‚ key distinctions exist. The 1975 Defiant‚ the original‚ underwent rigorous testing and certification by OMNI-Test Laboratories in Portland‚ Oregon‚ ensuring compliance with stringent safety standards. It’s a non-catalytic/catalytic wood burning heater.

The 1910 model represents a later iteration‚ potentially incorporating design refinements or material updates based on user feedback and evolving manufacturing processes. Although specific differences may vary‚ both models utilize the Flexburn air control system for optimized combustion. Owners should always refer to the specific manual corresponding to their model year for accurate installation‚ operation‚ and maintenance instructions. Always confirm you have the correct manual for your Defiant!

Safety Precautions and Warnings

Important! Your Vermont Castings Defiant stove generates intense heat; improper installation and operation pose significant fire and burn risks. Always adhere to local building codes and manufacturer’s instructions. Ensure proper clearances to combustible materials are maintained during installation‚ as detailed in the installation manual.

Never store flammable materials near the stove. Regularly inspect the chimney for creosote buildup‚ a highly flammable substance‚ and schedule professional cleaning as needed. Use only seasoned wood to minimize smoke production and creosote accumulation. Caution: Hot surfaces can cause severe burns – keep children and pets at a safe distance. Carbon monoxide is a deadly‚ odorless gas; install and maintain carbon monoxide detectors. Read the entire manual before operating your Defiant.

Installation Procedures

Proper installation is crucial for safe and efficient operation of your Vermont Castings Defiant stove; follow all guidelines carefully‚ ensuring compliance with local regulations.

Preparing the Installation Site

Before installation‚ thoroughly assess the intended location for your Vermont Castings Defiant stove. Ensure the floor is structurally sound and capable of supporting the considerable weight. Hearth protection is paramount; a non-combustible hearth extending beyond the stove’s dimensions is mandatory‚ safeguarding against accidental ember escape.

Verify adequate clearances to combustible materials – walls‚ furniture‚ and draperies – strictly adhering to the manufacturer’s specifications detailed within this manual. Proper ventilation is vital; confirm the presence of an appropriately sized and functioning chimney system. Inspect the chimney for obstructions and ensure it meets relevant safety standards.

Consider accessibility for wood storage and ash removal. A level surface is essential for stable stove operation. Careful site preparation minimizes risks and maximizes the longevity and performance of your Defiant stove.

Hearth and Floor Protection Requirements

Protecting your floor is crucial when installing a Vermont Castings Defiant stove. A non-combustible hearth is absolutely required‚ extending at least 18 inches in front of the stove door and 8 inches to the sides. Acceptable materials include brick‚ stone‚ tile‚ or a listed hearth pad specifically designed for wood stoves.

The hearth must be of sufficient thickness and construction to withstand the stove’s weight and potential impacts. Floor protection extends beneath the stove’s rear and sides‚ safeguarding against radiant heat and accidental sparks. Ensure the hearth is level and securely positioned.

Compliance with local building codes regarding hearth dimensions and materials is essential. Ignoring these requirements can create a significant fire hazard. Always consult the installation manual for precise specifications and prioritize safety when selecting and installing your hearth protection.

Chimney Connection and Considerations

Proper chimney connection is paramount for safe and efficient Defiant stove operation. The stove must be connected to a listed‚ code-approved chimney or venting system suitable for solid fuel appliances. A dedicated chimney is highly recommended; do not share with other appliances.

Ensure the chimney flue is appropriately sized for the Defiant model‚ typically 6 inches in diameter‚ but always verify in the installation manual. The chimney should extend at least three feet above the roofline and two feet higher than any structure within ten feet.

Regular chimney inspections and cleaning are vital to prevent creosote buildup‚ a major fire hazard. Considerations include chimney height‚ location‚ and the presence of obstructions. Always adhere to local building codes and consult a qualified chimney sweep for professional advice.

Defiant Stove Placement and Clearances

Correct placement and adherence to minimum clearances are crucial for safety when installing your Vermont Castings Defiant. The stove must be positioned on a non-combustible hearth extending adequately beyond the stove’s dimensions‚ protecting the floor and surrounding materials.

Clearance requirements vary depending on wall construction. Consult the installation manual for specific distances to combustible walls‚ corners‚ and ceilings. Typically‚ a minimum of 18 inches of clearance is needed to the sides and rear‚ and 54 inches to combustible ceilings.

Protecting nearby combustible surfaces with heat shields may reduce required clearances‚ but always follow manufacturer’s specifications. Improper placement or insufficient clearances can create a significant fire hazard. Prioritize safety and consult local building codes.

Operating Your Defiant Stove

Mastering your Vermont Castings Defiant involves understanding fire starting‚ air control‚ wood loading‚ and achieving optimal burn rates for efficient‚ clean heating.

Starting a Fire: Best Practices

Successfully igniting your Vermont Castings Defiant requires a methodical approach. Begin with a generous bed of dry kindling – small‚ easily combustible wood pieces like pine or cedar work exceptionally well.

Next‚ loosely arrange crumpled newspaper or fire starters amongst the kindling. Avoid tightly packing‚ as airflow is crucial. Place slightly larger pieces of wood‚ gradually increasing in size‚ over the kindling.

Light the newspaper or fire starter and allow the kindling to catch. Once the kindling is burning steadily‚ carefully add small splits of seasoned hardwood.

Crucially‚ leave space between the wood pieces for air circulation. Gradually increase the wood size as the fire establishes itself.

Avoid overloading the stove initially; a smaller‚ well-established fire is more efficient than a large‚ struggling one. Utilize the air controls to regulate the burn rate once the fire is going strong.

Air Control System Explained (Flexburn)

The Vermont Castings Defiant features a Flexburn air control system‚ designed for optimal combustion and efficiency. This system regulates the amount of air entering the firebox‚ influencing burn rate and heat output.

The primary air control‚ typically a lever or dial‚ adjusts airflow under the fire. Opening it fully provides maximum air for quick starting and high heat. Closing it restricts air‚ slowing the burn for longer durations.

Secondary air controls‚ often smaller vents‚ introduce preheated air above the flames‚ promoting more complete combustion of gases and reducing smoke.

Experimentation is key to mastering Flexburn. Start with controls open for initial ignition‚ then gradually reduce airflow to achieve desired burn rates.

Observe the flame – a lively‚ bright flame indicates sufficient air‚ while a sluggish‚ smoky flame suggests insufficient airflow. Proper adjustment maximizes heat and minimizes emissions.

Loading Wood Efficiently

Efficient wood loading maximizes heat output and minimizes smoke production in your Vermont Castings Defiant. Seasoned hardwood – ideally with 20% or less moisture content – is crucial for a clean‚ hot burn.

Load wood strategically‚ leaving space for airflow around each piece. Avoid tightly packing the firebox‚ as this restricts oxygen and leads to incomplete combustion.

Consider the top-down loading method: place larger pieces at the bottom‚ followed by smaller kindling on top. This promotes a cleaner‚ more controlled burn.

When reloading‚ leave a bed of hot embers to ignite the new wood quickly. Avoid overloading the stove; adhere to the manufacturer’s recommended wood capacity.

Proper loading‚ combined with Flexburn air control adjustments‚ ensures optimal performance and a cozy‚ efficient heating experience.

Achieving Optimal Burn Rates

Optimal burn rates in your Vermont Castings Defiant depend on wood quality‚ air control settings‚ and desired heat output. Experiment to find the sweet spot for your specific conditions.

Initially‚ establish a hot fire with ample airflow using the Flexburn system. Once the wood is burning vigorously‚ gradually reduce the air intake to achieve a slower‚ more sustained burn.

Observe the flame pattern; a lively‚ yellow-orange flame indicates efficient combustion. A lazy‚ smoky flame suggests insufficient air or wet wood.

Avoid smoldering fires‚ as they produce creosote and reduce heating efficiency. Regularly adjust the air controls to maintain a clean‚ bright burn.

Monitoring flue gas temperatures can also help optimize burn rates‚ ensuring complete combustion and minimizing emissions.

Maintenance and Troubleshooting

Regular inspections‚ ash removal‚ and glass door care are crucial for your Vermont Castings Defiant. Address issues like poor draft promptly for safety.

Regular Inspection Checklist

Prioritize safety with frequent Defiant stove checks! Inspect the chimney for creosote buildup at least twice monthly during active use; professional cleaning is recommended annually.

Examine the door gaskets for proper sealing – replace if cracked or worn to maintain efficient combustion. Check the air control system‚ ensuring smooth operation for optimal burn rates.

Inspect the stove’s exterior for any cracks or damage‚ and verify proper clearances to combustibles. Review the glass door for cracks or breakage‚ and ensure the latch functions correctly;

Don’t forget the firebricks! Look for cracks or deterioration‚ replacing as needed. Finally‚ confirm the OMNI-Test Laboratories certification remains valid‚ ensuring continued safety standards are met. Consistent checks prolong your stove’s life!

Ash Removal and Disposal

Regular ash removal is crucial for efficient Defiant stove operation. Allow ashes to cool completely – this can take several days – before handling. Use a metal container with a tight-fitting lid for ash disposal‚ placing it away from combustible materials.

Avoid plastic containers‚ as embers can remain hot for extended periods. Small amounts of ash can be safely disposed of with regular trash‚ but larger quantities should be treated with caution.

Consider using cooled ash in your garden as a soil amendment‚ but be mindful of its alkalinity. Never dispose of hot ashes near flammable items or structures. Always prioritize safety when handling and disposing of wood stove ash.

Remember‚ proper ash disposal prevents potential fire hazards and ensures responsible stove ownership. Consistent practice maintains a safe heating environment!

Glass Door Cleaning and Maintenance

Maintaining a clean glass door enhances the viewing experience and maximizes heat output from your Vermont Castings Defiant. For routine cleaning‚ allow the stove to cool completely before proceeding. Use a specialized glass cleaner designed for wood stoves‚ or a mixture of wood ash and water.

Avoid abrasive cleaners‚ as they can scratch the glass. Apply the cleaner with a soft cloth or paper towel‚ gently wiping away soot and residue. For stubborn deposits‚ a plastic scraper can be used cautiously.

Regular cleaning – ideally after each burn – prevents buildup and simplifies the process. Inspect the gasket around the glass door periodically for wear and tear‚ replacing it if necessary to maintain a tight seal.

Proper glass door maintenance ensures optimal performance and a clear view of the fire. A clean door contributes to both safety and aesthetic appeal!

Troubleshooting Common Issues (Poor Draft‚ Smoke Back-up)

Poor draft or smoke back-up can indicate several issues. First‚ ensure your chimney is clean and unobstructed. A blocked chimney severely restricts airflow. Verify proper clearances around the stove‚ as obstructions can disrupt the draft.

Check the air control system (Flexburn) – a partially closed air inlet can sometimes cause smoking. Experiment with different settings to find the optimal balance. Cold chimney temperatures can also contribute to draft problems; priming the chimney with a small amount of burning paper can help establish a draft.

Ensure adequate combustion air is available in the room. Negative air pressure can hinder the stove’s performance. If problems persist‚ consult a qualified professional to inspect your chimney and stove.

Addressing these issues promptly ensures safe and efficient operation of your Vermont Castings Defiant.

Parts and Diagrams

Locating replacement parts for your Vermont Castings Defiant is simplified with detailed diagrams. OMNI-Test Laboratories certification ensures quality components and reliable performance.

Locating Replacement Parts

Ensuring the longevity of your Vermont Castings Defiant stove relies on readily available replacement parts. When needing components – from glass doors and gaskets to intricate Flexburn mechanisms – several avenues exist for procurement. Firstly‚ contacting authorized Vermont Castings dealers is highly recommended; they possess current parts inventories and expert advice.

Alternatively‚ online retailers specializing in wood stove parts often stock Defiant-specific components. When ordering online‚ meticulously verify the part number against your stove’s model (1975 or 1910) and the parts diagram to guarantee compatibility.

Furthermore‚ referencing the detailed parts diagram (discussed in the next section) is crucial for accurate identification. Keep your stove’s serial number handy when contacting dealers or ordering parts‚ as it aids in precise matching. Prioritize genuine Vermont Castings parts whenever possible to maintain performance and safety standards.

Understanding the Defiant Parts Diagram

The Vermont Castings Defiant parts diagram is an invaluable resource for identification‚ maintenance‚ and repair. This detailed schematic illustrates every component of your stove‚ labeled with specific part numbers. Familiarizing yourself with the diagram streamlines the process of ordering replacements and understanding the stove’s internal workings.

Key areas highlighted include the firebox‚ baffle system‚ air control mechanisms (Flexburn)‚ door assembly‚ and chimney connector. Each part‚ from the smallest screw to the substantial cast iron sections‚ is clearly depicted.

When referencing the diagram‚ always correlate the part number with your stove’s model – 1975 or 1910 – as variations exist. The diagram also aids in visualizing how components interact‚ assisting with troubleshooting and reassembly. A clean‚ well-lit workspace and careful observation are recommended when using the diagram for repairs.

OMNI-Test Laboratories Certification Details

The Vermont Castings Defiant model 1975 underwent rigorous testing and achieved certification from OMNI-Test Laboratories‚ located in Portland‚ Oregon. This independent evaluation confirms the stove meets stringent safety and performance standards for wood-burning appliances.

OMNI-Test Laboratories’ assessment adhered to established protocols‚ verifying emissions levels‚ efficiency ratings‚ and structural integrity. This certification provides assurance to owners that their Defiant stove operates within acceptable parameters‚ contributing to cleaner air and responsible heating practices.

The testing process involved simulated real-world conditions‚ evaluating the stove’s performance across various burn rates and wood types. Documentation of the certification is often available upon request and demonstrates Vermont Castings’ commitment to quality and environmental responsibility. This independent validation is a key factor in the Defiant’s reputation for reliability and safety.

brother cs6000i instruction manual

Brother CS6000i Instruction Manual: A Comprehensive Guide

This comprehensive guide details the Brother CS6000i‚ offering free digital manuals‚ parts access‚ and safety guidelines for optimal sewing machine operation and maintenance.

The Brother CS6000i is a popular computerised sewing machine‚ renowned for its user-friendly design and versatile features. This machine caters to both beginners and experienced sewists‚ offering a balance of affordability and functionality. Accessing the Brother CS6000i instruction manual is crucial for unlocking its full potential.

Pocono Sew-Vac and Brother Canada provide readily available free digital manuals‚ ensuring users have immediate access to guidance. These manuals cover everything from initial setup to advanced techniques. Understanding the machine’s capabilities‚ as outlined in the manual‚ allows for creative exploration and efficient project completion. Genuine Brother parts and accessories‚ alongside the quick reference guide‚ further enhance the sewing experience. The CS6000i is designed for both home and business use‚ offering reliability and consistent performance.

Understanding the Machine’s Features

The Brother CS6000i boasts a wide array of features detailed within its instruction manual. These include a selection of built-in stitch patterns‚ offering versatility for diverse projects. The automatic needle threader simplifies setup‚ while the speed control allows for precise sewing. Accessing these features effectively requires familiarisation with the machine’s controls‚ as explained in the Brother CS6000i manual.

Furthermore‚ the CS6000i is compatible with Brother iPrint&Scan software‚ enabling scanning and workflow functionality. Genuine Brother accessories‚ like various presser feet‚ expand the machine’s capabilities. Understanding the importance of using genuine parts‚ as recommended by Brother‚ ensures optimal performance and longevity. The manual provides comprehensive information on each feature‚ empowering users to maximise their creative potential and achieve professional results.

Getting Started with Your CS6000i

Begin your sewing journey by carefully unboxing and setting up your CS6000i‚ referencing the instruction manual for a smooth and successful initial experience.

Unboxing and Initial Setup

Carefully unpack your Brother CS6000i sewing machine‚ ensuring all components are present – the machine itself‚ power cord‚ foot controller‚ and included accessories like bobbins‚ needles‚ and various presser feet. Inspect for any shipping damage before proceeding. Remove all protective packaging materials.

Initial setup involves attaching the power cord and foot controller to the machine. Position the CS6000i on a stable‚ well-lit surface with ample workspace. Familiarize yourself with the machine’s key components‚ referencing the quick reference guide or full instruction manual for identification. Properly insert the bobbin case and bobbin‚ following the diagram in the manual. Ensure the presser foot is correctly attached. Before powering on‚ double-check all connections and ensure nothing is obstructing moving parts. A correct initial setup is crucial for optimal performance and longevity.

Powering On and Basic Operations

To power on your Brother CS6000i‚ connect the power cord to a grounded outlet and switch the machine on using the power switch‚ typically located on the side. The LCD screen will illuminate‚ displaying the machine’s ready state. Begin with basic operations by selecting a straight stitch – often the default setting.

Practice sewing on scrap fabric to get accustomed to the foot controller’s responsiveness; gentle pressure controls the sewing speed. Raise and lower the presser foot using the designated lever. Guide the fabric smoothly under the needle‚ avoiding forceful pushing or pulling. Utilize the reverse stitch function for securing seams. Familiarize yourself with the stitch length and width adjustment dials. Always refer to the manual for specific settings for different fabrics and stitch types. Consistent practice builds confidence and skill.

Threading the Machine

Proper threading is crucial for optimal performance of the Brother CS6000i. Begin by raising the presser foot and the needle to its highest position. Guide the upper thread through the designated thread guides‚ following the numbered sequence illustrated in the machine’s manual and on the machine itself. Ensure the thread is securely seated in the tension discs.

Next‚ thread the needle from front to back. Simultaneously‚ wind the bobbin with thread‚ inserting it correctly into the bobbin case‚ ensuring it clicks into place. Draw up the bobbin thread through the needle plate. Incorrect threading leads to skipped stitches or tension issues. Regularly check the threading path for obstructions and refer to the quick reference guide for visual assistance.

Upper Threading Guide

The Brother CS6000i’s upper threading path is clearly numbered for ease of use. Start by placing the thread spool on the spool pin‚ securing it with the spool cap. Then‚ guide the thread through the first thread guide‚ down and around the tension discs – ensuring it snaps firmly into place. Continue by leading the thread up and through the take-up lever‚ then down again through another thread guide.

Finally‚ thread the needle from front to back. Always raise the presser foot and needle before threading to release tension. A properly threaded machine prevents skipped stitches and ensures consistent stitch quality. Refer to the machine’s diagrams for a visual guide‚ and double-check each step for accuracy.

Bobbin Winding and Insertion

To wind the bobbin on your Brother CS6000i‚ place the thread spool on the spool pin and guide the thread through the designated bobbin winding tension disc. Then‚ thread the end through several holes in the bobbin itself. Place the bobbin onto the bobbin winder spindle and push it to the right to lock it in place.

Press the foot on the bobbin winder to start winding; it will automatically stop when full. Once wound‚ insert the bobbin into the top-loading bobbin case‚ ensuring it clicks securely. Pull a few inches of thread through the slot. Proper bobbin winding and insertion are crucial for balanced stitches and preventing issues like looping or nesting.

Essential Sewing Techniques

Mastering fundamental techniques‚ like stitch selection‚ fabric choices‚ and adjustments‚ unlocks the full potential of your Brother CS6000i sewing machine for diverse projects.

Stitch Selection and Adjustment

The Brother CS6000i boasts a variety of built-in stitch patterns‚ catering to diverse sewing needs – from basic straight and zigzag stitches to decorative options. Understanding how to select the appropriate stitch for your fabric and project is crucial for achieving professional results. The machine’s interface allows for easy stitch selection via intuitive buttons or a digital display.

Adjusting stitch length and width is equally important. Shorter stitch lengths are ideal for delicate fabrics or reinforcing seams‚ while longer lengths are suitable for basting or gathering. Similarly‚ varying stitch width impacts the appearance and strength of the seam. Experimentation is encouraged to find the optimal settings for each application. Refer to the quick reference guide for recommended settings based on fabric type and desired outcome. Precise adjustments ensure fabric integrity and a polished finish;

Fabric Selection and Needle Types

Choosing the correct fabric and needle combination is paramount for successful sewing with the Brother CS6000i. Different fabrics require specific needle types to prevent damage and ensure smooth stitching. Lightweight fabrics like silk or chiffon necessitate fine needles (sizes 60/8 to 70/10)‚ while heavier materials such as denim or canvas demand stronger needles (sizes 90/14 to 110/18).

Universal needles are versatile for woven fabrics‚ but specialized needles – like ballpoint needles for knits or leather needles for‚ well‚ leather – are essential for optimal results. Using the wrong needle can cause skipped stitches‚ fabric puckering‚ or even needle breakage. Always consult the manual or a fabric guide to determine the appropriate needle type and size for your chosen material. Proper needle selection significantly impacts stitch quality and longevity.

Adjusting Stitch Length and Width

Mastering stitch length and width adjustments on your Brother CS6000i unlocks creative sewing possibilities. Stitch length controls the distance between stitches; shorter lengths (around 1.5-2;0mm) are ideal for delicate fabrics and intricate details‚ while longer lengths (3.0-4.0mm) suit heavier materials and basting. Stitch width determines how wide a zigzag stitch is‚ influencing fabric stretch and decorative effects.

Experimentation is key! A narrower width creates a straight stitch‚ while increasing it produces wider zigzag patterns. The CS6000i’s dial controls allow precise adjustments. Always test stitch settings on a scrap fabric piece before starting your project. Incorrect settings can lead to puckering‚ thread breakage‚ or weak seams. Refer to the manual’s stitch guide for recommended settings based on fabric type and desired outcome.

Reverse Stitching and Reinforcement

Reinforcing seams with reverse stitching is crucial for durable garment construction. The Brother CS6000i features a dedicated reverse lever or button‚ allowing you to stitch backwards over the beginning and end of a seam. This secures the stitches‚ preventing unraveling during wear and washing. Typically‚ 2-3 stitches in reverse are sufficient for standard projects‚ but heavier fabrics or stress points may require more.

Proper reinforcement extends seam life significantly. Beyond the start and finish‚ consider reinforcing areas prone to strain‚ like pockets or belt loops. Utilize a slightly shorter stitch length for added strength. Always test the reinforced seam by gently pulling on it to ensure security. Consistent reverse stitching contributes to professional-quality results and long-lasting creations with your CS6000i.

Advanced Features and Functions

Explore the CS6000i’s capabilities‚ including the automatic needle threader‚ built-in stitch patterns‚ speed control‚ and the invaluable quick reference guide for enhanced sewing.

Using the Automatic Needle Threader

The Brother CS6000i boasts a convenient automatic needle threader‚ simplifying a traditionally tedious task. To utilize this feature‚ first‚ ensure the machine is turned off. Raise the needle to its highest position using the needle up/down button. Next‚ place the thread into the designated guide‚ ensuring it’s securely seated. Gently lower the thread into the needle clamp.

Activate the automatic needle threader by holding the lever down until the thread is caught and pulled through the needle eye. Release the lever once completed. It’s crucial to use appropriately sized thread for optimal performance. If the thread breaks or doesn’t thread correctly‚ double-check the thread path and ensure the machine is properly maintained. Regularly cleaning around the needle area will also contribute to smooth operation of this helpful function. This feature significantly speeds up setup and reduces eye strain;

Exploring the Built-in Stitch Patterns

The Brother CS6000i offers a diverse range of 60 built-in stitch patterns‚ catering to various sewing projects and skill levels. These include essential straight stitches‚ zigzag stitches‚ decorative stitches‚ and buttonhole stitches. Accessing these patterns is straightforward via the stitch selection dial on the machine’s front panel;

Each stitch is clearly numbered and illustrated in the machine’s manual‚ detailing its ideal applications. Experiment with different stitch widths and lengths to achieve desired effects on various fabrics. The machine allows for customization of these parameters‚ providing creative flexibility. Utilize the test fabric to preview stitches before committing to your final project. Understanding the purpose of each stitch – from basic seams to intricate embellishments – unlocks the full potential of the CS6000i‚ enabling you to tackle a wide array of sewing endeavors with confidence and precision.

Utilizing the Speed Control

The Brother CS6000i features a convenient speed control slider‚ allowing users to adjust the sewing speed to match their comfort level and the demands of the project. This is particularly beneficial for beginners learning delicate techniques or for navigating complex fabric manipulations. Lower speeds provide greater control‚ minimizing errors and ensuring precise stitching.

Experienced sewers can utilize higher speeds for faster completion of simpler tasks. The speed control slider is intuitively located and easily adjustable during operation. Start with a slower speed when beginning a new project or working with unfamiliar fabrics. Gradually increase the speed as confidence grows. Mastering the speed control enhances sewing accuracy‚ reduces strain‚ and ultimately improves the overall sewing experience with the CS6000i.

The Importance of the Quick Reference Guide

The Brother CS6000i Quick Reference Guide is an invaluable tool for everyday sewing. It provides a concise overview of essential functions‚ stitch settings‚ and troubleshooting tips‚ eliminating the need to constantly consult the full instruction manual. This handy guide conveniently displays frequently used stitch patterns‚ their corresponding settings‚ and recommended applications.

It’s perfect for quick reminders while actively sewing‚ ensuring efficient workflow and minimizing interruptions. The guide also includes diagrams illustrating proper threading procedures and basic maintenance steps; Keeping the Quick Reference Guide readily accessible near your sewing machine will significantly enhance your sewing experience and maximize the CS6000i’s capabilities.

Maintenance and Troubleshooting

Regular cleaning and lubrication are vital for optimal performance. Addressing thread breakage and bobbin issues promptly ensures smooth operation and extends machine lifespan.

Cleaning the Machine

Maintaining a clean sewing machine is crucial for consistent performance and longevity of your Brother CS6000i. Regularly remove lint‚ dust‚ and thread debris from all areas‚ especially the bobbin case and feed dogs. Use a soft brush‚ or the provided cleaning brush‚ to gently dislodge accumulated particles.

Always power off and unplug the machine before cleaning. A small vacuum cleaner with a brush attachment can effectively remove lint from hard-to-reach areas. Avoid using compressed air‚ as it can blow dust further into the machine. Wipe down the exterior surfaces with a soft‚ damp cloth. Do not use harsh chemicals or abrasive cleaners‚ as these can damage the finish.

Pay close attention to the needle plate and surrounding areas‚ ensuring they are free from obstructions. Consistent cleaning prevents skipped stitches and ensures smooth fabric feeding. Following these simple steps will keep your CS6000i operating at its best for years to come.

Oil Points and Lubrication

Proper lubrication is essential for the smooth operation of your Brother CS6000i sewing machine‚ minimizing friction and wear. Refer to your instruction manual for specific oil points; typically‚ these include the bobbin race‚ hook assembly‚ and presser foot bar. Use only sewing machine oil – never use oil intended for other purposes.

Apply oil sparingly‚ using a needle-nose oiler to target precise locations. Avoid over-oiling‚ as excess oil can attract lint and cause build-up. After oiling‚ operate the machine slowly for a few minutes to distribute the lubricant evenly. Wipe away any excess oil with a clean‚ soft cloth.

Regular lubrication‚ as recommended in the manual‚ will extend the life of your machine and maintain optimal performance. Ignoring this maintenance step can lead to increased noise‚ reduced stitch quality‚ and potential damage to internal components.

Troubleshooting Common Issues

Encountering problems with your Brother CS6000i is common‚ but many are easily resolved. This section addresses frequent issues. Thread breakage often stems from incorrect threading‚ a dull needle‚ or improper tension. Re-thread carefully‚ replace the needle‚ and adjust tension settings.

Bobbin problems‚ like jams or uneven stitching‚ can be caused by incorrect bobbin insertion‚ lint build-up‚ or using the wrong bobbin type. Ensure the bobbin is correctly seated‚ clean the bobbin area‚ and verify you’re using a compatible bobbin.

If the machine fails to power on‚ check the power cord and ensure it’s securely connected. Consult the manual for further diagnostic steps. Remember to always unplug the machine before attempting any internal repairs.

Dealing with Thread Breakage

Frequent thread breakage on your Brother CS6000i often indicates a simple fix. First‚ re-thread the machine completely‚ ensuring the presser foot is up and the thread is properly seated in all guides. A dull or damaged needle is a common culprit; replace it with a new‚ appropriate needle for your fabric type.

Incorrect tension settings can also cause breaks. Experiment with slightly loosening the upper tension. Lint and debris accumulating in the threading path can obstruct the thread‚ so clean the machine thoroughly. Finally‚ ensure you’re using quality thread compatible with your machine and fabric.

Addressing Bobbin Problems

Bobbin issues with the Brother CS6000i frequently stem from improper winding or insertion. Ensure the bobbin is wound evenly and not too tightly; uneven winding causes inconsistent stitching. When inserting‚ confirm the bobbin is correctly positioned in the bobbin case‚ following the diagram in your manual.

Lint buildup within the bobbin area can hinder smooth operation‚ so regular cleaning is crucial. If the machine jams‚ carefully remove the bobbin case and clear any obstructions. Using a compatible bobbin is essential; incorrect bobbins can cause tension problems and skipped stitches. Finally‚ re-thread both upper and lower threads after addressing any bobbin issue.

Safety Precautions and Guidelines

Prioritize safety by adhering to electrical instructions and preventing injuries during operation‚ as detailed in the Brother CS6000i manual for secure usage.

Electrical Safety Instructions

To ensure safe operation of your Brother CS6000i sewing machine‚ always adhere to crucial electrical safety guidelines. The manual strongly recommends using only genuine Brother components‚ as the machine’s temperature settings are pre-configured for these parts.

Never operate the machine with a damaged cord or plug; immediate replacement is vital. Avoid using extension cords if possible‚ and if necessary‚ ensure they are appropriately rated for the machine’s power requirements. Always unplug the machine from the electrical outlet before performing any maintenance‚ cleaning‚ or changing the needle.

Protect the power cord from physical damage‚ keeping it away from heated surfaces and sharp edges. Do not expose the machine to moisture or operate it with wet hands. If the machine malfunctions or exhibits any electrical issues‚ discontinue use immediately and consult a qualified technician. Following these precautions will help prevent electrical hazards and ensure a safe sewing experience.

Preventing Injuries During Operation

Prioritize safety while using your Brother CS6000i. Keep fingers away from moving parts‚ particularly the needle‚ presser foot‚ and rotating hook. Never sew over pins or thick layers of fabric that could cause the needle to break or damage the machine. Always use the appropriate needle type for the fabric being sewn to prevent breakage and potential injury.

Exercise caution when operating the machine at high speeds; maintain control and awareness of your hands and fingers. Never reach under the presser foot while the machine is running. Ensure the machine is stable and placed on a firm‚ level surface before operation.

Properly supervise children and inexperienced users when they are near the sewing machine. Disconnect the power supply when not in use and during maintenance to prevent accidental activation. Following these guidelines minimizes the risk of injury and promotes a safe sewing environment.

Resources and Support

Access digital manuals‚ genuine Brother parts‚ and the authorized reseller program for assistance; also‚ explore the iPrint&Scan software installation options readily available.

Accessing Digital Manuals Online

Locating your Brother CS6000i instruction manual online is remarkably straightforward‚ offering convenient access to comprehensive guidance at your fingertips. Pocono Sew-Vac and other reputable sources provide FREE digital manuals readily available for download. These manuals encompass detailed instructions‚ covering everything from initial setup and threading to advanced sewing techniques and troubleshooting.

You can find both the full sewing instruction manual and the quick reference guide online‚ allowing you to quickly address specific questions or refresh your memory on key procedures. Brother’s official website also hosts manuals‚ ensuring you receive the most up-to-date information. Utilizing these digital resources eliminates the need to physically store a bulky manual and provides instant access whenever and wherever you need it‚ enhancing your sewing experience with the CS6000i.

Finding Genuine Brother Parts and Accessories

Maintaining your Brother CS6000i requires access to genuine Brother parts and accessories to ensure optimal performance and longevity. Pocono Sew-Vac specializes in providing a vast selection of these components‚ including accessory feet specifically designed for your machine. Brother strongly recommends utilizing only genuine parts‚ as they are engineered to work seamlessly with your sewing machine’s pre-set temperatures and mechanisms.

Using non-genuine parts can potentially damage your machine and void your warranty. Brother’s Authorized Reseller Program connects you with trusted dealers who stock authentic components. This guarantees quality and compatibility. Explore online retailers and local sewing machine stores to locate the specific parts you need‚ safeguarding your investment and preserving the reliability of your CS6000i for years to come.

Brother Authorized Reseller Program

Brother’s commitment to quality extends to its network of Authorized Resellers. This program ensures customers receive expert advice‚ genuine Brother products‚ and reliable service when purchasing a CS6000i or seeking assistance. Becoming a Brother Authorized Reseller signifies a dedication to upholding Brother’s standards of excellence in the sewing and crafting industry.

Authorized dealers are equipped with the knowledge to guide you through selecting the right accessories‚ troubleshooting issues‚ and maximizing your machine’s capabilities. They offer a direct link to Brother’s support system and provide access to the latest product information. Locating an authorized reseller guarantees you’re receiving authentic parts and benefiting from professional expertise‚ enhancing your overall sewing experience with your CS6000i.

Brother iPrint&Scan Software Installation

While primarily designed for Brother printers and all-in-one devices‚ the iPrint&Scan software can offer supplementary functionality for some Brother sewing machines‚ including potential scanning capabilities if your CS6000i model supports it. Installation involves downloading the software package from the official Brother website‚ specifically selecting the version compatible with your operating system – Windows or Macintosh.

The process includes following the on-screen prompts‚ potentially requiring a USB connection or wireless network setup to connect your computer to the machine. Detailed instructions are available on Brother’s support pages‚ guiding users through network configuration and driver installation. Ensure your CS6000i is powered on and recognized by your computer before initiating the software installation for seamless integration and optimal performance.

honeywell th1110d2009 manual pdf

Honeywell TH1110D2009 Manual PDF: A Comprehensive Guide

Discover detailed instructions for your Honeywell TH1110D2009 thermostat‚ including installation‚ operation‚ and troubleshooting‚ all conveniently available in PDF format.

The Honeywell TH1110D2009 is a widely utilized thermostat designed for reliable control of home heating and cooling systems. This guide simplifies setup and operation‚ offering clear instructions and illustrations for a seamless user experience. It’s ideal for those seeking efficient temperature management. The thermostat supports both 24 VAC single-stage systems‚ common in many homes‚ and 750 mV heating systems‚ providing broad compatibility.

This manual‚ available as a PDF‚ details everything from unpacking components to programming schedules. Whether you’re a homeowner or a professional installer‚ this resource ensures proper installation and optimal performance. Understanding its features unlocks the full potential of your HVAC system‚ leading to increased comfort and potential energy savings.

Understanding the TH1110D2009 Model Number and Variations

The TH1110D2009 model number signifies a specific configuration within Honeywell’s thermostat line. While core functionality remains consistent – controlling heating and cooling – slight variations may exist. These can include packaging differences or bundled accessories. The ‘D’ often indicates a digital‚ non-programmable model‚ focusing on simplicity and ease of use.

Referencing the PDF manual is crucial for identifying exact specifications. Honeywell frequently updates models‚ and the manual provides the most accurate details for your specific unit. Understanding these nuances ensures compatibility with your HVAC system and allows you to leverage all available features. Always verify the model number on your device matches the manual before proceeding with installation or troubleshooting.

Installation Guide

Follow the detailed steps within the Honeywell TH1110D2009 PDF manual for safe and correct installation‚ ensuring optimal performance of your new thermostat.

Unpacking and Checking Components

Carefully unpack your Honeywell TH1110D2009 thermostat package‚ referencing the included parts list within the PDF manual to verify all components are present. This list typically includes the thermostat base‚ the thermostat body‚ mounting screws‚ wire labels‚ and this comprehensive installation guide itself. Inspect each item for any signs of damage that may have occurred during shipping.

If any parts are missing or damaged‚ do not proceed with installation. Contact Honeywell support or the retailer where you purchased the thermostat immediately for replacements. Proper component verification‚ as detailed in the manual‚ ensures a smooth and successful installation process‚ preventing potential issues later on. Retain the packaging for potential returns or warranty claims.

Wiring Diagrams for Different System Types

The Honeywell TH1110D2009 manual PDF provides crucial wiring diagrams tailored to various HVAC system configurations. Specifically‚ detailed schematics are included for both 24 VAC single-stage heating and cooling systems‚ and also for older 750 mV heating systems. Carefully identify your system type before attempting any wiring connections.

Incorrect wiring can damage your thermostat or HVAC equipment. The diagrams clearly illustrate terminal designations and wire colors for proper connection. Always disconnect power to your HVAC system at the breaker before working with any wiring. Refer to the PDF manual’s safety precautions and‚ if unsure‚ consult a qualified HVAC technician for assistance.

24 VAC Single-Stage Heating and Cooling Systems

For 24 VAC single-stage systems‚ the Honeywell TH1110D2009 manual PDF illustrates a standard wiring configuration. Typically‚ this involves connecting wires to terminals labeled R‚ C‚ W‚ Y‚ and G. ‘R’ provides 24 VAC power‚ ‘C’ is the common wire‚ ‘W’ activates heating‚ ‘Y’ activates cooling‚ and ‘G’ controls the fan.

The manual’s diagram clearly shows how these wires correspond to your HVAC system’s wiring. Ensure proper connections‚ and double-check polarity if applicable. Always prioritize safety by disconnecting power before working with wires. If your system deviates from the standard configuration‚ consult a qualified HVAC professional for guidance‚ referencing the detailed PDF manual.

750 mV Heating Systems

The Honeywell TH1110D2009 manual PDF provides specific wiring instructions for 750 mV heating systems‚ which differ significantly from 24 VAC setups. These systems utilize a millivolt signal to control heating‚ typically found in older or specialized heating applications. Key terminals include V‚ W‚ and often a common terminal.

The manual’s diagram details the correct wire placement‚ emphasizing the importance of accurate connections for proper operation. Incorrect wiring can lead to system malfunction or damage. Always verify the voltage output of your heating system before connecting the thermostat. If unsure‚ consult a qualified technician and carefully review the PDF manual’s illustrations.

Mounting the Thermostat Base

The Honeywell TH1110D2009 manual PDF stresses the importance of a secure and level base mounting for accurate temperature sensing and reliable operation. Begin by disconnecting power to the HVAC system at the breaker. Use the included mounting screws and wall anchors‚ ensuring they are appropriate for your wall type.

The manual illustrates proper screw placement‚ avoiding proximity to wiring. Leveling the base is crucial; use a small level to confirm it’s perfectly horizontal. Carefully route wires through the base opening‚ avoiding pinching or strain. Once secured‚ double-check all connections before proceeding to attach the thermostat body‚ as detailed in the PDF guide.

Operating Instructions

Learn to efficiently control your home’s climate with the Honeywell TH1110D2009‚ utilizing its intuitive display and buttons for optimal comfort and savings.

Understanding the Display and Buttons

The Honeywell TH1110D2009 features a clear‚ easy-to-read display providing essential information at a glance. You’ll find the current room temperature prominently shown‚ alongside the set temperature. The display also indicates the current operating mode – Heat‚ Cool‚ or Auto – and whether the system is actively heating or cooling.

Several buttons facilitate thermostat control. The ‘Temperature Up’ and ‘Temperature Down’ buttons adjust the desired temperature. The ‘Mode’ button cycles through Heat‚ Cool‚ Off‚ and Auto settings. A ‘Fan’ button controls the fan operation‚ offering options like ‘Auto’ and ‘On’. Refer to the manual’s diagrams for precise button locations and functions‚ ensuring proper operation and maximizing your comfort. Understanding these controls unlocks the full potential of your thermostat.

Setting the Temperature

Adjusting the temperature on your Honeywell TH1110D2009 is straightforward. Utilize the ‘Temperature Up’ and ‘Temperature Down’ buttons located on the thermostat’s faceplate. Each press will incrementally increase or decrease the set temperature‚ displayed clearly on the screen. The thermostat responds quickly‚ allowing for precise adjustments to achieve your desired comfort level.

Remember that the displayed temperature is the target temperature‚ not necessarily the current room temperature. The system will activate heating or cooling to reach this setpoint. For optimal energy efficiency‚ avoid extreme temperature settings. Consult the manual for recommended temperature ranges and tips on balancing comfort with energy savings. Proper temperature setting ensures a comfortable and cost-effective environment.

Programming Schedules

The Honeywell TH1110D2009 allows for customized heating and cooling schedules‚ optimizing comfort and energy savings. Access the programming mode through the thermostat’s menu‚ typically initiated by pressing and holding a designated button. You can then define different temperature settings for various times of the day and days of the week.

Creating schedules involves setting ‘Wake‚’ ‘Leave‚’ ‘Return‚’ and ‘Sleep’ periods with corresponding temperatures. This ensures the system adjusts automatically to your lifestyle. The manual provides detailed step-by-step instructions for both daily and 7-day scheduling options. Properly programmed schedules significantly reduce energy consumption while maintaining a comfortable home environment.

Setting Daily Schedules

To establish a daily schedule on your Honeywell TH1110D2009‚ navigate to the programming mode and select the “Daily” option. This allows you to define a consistent temperature program that repeats every day of the week. You’ll typically set four periods: ‘Wake‚’ ‘Leave‚’ ‘Return‚’ and ‘Sleep‚’ assigning a desired temperature to each.

The manual guides you through setting the start time and temperature for each period. Ensure accurate time settings for optimal performance. Daily schedules are ideal for routines that don’t vary significantly. Remember to save your changes after configuring each period. This streamlined approach provides consistent comfort and energy efficiency.

Setting 7-Day Schedules

The Honeywell TH1110D2009 allows for customized comfort with its 7-day scheduling feature. Select the “7-Day” option within the programming mode to create unique temperature programs for each day of the week. This is perfect for varying routines – perhaps cooler temperatures on workdays and warmer settings on weekends.

The manual details how to individually program each day‚ setting the ‘Wake‚’ ‘Leave‚’ ‘Return‚’ and ‘Sleep’ periods with specific times and temperatures. This granular control maximizes energy savings and ensures comfort when you need it. Save each day’s settings individually‚ and review the complete weekly schedule to confirm accuracy.

Troubleshooting Common Issues

Resolve typical problems like power failures‚ inaccurate readings‚ or HVAC communication errors using the detailed troubleshooting guide within the TH1110D2009 manual.

Thermostat Not Powering On

If your Honeywell TH1110D2009 thermostat fails to power on‚ consult the manual’s troubleshooting section for a systematic approach to diagnosis. First‚ verify the power supply – ensure the system’s breaker hasn’t tripped and that the thermostat wiring is secure.

Check the 24 VAC power connection‚ as this is crucial for operation. The manual details how to confirm proper voltage. Inspect the batteries‚ if applicable‚ and replace them with fresh ones. Review the wiring diagram in the PDF manual to confirm correct connections‚ especially if recent work was performed on the HVAC system.

A disconnected wire or a faulty transformer could be the culprit. Refer to the manual’s illustrations for visual guidance. If issues persist‚ professional HVAC assistance may be required to diagnose more complex electrical problems.

Incorrect Temperature Readings

If the Honeywell TH1110D2009 displays inaccurate temperatures‚ the manual suggests several checks. First‚ ensure the thermostat isn’t exposed to direct sunlight‚ drafts‚ or heat sources‚ as these can skew readings. Verify the thermostat is level; an unlevel installation can affect accuracy.

Consult the manual’s calibration section to learn how to adjust the temperature offset‚ if available. Compare the thermostat’s reading with a known accurate thermometer placed nearby. Check for obstructions blocking airflow around the thermostat.

The PDF manual details potential causes‚ like a faulty temperature sensor. If calibration doesn’t resolve the issue‚ or the discrepancy is significant‚ professional HVAC service is recommended to diagnose and potentially replace the sensor.

Communication Errors with HVAC System

The Honeywell TH1110D2009 manual PDF addresses communication issues between the thermostat and your HVAC system. First‚ verify the wiring connections at both the thermostat and the furnace/air handler‚ referencing the appropriate wiring diagram within the manual. Ensure all wires are securely fastened and haven’t become loose or corroded.

Check the system’s circuit breaker; a tripped breaker can interrupt communication. The manual details troubleshooting steps for specific error codes displayed on the thermostat‚ if applicable. Confirm compatibility; the TH1110D2009 supports 24 VAC and 750 mV systems – ensure your system matches.

If problems persist‚ the PDF recommends consulting a qualified HVAC technician to diagnose potential issues with the HVAC control board or wiring.

Technical Specifications

The Honeywell TH1110D2009 manual PDF outlines voltage requirements‚ temperature range‚ and HVAC system compatibility details for optimal performance and installation.

Voltage Requirements

According to the Honeywell TH1110D2009 manual PDF‚ this thermostat is designed to operate with standard low-voltage systems commonly found in residential heating and cooling setups. Specifically‚ it requires a 24 VAC (Volts Alternating Current) power supply for typical functionality‚ encompassing both heating and cooling control. However‚ the manual also details compatibility with 750 mV heating systems‚ offering flexibility for various installations.

It’s crucial to verify your existing HVAC system’s voltage before installation to ensure proper operation and prevent damage to the thermostat or the connected equipment; Incorrect voltage can lead to malfunction or even safety hazards. The PDF manual provides clear guidance on identifying the correct voltage and wiring configurations for different system types‚ emphasizing the importance of adhering to these specifications.

Temperature Range

The Honeywell TH1110D2009 thermostat‚ as detailed in its PDF manual‚ boasts a wide operational temperature range designed to accommodate most residential heating and cooling needs. The thermostat can accurately display and control temperatures spanning from approximately 40°F to 90°F (4.4°C to 32.2°C) for cooling operations. For heating‚ the range extends from roughly 32°F to 85°F (0°C to 29.4°C).

However‚ the manual notes that actual achievable temperature ranges may vary slightly depending on the specific HVAC system and environmental conditions. It’s important to consider these factors when setting schedules and desired temperatures. The PDF provides guidance on optimizing performance within these ranges‚ ensuring comfortable and efficient climate control throughout the year.

Compatibility with HVAC Systems

According to the Honeywell TH1110D2009 manual PDF‚ this thermostat demonstrates broad compatibility with common residential HVAC systems. Specifically‚ it’s designed to effectively control 24 VAC single-stage heating and cooling systems‚ encompassing gas‚ oil‚ and electric furnaces or air conditioners. Furthermore‚ the thermostat also supports 750 mV heating systems‚ offering flexibility for various home setups.

The manual emphasizes checking existing wiring before installation to ensure a seamless integration. While generally compatible‚ certain advanced or proprietary HVAC systems might require additional considerations. The PDF provides detailed wiring diagrams and troubleshooting tips to address potential compatibility issues‚ ensuring optimal performance and preventing system malfunctions.

PDF Manual Resources and Downloads

Access the official Honeywell TH1110D2009 manual PDF and explore third-party repositories for installation guides‚ user instructions‚ and troubleshooting assistance online.

Official Honeywell Website for Manuals

Honeywell’s official website serves as the primary and most reliable source for obtaining the TH1110D2009 thermostat’s PDF manual. Directly downloading from Honeywell ensures you receive the latest version‚ free from potential inaccuracies found on other platforms. Navigating their support section‚ often categorized by product type‚ allows for a quick and targeted search.

Typically‚ you can locate the manual by entering the model number (TH1110D2009) into the search bar. The website provides both installation manuals detailing the wiring and mounting procedures‚ and user guides explaining day-to-day operation and programming schedules. Registration may be required to access certain resources‚ but it often unlocks additional support options and warranty information. Always prioritize Honeywell’s official documentation for accurate and up-to-date guidance.

Third-Party Manual Repositories

While Honeywell’s website is preferred‚ several third-party repositories host the TH1110D2009 manual in PDF format. These sites can be useful if you encounter difficulties accessing the official documentation or require an alternative download source. However‚ exercise caution when using these platforms‚ as manual versions may be outdated or contain inaccuracies.

Common repositories include document-sharing websites and online forums dedicated to HVAC systems. Always verify the file’s integrity and source before downloading. Look for reputable sites with user reviews or ratings. Be mindful of potential malware risks and ensure your antivirus software is up-to-date. Cross-reference information with Honeywell’s official documentation whenever possible to confirm accuracy and avoid installation or operational errors.

lansinoh wearable breast pump manual

Lansinoh, for over four decades, passionately supports mothers through pregnancy, postpartum, and nursing, innovating solutions like the Wearable Breast Pump․

What is the Lansinoh Wearable Breast Pump?

The Lansinoh Wearable Breast Pump represents a significant advancement in pumping technology, designed for the modern, on-the-go mother․ Unlike traditional pumps requiring you to be tethered to a wall, this innovative device offers hands-free pumping, allowing for greater freedom and discretion․ It’s a compact and discreet solution, fitting comfortably inside your bra, enabling you to pump while working, exercising, or simply managing daily activities․

This pump is designed with comfort and efficiency in mind, utilizing a quiet motor and customizable settings․ The Wearable Pump Instruction Manual details its features, emphasizing its ability to provide a convenient and effective pumping experience․ It’s a product born from Lansinoh’s 40+ years of dedication to supporting mothers throughout their breastfeeding journey, offering a practical solution for maintaining milk supply while balancing a busy lifestyle․

Benefits of a Wearable Breast Pump

A wearable breast pump, like the Lansinoh model, offers numerous advantages for breastfeeding mothers․ The primary benefit is unparalleled freedom and mobility; pump comfortably while working, caring for other children, or engaging in light activities – no more being confined to one location․ This hands-free capability significantly improves convenience and allows for a more natural pumping experience․

Discretion is another key advantage, as the pump’s compact design fits discreetly inside a bra․ The quiet motor minimizes noise, further enhancing privacy․ Consistent milk production is supported through customizable settings detailed in the Wearable Pump Instruction Manual․ Lansinoh’s commitment to maternal support shines through, providing a solution that seamlessly integrates into a busy lifestyle, empowering mothers to maintain their breastfeeding goals with ease and confidence․

Components and Features

The Lansinoh Wearable Breast Pump includes a motor unit, collection cups, flanges, and a control panel, all designed for efficient and comfortable milk expression․

Pump Motor Unit

The Lansinoh Wearable Breast Pump’s motor unit is the core of the system, powering the suction necessary for effective milk expression․ It’s designed to be compact and lightweight, integrating seamlessly into the overall wearable design for discreet pumping․ The motor’s performance balances power with quiet operation, allowing for comfortable use in various settings – at work, while traveling, or simply relaxing at home․

Safety features are integrated into the motor unit; if excessive warmth is detected during operation, the pump will automatically stop to prevent discomfort or potential harm․ This immediate shut-off is a crucial safety measure․ The motor unit connects securely to the collection cups, ensuring a closed system to maintain milk purity․ Proper care and maintenance of the motor unit, as detailed in the instruction manual, are essential for optimal performance and longevity․

Collection Cups & Sizes

Lansinoh Wearable Breast Pump collection cups are designed to comfortably and efficiently gather expressed breast milk․ These cups are a key component, working in conjunction with the motor unit to create a hands-free pumping experience․ They are available in multiple sizes to ensure a proper fit for each individual, maximizing comfort and milk output․

Selecting the correct flange size is paramount; an ill-fitting flange can lead to discomfort, reduced milk flow, and potential nipple damage․ The manual provides guidance on measuring nipple size to determine the appropriate collection cup size․ The cups are constructed from food-grade materials, ensuring milk safety and hygiene․ Regular cleaning and sterilization, following the instructions, are vital to maintain optimal performance and prevent bacterial growth within the collection system․

Flanges and Their Importance

Lansinoh Wearable Breast Pump flanges are the breast shields that create the seal between the pump and your breast․ Proper flange fitting is absolutely crucial for comfortable and effective pumping․ Incorrectly sized flanges can cause nipple pain, blisters, or reduced milk expression․ The manual emphasizes the importance of measuring your nipple size to determine the optimal flange fit․

Flanges come in various sizes, and finding the right one ensures a good seal without excessive friction or pressure․ Signs of a poor fit include discomfort during pumping, milk leaking from the flange, or a feeling that your nipples are rubbing against the tunnel of the flange․ The manual details how to assess the fit and adjust accordingly․ Regularly inspect flanges for cracks or damage, as compromised flanges can affect suction and hygiene․

Control Panel & Display

The Lansinoh Wearable Breast Pump features an intuitive control panel and clear display for easy operation․ The display shows essential information such as pumping mode, suction level, battery life, and timer․ The control panel typically includes buttons for powering the device on/off, selecting pumping modes (stimulation and expression), and adjusting the suction intensity․

The manual details each button’s function and explains how to navigate the different settings․ Users can customize their pumping experience by choosing from various suction levels to find what’s most comfortable and effective․ The display also provides visual cues to indicate the pump’s status, such as when it’s charging or if there’s an error․ Understanding the control panel and display is key to maximizing the pump’s functionality․

Setting Up Your Pump

Proper setup involves charging the device, carefully assembling all components, and ensuring a correct flange fit for optimal comfort and efficient milk expression․

Charging the Device

Before your first use, and whenever the pump indicates low battery, fully charge the Lansinoh Wearable Breast Pump to ensure optimal performance․ Connect the provided USB cable to the pump’s charging port and a suitable power source – a USB wall adapter or a computer․

During charging, the indicator light will illuminate, typically displaying a pulsing or specific color to signify the charging process․ Once fully charged, the indicator light will change, often becoming solid or a different color, indicating readiness․

A full charge typically takes several hours, providing ample power for multiple pumping sessions․ Avoid using the pump while it is charging, as this may interfere with the charging process or potentially damage the device․ Always disconnect the USB cable once charging is complete to conserve energy and prolong the battery’s lifespan․ Refer to the complete instruction manual for specific charging light indicators and estimated charging times․

Assembling the Pump Components

Proper assembly is crucial for effective and hygienic pumping․ Begin by ensuring all components are clean and dry․ Carefully attach the collection cup to the pump motor unit, aligning the connectors until you hear a secure click․ Ensure a tight seal to prevent leaks during operation․

Next, select the appropriate flange size for your comfort and nipple dimensions – proper flange fitting is essential (see the ‘Proper Flange Fitting’ section)․ Securely attach the flange to the collection cup, again ensuring a firm connection․

Double-check all connections before use․ A loose connection can result in reduced suction or milk leakage․ Refer to the detailed diagrams in the instruction manual for visual guidance․ Regularly inspect all parts for wear and tear, replacing them as needed to maintain optimal performance and hygiene․

Proper Flange Fitting

Achieving a comfortable and efficient pumping experience hinges on selecting the correct flange size․ An ill-fitting flange can cause discomfort, nipple damage, and reduced milk expression․ To determine your ideal size, measure your nipple diameter at its widest point․ Lansinoh offers various flange sizes; consult the sizing guide included with your pump․

During pumping, your nipple should move freely within the flange tunnel without rubbing or experiencing excessive friction․ If the flange feels too small, your nipple may be pulled into the tunnel, causing pain․ Conversely, a flange that’s too large can lead to insufficient suction and milk leakage․

Experiment with different sizes to find the best fit․ Observe your nipples after each pumping session for any signs of irritation or damage․ Adjust the flange size accordingly for optimal comfort and milk removal․

Using the Lansinoh Wearable Breast Pump

Power on the device, select your desired mode, and customize pumping settings for a comfortable and efficient experience, ensuring optimal milk expression․

Powering On and Selecting Modes

To begin, ensure the Lansinoh Wearable Breast Pump is adequately charged and properly assembled․ Press and hold the power button, typically located on the pump motor unit, until the display illuminates․ The pump offers various modes designed to cater to different stages of lactation and individual preferences․

Common modes include a stimulation mode, which gently encourages let-down, and an expression mode for efficient milk removal․ Navigate through these modes using the control panel buttons; refer to the user manual for specific button functions․ The display will clearly indicate the currently selected mode․ Some models may also feature a massage mode for added comfort and stimulation․

Experiment with different modes to discover what works best for your body and milk supply․ Always start with the stimulation mode before transitioning to expression for optimal results․ If excessive warmth is detected during pumping, immediately stop and remove the pump․

Pumping Settings & Customization

The Lansinoh Wearable Breast Pump allows for personalized pumping experiences through adjustable settings․ Utilize the control panel to modify suction levels, increasing or decreasing intensity to find your comfort zone․ Gradual adjustments are recommended, starting with the lowest setting and slowly increasing until effective milk expression is achieved․

Cycle speed, the rate at which the pump mimics a baby’s suckling, is also customizable․ Experiment with different cycle speeds to optimize milk flow and comfort․ Many users find varying the speed throughout a pumping session beneficial․ Remember to save your preferred settings for consistent use․

The pump’s display provides clear feedback on current settings․ Regularly review the manual to fully understand all customization options and ensure optimal performance․ Prioritize comfort; discontinue use if experiencing pain or discomfort․

Troubleshooting Common Issues

If experiencing reduced milk flow, first ensure proper flange fit and adequate suction level․ Check that all components are correctly assembled and that the collection cups are securely attached․ Excessive warmth during pumping necessitates immediate cessation of use and pump removal – this is a safety precaution․

For connectivity issues with the app, verify Bluetooth is enabled and the pump is within range․ Restarting both the pump and your mobile device can often resolve these problems․ If the pump isn’t charging, try a different USB cable and power adapter․

Always refer to the full instruction manual for detailed troubleshooting steps․ If issues persist, contact Lansinoh customer support for assistance․ Save these instructions alongside your receipt for warranty claims․

Care and Maintenance

Lansinoh recommends thorough cleaning after each use, following detailed instructions within the manual, to ensure hygiene and longevity of the Wearable Breast Pump․

Cleaning Instructions

Lansinoh emphasizes meticulous cleaning of the Wearable Breast Pump components after every pumping session to maintain optimal hygiene and prevent bacterial growth․ Disassemble all parts that come into contact with breast milk – collection cups, flanges, membranes, and the pump motor unit’s milk touchpoints․

Wash these components with warm, soapy water, ensuring thorough rinsing to remove all soap residue․ Alternatively, many parts are dishwasher-safe (top rack only), but always consult the manual for specific component compatibility․

Sterilize the parts regularly, especially for newborns or infants with compromised immune systems, using a Lansinoh sterilizer or by boiling for five minutes․ Allow all components to air dry completely on a clean surface before reassembling․ The pump motor unit itself should be wiped down with a damp cloth; avoid immersing it in water․ Proper cleaning extends the pump’s lifespan and safeguards your milk supply․

Storage Guidelines

Proper storage of your Lansinoh Wearable Breast Pump ensures its longevity and optimal performance․ When not in use, store the pump motor unit in a cool, dry place, away from direct sunlight and extreme temperatures․ Avoid storing it in humid environments, as moisture can damage the electronic components․

Clean and thoroughly dry all milk-touching parts before storing them in a clean, airtight container or bag․ This prevents contamination and maintains hygiene․ It’s recommended to store the disassembled components separately to avoid damage during storage․

Keep the pump out of reach of children․ Regularly check the pump and its components for any signs of wear and tear․ Following these guidelines will help maintain the pump’s functionality and ensure it’s ready when you need it, supporting a consistent and hygienic pumping routine․

Replacing Parts

To maintain optimal hygiene and performance of your Lansinoh Wearable Breast Pump, regular replacement of certain parts is crucial․ Milk-touching components, such as the collection cups, flanges, and membranes, should be replaced periodically – approximately every three months with regular use, or sooner if you notice any cracks, tears, or deterioration․

The valve and silicone diaphragm are also key components that benefit from routine replacement to ensure consistent suction․ Lansinoh offers replacement part kits for convenience․ Always use genuine Lansinoh replacement parts to guarantee compatibility and maintain the pump’s effectiveness․

Inspect all parts before each use and discard any damaged items immediately․ Consistent replacement of worn parts contributes to a hygienic and efficient pumping experience, safeguarding both your milk supply and your comfort․

Safety Precautions

If excessive warmth is detected from the Wearable Pump during operation, immediately cease pumping and remove the device; retain these Instructions․

Important Warnings

Lansinoh emphasizes crucial safety measures when utilizing the Wearable Breast Pump․ Discontinue use immediately if experiencing discomfort or skin irritation․ Never modify the pump; use only genuine Lansinoh parts to maintain safety and performance․

Regularly inspect all components for damage, and do not use if cracked or broken․ Avoid submerging the pump motor unit in water․ Ensure proper flange fitting to prevent nipple damage; incorrect sizing can lead to discomfort or reduced milk flow․

This device is intended for single-user operation only; sharing poses hygiene risks․ Keep the pump away from children․ Save these instructions and your receipt for future reference and potential warranty claims․ Always follow cleaning and sterilization guidelines to prevent bacterial growth․

When to Discontinue Use

Immediately stop using the Lansinoh Wearable Breast Pump if you detect excessive warmth during operation, as indicated in the manual․ Any sign of malfunction, such as unusual noises, erratic operation, or damage to components, warrants immediate cessation of use․

Discontinue use if you experience persistent nipple pain, cracking, or signs of infection․ If the pump is visibly damaged – cracks, broken parts, or compromised seals – do not attempt to repair it; replace it․

If you notice any changes in your milk supply or breast health while using the pump, consult with a lactation consultant or healthcare professional․ Always prioritize your comfort and well-being; discontinue use if it causes any distress․ Retain the pump’s instructions for future reference․

Frequently Asked Questions (FAQs)

Q: Where can I find the instruction manual for the Lansinoh Wearable Breast Pump? A: The complete Wearable Pump Instruction Manual is readily available online through Lansinoh’s official website and various retailers․ It’s crucial to review this manual before initial use․

Q: Are there accompanying apps for the Lansinoh Smartpump? A: Yes, Lansinoh offers dedicated Smartpump apps – Smartpump 3․0 Baby App and Smartpump 2․0 Baby App – designed to enhance your pumping experience and track sessions․

Q: What should I do if the pump feels warm during operation? A: If you experience excessive warmth, immediately stop pumping and remove the device; Refer to the manual for detailed safety guidelines․ Lansinoh prioritizes user safety and provides comprehensive support resources․

2010 mazda3 owners manual

This manual details the 2010 Mazda3’s operation, maintenance, and features․ Download the owner’s manual, smart start guide, or access workshop resources online for assistance․

Overview of the Manual’s Purpose

The 2010 Mazda3 owner’s manual serves as a comprehensive guide for understanding your vehicle․ It covers essential aspects like operation, maintenance schedules, and safety features․ The Smart Start Guide offers quick reference for basic functions․ Workshop manuals, including those from MESI (2003-2020), provide detailed repair and service information, including wiring diagrams and technical data․ These resources empower owners and technicians alike to properly care for and maintain the vehicle, ensuring optimal performance and longevity․

Where to Find the Official Manual (Digital & Physical)

Digital versions of the 2010 Mazda3 owner’s manual and Smart Start Guide are readily available for download․ Resources like autorepairmanuals․co․uk host manuals․ Mediafire links provide access to the 2010 Mazda3 4-Door Smart Start Guide and interior trim workshop manuals․ The Internet Archive offers the Mazda3/Mazdaspeed3 workshop manual (2010-2012)․ A physical copy was originally included with the vehicle; however, digital access is now more common․

Vehicle Identification & Key Information

Locate your Vehicle Identification Number (VIN) for crucial vehicle history and identification․ Keyless entry systems offer convenient access and operation․

Vehicle Identification Number (VIN) Location

The unique 17-digit VIN is essential for identifying your specific 2010 Mazda3․ It’s crucial for warranty work, theft recovery, and vehicle history reports․ You can typically find the VIN in several locations within the vehicle․ Look on the driver’s side dashboard, visible through the windshield․ Additionally, check the driver’s side doorjamb and your vehicle registration documents․ Maintaining a record of your VIN is highly recommended for quick access when needed․

Keyless Entry System Operation

The 2010 Mazda3 offers a convenient keyless entry system․ For standard keyless entry, press the unlock button on the key fob to disarm the alarm and unlock the doors․ The lock button will arm the system and lock the doors․ Advanced keyless entry systems may allow unlocking by touching the door handle․ Refer to your owner’s manual for specific instructions and troubleshooting tips regarding your vehicle’s keyless entry functionality․

Operating Your 2010 Mazda3

Understand starting, stopping, and fuel requirements for optimal performance․ The Mazda3 requires regular unleaded (87 octane) or premium (91-93 octane) fuel․

Starting and Stopping the Engine

To start the 2010 Mazda3, ensure the parking brake is engaged and the transmission is in Park (P) or Neutral (N)․ Insert the key or use the start/stop button, pressing the clutch pedal (manual transmission) fully․ Turn the key to the ‘Start’ position and release once the engine ignites․

To stop, depress the brake pedal firmly and shift the transmission into Park (P)․ Turn the ignition key to the ‘Lock’ position or press the start/stop button․ Always allow the engine to idle briefly before shutting off․

Fuel Requirements (Regular vs․ Premium)

The 2010 Mazda3 has differing fuel needs based on the model․ Standard Mazda3 models require regular unleaded fuel with an octane rating of 87․ However, Mazdaspeed3 variants demand premium fuel, specifically with an octane rating between 91 and 93․

Using the correct fuel ensures optimal engine performance and longevity․ Refer to your vehicle’s specific documentation for confirmation, as incorrect fuel can negatively impact operation․

Fuel Door Release Mechanism

To open the fuel door on your 2010 Mazda3, locate the release lever situated on the floor in front of the driver’s seat․ Simply pull this lever to activate the release mechanism, allowing you to open the fuel door․

Exercise caution when opening to avoid scratching the paint․ This manual release is the standard method for accessing the fuel filler on this vehicle model․

Maintenance Schedule & Procedures

Regular maintenance, including oil changes and tire pressure checks (TPMS), is crucial for your 2010 Mazda3’s longevity and optimal performance․

Recommended Oil Change Intervals

Maintaining proper oil levels is vital for your 2010 Mazda3’s engine health․ While specific intervals depend on driving conditions, a general guideline suggests oil changes every 5,000 to 7,500 miles using the recommended oil type․

Severe driving conditions – frequent short trips, towing, or dusty environments – necessitate more frequent changes․ Consult the official owner’s manual for detailed recommendations tailored to your driving habits and ensure optimal engine performance and longevity․

Tire Pressure Monitoring System (TPMS)

The 2010 Mazda3 is equipped with a Tire Pressure Monitoring System (TPMS) to enhance safety․ This system alerts you when tire pressure is significantly low, potentially preventing accidents․ The TPMS warning light illuminates on the dashboard when a tire needs attention․

Regularly check your tire pressure manually, even with TPMS, and inflate tires to the recommended PSI found on the driver’s side doorjamb․ Proper tire inflation improves fuel efficiency and extends tire life․

Interior Features & Controls

Explore the 2010 Mazda3’s interior, featuring manual seat controls and, if equipped, a navigation system․ Understand operation for optimal comfort and convenience․

Manual Seat Controls

Adjust your 2010 Mazda3’s seating position using the manually operated controls․ These are typically located on the side of the seat, allowing for adjustments to height, recline, and fore/aft positioning․ Ensure a comfortable and secure driving posture by familiarizing yourself with these controls․ Proper adjustment is crucial for safety and optimal vehicle control․ Refer to the owner’s manual for detailed instructions and diagrams illustrating the location and operation of each control․

Navigation System (If Equipped)

If your 2010 Mazda3 includes a navigation system, consult the separate navigation manual for detailed operating instructions․ This system provides turn-by-turn directions, points of interest, and route planning capabilities․ Familiarize yourself with map updates, destination entry, and voice guidance features․ Ensure the system is properly updated for accurate information․ Refer to the dedicated manual for troubleshooting and advanced functionalities․

Electrical System Details

Access Mazda electrical wiring diagrams online at autoshop101․com․ Review fuse box locations and diagrams for quick troubleshooting of electrical issues․

Mazda Electrical Wiring Diagrams

Detailed electrical wiring diagrams are crucial for diagnosing and repairing electrical faults within your 2010 Mazda3․ These diagrams illustrate the complex network of wires, connectors, and components․ Fortunately, a comprehensive resource is readily available at autoshop101․com, providing access to Mazda’s electrical wiring diagrams․ Utilize these diagrams when performing electrical system maintenance or troubleshooting to ensure accurate repairs and avoid further complications․ Understanding these schematics is vital for both DIY enthusiasts and professional technicians․

Fuse Box Locations & Diagrams

Locating the fuse boxes is essential for addressing electrical issues in your 2010 Mazda3․ The owner’s manual details their specific locations within the vehicle, typically found inside the cabin and within the engine compartment․ Diagrams illustrating the fuse layout are also provided, identifying each fuse’s function․ Always consult the manual before replacing a fuse, ensuring you use the correct amperage to prevent damage or further electrical problems․ Proper fuse replacement maintains system integrity․

Troubleshooting Common Issues

Resolve typical problems like a dead battery or warning lights using the guide․ Refer to the manual for indicator meanings and solutions․

Dealing with a Dead Battery

If your 2010 Mazda3 battery is dead, jump-starting is a viable solution․ Ensure you have jumper cables and a functioning vehicle․ Connect the cables correctly – positive to positive, negative to a grounded metal surface on the Mazda3․ Follow the proper sequence to avoid damage․ Alternatively, a portable jump starter or professional assistance can be utilized; Always consult the owner’s manual for specific instructions and safety precautions related to jump-starting your vehicle․

Warning Light Indicators & Meanings

The 2010 Mazda3 utilizes various warning lights to alert drivers to potential issues․ Understanding these indicators is crucial for safe operation․ Lights include check engine, ABS, airbag, brake warning, and low fuel․ Refer to the owner’s manual for a comprehensive list and detailed explanations of each light’s meaning․ Ignoring warning lights can lead to more significant problems, so prompt attention is always recommended for vehicle health․

Body & Trim Information

Details regarding interior trim, exterior paint care, and workshop manuals for the 2010 Mazda3 are available․ Resources include online manuals and guides․

Interior Trim Workshop Manual Details

Access the 2010 Mazda3/Mazdaspeed3 Interior Trim Workshop Manual via Mediafire for detailed repair procedures․ This manual, added to the Internet Archive on August 11, 2023, covers comprehensive interior component work․ It provides guidance on disassembly, repair, and reassembly of trim pieces․ The identifier for this resource is mazda-3-mazdaspeed-3-workshop-manual-2010-2012, ensuring you locate the correct documentation for your vehicle’s interior needs․

Exterior Paint Care & Maintenance

To avoid scratching the paint when accessing the fuel door, use caution․ The 2010 Mazda3’s exterior finish requires regular care to maintain its appearance․ While the manual doesn’t detail specific paint care products, consistent washing and waxing are recommended․ Protect against environmental factors like UV rays and road debris․ Consider professional detailing for optimal results and long-term paint preservation, ensuring a lasting shine․

Technical Specifications

Engine specs include horsepower and torque figures, while transmission details are also provided․ Refer to the manual for precise data regarding your 2010 Mazda3․

Engine Specifications (Horsepower, Torque)

The 2010 Mazda3 offers varied engine options impacting horsepower and torque․ For the standard Mazda3, regular unleaded 87 octane fuel is recommended․ However, the Mazdaspeed3 variant requires premium fuel, specifically 91-93 octane, to optimize performance․ Detailed engine specifications, including exact horsepower and torque ratings for each engine type, are comprehensively outlined within the owner’s manual for precise reference․ Consult the manual to understand your vehicle’s specific engine characteristics․

Transmission Details

The 2010 Mazda3 was available with multiple transmission options, including both manual and automatic transmissions․ Specific transmission types varied depending on the engine and trim level selected․ The owner’s manual provides detailed information regarding the operation and maintenance of your specific transmission․ It covers aspects like shift patterns, fluid checks, and recommended service intervals to ensure optimal performance and longevity․ Refer to the manual for complete transmission specifications․

Safety Features & Systems

The 2010 Mazda3 features an airbag system and anti-lock braking system (ABS) for enhanced safety․ Consult the owner’s manual for detailed operational information․

Airbag System Operation

The 2010 Mazda3 is equipped with a sophisticated airbag system designed to provide crucial protection during collisions․ This system includes front, side, and curtain airbags, strategically positioned throughout the vehicle’s cabin․ Proper seatbelt usage is essential for optimal airbag effectiveness; airbags supplement, not replace, seatbelts․ Refer to the owner’s manual for detailed information regarding airbag deployment, system indicators, and safety precautions․ Understanding these features ensures passenger safety and responsible vehicle operation․

Anti-lock Braking System (ABS)

The 2010 Mazda3 features an Anti-lock Braking System (ABS) to enhance control during hard braking and slippery conditions․ ABS prevents wheel lockup, allowing the driver to maintain steering capability․ A pulsing sensation in the brake pedal indicates ABS is actively engaged – maintain firm, continuous pressure․ Do not pump the brakes; let the system work․ Consult the owner’s manual for detailed operation, warning light indicators, and system limitations for safe and effective use․

Repair & Service Information

Access the 2003-2020 MESI workshop manual for detailed repair procedures, wiring diagrams, and technical data for your 2010 Mazda3․

Accessing the Workshop Manual

Comprehensive repair information for the 2010 Mazda3 is available through the MESI workshop manual, covering models from 2003-2020․ This resource includes wiring diagrams, technical guides, body repair details, and maintenance schedules․ A 2nd Generation Mazda3/Mazdaspeed3 service manual can be found at mediafire․com․ Additionally, the 2010 Mazda3 Interior Trim Workshop Manual is also available on mediafire․com, offering specific guidance for interior work․

MESI Workshop Manual Coverage (2003-2020)

The MESI Workshop Manual provides extensive coverage for Mazda vehicles from 2003 to 2020, including the 2010 Mazda3․ It encompasses vital sections like wiring diagrams, technical guides, detailed workshop procedures, body repair manuals, and comprehensive technical data․ This resource also includes essential maintenance care information, ensuring thorough support for both routine servicing and complex repairs․

Smart Start Guide

The Smart Start Guide offers a quick reference for basic 2010 Mazda3 operations; download it locally to save bandwidth and quickly access key features․

Quick Reference for Basic Operations

For immediate assistance, the 2010 Mazda3’s Smart Start Guide provides essential operational details․ Keyless entry functions are outlined, alongside the fuel door release location – found on the driver’s side floor․

Regarding fuel, the Mazda3 requires 87 octane regular unleaded, while the Mazdaspeed3 demands 91-93 octane premium fuel․ This guide simplifies common tasks, ensuring a smooth driving experience and quick access to vital information․

Downloading the Smart Start Guide

To conserve bandwidth and ensure readily available access, the 2010 Mazda3’s Smart Start Guide is best downloaded and saved locally․ This guide offers a quick reference for basic operations, including keyless entry and fuel door release procedures․

Find the guide available for download online; it’s a valuable resource for new owners․ Saving it locally guarantees access even without an internet connection, providing immediate assistance when needed․

Additional Resources

Explore online Mazda forums and auto repair manual websites for community support and detailed repair information regarding your 2010 Mazda3․

Online Mazda Forums & Communities

Engage with fellow 2010 Mazda3 owners on dedicated online forums like the 2004-2020 Mazda 3 Forum and Mazdaspeed 3 Forums․ These platforms offer invaluable opportunities to share experiences, troubleshoot issues, and access a wealth of knowledge from experienced enthusiasts․

Discuss modifications, maintenance tips, and common problems specific to the 2010 model year, benefiting from collective wisdom and potentially finding solutions tailored to your vehicle’s needs․

Auto Repair Manuals Websites

Access comprehensive repair information through websites like autorepairmanuals․co․uk, offering a vast library of auto repair manuals, including resources for the 2010 Mazda3․ Explore detailed guides for maintenance, diagnostics, and repairs․

Find downloadable PDF versions of the owner’s manual and workshop manuals, providing step-by-step instructions and diagrams to assist with various automotive tasks․ Utilize these resources for informed self-service or to better understand professional repairs․

craftsman table saw owners manual

Craftsman table saws are renowned for their durability and precision, offering both hobbyists and professionals reliable performance. This guide, derived from Sears resources and manuals like manualzz, provides essential information for owners.

Understanding your Craftsman 21807 – 10 in. Table Saw, through the official manual available at www.sears.com/craftsman, is crucial for safe and effective operation.

This introduction will help you navigate the features, assembly, operation, and maintenance of your new tool, ensuring years of successful woodworking projects.

Understanding Your Table Saw

Your Craftsman table saw, as detailed in the owner’s manual sourced from resources like manualzz, is a powerful tool designed for precise woodcutting. Familiarizing yourself with its core functionalities is paramount before operation. The saw’s primary function revolves around the rotating blade, powered by a motor, which cuts through wood as it’s fed across the table.

Key components, like the fence, miter gauge, and blade guard, contribute to accuracy and safety. The fence ensures rip cuts are parallel, while the miter gauge facilitates accurate crosscuts. The blade guard and anti-kickback pawls are vital safety features, preventing accidental contact and workpiece kickback.

Referencing the Sears-provided manual (available via www.sears.com/craftsman) will illustrate these components and their proper usage. Understanding the saw’s rip capacity and table extension capabilities will also maximize its versatility for various projects. Proper understanding is key to safe and efficient operation.

Safety First: Essential Precautions

Prioritizing safety is crucial when operating your Craftsman table saw. Always consult the official owner’s manual, accessible through Sears at www.sears.com/craftsman, before each use. Wear appropriate safety glasses and hearing protection to shield against debris and noise.

Never remove the blade guard or anti-kickback pawls unless performing a specific operation explicitly detailed in the manual. Maintain a firm grip on the workpiece and use push sticks when cutting smaller pieces close to the blade. Avoid reaching over or behind the blade while it’s rotating.

Ensure the work area is well-lit and free of obstructions. Disconnect the power cord before making adjustments or changing the blade. Familiarize yourself with the emergency stop switch location. Following these precautions, as outlined in the manual, will minimize the risk of injury.

Components and Features

Your Craftsman table saw, detailed in the Sears manual, boasts a robust base, precise fence system, and essential safety features like blade guards and anti-kickback pawls.

Table Saw Base and Stand

The Craftsman table saw’s base and stand are fundamental to its stability and operational safety, as outlined in the owner’s manual available through Sears. Typically constructed from heavy-gauge steel, the base provides a solid foundation minimizing vibrations during cutting operations.

The stand design often incorporates folding legs for portability and convenient storage, a feature highlighted in various online resources referencing the manualzz documentation. Ensure the stand is fully locked and level before each use; uneven surfaces can compromise cutting accuracy and safety.

Inspect the base regularly for any signs of damage or corrosion, addressing issues promptly to maintain structural integrity. Proper assembly, as detailed in the manual, is critical for optimal performance and longevity of the saw.

Fence System: Alignment and Adjustment

The fence system on your Craftsman table saw, detailed in the official owner’s manual sourced from Sears, is paramount for achieving accurate rip cuts. Proper alignment ensures the workpiece remains parallel to the blade throughout the cut, preventing binding and kickback.

Adjustment mechanisms typically involve a locking lever and adjustment wheel, allowing for precise positioning. Regularly check the fence for squareness to the blade using a reliable square; even slight misalignment can affect cut quality.

The manual emphasizes the importance of a smooth, consistent fence movement. Lubricate the fence rails periodically to maintain ease of adjustment. Refer to manualzz for supplemental guidance on fence calibration and troubleshooting common alignment issues.

Blade Guard and Anti-Kickback Pawls

Your Craftsman table saw’s blade guard and anti-kickback pawls, as detailed in the Sears-provided owner’s manual, are critical safety features. The blade guard provides a physical barrier, protecting your hands from accidental contact with the spinning blade. Always ensure it’s properly installed and adjusted before operation.

Anti-kickback pawls prevent the workpiece from being thrown back towards the operator during a cut, minimizing the risk of serious injury. These pawls should move freely and engage the workpiece firmly.

The manual stresses never to disable or bypass these safety components. Resources like manualzz can offer visual aids for proper installation and adjustment, ensuring optimal protection during all cutting operations. Prioritize safety above all else.

Motor and Power Switch

The Craftsman table saw’s motor is a powerful component, and understanding its operation is vital, as outlined in the official Sears owner’s manual. The manual details the motor’s specifications, including voltage and amperage requirements, ensuring proper power supply connection. Always verify compatibility before plugging in the saw.

The power switch is designed for quick and easy on/off control, but the manual emphasizes the importance of disconnecting the power cord from the outlet before performing any maintenance or blade changes.

Never operate the saw with a damaged power cord. Resources like manualzz may provide diagrams illustrating the switch’s functionality and safety features. Familiarize yourself with the emergency stop procedures detailed in the manual.

Rip Capacity and Table Extension

Your Craftsman table saw’s rip capacity – the maximum width of material it can cut – is a key specification detailed in the owner’s manual sourced from Sears. This capacity is often influenced by the fence system and any installed table extensions.

The manual will specify the standard rip capacity and how to maximize it using the table extensions. These extensions provide additional support for larger workpieces, enhancing accuracy and safety during rip cuts.

Properly installing and securing the table extension is crucial, as outlined in the manual. Resources like manualzz may offer visual guides. Always ensure the extension is level and firmly attached before operation to prevent instability and potential kickback.

Assembly and Setup

Carefully follow the Craftsman table saw owner’s manual (available via Sears and resources like manualzz) for correct assembly. Prioritize safety during each step!

Unboxing and Initial Inspection

Upon receiving your Craftsman table saw, carefully inspect the shipping carton for any visible damage before opening. Document any damage with photographs immediately and contact the retailer. Once opened, meticulously inventory all components against the parts list provided in the Craftsman owner’s manual – accessible through Sears’ website (www.sears.com/craftsman) and resources like manualzz.

Verify the presence of the table saw base, stand components, fence assembly, blade guard, miter gauge, blade, power switch, and all hardware. Check for any missing parts or defects in materials or workmanship. Ensure the blade is securely packaged and that all protective covers are intact. A thorough initial inspection, guided by the manual, prevents issues during assembly and ensures a safe operating experience. Retain the packaging materials for potential returns or warranty claims.

Attaching the Legs and Stand

Refer to the detailed diagrams in your Craftsman table saw owner’s manual (available via Sears at www.sears.com/craftsman or manualzz) for proper leg and stand attachment. Typically, this involves aligning the legs with the pre-drilled holes on the table saw base and securing them with the provided bolts and washers.

Ensure all bolts are tightened firmly, but avoid over-tightening, which could damage the base. The stand assembly usually requires connecting support rails between the legs for added stability. Double-check that the stand is level before fully tightening all fasteners. A stable base is paramount for safe and accurate operation. Verify the stand’s locking mechanisms are engaged to prevent accidental collapse during use. Consult the manual for specific torque specifications.

Fence Installation and Calibration

Your Craftsman table saw’s fence is critical for accurate rip cuts; therefore, proper installation and calibration, as detailed in the owner’s manual (found on Sears’ website or manualzz), are essential. Begin by securely attaching the fence rail to the table saw, ensuring it’s parallel to the blade.

Calibration involves verifying the fence reads zero when aligned with the blade. Use a precision measuring tool to confirm this. Adjust the fence locking mechanism to eliminate any play or movement during operation. Regularly check fence alignment, especially after moving or transporting the saw. A misaligned fence will result in inaccurate cuts and potential safety hazards. Refer to the manual for specific adjustment procedures and recommended tools.

Blade Installation and Changing

Safely installing and changing blades on your Craftsman table saw, as outlined in the official owner’s manual available through Sears and resources like manualzz, is paramount. Always disconnect the power supply before commencing any blade work. Utilize the appropriate wrenches for loosening and tightening the arbor nut.

Ensure the blade is correctly oriented – teeth pointing towards the operator. When mounting, verify the blade sits flush against the mounting flange. Tighten the arbor nut securely, but avoid over-tightening. Regularly inspect blades for sharpness and damage, replacing them as needed. The manual details specific blade types compatible with your model. Proper blade installation guarantees accurate cuts and minimizes the risk of kickback.

Operating Instructions

Refer to your Craftsman table saw manual (available via Sears and manualzz) for detailed guidance on safe and effective operation, covering all cutting techniques.

Basic Cutting Techniques

Mastering basic cuts is fundamental to utilizing your Craftsman table saw effectively and safely. Always consult your Craftsman table saw owner’s manual (found on Sears’ website or resources like manualzz) before beginning any operation. Begin with understanding feed rate – controlling the speed at which wood enters the blade is vital for clean cuts and preventing kickback.

Ensure the blade guard and anti-kickback pawls are correctly positioned before each cut. Practice smooth, consistent feeding, avoiding forcing the material. Proper stance and hand placement are also crucial for control and safety. Remember to always disconnect power before making adjustments or changing blades. Familiarize yourself with the saw’s controls and safety features as detailed in the manual.

These foundational techniques will build confidence and precision in your woodworking endeavors, allowing you to tackle more complex projects with ease and security.

Making Rip Cuts

Rip cuts, those made with the grain of the wood, are a core function of your Craftsman table saw. Refer to your Craftsman owner’s manual (available via Sears or manualzz) for detailed guidance and safety precautions. Properly adjust the fence to the desired width of the finished piece, ensuring it’s parallel to the blade.

Securely position the wood against the fence, maintaining consistent pressure throughout the cut. Use a push stick, especially when nearing the blade, to avoid hand contact and maintain control. A featherboard can further enhance safety and accuracy by keeping the wood firmly against the fence.

Avoid binding, which can cause kickback; a smooth, controlled feed rate is essential. Always double-check your measurements and fence alignment before initiating the cut.

Performing Crosscuts

Crosscuts, made across the wood grain, require a different approach than rip cuts. Your Craftsman table saw manual (sourced from Sears or sites like manualzz) emphasizes the importance of using the miter gauge for accurate crosscuts. Ensure the miter gauge slides smoothly within the table saw’s miter slots.

Securely hold the workpiece against the miter gauge, maintaining firm and consistent pressure. Never use the fence and the miter gauge simultaneously, as this can cause binding and dangerous kickback. For wider pieces, consider using a crosscut sled for improved support and accuracy.

Always keep your hands clear of the blade’s path and maintain a controlled feed rate throughout the cut.

Using the Miter Gauge

The miter gauge, detailed in your Craftsman table saw manual (available via Sears and resources like manualzz), is essential for precise angled and crosscuts. It slides within the table’s miter slots, guiding the workpiece. Before use, verify the miter gauge fits snugly and moves smoothly – adjustments may be needed.

To set an angle, loosen the locking knob, rotate the gauge to the desired degree marking, and retighten securely. Always ensure the workpiece is firmly against the gauge throughout the cut, providing consistent pressure. Never use the fence and miter gauge concurrently; this creates a bind risk.

For wider boards, a crosscut sled offers enhanced stability and accuracy when paired with the miter gauge.

Maintenance and Troubleshooting

Regular maintenance, as outlined in your Craftsman manual from Sears, ensures optimal performance and longevity. Addressing common issues promptly, using manualzz resources, is key.

Blade Sharpening and Replacement

Maintaining a sharp blade is paramount for safe and accurate cuts with your Craftsman table saw. Dull blades require more force, increasing kickback risk. Refer to your Craftsman owner’s manual, accessible via Sears’ website (www.sears.com/craftsman) or resources like manualzz, for specific blade sharpening recommendations.

Sharpening can be done professionally or with a blade sharpening kit. When the blade is excessively worn or damaged, replacement is necessary. Always disconnect the power before handling the blade. Ensure the new blade is compatible with your saw’s arbor size and maximum RPM.

Proper blade installation, detailed in the manual, involves securing the blade with the correct washers and tightening the arbor nut to the specified torque. Regularly inspect blades for missing teeth or damage.

Belt Tension Adjustment

Proper belt tension is critical for optimal power transfer and preventing premature wear on your Craftsman table saw’s motor and drive system. Consult your Craftsman owner’s manual – downloadable from Sears’ website (www.sears.com/craftsman) or found on sites like manualzz – for specific adjustment procedures for your model.

A belt that is too loose will slip, reducing cutting power and generating heat. Conversely, a belt that is too tight can strain the motor bearings and shorten belt life. The manual will detail how to locate the belt tension adjustment mechanism, typically involving loosening a motor mount and adjusting its position.

Check belt tension periodically and adjust as needed, ensuring it deflects within the range specified in the manual.

Cleaning and Lubrication

Regular cleaning and lubrication are essential for maintaining the performance and longevity of your Craftsman table saw. Refer to your Craftsman owner’s manual – accessible via Sears’ website (www.sears.com/craftsman) or resources like manualzz – for specific recommendations.

After each use, remove sawdust and debris from the table surface, blade guard, and internal components using a brush or vacuum. Avoid using compressed air, as it can spread dust into sensitive areas. Periodically lubricate moving parts, such as the elevation and tilt mechanisms, with a light machine oil or grease as indicated in the manual.

Proper lubrication reduces friction, prevents corrosion, and ensures smooth operation. Always disconnect the power before cleaning or lubricating your saw.

Common Problems and Solutions

Troubleshooting minor issues can often prevent costly repairs to your Craftsman table saw. Your Craftsman owner’s manual, found on resources like manualzz and the Sears website (www.sears.com/craftsman), provides valuable guidance.

If the blade drifts during cuts, check fence alignment and ensure it’s securely locked. For reduced power, inspect the drive belt for wear or looseness and adjust tension accordingly. Excessive vibration may indicate a dull or damaged blade, or loose components – tighten all bolts and ensure proper blade installation.

If the saw won’t start, verify the power cord and switch functionality. Always disconnect power before inspecting or repairing any electrical components. For more complex issues, consult a qualified technician or the Sears Parts & Repair Center (1-800-488-1222).

Warranty Information

Sears offers a one-year warranty covering defects in materials or workmanship on your Craftsman table saw, ensuring repair or replacement if needed.

Refer to your Craftsman owner’s manual for complete warranty details and procedures for filing a claim with Sears.

Craftsman Table Saw Warranty Details

Your Craftsman table saw is warranted against defects in material and workmanship for a period of one year from the original date of purchase. This warranty, as detailed in the owner’s manual and provided by Sears, Roebuck and Co., covers repairs or replacement of defective parts.

The warranty specifically excludes damage resulting from misuse, abuse, normal wear and tear, alterations, or improper maintenance. Sears reserves the right to inspect any claimed defect before determining the appropriate remedy.

To obtain warranty service, contact the Sears Parts and Repair Center at 1-800-488-1222 or visit their website at www.sears.com/craftsman. Proof of purchase, including the original sales receipt, is required for all warranty claims. This warranty gives you specific legal rights, and you may have other rights which vary by state.

Sears Parts and Repair Center Contact

For all parts inquiries, repair services, or assistance with your Craftsman table saw, the Sears Parts and Repair Center is your primary point of contact. They offer a comprehensive range of genuine Craftsman replacement parts to ensure the longevity and optimal performance of your tool.

You can reach the Sears Parts and Repair Center by phone at 1-800-488-1222. Their knowledgeable representatives are available to assist you with identifying the correct parts for your specific model and scheduling repair appointments if needed.

Alternatively, visit the Craftsman website at www.sears.com/craftsman to browse parts diagrams, access online support resources, and locate authorized service centers in your area. Remember to have your table saw’s model number readily available when contacting Sears.

Resources and Support

Access comprehensive support, including downloadable manuals and helpful guides, at the official Craftsman website: www.sears.com/craftsman. Explore detailed information today!

Craftsman Website and Manual Downloads

The Craftsman website, located at www.sears.com/craftsman, serves as a central hub for all your table saw support needs. Here, you can directly access and download digital versions of your owner’s manual, including the Craftsman 21807 – 10 in. Table Saw manual, available through resources like manualzz.

These downloadable PDFs provide detailed instructions on assembly, operation, maintenance, and troubleshooting. Beyond the core manual, Sears often provides supplementary guides, parts diagrams, and safety information.

Utilizing these online resources ensures you always have the latest information at your fingertips, eliminating the need to search for physical copies. Regularly check the website for updates and revisions to your table saw’s documentation, guaranteeing optimal performance and safety throughout its lifespan.