Category Archives: Instructions

weber genesis grill instruction manual

Weber Genesis Grill Instruction Manual: A Comprehensive Guide

Discover premium grilling! This manual details Weber Genesis grills, accessories, courses, and recipes for a perfect BBQ experience․ Explore features like sear stations and rotisserie compatibility․

Understanding Your Weber Genesis Grill

Welcome to the world of Weber Genesis! This grill represents decades of innovation in food processing and outdoor cooking․ Weber’s unique design ensures exceptional heat circulation for even cooking at any temperature, delivering consistently delicious results․

The Genesis series boasts features like a built-in smoker box and advanced grilling capabilities․ Whether you’re a seasoned grill master or a beginner, understanding your grill’s components and functionalities is key to unlocking its full potential․ Explore the Q series for compact, reliable grilling too!

Unboxing and Initial Setup

Carefully unpack your Weber Genesis grill, verifying all components are present․ Inspect for any shipping damage before proceeding․ Initial setup involves attaching the side tables, grease management system, and ensuring the burner valves are securely connected․

Refer to the detailed diagrams within this manual for proper assembly․ Before first use, thoroughly clean the grill grates and flavorizer bars․ Weber prioritizes quality and reliability; proper setup ensures years of enjoyable grilling experiences․ Visit Weber’s website for additional support and resources․

Identifying Grill Components

Familiarize yourself with your Weber Genesis grill’s key parts․ This includes the burner valves, control panel, grill grates, flavorizer bars, and grease management system․ Locate the sear station and side burner (if equipped)․ Understanding each component’s function is crucial for optimal performance․

Weber’s unique design ensures even heat circulation․ The Q series offers compact grilling, while Genesis models boast advanced features․ Refer to the diagrams for precise component locations and names․ Proper identification aids in maintenance and troubleshooting․

Gas Supply Connection

Ensure a secure gas connection for safe operation․ Connect a standard LP gas tank, regulator, and hose to the grill’s gas valve․ Verify compatibility and inspect for damage before connecting․ Tighten all connections firmly to prevent leaks – always use leak detection solution!

Weber grills require proper gas pressure for optimal performance․ Never use excessive force when connecting․ Regularly check the hose for cracks or wear․ Disconnect the gas supply when not in use or during maintenance․

Control Panel Overview

The Genesis control panel offers intuitive operation․ Individual burner controls allow precise temperature adjustments․ The ignition knob initiates the electronic ignition system․ Look for indicator lights confirming burner activity․ Some models feature a crossover ignition system for reliable lighting․

Additional controls may include a side burner knob and rotisserie settings․ Familiarize yourself with each function before grilling․ The panel’s design ensures easy access and clear visibility, even in low light conditions;

Burner Identification

Weber Genesis grills utilize high-performance stainless steel burners․ Typically, Genesis models feature three or more burners, strategically positioned for even heat distribution․ Each burner is individually controlled via the main control panel․ Identifying each burner allows for targeted temperature zones․

Burners are numbered or labeled for easy reference during setup and troubleshooting․ Regularly inspect burners for obstructions or damage․ Proper burner function is crucial for optimal grilling performance and consistent results․

Safety Precautions

Prioritize safety when operating your Weber Genesis grill․ Always perform a leak detection test before each use, utilizing soapy water on gas connections․ Ensure adequate ventilation; never operate the grill indoors or in enclosed spaces․ Maintain a safe grilling distance from flammable materials․

Never leave a lit grill unattended․ Keep children and pets away from the grilling area․ Wear appropriate heat-resistant gloves and clothing․ Familiarize yourself with all safety warnings detailed in this manual before operation․

Gas Leak Detection

Before each use, meticulously check for gas leaks․ Prepare a solution of soapy water – mix liquid dish soap with water․ Apply this solution to all gas connections, including the regulator, hose, and manifold․

Turn the grill’s gas supply ON, but do NOT ignite the burners․ Watch for bubbles forming at any connection point; bubbles indicate a leak․ If a leak is detected, immediately turn the gas OFF and address the issue before further operation․

Proper Ventilation

Always operate your Weber Genesis grill in a well-ventilated outdoor area․ Never use it inside a garage, shed, or any enclosed space․ Adequate ventilation is crucial to prevent carbon monoxide buildup, a potentially deadly odorless gas․

Ensure the grill is positioned at least three feet away from any combustible materials, such as walls, fences, or overhanging structures․ Maintain clear airflow around the grill for safe and efficient operation․

Safe Grilling Practices

Prioritize safety when using your Weber Genesis grill․ Never leave a lit grill unattended․ Keep children and pets a safe distance away from the hot surface․ Utilize long-handled grilling tools to avoid burns․

Always ensure the grill is stable on a level surface before operation․ Wear appropriate heat-resistant gloves or mitts when handling hot components․ Be cautious when opening the grill lid, as hot steam can escape․

Lighting the Grill

Igniting your Weber Genesis is straightforward․ First, ensure all burner control knobs are in the “OFF” position․ Open the lid to prevent gas buildup․ Turn on the gas supply at the propane tank or natural gas line․

Press the igniter button; you should hear a clicking sound and see a flame․ If it doesn’t ignite, refer to the manual’s manual lighting procedure for step-by-step instructions․ Always follow safety precautions during ignition․

Ignition System Operation

The Weber Genesis utilizes a reliable electronic ignition system․ Pressing the ignition button creates a spark at each burner, initiating gas flow and combustion․ Ensure the igniter button clicks audibly․ A consistent clicking sound indicates proper operation․

If the igniter doesn’t spark, check the battery (if applicable) or wiring connections․ A weak spark may require battery replacement or professional servicing․ Always ensure gas is flowing before attempting ignition․

Manual Lighting Procedure

In case of ignition system failure, manual lighting is possible․ First, fully open the grill lid․ Locate the burner ports and carefully insert a long-handled lighter or match near each burner․ Simultaneously, slowly turn the burner control knob to the ‘High’ position․

Be extremely cautious during this process, maintaining a safe distance․ If the burner doesn’t light immediately, repeat the process․ Never lean over the grill when lighting manually․

Temperature Control

Achieving optimal grilling temperatures is crucial for delicious results․ Begin by preheating the grill on high for 10-15 minutes to ensure even heat distribution․ Utilize the control panel to precisely adjust burner settings, ranging from low for indirect cooking to high for searing․

Monitor the grill’s built-in thermometer for accurate readings․ Adjust burners individually to create distinct cooking zones for versatile grilling experiences․

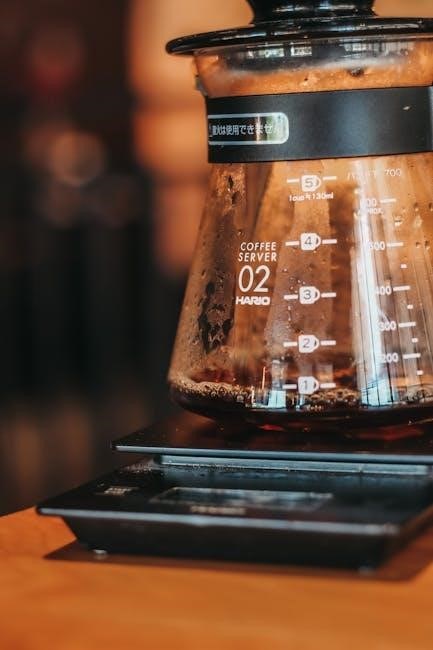
Preheating the Grill

Proper preheating is essential for successful grilling with your Weber Genesis․ Begin by ensuring all burner valves are turned off․ Ignite the grill using the ignition system or manual lighting procedure․ Set all burners to the highest setting and close the lid․

Allow the grill to preheat for a full 10-15 minutes․ This ensures the grates reach optimal temperature for searing and even cooking, guaranteeing delicious results every time․

Adjusting Burner Settings

The Weber Genesis control panel allows precise temperature control․ Adjust burner knobs to achieve desired heat levels – higher for searing, lower for slow cooking․ Utilize the individual burner controls to create cooking zones, offering versatility for various foods․

Experiment with different settings to master your grill․ Remember, preheating is crucial before adjusting․ Consistent temperature management ensures evenly cooked, flavorful meals․ Monitor the grill’s thermometer for accurate readings․

Grilling Features

The Weber Genesis boasts exceptional grilling capabilities․ Explore the powerful sear station for intense, restaurant-quality searing․ Utilize the convenient side burner for sauces, side dishes, or warming․ Genesis grills are also rotisserie compatible, expanding your cooking options․

These features, combined with Weber’s unique design for even heat circulation, deliver consistently delicious results․ Enjoy versatile cooking zones and precise temperature control for a truly elevated grilling experience; Unlock your culinary potential!

Sear Station Functionality

The Genesis sear station delivers high-intensity heat for perfect searing․ This feature utilizes a dedicated high-output burner, achieving restaurant-quality results quickly․ It’s ideal for steaks, chops, and burgers, creating a flavorful crust while sealing in juices․

Activate the sear station for a focused, intense heat zone․ Preheating is crucial for optimal performance․ Remember to adjust cooking times accordingly, as searing happens rapidly․ Enjoy perfectly seared meats every time!

Side Burner Usage

The Weber Genesis side burner expands your outdoor cooking capabilities․ It’s perfect for preparing sauces, side dishes, or even complete meals without needing to enter the kitchen․ Utilize standard cookware compatible with gas burners for optimal results․

Ensure proper ventilation when using the side burner․ Adjust the burner control knob to achieve desired heat levels․ Regularly clean the burner to maintain efficient performance․ Enjoy convenient, versatile cooking alongside your grilling!

Rotisserie Compatibility

Enhance your grilling with the Weber Genesis rotisserie kit! Designed for even cooking and succulent results, the rotisserie transforms your grill into a versatile cooking station․ Ensure the rotisserie motor is securely attached and balanced for optimal performance․

Follow the included rotisserie instructions carefully for safe operation․ Regularly inspect the components for wear and tear․ Enjoy perfectly roasted meats, poultry, and vegetables with this fantastic grilling addition!

Cleaning and Maintenance

Preserve your Weber Genesis grill’s performance with regular cleaning! Thoroughly clean burners to ensure efficient gas flow and consistent heating․ Remove grease buildup from the grease management system to prevent flare-ups and maintain safety․

Grill grate cleaning is essential for optimal cooking․ Utilize appropriate brushes and cleaners․ Consistent maintenance extends the grill’s lifespan and guarantees delicious results for years to come․ Refer to the detailed sections below for specific cleaning procedures․

Burner Cleaning

Maintain optimal burner performance for consistent heat! Regularly inspect burners for debris or blockages․ Carefully remove burners and clean the ports with a wire brush or specialized cleaning tool․ Ensure all ports are clear to allow for even gas flow․

Inspect for corrosion and replace burners if necessary․ Reinstall burners securely, verifying proper alignment․ Clean burner covers to prevent grease buildup․ A clean burner system ensures efficient grilling and extends the life of your Weber Genesis․

Grill Grate Cleaning

Keep your grill grates pristine for optimal cooking! After each use, brush grates thoroughly with a grill brush to remove food residue․ For stubborn buildup, heat the grill and then scrub vigorously․ Avoid harsh chemicals; hot, soapy water is often sufficient․

Periodically, remove grates for a deeper clean․ Inspect for rust and consider seasoning with oil to prevent sticking․ Clean grates contribute to better flavor transfer and prevent flare-ups, ensuring enjoyable grilling sessions․

Grease Management System

Weber Genesis grills feature a robust grease management system! This system efficiently channels grease away from the burners, minimizing flare-ups and simplifying cleanup․ Regularly empty the grease tray to prevent overflow and potential fire hazards․

Inspect the grease channels for blockages and clear them as needed․ Proper grease management is crucial for safe and efficient grilling․ A clean system ensures consistent cooking temperatures and prevents unwanted flavors from impacting your food․

Troubleshooting Common Issues

Encountering problems with your Weber Genesis? Common issues include uneven heating, ignition failures, and gas flow restrictions․ For uneven heating, ensure burners are clean and properly aligned․ Ignition problems may stem from a weak spark or empty fuel source – check connections!

Gas flow issues could indicate a blocked regulator or supply line․ Consult the manual for detailed diagnostics and solutions․ Prioritize safety; if issues persist, contact Weber customer support for assistance․

Uneven Heating

Is your Genesis grill heating inconsistently? Uneven heating often results from dirty or misaligned burners․ Thoroughly clean burners, removing any debris or blockages․ Ensure burners are correctly seated and aligned within the grill’s firebox․ Check for obstructions within the burner tubes themselves․

Also, verify proper gas pressure and regulator function․ A malfunctioning regulator can cause inconsistent fuel delivery․ Even distribution of flavorizer bars is crucial for heat management, too․

Ignition Problems

Experiencing difficulty lighting your Weber Genesis grill? First, confirm the gas supply is open and the propane tank isn’t empty․ Inspect the igniter module for damage or corrosion; replace if necessary․ Ensure the igniter wire is securely connected to the burner․ A weak spark can be caused by a low battery – replace it!

If using manual lighting, follow the procedure carefully․ Clean the burner ports to ensure gas flows freely․ Check for moisture buildup, which can interfere with ignition․

Gas Flow Issues

Encountering insufficient gas flow to your Weber Genesis grill? Begin by verifying the propane tank is full and the valve is fully open․ Inspect the gas supply hose for kinks, bends, or damage – replace if found․ Ensure the regulator is properly connected to both the tank and the grill․

Check burner ports for obstructions; debris can restrict gas flow․ A clogged regulator can also cause issues, requiring professional attention or replacement․

Flavorizer Bars: Installation and Care

Weber Genesis flavorizer bars are crucial for optimal grilling! These angled bars vaporize drippings, adding smoky flavor and protecting burners․ Installation involves simply positioning them above the burners, angled towards the grease management system․ Regularly inspect bars for excessive grease buildup or damage․

Cleaning can be done during routine grill maintenance; scrape off debris with a brush․ Replacement is recommended annually, or as needed, to maintain peak performance and flavor․

Cooking Zone Configuration

Maximize your Weber Genesis grill’s versatility with customized cooking zones! The Genesis allows for multiple heat zones – direct and indirect – ideal for various cooking methods․ Utilize different burner settings to create searing hot areas alongside cooler zones for slow cooking or warming․

Experiment with configurations for tasks like roasting, smoking, and delicate fish preparation․ Proper zone setup ensures perfectly cooked food every time, adapting to your culinary needs․

Using Weber Connect App

Elevate your grilling experience with the Weber Connect app! This smart hub seamlessly integrates with your Genesis grill, offering real-time temperature monitoring and customizable alerts․ Receive notifications when your food reaches desired doneness, ensuring perfect results every time․

Access guided cooking programs, recipe suggestions, and helpful grilling tips directly through the app․ Track cook times, adjust settings remotely, and enjoy a connected grilling journey․

Grill Cover Installation and Removal

Protect your investment with a Weber Genesis grill cover! Proper installation safeguards against the elements, extending your grill’s lifespan․ Ensure the grill is completely cool before covering․ Align the cover with the grill, securing it firmly with the integrated straps or buckles․

For removal, simply detach the fasteners․ Regularly inspect the cover for wear and tear, cleaning as needed to maintain optimal protection․ A well-maintained cover ensures years of grilling enjoyment․

Winterizing Your Weber Genesis Grill

Prepare your Weber Genesis for colder months! Disconnect the propane tank and clean the grill thoroughly, removing all food residue․ Inspect burners for obstructions and clean as needed․ Cover the grill with a fitted Weber cover to shield it from snow and ice․

Store the propane tank separately in a well-ventilated area․ Regular maintenance ensures a quick and easy start to grilling season next spring, preserving your grill’s performance․

Warranty Information

Weber stands behind its Genesis grills with a comprehensive warranty! The Genesis series typically includes a 10-year warranty on the firebox and lid, protecting against rust-through and burn-out․ A 5-year warranty covers burners, flavorizer bars, and cooking grates․

Other components have a 2-year warranty․ Registration is recommended for streamlined claims․ Refer to the separate warranty document included with your grill for complete details and limitations․

Replacement Parts

Maintaining your Weber Genesis is easy with readily available replacement parts! Weber offers a vast selection of parts – burners, grates, flavorizer bars, igniters, and more – directly through their website (weber․com) or authorized retailers․

To ensure compatibility, have your grill’s model and serial number handy․ Weber’s online parts finder simplifies the process․ Quality Weber parts guarantee optimal performance and extend your grill’s lifespan, preserving your BBQ experience for years to come․

Weber Customer Support

Need assistance with your Weber Genesis grill? Weber provides comprehensive customer support through multiple channels․ Visit their website (weber․com) for FAQs, troubleshooting guides, and contact information․ You can reach their support team via phone or email for personalized assistance with any questions or concerns․

Weber’s dedicated experts are available to help with everything from parts inquiries to grilling techniques, ensuring a seamless and enjoyable grilling experience․ They are committed to customer satisfaction!

Grilling Accessories

Enhance your Weber Genesis grilling experience! Weber offers a wide range of accessories designed to maximize your grill’s functionality․ Explore options like grilling baskets, pizza stones, rib racks, and specialized tools for searing and smoking․ These accessories elevate your cooking capabilities and allow for diverse culinary creations․

From quality tools to specialized attachments, Weber accessories ensure reliability and longevity, providing everything needed for daily grilling or more ambitious BBQ projects․

Recipes for Your Genesis Grill

Unlock a world of flavor with your Weber Genesis! Discover a diverse collection of recipes, from classic burgers and steaks to more adventurous dishes like smoked ribs and grilled pizza․ Weber provides inspiration for every skill level, ensuring delicious results every time․

Explore recipes optimized for the Genesis grill’s features, including sear stations and multiple burners․ Elevate your BBQ experience and impress your guests with expertly grilled meals!

Understanding Weber’s Slicing Technology (Related to Weber as a company)

Beyond grilling, Weber excels in food processing! For over 40 years, Weber has been a market leader in slicing technology, providing reliable and durable tools for the industry․ They’ve become a leading system provider for slicing applications, serving as a strong partner to food processors worldwide․

Weber’s commitment to quality ensures precision and efficiency in every slice, benefiting professionals and consumers alike․

Weber’s Role in the Food Processing Industry

Weber is a significant player in food processing! For decades, the company has established itself as a leading provider of slicing solutions, offering quality, reliability, and longevity in their tools; They proudly partner with the food processing industry, delivering innovative technologies and comprehensive support․

Weber provides technical documentation, certifications, and specialized brochures for professionals, ensuring optimal performance and safety․

Technical Documentation and Certifications

Access comprehensive resources for professionals! Weber provides detailed technical bulletins, certifications, and color collections to support skilled tradespeople․ Specialized brochures cater to specific needs, ensuring proper application and installation of their products․

The Weber search function facilitates quick problem-solving, offering solutions and product information․ These resources demonstrate Weber’s commitment to quality and industry standards, aiding in efficient and reliable performance․

malt o meal instructions

Malt-O-Meal Instructions: A Comprehensive Guide

Embark on a delightful culinary journey with Malt-O-Meal! This guide unveils diverse cooking methods, from stovetop simplicity to Instant Pot efficiency, ensuring a perfect bowl every time.

Understanding Malt-O-Meal

Malt-O-Meal has become a beloved breakfast staple for many, offering a comforting and economical alternative to traditional hot cereals. Its popularity stems from its quick cooking time and satisfying texture, making it ideal for busy mornings or a cozy weekend brunch. Understanding the core characteristics of Malt-O-Meal is key to achieving optimal results.

Essentially, Malt-O-Meal is a farina, a milled product made from wheat, though varieties utilizing other grains exist. The milling process breaks down the wheat into a granular consistency, allowing it to cook rapidly when combined with liquid. Different types cater to varied preferences, ranging from quick-cooking options to those requiring a slightly longer simmer. Knowing these nuances will empower you to tailor your cooking method for a consistently delicious outcome. The UPC code, 0042400001050, identifies original varieties.

What is Malt-O-Meal?

Malt-O-Meal is a brand of hot cereal, primarily known for its quick-cooking and affordable nature. It’s fundamentally a farina – a type of milled wheat product – offering a creamy, porridge-like consistency when cooked. Unlike rolled oats, Malt-O-Meal utilizes a finer grain, resulting in a faster cooking process and a smoother texture.

Originally marketed as a cost-effective substitute for Cream of Wheat, Malt-O-Meal has expanded its product line to include various flavors and formulations. The “Hot Wheat” variety remains a classic, but options now encompass different grains and sweetened versions. It’s a versatile cereal, easily customized with salt, sugar, honey, or spices to suit individual tastes. Its simplicity and adaptability contribute to its enduring appeal as a comforting breakfast choice, enjoyed by families for generations.

Types of Malt-O-Meal Available

Malt-O-Meal boasts a diverse range of options beyond the original Hot Wheat, catering to varied preferences. You’ll find “Quick” varieties designed for even faster preparation, ideal for busy mornings. Flavored options, like Frosted, Cinnamon Swirl, and Apple Cinnamon, offer pre-sweetened convenience. Beyond wheat-based cereals, Malt-O-Meal also produces corn-based options, providing a different texture and flavor profile.

Furthermore, the brand offers different package sizes, from individual servings to larger containers for families. Haggen stores, for example, carry the 28oz Hot Wheat Quick Cooking Original. Product variations also exist regarding organic or gluten-free formulations, addressing specific dietary needs. Manufacturers frequently update packaging, so appearances may differ, but the core quality remains consistent. Exploring these options allows consumers to discover their perfect Malt-O-Meal experience.

Cooking Methods

Discover versatile preparation techniques! From classic stovetop simmering to speedy microwave heating and modern Instant Pot convenience, enjoy Malt-O-Meal your way.

Stovetop Instructions

Preparing Malt-O-Meal on the stovetop is a wonderfully traditional method, yielding a creamy and satisfying result. Begin by bringing water to a rolling boil in a medium-sized saucepan. Carefully add the Malt-O-Meal cereal, gradually pouring it in to prevent clumping. Once added, reduce the heat to low, ensuring a gentle simmer. Consistent stirring is absolutely crucial during the cooking process; this prevents the cereal from sticking to the bottom of the pot and guarantees even cooking.

Pay close attention to the texture as it thickens. The entire process typically takes between 3 to 5 minutes, but cooking times can vary slightly depending on your stove and desired consistency. Remember to stir frequently! A well-stirred pot means a smooth, delicious bowl of Malt-O-Meal, free from any unwanted sticking or lumps.

Water to Cereal Ratio for Stovetop

Achieving the perfect stovetop Malt-O-Meal consistency begins with the correct water-to-cereal ratio. A generally recommended guideline is 3 cups of water for every ½ cup of Malt-O-Meal cereal. However, this can be adjusted slightly to suit your personal preference. For a thicker, more substantial cereal, you can reduce the water to 2 ¾ cups. Conversely, if you prefer a thinner consistency, increase the water to 3 ¼ cups.

It’s best to start with the standard 3:½ ratio and then adjust in subsequent batches. Remember that Malt-O-Meal continues to thicken as it cools, so err on the side of slightly thinner initially. Precise measurement ensures a consistently delightful breakfast experience, avoiding a watery or overly dense outcome.

Cooking Time on the Stovetop

When preparing Malt-O-Meal on the stovetop, the cooking time is relatively quick, but requires attentive monitoring. Begin by bringing the water (following the correct ratio) to a rolling boil in a medium-sized saucepan. Once boiling, gradually whisk in the Malt-O-Meal cereal, ensuring it’s fully incorporated to prevent clumping.

Reduce the heat to low and continue to cook for approximately 5-7 minutes, stirring frequently. The exact cooking time will depend on your stove and desired consistency. The cereal is ready when it has thickened to your liking and is smooth in texture. Avoid prolonged boiling, as this can cause sticking and scorching. Consistent stirring is key to a perfect result!

Stirring and Preventing Sticking

Consistent stirring is absolutely crucial when cooking Malt-O-Meal on the stovetop, or even in the microwave, to prevent the cereal from sticking to the bottom of the pot or bowl. Begin stirring immediately after adding the cereal to the boiling water, and continue doing so frequently throughout the entire cooking process.

Pay particular attention to the edges and corners of the saucepan, where sticking is most likely to occur. A good technique is to use a whisk or a spatula to scrape the bottom and sides of the pot regularly. This ensures even cooking and a smooth, creamy texture. If sticking does begin to happen, immediately reduce the heat and stir vigorously to dislodge the cereal.

Microwave Instructions

For a quick and convenient serving of Malt-O-Meal, the microwave offers an excellent alternative to the stovetop. Begin by combining the cereal and water in a microwave-safe bowl – a larger bowl is recommended to prevent boil-overs. A typical starting ratio is one part cereal to three parts water, but adjustments may be needed based on your preference.

Microwave on high for one to two minutes initially. Because microwave ovens vary significantly in power, cooking times will differ. After the initial interval, stir the mixture thoroughly. Continue microwaving in 30-second increments, stirring after each, until the cereal reaches your desired thickness. Watch carefully to prevent it from boiling over, and remember that it will continue to thicken as it cools.

Water to Cereal Ratio for Microwave

Achieving the perfect Malt-O-Meal consistency in the microwave hinges on the correct water-to-cereal ratio. A generally recommended starting point is three cups of water for every one cup of Malt-O-Meal cereal. However, this is merely a guideline, and personal preference plays a significant role. For a creamier, more porridge-like texture, you might slightly increase the water amount – perhaps to 3.5 cups per cup of cereal.

Conversely, if you prefer a thicker consistency, reduce the water to 2.5 cups per cup of cereal. Remember that the cereal will continue to thicken as it cools after microwaving, so err on the side of slightly more liquid initially. Experimenting with small adjustments will help you discover your ideal ratio for consistently delicious results.

Microwave Cooking Time – Initial & Subsequent Intervals

Microwaving Malt-O-Meal requires a phased approach to ensure even cooking and prevent boil-overs. Begin with an initial cooking interval of one to two minutes on high power. This initial burst starts the cooking process and allows the cereal to begin absorbing the water. Following this, carefully check the consistency. It will likely still be quite liquid.

Continue cooking in subsequent intervals of 30 seconds to one minute, stirring thoroughly after each interval. The total cooking time will vary depending on your microwave’s wattage and the desired thickness. Watch carefully, as it can thicken rapidly towards the end. Expect a total cooking time ranging from approximately 2 to 4 minutes.

Importance of Stirring During Microwave Cooking

Stirring is absolutely crucial when cooking Malt-O-Meal in the microwave. Unlike stovetop cooking where heat distributes more evenly, microwaves can create hot spots. Without stirring, these hot spots can cause the cereal to stick and potentially burn, leading to an unevenly cooked and unpleasant texture.

Regular stirring – every 30 seconds to one minute during subsequent cooking intervals – ensures that all the cereal granules are exposed to the heat, promoting consistent thickening. It also prevents a starchy film from forming on the bottom of the bowl. Consistent stirring guarantees a smooth, creamy, and enjoyable Malt-O-Meal experience, maximizing flavor and texture.

Instant Pot Instructions

The Instant Pot offers a remarkably convenient way to prepare Malt-O-Meal, delivering a creamy and consistent result with minimal effort. Begin by combining 3 cups of water with ½ cup of Malt-O-Meal cereal and a teaspoon of salt directly into the Instant Pot’s inner pot. For optimal texture and flavor, utilize the “Porridge” setting, which is specifically designed for cereals and similar dishes.

Cooking time typically ranges from 5-7 minutes, followed by a natural pressure release for 10-15 minutes. This allows the cereal to fully absorb the liquid and achieve a desirable consistency. After the pressure has naturally released, carefully open the lid and stir well before serving. Enjoy a hassle-free and delicious bowl of Malt-O-Meal!

Water to Cereal Ratio for Instant Pot

Achieving the perfect Malt-O-Meal consistency in your Instant Pot hinges on utilizing the correct water-to-cereal ratio. A generally recommended proportion is 3 cups of water for every ½ cup of Malt-O-Meal cereal. This ratio ensures a creamy, yet not overly watery, texture. However, slight adjustments can be made based on personal preference.

For a thicker cereal, reduce the water to 2 ¾ cups. Conversely, if you prefer a thinner consistency, increase the water to 3 ¼ cups. Remember to always add a teaspoon of salt alongside the water and cereal to enhance the flavor profile. Experimenting within these guidelines will help you discover your ideal Malt-O-Meal texture when using the Instant Pot.

Instant Pot Settings for Malt-O-Meal

When preparing Malt-O-Meal in your Instant Pot, the “Porridge” setting often yields excellent results. This setting is specifically designed for cereals and similar dishes, providing gentle and consistent heat. Alternatively, you can utilize the “Manual” or “Pressure Cook” setting on high pressure. If opting for Manual, ensure you set a cooking time (detailed in the next section) and manually release the pressure afterward.

The “Porridge” setting typically handles the pressure and temperature regulation automatically, simplifying the process. Regardless of the chosen setting, remember to thoroughly stir the Malt-O-Meal after cooking and before serving to prevent sticking and ensure even consistency. Always prioritize safety when working with a pressure cooker.

Instant Pot Cooking Time & Release Method

For optimal results with Malt-O-Meal in the Instant Pot, a cooking time of 3-5 minutes on high pressure is generally recommended. This timeframe applies after the pot has reached full pressure. Following the cooking period, it’s crucial to perform a quick release of the pressure. Carefully follow the Instant Pot’s safety guidelines when venting steam.

A quick release prevents overcooking and maintains the desired cereal texture. Avoid natural pressure release, as it can lead to a mushy consistency. After releasing the pressure, stir the Malt-O-Meal thoroughly to ensure even distribution of heat and prevent sticking. Adjust cooking time slightly based on your preferred thickness and the specific Malt-O-Meal variety used.

Customization & Variations

Elevate your Malt-O-Meal experience! Explore delightful additions like salt, sweeteners, and flavorful spices to create a personalized and truly satisfying breakfast bowl.

Adding Salt

A pinch of salt can dramatically enhance the flavor profile of your Malt-O-Meal, balancing the sweetness and bringing out the subtle nuances of the wheat. While optional, many find that a small amount of salt elevates the overall taste experience, creating a more satisfying and complete breakfast. The ideal quantity of salt is a matter of personal preference, but a good starting point is approximately one-quarter to three-quarters of a teaspoon per three cups of Malt-O-Meal.

Experiment to find your perfect balance! Some individuals prefer a more pronounced salty note, while others opt for a more subtle enhancement. Remember, you can always add more salt, but it’s difficult to remove it once it’s been incorporated. Consider the other additions you’re making – if you’re using a sweetened topping like honey or sugar, you might want to lean towards the lower end of the salt range. Conversely, if you’re adding spices or extracts, a slightly higher amount of salt could provide a better counterpoint to those flavors.

Recommended Salt Quantity

For a standard serving of Malt-O-Meal, utilizing three cups of cereal and three cups of water, we recommend starting with a conservative amount of salt – approximately ¼ teaspoon. This provides a subtle enhancement without overpowering the natural wheat flavor. If you prefer a more noticeable salty taste, gradually increase the quantity in ⅛ teaspoon increments, tasting after each addition. A maximum of ¾ teaspoon of salt for this serving size is generally sufficient, preventing an overly salty outcome.

Remember, individual preferences vary significantly. Factors like the type of liquid used (water versus milk) and any accompanying sweeteners or flavorings will influence the perceived saltiness. Always taste-test and adjust accordingly. Utilizing a precise measuring spoon ensures consistency in your results. Don’t hesitate to experiment to discover your ideal salt level, creating a Malt-O-Meal experience perfectly tailored to your palate!

Sweetening Options

Malt-O-Meal’s mild flavor profile makes it a fantastic canvas for various sweeteners. Traditional granulated sugar remains a popular choice, dissolving readily into the hot cereal. For a richer, more nuanced sweetness, consider honey – its floral notes complement the wheat beautifully. Start with a tablespoon and adjust to your liking. Alternative sweeteners, such as stevia, monk fruit, or erythritol, offer sugar-free options without significantly altering the texture.

Maple syrup provides a distinctive flavor, adding a touch of warmth. Brown sugar introduces molasses undertones, creating a comforting taste. Remember that liquid sweeteners may slightly affect the cereal’s consistency, potentially requiring a longer cooking time. Experiment with combinations – a dash of cinnamon alongside maple syrup, for example – to unlock a world of delightful flavor possibilities. Sweeten to your personal preference, creating a truly customized Malt-O-Meal experience!

Sugar, Honey, and Alternative Sweeteners

When enhancing Malt-O-Meal’s natural taste, sugar provides a classic, readily dissolved sweetness. Granulated sugar blends seamlessly, offering predictable results. Honey introduces a floral complexity, though its liquid form might necessitate slight adjustments to cooking time for optimal thickness. A tablespoon is a good starting point, allowing for personalized sweetness levels.

For those seeking sugar-free alternatives, stevia, monk fruit, and erythritol present viable options. These sweeteners deliver sweetness without impacting blood sugar levels, catering to dietary preferences. Be mindful of their varying sweetness intensities; a little goes a long way! Experimenting with these options allows for a guilt-free indulgence. Consider combining sweeteners – a touch of honey with a dash of stevia – to achieve a balanced and satisfying flavor profile. Ultimately, the best sweetener is the one that suits your taste.

Flavor Enhancements

Elevate your Malt-O-Meal experience beyond the ordinary with a touch of culinary creativity! Spices can transform a simple bowl into a comforting delight. A dash of cinnamon evokes warmth, while nutmeg adds a subtle, nutty undertone. For a bolder flavor, explore cardamom or even a pinch of ginger. Extracts, like vanilla or almond, introduce aromatic complexity, complementing the cereal’s inherent sweetness.

Don’t limit yourself to traditional additions! A swirl of peanut butter creates a satisfyingly rich and protein-packed breakfast. A sprinkle of cocoa powder transforms Malt-O-Meal into a chocolatey treat. Consider incorporating fruit purees – apple, banana, or berry – for natural sweetness and added nutrients. Remember, a little experimentation can unlock a world of flavor possibilities. Start small, taste frequently, and discover your perfect Malt-O-Meal combination!

Spices and Extracts to Add

Unleash a world of aromatic possibilities by incorporating spices and extracts into your Malt-O-Meal. Cinnamon, a classic choice, provides comforting warmth, while nutmeg offers a subtle, nutty nuance. For adventurous palates, cardamom introduces an exotic floral note, and a tiny pinch of ginger adds a delightful zing. These spices blend beautifully with the cereal’s natural flavors, enhancing the overall experience.

Extracts, used sparingly, can also elevate your bowl. Vanilla extract is a versatile addition, enhancing sweetness and aroma. Almond extract provides a delicate, marzipan-like flavor. Consider experimenting with other extracts like maple or lemon for unique twists. Remember to start with just a drop or two, as extracts are potent. A harmonious blend of spice and extract will transform your Malt-O-Meal into a truly personalized treat!

Troubleshooting

Encountering issues? Adjust water ratios or cooking times to resolve watery or thick cereal. Prevent sticking with consistent stirring during preparation and cooking.

Cereal is Too Watery

If your Malt-O-Meal appears too watery after initial cooking, don’t despair! Several simple adjustments can quickly rectify the situation. The most common cause is an incorrect water-to-cereal ratio; ensure you’re adhering to the recommended proportions for your chosen cooking method – stovetop, microwave, or Instant Pot.

For immediate correction, continue cooking the cereal for an additional minute or two, stirring frequently. This allows excess moisture to evaporate, thickening the consistency. If using a microwave, increase the cooking time in 30-second intervals, stirring after each burst. Remember that microwave power varies, so careful observation is key.

Alternatively, you can carefully add a small amount of dry Malt-O-Meal, stirring thoroughly to incorporate it. This will absorb some of the excess liquid. Avoid adding too much at once, as it can create clumps. Patience and incremental adjustments are your allies in achieving the perfect creamy texture!

Cereal is Too Thick

Encountering overly thick Malt-O-Meal is easily remedied! The primary culprit is often using too much cereal relative to the amount of liquid. To restore a smoother consistency, gradually add small amounts of water, milk, or even a splash of cream, stirring continuously after each addition.

When using the stovetop, a tablespoon or two of liquid at a time is ideal. For microwave adjustments, add liquid in smaller increments – perhaps a teaspoon – and microwave for brief 15-30 second intervals, stirring well between each. This prevents overheating and ensures even distribution.

Remember, it’s easier to add liquid than to remove it! Proceed cautiously, aiming for a creamy, pourable texture. If you’ve used the Instant Pot, a little extra liquid can quickly solve the problem during a quick simmer or a brief additional cooking cycle.

Cereal is Sticking to the Pot

Preventing Malt-O-Meal from sticking requires consistent attention and a few simple techniques. The key is frequent stirring, especially during the initial stages of cooking on the stovetop. A good, heavy-bottomed pot also helps distribute heat more evenly, reducing the likelihood of sticking.

If you’re using the microwave, ensure you’re stirring every 30 seconds, as hotspots can quickly cause sticking. A non-stick pot is highly recommended for both stovetop and microwave methods. For Instant Pot cooking, the stainless steel inner pot generally doesn’t pose a sticking issue, but a quick stir is still advisable.

If sticking does occur, immediately reduce the heat (stovetop) or pause the microwave. Add a splash of liquid and gently scrape the bottom of the pot to dislodge the cereal. Consistent stirring is your best defense!

Product Information & Storage

Malt-O-Meal’s UPC is 0042400001050; manufacturers may update packaging. Store in a cool, dry place for optimal freshness and extended enjoyment.

UPC Codes and Product Variations

Identifying your specific Malt-O-Meal product is simplified with its Universal Product Code, or UPC. A frequently cited UPC for the Original Hot Wheat Quick Cooking Cereal is 0042400001050. However, it’s crucial to remember that Malt-O-Meal offers a diverse range of flavors and formulations, each potentially possessing a unique UPC.

Variations extend beyond flavor profiles – consider the different package sizes available, from individual serving pouches to larger family-sized boxes. Furthermore, Malt-O-Meal frequently introduces limited-edition flavors or seasonal varieties. Manufacturers routinely update product packaging and formulations to enhance quality or respond to consumer preferences. Therefore, the UPC printed on your specific box is the most reliable identifier. Always check the packaging for the most accurate product information, as details can change over time.

Storage Guidelines for Malt-O-Meal

Maintaining the freshness and quality of your Malt-O-Meal is straightforward with proper storage. An unopened box should be stored in a cool, dry pantry, away from direct sunlight and moisture. This helps preserve the cereal’s texture and flavor for an extended period. Once opened, transfer the Malt-O-Meal to an airtight container to prevent it from becoming stale or absorbing unwanted odors.

Avoid storing near strong-smelling foods. While Malt-O-Meal doesn’t typically require refrigeration, ensuring a consistently cool storage environment is beneficial. Properly stored, opened cereal should remain palatable for several weeks. Regularly check the packaging for any signs of damage or pest infestation. Discard any cereal that appears compromised to ensure food safety and optimal enjoyment.

sure jell instructions pdf free

Sure Jell Instructions PDF Free: A Comprehensive Guide

Finding readily available Sure Jell instructions in PDF format requires exploring various online resources, including the official Heinz/Kraft Heinz website and helpful communities like r/Canning on Reddit.

Understanding Sure Jell Pectin

Sure Jell pectin is a crucial ingredient for successful home canning, acting as a gelling agent to transform fruit juice into delightful jams and jellies. It’s a powdered form of pectin, a naturally occurring substance found in fruits – particularly apples and citrus fruits. However, many fruits don’t contain enough natural pectin to create a firm gel on their own, which is where Sure Jell steps in.

Essentially, Sure Jell provides a standardized pectin level, ensuring consistent results; It works by interacting with the sugar and acid present in the fruit mixture, forming a network that traps the liquid and creates that desirable, spreadable texture. Different types of Sure Jell are formulated for varying sugar levels, catering to preferences for traditional, full-sugar recipes or reduced-sugar alternatives. Understanding this interaction is key to mastering the art of jam and jelly making, and readily available PDF instructions can guide you through the process.

What is Sure Jell?

Sure Jell is America’s original fruit pectin, a brand synonymous with home canning since 1934. It’s a powdered product designed to help home cooks create consistently set jams, jellies, and preserves. Functioning as a gelling agent, Sure Jell ensures that fruit mixtures achieve the desired thickness and texture, transforming them from liquid to a spreadable consistency.

Available in boxes, typically 1.75oz, Sure Jell isn’t just a thickener; it’s a key component in preserving the flavors of seasonal fruits. It’s incredibly versatile, working with a wide range of fruits and recipes. The product description highlights its role as a “kitchen staple” and a “premium gelling agent.” Finding detailed instructions, often available as a PDF download, is crucial for understanding how to properly utilize Sure Jell and achieve perfect results every time.

History of Sure Jell (Since 1934)

Sure Jell’s story began in 1934, establishing it as a pioneering force in home canning. Before its introduction, achieving a reliable gel in homemade jams and jellies was often inconsistent and challenging. Sure Jell revolutionized the process, offering a standardized pectin source that guaranteed successful results for home cooks across America.

Over the decades, Sure Jell has become a trusted household name, passed down through generations. The brand has consistently adapted to changing consumer needs, introducing variations like “Low/No Sugar” options to cater to different dietary preferences. Despite these innovations, the core principle remains the same: providing a reliable gelling agent for delicious, homemade preserves. Accessing historical recipe cards and instructions, often found in PDF format online, offers a glimpse into the evolution of canning techniques alongside this iconic brand.

Types of Sure Jell Pectin Available

Sure Jell offers a range of pectin products tailored to different recipes and sugar levels. Regular Sure Jell Pectin is the classic choice, designed for use with traditional amounts of sugar in cooked jams and jellies. It consistently delivers a firm set, making it ideal for preserving a wide variety of fruits.

For those seeking to reduce sugar intake, Low/No Sugar Sure Jell Pectin provides a viable alternative. This pectin formulation requires specific recipes and often utilizes calcium water to achieve the desired gel consistency. Understanding the nuances of each pectin type is crucial for successful canning. Many resources, including PDF instruction downloads, detail the specific requirements for each product, ensuring optimal results. Choosing the correct pectin is key to achieving the perfect texture and preserving your homemade creations.

Regular Sure Jell Pectin

Regular Sure Jell Pectin, the original formula since 1934, remains a popular choice for classic jam and jelly making. It’s specifically formulated to work with recipes containing standard amounts of sugar – typically around 100% sugar by weight of fruit. This ensures a reliably firm gel, essential for preserving fruit flavors and textures.

Instructions for using Regular Sure Jell are widely available, often included as inserts within the product packaging and readily found as PDF downloads online. These guides detail precise measurements of fruit, sugar, and pectin, alongside cooking times and canning procedures. Successful use hinges on following these instructions carefully. It’s a kitchen staple, trusted by generations for its consistent performance in creating delicious, homemade preserves. Remember to consult a PDF guide for the most accurate and up-to-date instructions.

Low/No Sugar Sure Jell Pectin

Low/No Sugar Sure Jell Pectin caters to those seeking reduced-sugar or sugar-free jam and jelly options. Unlike the regular formula, this pectin requires specific recipes and often incorporates artificial sweeteners or fruit juice concentrates to achieve the necessary gel structure. It’s crucial to understand that simply substituting this pectin one-to-one with regular pectin won’t yield satisfactory results.

PDF instructions for Low/No Sugar Sure Jell are vital, as they outline the precise ratios of ingredients and adjusted cooking methods. These guides emphasize the importance of using approved sweeteners and often include detailed charts for different fruit types. Finding a reliable PDF download ensures you’re following a tested recipe for a successful set. Utilizing the correct recipe is paramount when working with this pectin variant, guaranteeing a delicious, low-sugar preserve.

Finding Sure Jell Instructions in PDF Format

Locating Sure Jell instructions as PDFs involves checking the Heinz/Kraft Heinz site, Reddit’s r/Canning, and various recipe archives for downloadable guides.

Official Heinz/Kraft Heinz Website

The official Heinz/Kraft Heinz website serves as a primary source for Sure-Jell pectin instructions, though direct PDF downloads aren’t always immediately apparent. Navigating their “Recipes” section, specifically focusing on jam and jelly preparations, often yields valuable information.

Users can find detailed guidance on using Sure-Jell for both cooked and no-cook recipes. While a single, comprehensive PDF containing all instructions might not be available, individual recipe pages frequently include printable versions with specific directions.

Furthermore, the website provides “remake directions” for cooked jams and jellies that don’t set properly, a crucial resource for successful canning. Sure-Jell’s product pages also highlight its versatility for recipes requiring less or no sugar, with links to supporting materials. Regular checks of the site are recommended, as content can be updated or reorganized.

Reddit Resources (r/Canning)

The r/Canning subreddit is a vibrant community frequently discussing Sure-Jell pectin and sharing resources, including links to PDF versions of original instructions. A recent post from February 7, 2026, specifically requested a picture of the original Sure-Jell pectin instructions insert, particularly the cooked jam section.

Notably, a user responded by providing a PDF link to the recipe card for regular Sure-Jell instructions, dated June 28, 2024. This demonstrates the community’s willingness to archive and share valuable information.

Searching within r/Canning using keywords like “Sure-Jell,” “pectin,” “instructions,” and “PDF” can uncover additional shared resources. Reddit offers a dynamic and user-driven approach to finding information, often providing practical advice and troubleshooting tips alongside the instructions themselves. It’s a great place to ask questions and learn from experienced canners.

Third-Party Recipe Websites & Archives

Numerous recipe websites and online archives host scanned copies of vintage Sure-Jell instruction booklets and recipe cards, often available as PDF downloads. These sites frequently compile older publications, making them valuable resources for locating historical instructions. While the official Heinz/Kraft Heinz site is primary, these alternatives offer expanded access.

Retailer websites, like Gerbes Super Markets and Bakers, showcase product information for Sure-Jell Premium Fruit Pectin, highlighting its use as a kitchen staple since 1934. Although they don’t directly host PDF instructions, they reinforce the product’s long-standing presence and availability.

Dedicated food preservation blogs and websites may also feature transcribed or scanned versions of Sure-Jell recipes and instructions. Carefully evaluate the source’s credibility before relying on information from third-party sites, ensuring it aligns with current safety guidelines.

Google Search Strategies for PDF Downloads

To efficiently locate Sure-Jell instructions in PDF format using Google, employ specific search operators. Combine keywords like “Sure-Jell,” “pectin,” “instructions,” “recipe,” and “PDF.” Utilize the “filetype:” operator – for example, “Sure-Jell instructions filetype:pdf” – to narrow results to PDF documents exclusively.

Refine searches by adding the year or decade of the instructions you seek, such as “Sure-Jell 1980s instructions pdf.” This can help pinpoint vintage booklets. Explore variations like “Sure-Jell cooked jam recipe pdf” or “Sure-Jell no sugar pectin instructions pdf” for targeted results.

Leverage Google’s advanced search tools to filter by date range, ensuring you’re accessing current or historically relevant information. Remember to scan PDF previews to confirm the document contains the desired Sure-Jell instructions before downloading, verifying its authenticity and completeness.

Using Sure Jell for Cooked Jams and Jellies

Successfully creating homemade jams and jellies with Sure-Jell requires specific equipment, precise ingredient measurements, and careful adherence to detailed cooking and processing instructions.

Essential Equipment for Canning

Successful home canning with Sure-Jell necessitates a collection of specialized equipment to ensure both quality and, crucially, safety. A large, heavy-bottomed stainless steel pot is vital for cooking jams and jellies, preventing scorching and ensuring even heat distribution.

Canning jars, specifically designed for preserving, are essential – both pint and quart sizes are common. New lids and screw bands are required for each batch, as lids are single-use for proper sealing. A jar lifter is indispensable for safely removing hot jars from the boiling water bath.

A wide-mouth funnel aids in cleanly filling jars, minimizing spills. A headspace tool ensures consistent headspace, crucial for proper vacuum sealing. Finally, a boiling water bath canner with a rack is needed to process filled jars, achieving the necessary temperature for preservation. Having these tools readily available streamlines the canning process.

Ingredients Required (Fruit, Sugar, Pectin)

Creating delicious jams and jellies with Sure-Jell hinges on the precise balance of three key ingredients: fruit, sugar, and, of course, the pectin itself. The type of fruit dictates the flavor profile, and ripeness significantly impacts the final set; slightly underripe fruit often contains more natural pectin.

Granulated sugar isn’t merely for sweetness; it’s integral to the gelling process, drawing water from the fruit and interacting with the pectin. The amount of sugar varies depending on the Sure-Jell product used – regular, low-sugar, or no-sugar varieties each require different proportions.

Sure-Jell pectin, the gelling agent, comes in powdered form. It’s crucial to select the correct pectin type based on the sugar content of your recipe. Following the package instructions precisely regarding pectin quantity is paramount for achieving the desired jam or jelly consistency.

Detailed Cooked Jam Recipe Instructions

Begin by preparing your chosen fruit – washing, peeling, and crushing or chopping it according to the recipe. Combine the prepared fruit with liquid, typically water, in a large, heavy-bottomed pot. Bring the mixture to a rolling boil over high heat, stirring constantly to prevent sticking.

Next, measure the precise amount of sugar specified in your Sure-Jell recipe and add it to the boiling fruit mixture. Stir continuously until the sugar is completely dissolved. Add the measured amount of Sure-Jell pectin to the pot, ensuring it’s evenly distributed.

Return the mixture to a full rolling boil that cannot be stirred down. Boil hard for exactly one minute, stirring constantly. Remove from heat and quickly skim off any foam that forms on the surface. Proceed immediately to filling sterilized jars and processing for a proper seal.

Preparing the Fruit

Successful jam making hinges on properly prepared fruit. Begin by carefully washing your chosen fruit to remove any dirt or debris. Depending on the fruit type, peeling may be necessary – apples, peaches, and pears generally require peeling, while berries do not. Remove any bruised or damaged portions, as these can affect the final product’s quality.

Next, crush or chop the fruit to the consistency specified in your recipe. Berries can be lightly crushed, while larger fruits like peaches or apples should be chopped into smaller, uniform pieces. Precise measurements are crucial; use a liquid measuring cup for accurate volume.

Some fruits benefit from pre-cooking to release their natural pectin. This is particularly helpful when using low-pectin fruits. Always refer to your specific Sure-Jell recipe for guidance on fruit preparation, as requirements vary significantly.

Combining Ingredients & Cooking Process

Begin by combining the prepared fruit with the measured amount of Sure-Jell pectin in a large, heavy-bottomed saucepan. Stir well to ensure the pectin is thoroughly dispersed. Add any additional ingredients, like lemon juice, which enhances flavor and aids in gel formation.

Bring the mixture to a full rolling boil – a boil that doesn’t stop bubbling even when stirred – over high heat. Continuously stir to prevent sticking and scorching. Once boiling, quickly add the measured sugar, stirring constantly to dissolve it completely.

Return the mixture to a full rolling boil and continue boiling for the time specified in your Sure-Jell recipe, usually around one minute. Stir constantly throughout this process. Accurate timing is vital for achieving the correct gel consistency.

Testing for Gel Set

Determining if your jam or jelly has reached the proper gel point is crucial for successful canning. Several methods can be employed. The classic “plate test” involves chilling a small spoonful of the hot mixture on a cold plate for 30 seconds.

Gently push the jam with your finger; if it wrinkles and doesn’t run back together, it’s likely set; Another method is the “sheet test,” where a spoonful is dropped from a spoon – if it forms two drops that merge and “sheet” off the spoon, it’s ready.

A thermometer can also be used; jams typically set around 220°F (104°C) at sea level. Remember altitude adjustments are necessary for accurate temperature readings. If the gel test fails, refer to the Sure-Jell remake directions for guidance.

Troubleshooting Common Canning Issues

Addressing problems like jam not setting, crystallization, or mold requires understanding potential causes and solutions, often involving remake directions or improved sterilization techniques.

Jam Not Setting? (Remake Directions)

Occasionally, despite following instructions, your jam might not achieve the desired gelled consistency. Don’t despair! Sure-Jell provides specific remake directions to salvage your batch. First, allow the jam to cool slightly, then add an additional tablespoon of Sure-Jell pectin dissolved in a small amount of cold water.

Reheat the mixture to a full rolling boil, stirring constantly for precisely one minute. Remove from heat and test for gel set using the methods described in the recipe. If it still doesn’t set, repeat the process – adding another tablespoon of dissolved pectin and reboiling for one minute.

However, be cautious! Excessive pectin can result in a rubbery texture. It’s generally recommended to not repeat this process more than twice. If multiple attempts fail, consider using the jam as a sauce or topping instead of a traditional spread. Remember to always consult the official Sure-Jell instructions for the most accurate guidance.

Crystallization in Jam

Crystallization, the formation of sugar crystals within your jam, is a common issue, though doesn’t affect safety. It’s often caused by an imbalance of sugar and acid, or the presence of excess undissolved sugar. To prevent this, ensure accurate measurements of all ingredients, particularly sugar. Using a reliable kitchen scale is highly recommended.

If crystallization occurs, you can sometimes remedy it. Gently reheat the jam, stirring constantly, to dissolve the crystals. Avoid vigorous boiling, as this can worsen the problem. Adding a small amount of lemon juice can also help redissolve the sugar and restore a smoother texture.

However, severely crystallized jam may not fully recover. While still edible, its texture will be grainy. Prevention is key – carefully follow the Sure-Jell recipe and avoid stirring the jam excessively during the cooking process, as this can encourage crystal formation.

Mold Growth in Jars

Mold growth in home-canned jams and jellies is a serious concern, indicating a compromised seal or insufficient processing. While surface mold can sometimes be removed, it’s generally recommended to discard the entire jar and its contents. Mold spores can penetrate below the surface, making the jam unsafe to consume, even if it appears clear.

Proper jar sterilization and adherence to recommended processing times are crucial for preventing mold. Ensure jar rims are clean before applying lids, and that lids are properly sealed after processing; Inspect jars carefully after cooling; lids should be concave and not flex when pressed.

If you suspect a jar isn’t properly sealed, refrigerate the jam immediately and use it within a few weeks. Never taste or consume jam from a jar showing signs of mold. Prioritize safety and discard any questionable product to avoid potential health risks.

Dealing with Failed Jars

Occasionally, despite careful adherence to canning procedures, jars may fail to seal properly. This can manifest as a flexible lid, or a lack of vacuum when pressed. Don’t despair! Failed jars don’t necessarily mean wasted effort. Immediately refrigerate any unsealed jars and consume the contents within a few weeks, treating them as you would fresh jam.

Investigate the cause of the failure. Common culprits include chipped jar rims, improper lid application, or insufficient processing time. Re-process the jam using new lids within 24 hours, if desired, ensuring all steps are followed meticulously. However, quality may diminish with re-processing.

Remember, safety is paramount. Never attempt to re-use a jar that has cracked or broken. Discard any jars exhibiting signs of spoilage, such as mold or off-odors. Learning from failures improves future canning success!

Safety Guidelines for Home Canning

Prioritize proper sterilization, headspace, and processing times to prevent botulism. Following Sure-Jell instructions and reliable sources ensures safe, delicious homemade preserves for you and your family.

Proper Jar Sterilization Techniques

Ensuring jars are thoroughly sterilized is paramount for safe home canning, preventing spoilage and the risk of botulism. Before beginning, inspect jars for any chips or cracks, discarding any damaged ones. Sterilization can be achieved through several methods, each with specific guidelines.

Boiling Water Method: Place clean jars in a large pot, cover with water, and bring to a rolling boil. Boil for 10 minutes at altitudes less than 1,000 feet, adding one minute for each additional 1,000 feet. Keep jars hot until ready to fill.

Dishwasher Method: Use the hottest wash and rinse cycle. Jars must be kept hot until filled. This method is suitable if processing immediately after the cycle completes.

Oven Method: Preheat oven to 200°F (93°C). Place clean jars on a baking sheet and heat for 10 minutes. Avoid thermal shock by gradually increasing and decreasing the temperature.

Lids and Rings: While jars are sterilizing, simmer lids in hot (not boiling) water to soften the sealing compound. Rings do not require sterilization.

Headspace Requirements

Maintaining proper headspace – the empty space between the top of the food and the lid – is crucial for creating a vacuum seal during processing. Insufficient headspace can cause jar breakage or seal failure, while excessive headspace may prevent proper sealing.

For jams and jellies made with Sure Jell, a ¼-inch headspace is generally recommended. This means leaving a space of ¼ inch between the surface of the jam/jelly and the top of the jar rim. Accurate measurement is vital; use a headspace tool or ruler to ensure consistency.

To measure headspace, fill jars leaving the specified space. Remove air bubbles by gently tapping the jar on the counter or using a plastic spatula. Adjust the food level if necessary to maintain the correct headspace.

Wipe the jar rim clean with a damp cloth before applying the lid and ring. Proper headspace, combined with a clean rim, significantly increases the likelihood of a successful seal.

Processing Times Based on Altitude

Altitude significantly impacts the boiling point of water, and therefore, the processing time required for safe canning. At higher altitudes, water boils at a lower temperature, necessitating longer processing times to achieve the necessary heat penetration for proper sterilization and seal formation.

Sure Jell instructions, often found in PDF format, will provide altitude adjustment charts. These charts detail the increased processing times needed for different altitude ranges – typically categorized as 0-1,000 feet, 1,001-3,000 feet, 3,001-6,000 feet, and above 6,000 feet.

Failing to adjust processing times for altitude can lead to under-processing, potentially resulting in spoilage and the risk of botulism. Always consult a reliable source, like the Sure Jell PDF or the National Center for Home Food Preservation, for accurate altitude adjustments.

Accurate altitude determination is crucial. Use a reliable source to determine your exact elevation above sea level before beginning the canning process.

Botulism Prevention in Home Canning

Botulism is a serious and potentially fatal illness caused by a toxin produced by the bacterium Clostridium botulinum. This bacterium thrives in low-oxygen environments, like improperly canned foods, making safe canning practices paramount. Sure Jell instructions, available in PDF format, emphasize adherence to tested recipes and processing times to mitigate this risk.

Proper acidification is key, especially with fruits. Pectin, like Sure Jell, aids in achieving the necessary acidity for safe preservation. Following the precise ratios of fruit, sugar, and pectin outlined in the PDF guides is vital.

Adequate processing times, adjusted for altitude (see related section), are crucial for destroying botulism spores. Always use a pressure canner for low-acid foods and strictly follow recommended processing times. Inspect jars for proper seals after cooling; any unsealed jars should be refrigerated and consumed immediately or discarded.

Never taste food from a jar with a bulging lid or any signs of spoilage.

cuisinart frozen yogurt ice cream maker instructions

Cuisinart Frozen Yogurt, Ice Cream & Sorbet Maker: A Comprehensive Guide

This guide details using your Cuisinart machine for delicious frozen treats․ It includes instructions, recipes, and troubleshooting, ensuring perfect results in under 30 minutes․

Included is a recipe booklet for inspiration, covering yogurt, ice cream, and sorbet․ Firmness can be improved with 2 hours of freezer storage․

Understanding Your Cuisinart Machine

Your Cuisinart machine is designed for effortless creation of frozen desserts – yogurt, ice cream, and sorbet․ It operates by freezing the bowl beforehand and then churning your mixture into a delightful treat․ The double-insulated freezer bowl is key; it maintains a consistently cold temperature without needing ice․

Automatic operation simplifies the process: add ingredients, turn it on, and enjoy! The large ingredient spout allows for easy addition of mix-ins during churning․ Familiarize yourself with the components and the included instruction/recipe booklet․ Proper understanding ensures optimal performance and delicious results every time․ Remember to consult the manual for specific model details․

Model Variations & Compatibility

Cuisinart offers several frozen dessert maker models, including the ICE-30BCP1 and the classic ICE-25 series․ While core functionality remains consistent – freezing and churning – slight variations exist in features and capacity․ Compatibility primarily concerns the freezer bowl; ensure it’s fully frozen before each use, regardless of the model․

Recipe booklets often differ between models, offering tailored suggestions․ Accessories may also vary․ The ICE-25 series instruction manual is readily available online․ Generally, recipes are interchangeable, but adjust churning times based on your specific machine and desired consistency․ Always refer to your model’s manual for precise guidance․

Key Components Overview

Your Cuisinart machine comprises several essential parts․ The double-insulated freezer bowl is crucial, requiring complete freezing before operation․ A motor base houses the churning mechanism․ The mixing bowl lid with the ingredient spout allows for easy addition of mix-ins during churning․

A dasher, or paddle, mixes the ingredients․ Understanding each component’s function is vital for proper assembly and operation․ The ingredient spout prevents large additions from stopping the churning process․ Refer to your manual for a detailed diagram identifying each part and its correct placement for optimal performance․

Before First Use: Preparation

Prior to initial use, thoroughly wash the freezer bowl, lid, dasher, and ingredient spout with warm, soapy water․ Ensure all components are completely dry before assembly․ The freezer bowl requires a minimum of 16-24 hours of freezing – a critical step for successful frozen dessert creation․

Place the bowl in the coldest part of your freezer, avoiding frequent door openings․ Confirm it’s fully frozen by shaking; no liquid sloshing should be audible․ Familiarize yourself with the machine’s parts and the instruction manual to ensure a smooth first experience․

Getting Started: Basic Instructions

Begin by ensuring the bowl is fully frozen․ Add your prepared base through the ingredient spout while the machine is running․ Enjoy fresh desserts!

Freezing the Bowl: Essential Step

Achieving the correct frozen bowl temperature is absolutely crucial for successful frozen dessert creation․ The bowl must be thoroughly frozen for a minimum of 16-24 hours before initial use, and after each subsequent use․ Ensure it’s placed in the freezer flat, without anything on top of it, to allow for even freezing․

A properly frozen bowl will feel very cold to the touch and have a frosted appearance․ If the bowl isn’t adequately frozen, the mixture won’t solidify, resulting in a soupy consistency․ Don’t attempt to operate the machine if the bowl isn’t completely frozen; it won’t work effectively and could potentially damage the unit․

For consistent results, dedicate a specific space in your freezer solely for the bowl․ This prevents accidental obstruction and ensures it remains consistently cold and ready for your next frozen treat adventure!

Ingredient Spout Functionality

The large ingredient spout on your Cuisinart machine is designed for convenient addition of mix-ins during the churning process․ This feature allows you to incorporate chocolate chips, nuts, fruit pieces, or other desired flavors without interrupting the freezing cycle․

To utilize the spout, simply turn on the machine and slowly pour your mix-ins through the opening while the mixture is churning․ Avoid adding too much at once, as this could overwhelm the machine and affect the final texture․ A steady stream is recommended for optimal distribution․

Remember to only add mix-ins during the last few minutes of churning to prevent them from becoming overly frozen or crushed․ This ensures a delightful texture in every bite!

Assembling the Machine Correctly

Proper assembly is crucial for optimal performance of your Cuisinart frozen dessert maker; First, ensure the freezer bowl is thoroughly frozen – typically at least 24 hours․ Next, place the dasher assembly into the bowl, aligning the motor shaft with the opening․

Securely attach the outer bowl and lid to the dasher assembly, ensuring a snug fit․ The lid should lock into place, creating a sealed environment for churning․ Double-check that all components are correctly aligned before plugging in the machine․

Incorrect assembly can lead to leakage, uneven freezing, or even damage to the unit․ Refer to your instruction manual for detailed diagrams and guidance․

Making Frozen Yogurt: Step-by-Step

Prepare your yogurt base, then pour it into the frozen bowl․ Turn on the machine and add mix-ins via the ingredient spout for delicious results!

Yogurt Base Recipes: Options

Creating the perfect yogurt base is crucial for exceptional frozen yogurt․ Begin with a simple blend of yogurt – Greek yogurt yields a thicker consistency – and a sweetener like honey or sugar․ Experiment with different yogurt fat contents to adjust the final texture․

For a richer base, incorporate cream or milk․ Fruit purees, such as mango (using fresh, ripe mangoes for optimal flavor), can be blended directly into the base․ Consider adding a touch of vanilla extract or lemon juice to enhance the overall taste profile․

Alternatively, explore recipes utilizing yogurt combined with condensed milk for a sweeter, creamier outcome․ Remember to chill the base thoroughly before churning in your Cuisinart machine for best results․

Adding Flavors & Mix-Ins

The large ingredient spout on your Cuisinart machine simplifies adding flavors and mix-ins during the churning process․ For best results, add these during the last few minutes of churning, preventing them from becoming overly crushed․

Popular mix-ins include chocolate chips, chopped nuts, fruit pieces, cookies, or even swirls of jam or caramel․ Liquid flavors, like extracts or sauces, can be added directly to the base before churning․

Be mindful of quantity; excessive mix-ins can hinder the freezing process․ A general guideline is to use no more than one cup of mix-ins per quart of base․ Experiment to discover your favorite combinations!

Churning Time & Consistency

Churning typically takes between 20 to 30 minutes, but this can vary depending on the recipe, ambient temperature, and the machine’s starting conditions․ Monitor the mixture’s consistency; it should resemble soft-serve ice cream․

If a firmer consistency is desired, transfer the frozen dessert to an airtight container and place it in the freezer for approximately 2 hours․ This allows it to harden further․

Remove from the freezer about 15 minutes before serving for easier scooping․ Note that homemade frozen desserts may not achieve the exact same hardness as commercially produced varieties․

Making Ice Cream: A Detailed Process

Simply add your ice cream base to the frozen bowl, turn the machine on, and enjoy freshly made ice cream in under 30 minutes!

Classic Ice Cream Recipes

Explore delightful classic ice cream recipes perfectly suited for your Cuisinart machine․ Begin with a simple vanilla base: combine 2 cups heavy cream, ¾ cup sugar, and 1 teaspoon vanilla extract․ For chocolate, add ½ cup cocoa powder to the base․

Remember to chill the base thoroughly before churning – at least 2 hours is recommended for optimal texture․ The machine’s ingredient spout allows for adding mix-ins like chocolate chips, nuts, or fruit during the final minutes of churning․

If a firmer consistency is desired, transfer the freshly churned ice cream to an airtight container and freeze for approximately 2 hours before serving․ This enhances the overall texture and enjoyment!

Achieving the Perfect Texture

Optimal texture relies on a fully frozen bowl and a well-chilled base․ Ensure the bowl is frozen for at least 24 hours before use․ The base mixture should be refrigerated for a minimum of 2 hours, ideally longer, to maximize smoothness․

Churning time varies, but generally 20-30 minutes yields a soft-serve consistency․ For a firmer texture, transfer the mixture to a freezer-safe container and freeze for an additional 2 hours․

Avoid overfilling the bowl; leave ample space for expansion during churning․ Consistent monitoring and adjusting churning time are key to achieving your desired ice cream texture․

Dealing with Soft Serve Consistency

Soft serve consistency is typical immediately after churning․ This is perfectly normal and often preferred for immediate enjoyment! However, if a firmer texture is desired, a simple solution exists․

Transfer the freshly churned mixture to an airtight container․ Place this container into your freezer for approximately 2 hours․ This “hardening” process will significantly improve the scoopability and overall firmness of your frozen dessert․

Remember to remove the container about 15 minutes before serving to allow for easier scooping․ Enjoy your perfectly textured homemade treat!

Making Sorbet: Refreshing & Fruity

Sorbet base preparation is key! Use fresh, ripe fruit for optimal flavor․ Adjust sweetness to your preference for a truly refreshing, homemade sorbet experience․

Sorbet Base Preparation

Creating a flavorful sorbet base begins with a simple syrup․ Combine equal parts sugar and water in a saucepan, heating until the sugar dissolves completely․ Allow this mixture to cool fully before proceeding – this is crucial for optimal freezing․

Next, incorporate your chosen fruit․ Pureeing the fruit ensures a smooth texture, eliminating any icy crystals․ The quantity of fruit will influence the sorbet’s intensity; experiment to find your ideal balance․

For a brighter flavor, add a touch of citrus juice, like lemon or lime․ This also helps prevent crystallization․ Remember to strain the mixture before churning to remove any seeds or pulp, resulting in a refined sorbet texture․

Fruit Selection for Optimal Flavor

Choosing ripe, high-quality fruit is paramount for exceptional sorbet․ The flavor intensity directly correlates with the fruit’s ripeness; underripe fruit will yield a bland result․ Mangoes, for example, should be fragrant and slightly soft to the touch for the best frozen yogurt․

Consider seasonal fruits at their peak for maximum flavor․ Berries, peaches, and plums are excellent choices during their respective seasons․ Frozen fruit can be used as a convenient alternative, though fresh fruit generally provides a superior taste․

Experiment with combinations! Pairing complementary fruits can create complex and delightful sorbet flavors․ Don’t be afraid to try unique blends to discover your personal favorites․

Adjusting Sweetness Levels

Sweetness is crucial in sorbet, as freezing dulls the perception of sugar․ Start with the recipe’s suggested amount, but taste the base before churning․ Adjust gradually, adding small increments of sugar or sweetener until the desired level is reached․

Consider the natural sweetness of the fruit; riper fruits require less added sugar․ For tart fruits like raspberries, you may need to increase the sugar slightly․ Liquid sweeteners like simple syrup dissolve more easily than granulated sugar․

Remember, you can always add more sweetness, but it’s difficult to remove it․ Taste frequently throughout the process to achieve the perfect balance․

Troubleshooting Common Issues

If the machine doesn’t start, check the power connection․ For soft mixtures, freeze for 2 hours․ Crystals form if the dessert isn’t stored airtight․

Machine Not Turning On

First, ensure the machine is properly plugged into a functioning electrical outlet․ Verify the outlet is delivering power by testing it with another device․ Next, double-check that the freezer bowl is securely locked into place; the machine won’t operate if it doesn’t detect proper assembly․

Confirm the unit’s on/off switch is fully engaged․ Sometimes, a simple reset can resolve the issue – unplug the machine for a few minutes, then plug it back in and try again․ If problems persist, inspect the power cord for any visible damage․ Do not attempt to repair the cord yourself; contact customer support for assistance․

Frozen Mixture Too Soft

If your frozen dessert lacks desired firmness, transfer it immediately to an airtight container․ Place this container in the freezer for approximately two hours to allow for further hardening․ This step is crucial, especially for achieving a scoopable consistency․

Ensure the freezer bowl was thoroughly frozen for the recommended duration – at least 24 hours – before use․ Insufficient freezing of the bowl is a common cause of soft mixtures․ Consider the recipe; some formulations naturally yield softer results․ Adjusting ingredients or adding stabilizers can improve texture․

Crystals Forming in Frozen Dessert

Ice crystal formation often indicates slow freezing or temperature fluctuations․ Ensure your freezer bowl is completely frozen – a minimum of 24 hours is vital․ Rapid freezing is key to minimizing crystal size․ Using high-fat content ingredients in your base can also help, as fat interferes with crystal development․

Proper storage is crucial; transfer the finished dessert to an airtight container immediately․ Avoid repeatedly thawing and refreezing, as this encourages larger crystals to form․ Consider adding a small amount of corn syrup or glucose to the base; these act as natural anti-crystallizing agents․

Cleaning & Maintenance

Disassemble components after each use for thorough cleaning․ Hand washing is recommended, though some parts are dishwasher safe․ Proper storage prevents damage․

Disassembling for Cleaning

Before cleaning, always unplug your Cuisinart frozen dessert maker․ Carefully remove the freezer bowl from the unit․ Detach the mixing arm – it typically pulls straight up and off․ Next, remove the dasher (the paddle inside the mixing arm)․ The lid and ingredient spout are also easily removable for separate washing․

Ensure all parts are fully detached before proceeding․ Inspect each component for any remaining frozen dessert․ A quick rinse with warm water can help loosen stubborn residue․ Remember to handle the freezer bowl with care, as sudden temperature changes could cause damage․ Proper disassembly simplifies the cleaning process and ensures longevity of your machine․

Hand Washing vs․ Dishwasher

Most Cuisinart frozen dessert maker parts are dishwasher-safe, offering convenience․ However, hand washing is often recommended to preserve the quality and appearance of the components․ The freezer bowl, being aluminum, should never be washed in a dishwasher, as it can lose its freezing properties․

For dishwasher use, place parts on the top rack․ When hand washing, use warm, soapy water and a soft sponge․ Avoid abrasive cleaners that could scratch surfaces․ Thoroughly rinse and dry all parts before reassembling․ Prioritizing gentle cleaning extends the lifespan of your machine and maintains optimal performance․

Proper Storage Techniques

To ensure longevity, store your Cuisinart machine properly․ Always completely dry all components before storage․ The freezer bowl requires special attention; it should be stored in the freezer to maintain its chilling capability, ready for the next use․ Avoid storing it at room temperature․

The motor unit and other parts can be stored in a cool, dry place, away from direct sunlight․ Keep the instruction booklet handy for future reference․ Proper storage prevents damage and ensures your machine is always ready to create delicious frozen desserts․ Regular checks for cleanliness are also advised․

Recipes & Inspiration

Explore delightful recipes like Mango Frozen Yogurt, Chocolate Ice Cream, and Strawberry Sorbet! Utilize fresh, ripe ingredients for optimal flavor and texture in every batch․

Mango Frozen Yogurt Recipe

To create a vibrant Mango Frozen Yogurt, begin with 2 cups of peeled, chopped fresh mangoes – ensure they are ripe for the best flavor․ Combine the mango with 1 cup of plain yogurt, ½ cup of sugar (adjust to taste), and 2 tablespoons of lemon juice in a blender․

Blend until completely smooth․ Pour the mixture into your pre-frozen Cuisinart freezer bowl․ Churn for approximately 20-25 minutes, or until it reaches a soft-serve consistency․ For a firmer texture, transfer to an airtight container and freeze for an additional 2 hours․ Remove from the freezer 15 minutes before serving for easier scooping!

Enjoy this refreshing and healthy treat!

Chocolate Ice Cream Recipe

For a classic Chocolate Ice Cream, combine 2 cups of heavy cream, ¾ cup of whole milk, ¾ cup of granulated sugar, and ¼ cup of unsweetened cocoa powder in a saucepan․ Heat gently, stirring until the sugar dissolves and the cocoa is fully incorporated․ Do not boil!

Remove from heat and stir in 1 teaspoon of vanilla extract․ Chill the mixture thoroughly – at least 4 hours, or preferably overnight․ Pour into your pre-frozen Cuisinart freezer bowl and churn for 20-25 minutes․ For a firmer consistency, freeze for an additional 2 hours․ Enjoy this decadent treat!

Strawberry Sorbet Recipe

To create a refreshing Strawberry Sorbet, begin with 2 pounds of fresh, ripe strawberries – quality matters! Combine the strawberries with ¾ cup of granulated sugar and ¼ cup of water in a blender․ Blend until completely smooth․ For a smoother texture, strain the mixture through a fine-mesh sieve to remove seeds․

Chill the strawberry puree thoroughly – at least 2 hours․ Pour into your pre-frozen Cuisinart freezer bowl and churn for 20-25 minutes․ Adjust sweetness to your preference․ Serve immediately for a soft sorbet, or freeze for a firmer consistency․

Advanced Techniques & Tips

Experiment with layering mix-ins during churning for varied textures․ Adjust recipes for dietary needs, and consider additives to enhance consistency and flavor profiles․

Layering Flavors & Mix-Ins

Achieving a dynamic dessert experience with your Cuisinart maker involves strategic layering․ During the final minutes of churning, slowly add mix-ins like chocolate chips, fruit pieces, or nuts through the ingredient spout․ This prevents them from sinking to the bottom․

For a ripple effect, drizzle melted chocolate or fruit purees down the sides of the bowl as it churns․ Alternating layers of different flavored bases—vanilla then strawberry, for example—creates a visually appealing and flavorful treat․ Remember to avoid overfilling, allowing space for proper mixing․ Experiment with textures, combining crunchy elements with smooth bases for a delightful contrast․

Adjusting Recipes for Dietary Needs

Adapting recipes for dietary restrictions is easily achievable with your Cuisinart machine․ For dairy-free options, substitute coconut milk or almond milk for traditional dairy․ Ensure the chosen alternative has a sufficient fat content for optimal texture․

To create sugar-free desserts, utilize natural sweeteners like stevia or erythritol, adjusting quantities to taste․ Vegan recipes require plant-based alternatives for all dairy components․ Experiment with fruit purees to enhance sweetness and flavor․ Always consider how substitutions might affect the freezing process and adjust churning time accordingly for desired consistency․

Improving Consistency with Additives

Achieving the perfect frozen dessert texture often benefits from strategic additives․ Gelatin or cornstarch, used in small amounts, can prevent ice crystal formation, resulting in a smoother consistency․ For richer ice cream, add a tablespoon of vodka – it inhibits complete freezing, creating a softer serve․

Guar gum or xanthan gum, also in minimal quantities, act as stabilizers, enhancing creaminess․ Consider adding a touch of glucose syrup to prevent crystallization and maintain a scoopable texture․ Remember to thoroughly blend additives into the base before churning for even distribution and optimal results․

Safety Precautions

Always unplug the machine before cleaning․ Ensure proper electrical safety and avoid component misuse․ Never operate a damaged machine, preventing potential hazards․

Electrical Safety Guidelines

Prioritize safety when operating your Cuisinart frozen dessert maker․ Always ensure the machine is plugged into a grounded electrical outlet, matching the voltage specified on the appliance․ Never immerse the motor base in water or any other liquid, as this presents a severe shock hazard․

Inspect the power cord regularly for any signs of damage․ If the cord is damaged, it must be replaced by the manufacturer, its service agent, or similarly qualified persons to avoid danger․ Do not operate the appliance with a damaged cord or plug․ Avoid using extension cords; if necessary, use a heavy-duty extension cord appropriately rated for the appliance’s power consumption․

Unplug the machine from the outlet when not in use, before cleaning, and during assembly or disassembly․ Never pull the cord to disconnect the appliance; grasp the plug instead․

Proper Usage of Components

Correct assembly is crucial for optimal performance․ Ensure the freezer bowl is thoroughly frozen – typically 24 hours – before use․ Carefully attach the bowl to the motor base, aligning it securely․ The ingredient spout facilitates adding mix-ins during churning; avoid overfilling․

The mixing blade must be properly inserted into the freezer bowl before operation․ Do not operate the machine without the blade in place․ Follow recipe instructions regarding ingredient quantities and chilling times․ Avoid using metal utensils inside the bowl, as they can damage the non-stick surface․

Always allow the machine to come to a complete stop before disassembling․ Handle components with care to prevent damage․

Avoiding Damage to the Machine

Never immerse the motor base in water or any other liquid․ Always unplug the machine before cleaning or disassembling․ Do not operate the machine continuously for extended periods; allow it to rest to prevent overheating․ Avoid forcing components together during assembly․

Ensure the freezer bowl is completely frozen before each use; a partially frozen bowl can strain the motor․ Do not use metal utensils inside the bowl, as they can scratch and damage the non-stick coating․ Avoid dropping or impacting the freezer bowl, as it is fragile․

Proper storage is key; protect the machine from extreme temperatures and humidity․

shirt tag with washing instructions crossword clue

Article Plan: Shirt Tag with Washing Instructions Crossword Clue

Decoding these cryptic symbols found on garment tags is crucial for maintaining clothing quality; this article will unravel the mystery behind laundry care instructions.

Have you ever stared at those perplexing symbols on a shirt tag, wondering what they mean? You’re not alone! These aren’t random doodles; they’re a standardized language communicating essential washing instructions. Often appearing as a “shirt tag with washing instructions crossword clue,” deciphering these symbols is key to preserving your clothes. Ignoring them can lead to shrinking, fading, or even irreversible damage.

This guide will demystify these laundry hieroglyphics, empowering you to confidently care for your wardrobe. We’ll explore the history, meaning, and practical application of each symbol, ensuring your favorite garments stay looking their best for years to come.

Decoding Laundry Symbols: A Comprehensive Guide

Understanding garment care labels is essential for proper washing; this guide breaks down each symbol, preventing laundry mishaps and extending clothing lifespan.

The Significance of Care Labels

Care labels are more than just tags; they’re a garment’s instruction manual, dictating its longevity and appearance. Ignoring these symbols can lead to shrinking, fading, or even complete ruin of your clothes. Standardized symbols communicate washing temperatures, drying methods, ironing suitability, and bleaching permissions – all crucial for effective garment care. These labels translate complex cleaning processes into universally understood icons, bridging language barriers and ensuring consistent care across different regions. Properly heeding these instructions preserves fabric integrity, color vibrancy, and overall garment lifespan, ultimately saving you money and reducing textile waste.

Understanding Standardized Washing Symbols

Globally recognized icons on care labels offer concise guidance on washing, drying, ironing, and bleaching, ensuring proper garment treatment and preventing damage.

History of Laundry Symbols

The story of laundry symbols began in the early 20th century, driven by the rise of manufactured fabrics and the need for standardized care instructions. Initially, varied and often lengthy written directions were common, leading to confusion and garment damage. In the 1950s, efforts began to create a universal system.

However, it wasn’t until 1986 that the International Organization for Standardization (ISO) published ISO 3758, establishing the globally recognized set of symbols we use today. This standardization aimed to overcome language barriers and simplify laundry care for consumers worldwide, ultimately extending the lifespan of clothing and reducing textile waste.

The International System

The globally adopted system, formalized by ISO 3758, utilizes pictograms – small, illustrative symbols – to convey washing, bleaching, drying, ironing, and dry cleaning instructions. These symbols aren’t language-dependent, making them universally understandable. Each symbol has variations indicated by lines or dots.

For example, a tub represents washing, with temperature settings denoted by dots inside. A triangle signifies bleaching, crossed out indicating prohibition; The system’s success lies in its simplicity and clarity, ensuring consistent care instructions across different brands and countries, ultimately protecting your garments.

Wash Cycle Symbols Explained

Tub icons dictate wash cycles: a tub alone means normal, with underlines for gentle, and two underlines for delicate fabrics – crucial for preventing damage.

Normal Wash Cycle Symbol

The standard wash cycle is represented by a tub icon, typically without any additional markings like underlines or dots. This signifies that the garment can withstand a robust washing process, suitable for durable fabrics like cotton and linen. It indicates a higher agitation level and is generally safe for everyday clothing items that aren’t particularly delicate. However, always check for accompanying temperature and colorfastness symbols. Ignoring these could still lead to fading or shrinkage, even with the ‘normal’ cycle designation. Understanding this basic symbol is the foundation for correctly interpreting more complex care instructions found on shirt tags.

Delicate/Gentle Cycle Symbol

The delicate or gentle wash cycle is depicted by a tub icon with one or more underlines beneath it. Each underline indicates a reduced level of agitation – one underline suggests gentle, while two indicate very gentle. This cycle is ideal for fragile fabrics like silk, lace, and sheer materials. It minimizes wear and tear, preventing damage like stretching or snagging. Using this cycle extends the lifespan of delicate garments. Always confirm the water temperature symbol alongside it, as even gentle agitation with hot water can be detrimental. Prioritize careful handling for best results.

Permanent Press Cycle Symbol

The permanent press cycle, represented by a tub icon with a triangle inside, is designed for wrinkle-resistant fabrics. This cycle uses warm water and moderate agitation to help maintain the garment’s shape and reduce creasing. It’s suitable for synthetic blends, polyester, and items labeled “wrinkle-free.” However, it’s crucial to avoid overloading the machine, as this can hinder its effectiveness. Following the temperature guidelines is also vital; excessively hot water can damage the wrinkle-resistant finish. This cycle offers a balance between cleaning and fabric care.

Water Temperature Symbols

Temperature settings significantly impact cleaning and fabric preservation. Symbols indicate cold, warm, or hot washes, guiding users to prevent shrinking or color fading.

Cold Wash Symbol

The cold wash symbol, typically depicted as a bucket filled with water and one dot, signifies a washing temperature of 30°C (86°F) or lower. Utilizing cold water is incredibly beneficial for several reasons. It helps preserve vibrant colors, preventing them from fading or bleeding during the wash cycle. Furthermore, cold water is gentler on fabrics, minimizing the risk of shrinking or damage, especially for delicate materials.

This method also conserves energy, as heating water consumes a significant amount of electricity. Choosing a cold wash is an environmentally conscious and cost-effective practice, extending the lifespan of your garments while reducing your carbon footprint. Always adhere to the garment’s care label for optimal results.

Warm Wash Symbol

Represented by a bucket of water with two dots, the warm wash symbol indicates a washing temperature of 40°C (104°F). This setting strikes a balance between effective cleaning and fabric preservation. While warmer than a cold wash, it’s still gentle enough for many everyday items, offering a good compromise for moderately soiled clothes.

Warm water aids in dissolving detergents more effectively, enhancing cleaning power. However, it’s crucial to be mindful of colorfastness, as some dyes may still bleed at this temperature. Always check the garment’s label and test for color bleeding if unsure, particularly with brightly colored or new items.

Hot Wash Symbol

The hot wash symbol, depicted as a bucket with three dots, signifies a washing temperature of 60°C (140°F) or even 95°C (203°F) depending on the number of dots. This is the most aggressive wash cycle, ideal for heavily soiled items like bedding, towels, and work clothes needing thorough sanitization.

However, hot water can cause significant shrinkage and fading, so it’s reserved for fabrics that can withstand the heat – primarily durable cottons and linens. Avoid using this setting on delicate materials, synthetics, or brightly colored garments to prevent damage and maintain their appearance. Always verify the care label!

Bleaching Symbols

Bleach symbols indicate whether chlorine or oxygen bleach can be used safely on a garment, or if bleaching is strictly prohibited to prevent damage.

Bleach Allowed Symbol

The “Bleach Allowed” symbol is typically represented by a triangle, often solid or with diagonal lines inside. A solid triangle signifies that chlorine bleach can be used on the fabric without concern. However, even with this symbol, it’s wise to dilute the bleach properly and test it on an inconspicuous area first. Garments with this symbol can generally withstand the harsh effects of chlorine bleach, maintaining color and fabric integrity. Variations, like triangles with two diagonal lines, indicate oxygen bleach is safe, a gentler alternative suitable for delicate colors and fabrics. Always check the label carefully!

Do Not Bleach Symbol

The “Do Not Bleach” symbol is a triangle with a cross through it, a clear warning against using any bleaching agents on the garment. This includes both chlorine and oxygen bleach. Ignoring this symbol can lead to irreversible discoloration, weakening of the fabric fibers, and even permanent damage to your clothing. Delicate fabrics like silk, wool, and certain synthetics are particularly vulnerable to bleach. Adhering to this instruction is vital for preserving the garment’s original color and structural integrity, extending its lifespan and maintaining its appearance.

Drying Symbols

Drying symbols dictate how to safely dry your clothes, ranging from tumble drying options to air drying methods like line or flat drying techniques.

Tumble Dry Symbol

The tumble dry symbol, depicted as a square with a circle inside, indicates whether an item is suitable for machine drying. A plain circle signifies any temperature is acceptable. Dots within the circle represent heat levels: one dot for low, two for medium, and three for high heat. A crossed-out circle means do not tumble dry. A line underneath the symbol indicates line dry, while multiple lines suggest reduced heat or a delicate cycle. Understanding these variations prevents shrinkage or damage, preserving your garment’s original fit and fabric integrity. Always check the tag!

Line Dry Symbol

Represented by a horizontal line, the line dry symbol advises air-drying garments, avoiding the heat of a machine dryer. This method is gentler on fabrics, preventing shrinkage and extending the life of your clothes. Variations include a curved line, indicating hang to dry, and a flat line, meaning lay flat to dry. Garments with delicate embellishments or prone to stretching benefit greatly from line drying. It’s an energy-efficient and eco-friendly option, preserving colors and shapes. Always consider the weight of the item to prevent stretching while wet.

Flat Dry Symbol

The flat dry symbol, depicted as a square with a horizontal line inside, instructs you to lay the garment on a clean, flat surface to air dry. This is essential for delicate items like sweaters, as hanging can cause stretching and distortion. Avoid direct sunlight, which can fade colors. Ensure good air circulation around the item for even drying. This method prevents damage to embellishments and maintains the garment’s original shape. It’s particularly important for knitwear and items with elastic to prevent losing their form.

Ironing Symbols

Ironing symbols indicate safe heat levels – from high, medium, to low – or if ironing should be avoided altogether, preserving fabric integrity and preventing damage.

High Heat Ironing Symbol

The high heat ironing symbol, depicted as an iron with three dots inside, signifies that the garment can withstand the highest ironing temperature settings. This generally applies to sturdy fabrics like linen or cotton, capable of enduring significant heat without damage. However, caution is advised; always test a small, inconspicuous area first. Incorrectly applying high heat to delicate materials can cause scorching, melting, or irreversible alterations to the fabric’s texture and appearance. Understanding this symbol prevents accidental garment destruction, ensuring longevity and maintaining the item’s original quality. Always double-check the tag!

Medium Heat Ironing Symbol

Represented by an iron with two dots, the medium heat ironing symbol indicates a moderate temperature is suitable for the fabric. This setting is generally safe for materials like polyester blends, silk, and rayon – fabrics more sensitive to extreme heat than cotton or linen. Using a medium setting minimizes the risk of scorching or damaging the fibers, preserving the garment’s shape and color. It’s a versatile option for many everyday clothes, offering a balance between effective wrinkle removal and fabric protection. Always use an ironing board and consider a pressing cloth for added safety.

Low Heat Ironing Symbol

The low heat ironing symbol, depicted as an iron with just one dot, signifies the most delicate ironing temperature. This setting is ideal for heat-sensitive fabrics like acrylic, nylon, and certain delicate synthetics. Utilizing low heat prevents melting, shrinking, or creating a shiny appearance on these materials. It’s crucial to use a pressing cloth when ironing at this temperature to further protect the fabric. While it may require more passes to remove wrinkles, it’s the safest option for preserving the integrity and appearance of your more fragile garments.

Dry Cleaning Symbols

Dry cleaning instructions, indicated by a circle, detail whether professional cleaning is permitted or prohibited, impacting garment longevity and fabric preservation.

Dry Clean Allowed Symbol

The circle symbol signifies that the garment is suitable for professional dry cleaning. A solid circle indicates standard dry cleaning procedures are safe. However, variations within the circle provide crucial details. A letter inside, like ‘P’, denotes specific solvent usage – perchlorethylene, the most common. ‘F’ signifies a flammable solvent should be avoided. Lines underneath the circle indicate restrictions; one line means a reduced moisture limit during cleaning, while two lines suggest a very limited moisture process. Ignoring these nuances can lead to damage, shrinkage, or color loss, ultimately shortening the lifespan of your cherished clothing items.

Do Not Dry Clean Symbol

A crossed-out circle definitively communicates that dry cleaning is not recommended for the garment. Attempting to dry clean an item with this symbol can result in severe damage to the fabric, potentially causing irreversible shrinkage, distortion, or color fading. This restriction is often present on delicate materials like silk, rayon, or those with embellishments sensitive to the dry cleaning process. It’s vital to adhere to this instruction to preserve the garment’s integrity and avoid costly repairs or complete loss. Always prioritize alternative cleaning methods as indicated on the care label.

Using Smartphone Camera for Symbol Identification

Modern smartphones offer innovative features, like Live Text on iPhones, to instantly identify laundry symbols through a simple camera scan for easy decoding.

iPhone’s Live Text Feature

Apple’s Live Text, integrated into the iPhone camera, provides a remarkably convenient solution for deciphering those perplexing laundry symbols. Simply open the Camera app, point it at the care label, and Live Text will recognize the symbols as text. Users can then highlight the symbols to learn their meanings, eliminating guesswork. This feature, initially launched with iOS 15, has quickly become a favorite among those seeking to properly care for their garments. Brad Canning, from Melbourne, demonstrated this capability, showcasing how effortlessly it simplifies laundry routines. It’s a game-changer for avoiding laundry mishaps!

Android Alternatives

While iPhones boast Live Text, Android users aren’t left deciphering laundry symbols alone! Google Lens offers a comparable functionality, allowing users to scan care labels with their smartphone camera. The app identifies the symbols and provides detailed explanations of the washing instructions. Several dedicated laundry symbol scanner apps are also available on the Google Play Store, offering specialized features and extensive symbol databases. These apps often include additional resources like stain removal guides and washing tips, providing a comprehensive laundry care solution for Android device owners.

Common Mistakes to Avoid When Interpreting Symbols

Misreading temperature settings or ignoring bleach warnings can drastically damage fabrics; careful attention to each symbol ensures garment longevity and prevents costly mistakes.

Misinterpreting Temperature Settings

One frequent error involves incorrectly understanding water temperature symbols. A higher temperature isn’t always better; in fact, hot water can cause colors to fade, fabrics to shrink, and delicate materials to become damaged. Conversely, washing in water that’s too cold might not effectively remove dirt and stains. Always check the tag – a single dot signifies cold wash, two dots indicate warm, and three represent hot. Ignoring these cues can lead to irreversible damage, shortening the lifespan of your favorite garments and requiring premature replacements. Prioritize careful observation!

Ignoring Bleaching Instructions

Bleach, while effective at whitening and disinfecting, can be incredibly damaging to certain fabrics. The care label’s bleaching symbol is vital. A triangle indicates bleach is permissible, but even then, check for lines within – one line means use only non-chlorine bleach, while two lines signify no bleach at all. Disregarding these instructions can cause discoloration, weakening of fibers, and even holes to appear. Always err on the side of caution; if unsure, skip the bleach entirely to preserve your clothing’s integrity and vibrant colors.

Resources for Further Information

Numerous online charts and mobile apps simplify laundry symbol decoding, offering quick references for proper garment care and extending clothing lifespan.

Laundry Symbol Charts Online

A wealth of digital resources provides comprehensive laundry symbol charts, readily accessible for quick reference. Websites dedicated to laundry and garment care frequently host these charts, visually displaying each symbol alongside its corresponding meaning. These online guides cover everything from wash cycles and water temperatures to drying methods, ironing instructions, and dry cleaning recommendations. Searching for “laundry symbol chart” yields numerous options, often categorized for easy navigation. Many charts are downloadable for offline use, proving invaluable when tackling a mountain of laundry and encountering unfamiliar symbols on clothing tags. These resources empower consumers to confidently interpret care labels.

Mobile Apps for Laundry Symbol Decoding

Several mobile applications simplify laundry symbol interpretation, offering a convenient solution right at your fingertips. These apps typically utilize your smartphone’s camera to scan a care label, instantly identifying each symbol and providing a clear explanation of the recommended washing instructions. Some apps also allow manual symbol selection if scanning proves difficult. Features often include language support and the ability to save frequently washed items for quick access to their care guidelines. These apps are particularly helpful for deciphering complex or unfamiliar symbols, ensuring proper garment care and extending the lifespan of your clothes.

Understanding laundry symbols preserves clothing, preventing damage and fading; proper care extends garment life, saving money and reducing textile waste effectively.

Preserving Garment Lifespan Through Proper Care

Diligent attention to those small symbols on clothing tags is a surprisingly powerful tool in extending the life of your wardrobe. Ignoring these instructions can lead to shrinking, stretching, color fading, and even irreversible damage. By taking the time to decode wash cycles, water temperatures, and drying methods, you’re actively investing in the longevity of your favorite pieces.

Furthermore, understanding bleaching and ironing guidelines prevents unwanted alterations to fabric integrity. Embracing these simple practices not only saves you money in the long run but also contributes to a more sustainable approach to fashion, reducing textile waste and promoting responsible consumption.

lindberg jolly roger pirate ship instructions

Lindberg Jolly Roger Pirate Ship Instructions: A Comprehensive Guide

Embark on a thrilling journey constructing the Lindberg Jolly Roger! This guide details building this iconic pirate ship model, referencing experienced modelers’ logs and tutorials.

The Lindberg Jolly Roger pirate ship kit is a classic for model builders, offering a captivating glimpse into the Golden Age of Piracy. Released decades ago, it remains popular due to its detailed design and historical inspiration. Many enthusiasts fondly recall building this model, often seeking guidance from online communities like Model Ship World, where numerous build logs document the process.

This kit isn’t simply about assembling plastic parts; it’s about recreating a piece of maritime history. The Jolly Roger’s design closely resembles captured pirate vessels, making it a historically-grounded project. Builders often share tips on enhancing the model, from weathering techniques to rigging intricacies. This guide aims to consolidate that collective knowledge, providing a comprehensive resource for both novice and experienced modelers.

Historical Context of Pirate Ships

Pirate ships of the 17th and 18th centuries weren’t purpose-built for piracy; they were often captured merchant vessels or smaller warships refitted for speed and maneuverability. Speed was crucial for both chasing prey and escaping naval forces. Pirates favored sloops and brigs, modifying them with extra sails and streamlined hulls.

The Jolly Roger, the iconic pirate flag, served as a psychological weapon, intended to intimidate victims into surrendering without a fight. While the Lindberg kit represents a romanticized vision, understanding the practicalities of pirate vessels – their construction, armaments, and crew organization – enhances the building experience. These ships were floating fortresses, adapted for a life of plunder and adventure on the high seas.

Understanding the Kit Contents

The Lindberg Jolly Roger kit arrives with numerous plastic parts, meticulously molded to recreate the ship’s intricate details. Careful examination of the sprues is essential before commencing construction. The kit includes the hull halves, decking sections, masts, spars, and a wealth of smaller components for rigging and detailing.

A detailed decal sheet provides flags, pennants, and potentially some decorative elements. Familiarizing yourself with the parts layout, referencing the instruction manual, and planning the build sequence will streamline the process. Ensure you have the necessary adhesives and tools ready before beginning – a successful build relies on preparation!

Inventory of Parts

Before starting, meticulously inventory all parts against the kit’s parts list. This crucial step prevents mid-build frustration from missing components. The Lindberg Jolly Roger kit contains numerous plastic sprues, each holding various hull sections, deck fittings, masts, yards, and intricate details.

Carefully separate each part, noting any flash or mold lines requiring removal. Organize parts into labeled containers for easy access during assembly. Pay close attention to smaller components like blocks, deadeyes, and cannons, as these are easily misplaced. A thorough inventory ensures a smooth and enjoyable building experience, avoiding delays later on.

Decal Sheet Details

The Lindberg Jolly Roger kit includes a decal sheet featuring flags, emblems, and decorative elements to enhance realism. Carefully examine the sheet, noting the placement guide provided in the instructions. Decals add crucial details, like the iconic Jolly Roger flag, ship names, and ornamental designs.

Before application, cut each decal closely from the sheet to minimize carrier film. Soak the decal in lukewarm water for the recommended time, then gently slide it onto the model surface. Use a soft brush or cotton swab to remove air bubbles and ensure proper adhesion. A decal setting solution can aid in conforming the decal to curved surfaces for a professional finish.

Glue and Tools Required

Constructing the Lindberg Jolly Roger demands specific tools and adhesives. A plastic model cement is essential for bonding the kit’s plastic parts, ensuring a strong and durable assembly. Consider using a liquid cement with a fine applicator for precise application. Additionally, cyanoacrylate (super glue) can be useful for smaller, quick-bonding tasks.

Essential tools include a hobby knife for removing parts from sprues, tweezers for handling small decals, and sandpaper for smoothing surfaces. A small saw might be needed for modifying parts. Paintbrushes, files, and a cutting mat are also highly recommended for a successful build.

Hull Construction

Beginning the Lindberg Jolly Roger, hull construction forms the ship’s foundation. Carefully remove hull sides from the sprue, cleaning any excess plastic. Dry-fit the pieces to ensure a proper alignment before applying plastic cement. Assemble the port and starboard sides, ensuring a secure bond and straight form. Clamps can aid in maintaining shape during drying.

Next, attach the decking, aligning it precisely with the hull sides. The keel and false keel provide structural support; cement these components firmly into place. Pay attention to the instructions regarding the placement of these parts, as they influence the ship’s stability and appearance.

Assembling the Hull Sides

Initiating hull assembly, carefully detach the port and starboard hull sides from the sprue, utilizing sprue cutters to minimize stress. Thoroughly clean any remaining plastic remnants or flash from the edges, ensuring a smooth bonding surface. Perform a dry-fit to verify proper alignment before applying plastic cement – a crucial step for a seamless build.

Apply cement sparingly along the joining surfaces, avoiding excessive amounts that could mar the plastic. Securely clamp the hull sides together while the cement cures, maintaining a straight and accurate form. Allow ample drying time, typically 24 hours, before proceeding to the next stage of construction.

Attaching the Decking

With the hull sides securely joined, prepare the main deck piece for attachment. Carefully dry-fit the deck to the hull, ensuring a flush and even fit along all edges. Minor adjustments may be necessary; gently file or sand any areas preventing a perfect alignment. Apply plastic cement to the hull’s upper edges and the deck’s underside, distributing it evenly.

Position the deck onto the hull, applying gentle pressure to ensure full contact. Utilize clamps or weights to maintain consistent pressure during the curing process – approximately 24 hours is recommended. Inspect the seams for any gaps and address them with a suitable plastic filler, sanding smooth once dry for a pristine finish.

Adding the Keel and False Keel

After the hull sides and decking are firmly bonded, it’s time to reinforce the structure with the keel and false keel components. The keel provides essential longitudinal strength, while the false keel adds weight for stability and a more realistic profile. Begin by dry-fitting both pieces to the hull’s underside, checking for proper alignment and a snug fit.

Apply plastic cement liberally to the contact points, ensuring complete coverage. Carefully position the keel and false keel, clamping them securely in place until the adhesive fully cures. Inspect the joints for any gaps and fill them with plastic filler, sanding smooth once dry to create a seamless transition.

Superstructure and Details

With the hull established, attention shifts to building the intricate superstructure that defines the Jolly Roger’s character. This phase involves constructing the captain’s cabin, a focal point of the ship, followed by the fore and quarterdecks, which extend the working and living spaces. Carefully assemble each component, referencing the kit’s diagrams for accurate placement of windows, doors, and decorative elements.

Next, focus on creating the ship’s railings, vital for safety and visual appeal. Utilize the provided plastic stanchions and rails, gluing them securely along the deck edges. Patience is key here, ensuring a consistent height and spacing for a professional finish. These details significantly enhance the model’s realism.

Building the Captain’s Cabin

The captain’s cabin, a symbol of authority, requires meticulous assembly. Begin by carefully joining the cabin walls, ensuring square corners and a flush fit. Add the cabin roof, paying attention to the alignment with the hull’s superstructure. Next, install the windows – clear plastic pieces that allow light to enter, hinting at the interior.

Detailing is crucial; add the captain’s door, complete with hinges and a handle. Consider painting the interior with a contrasting color to the exterior, suggesting a lavishly appointed space. Finally, secure the completed cabin to the designated location on the quarterdeck, ensuring a stable and visually appealing integration with the ship’s overall structure.

Constructing the Forecastle and Quarterdeck

The forecastle and quarterdeck define the ship’s bow and stern, providing essential platforms for crew activity and weaponry. Begin by assembling the base structures, ensuring they align perfectly with the hull’s curvature. Add the railings, carefully gluing each section to create a continuous barrier.

Detailing enhances realism; incorporate miniature hatches, ladders, and capstans. The quarterdeck often features a raised platform for the captain and officers – construct this with precision. Securely attach both structures to the hull, reinforcing the joints for durability. These areas are focal points, so meticulous construction is paramount for an authentic pirate ship appearance.

Creating the Ship’s Railings

Ship’s railings are crucial for safety and visual appeal, encircling the decks and providing a sense of scale. The Lindberg kit provides railing sections; carefully remove these from the sprue, cleaning any excess plastic. Begin attaching the railings to the deck, using a small amount of glue to ensure a secure bond.

Pay attention to the curves and contours of the deck, bending the railings gently to follow the ship’s lines. Add stanchions for support, spacing them evenly along the railing’s length. Consider using photo-etched parts for enhanced detail, if available. A well-constructed railing system significantly elevates the model’s realism.

Mast and Spars Assembly

The masts and spars are the skeletal structure supporting the sails, demanding precision during assembly. Begin by carefully joining the mast sections, ensuring they are perfectly aligned. Reinforce these joints with glue for stability, as they’ll bear significant weight. Next, construct the yards and booms, attaching them to the masts at the correct positions – referencing the kit’s instructions is vital.

Dry-fitting components before gluing is highly recommended. Pay close attention to the angles and lengths of the spars, as these impact the rigging process. A solid mast and spar assembly forms the foundation for a realistic sailing ship model.

Assembling the Main Mast

The main mast, the tallest and most prominent, requires careful attention. Begin by joining the lower and upper mast sections, ensuring a seamless connection. Utilize a strong adhesive, allowing ample drying time for maximum stability. Reinforce the joint with fine thread if desired, mimicking the original construction.

Next, attach the fighting top – a platform for sharpshooters – ensuring it’s level and securely fastened. Add any included details, such as capstans or platforms, before proceeding. A straight and sturdy main mast is crucial for supporting the weight of the sails and rigging, impacting the ship’s overall appearance.

Constructing the Fore Mast and Mizzen Mast

The fore and mizzen masts, while smaller than the main mast, demand equal precision. Assemble each mast in stages, joining sections with adhesive and allowing sufficient drying time. Pay close attention to the alignment, ensuring they stand vertically. These masts support crucial sails and rigging, contributing to the ship’s balance and maneuverability.

Attach the respective fighting tops and any included details, mirroring the construction of the main mast. Reinforce joints for durability. Remember that the foremast is typically raked forward, while the mizzen mast is slightly aft, adding to the ship’s dynamic silhouette.

Rigging the Yards and Booms

Rigging the yards and booms is a meticulous process, bringing the ship to life. Begin by attaching the yardarms to the masts using thread or fine line, replicating the historical arrangement. Securely fasten the booms to the base of the masts, ensuring they can rotate freely. This allows for sail control and adjustment.

Employ a variety of knots – clove hitches, reef knots, and bowlines – to create realistic and secure connections. Refer to historical rigging diagrams for accurate placement of lines. Patience is key; take your time to achieve a clean and authentic appearance, enhancing the model’s overall realism.

Sail Construction and Rigging

Constructing and rigging the sails transforms the model into a fully-fledged pirate vessel. Carefully cut the sail material – often provided in the kit or sourced separately – to the correct shapes and sizes. Gently stretch and shape each sail, mimicking the billowing effect of wind-filled canvas. Attach the sails to the yards using thread, ensuring a slight droop for realism.

Detailed rigging involves running lines from the yards down to the deck, controlling sail position. Study historical references to accurately replicate the complex network of ropes. This stage demands patience and precision, but the resulting visual impact is substantial, completing the ship’s majestic appearance.

Preparing the Sails

Before attaching the sails, meticulous preparation is crucial for a realistic finish. Carefully remove the sail material from the sprue, cleaning any excess plastic. Gently stretch each sail to remove wrinkles, potentially using a slightly dampened cloth. Consider lightly staining the fabric with diluted tea or coffee to simulate age and weathering, enhancing the historical appearance.

Reinforce the sail edges with thin strips of fabric or thread to prevent tearing during rigging. Pay attention to the sail shapes, ensuring they accurately match the kit instructions. This foundational step significantly impacts the final aesthetic, contributing to the ship’s overall authenticity.

Attaching the Sails to the Yards

Carefully attach each prepared sail to its corresponding yard using a strong, yet flexible, thread. Begin with the larger sails, ensuring proper alignment and tension. Employ a knotting technique that allows for future adjustments during rigging – a bowline knot is often recommended. Refer to historical references and kit diagrams for accurate sail positioning and orientation.

Maintain a slight curve to the sails to simulate wind-filled conditions, avoiding a perfectly flat appearance. Secure the sails firmly, but avoid over-tightening, which could distort the fabric. Patience is key during this stage, as precise sail placement dramatically enhances the model’s realism and visual appeal.

Detailed Rigging Instructions

Begin the intricate rigging process by attaching the running rigging – lines used to control the sails. Utilize various thicknesses of thread to represent different rope sizes accurately. Follow the kit’s diagram meticulously, paying close attention to the routing of each line through blocks and pulleys. Ensure lines run smoothly and are taut, but not overly strained.

Next, address the standing rigging – the fixed lines supporting the masts. Secure these firmly to the hull and masts, creating a stable framework. Employ a variety of knots for different purposes, enhancing the model’s authenticity. Refer to online build logs for visual guidance and troubleshooting tips during this complex phase.

Finishing Touches

Bring your Jolly Roger to life with careful painting! Apply a base coat to the hull and superstructure, then add weathering effects for a realistic, aged appearance. Consider washes and dry brushing to highlight details and simulate wear and tear. Precision is key when applying the decal sheet, ensuring proper alignment and adhesion.

Finally, mount the miniature cannons along the gunwales, adding a formidable touch. Securely attach them, ensuring they are evenly spaced and aligned. A display base can enhance presentation, potentially incorporating realistic water effects. Step back and admire your completed pirate ship model – a testament to patience and skill!

Painting the Hull and Superstructure

Begin with a primer coat to ensure paint adhesion and a smooth finish. Acrylic paints are recommended for ease of use and cleanup. Research historical color schemes for pirate ships to achieve authenticity, or embrace creative freedom! Apply multiple thin coats rather than one thick coat, preventing runs and preserving detail.

Focus on achieving a weathered look; pirate ships weren’t pristine. Consider using darker shades in recesses to simulate shadows and grime. The superstructure benefits from contrasting colors to highlight architectural features. Allow each coat to dry completely before proceeding, and protect your work surface!

Applying Decals

Carefully cut out each decal from the sheet using a sharp hobby knife. Immerse the decal in lukewarm water for approximately 20-30 seconds, until it slides freely from the backing paper. Gently slide the decal onto the model’s surface, positioning it accurately.

Use a soft brush or cotton swab to remove any air bubbles and excess water. A decal setting solution can help the decal conform to curved surfaces and improve adhesion. Allow the decals to dry completely before applying a protective coat of clear varnish. This seals the decals and prevents damage during handling and weathering.

Adding Miniature Cannons

Assemble the miniature cannons according to the kit instructions, paying close attention to detail. These often consist of a barrel, carriage, and mounting bracket. Carefully glue the assembled cannons onto the designated positions along the ship’s gunwales, ensuring proper alignment and spacing.

Consider painting the cannons with a metallic color, such as gunmetal or black, to replicate their historical appearance. Adding small details like ropes or blocks around the cannons can enhance realism. Securely attach the cannons to prevent them from detaching during handling or display. This step dramatically increases the ship’s authentic pirate aesthetic.

Advanced Modeling Techniques

Elevate your Jolly Roger build with advanced techniques! Weathering and aging effects, using washes and dry brushing, simulate years at sea, adding realism to the hull and superstructure. Experiment with pigments to depict rust and grime. For realistic water effects, consider epoxy resin or acrylic gel mediums, layering shades of blue and green.

Creating a convincing seascape enhances the display. Consider building a base with sculpted waves or using a pre-made water effect base. Proper lighting can dramatically showcase your finished model. Explore online forums for inspiration and detailed tutorials on these advanced techniques, pushing your modeling skills further.

Weathering and Aging Effects

Transform your Jolly Roger into a battle-hardened vessel with weathering! Begin with a base wash of thinned brown or black acrylic paint to accentuate panel lines and details. Dry brushing with lighter shades simulates wear and tear on edges and raised surfaces. Utilize pigments – rust, grime, and soot – strategically applied to create realistic staining.

Consider chipping effects using a fine brush and silver paint to depict damaged paintwork. Vary the intensity of weathering; areas exposed to the elements should show more degradation. Research historical references for accurate weathering patterns. Subtle weathering adds immense realism, conveying the ship’s history.

Creating Realistic Water Effects

Elevate your Jolly Roger display with convincing water! Epoxy resin is ideal for larger water areas, allowing for layered effects and embedded details like debris. For smaller areas, acrylic gel mediums can simulate choppy waves. Tint the resin or gel with blues, greens, and browns for depth and realism.

White paint, lightly brushed on, creates breaking waves and foam. Consider adding texture with crumpled plastic wrap or sculpting materials beneath the resin. Experiment with different sheens – gloss for calm water, matte for rough seas. Remember lighting; backlighting enhances the water’s translucency. A well-executed water base dramatically enhances the model’s presentation.

Displaying Your Finished Model

Showcase your completed Jolly Roger with a fitting display! A custom-built diorama enhances the ship’s story, incorporating realistic water effects, islands, or even miniature figures engaged in naval combat. Consider a sturdy base to support the model’s weight and protect it from damage.

Lighting is crucial; spotlights highlight details, while ambient lighting sets the mood. A glass case protects against dust and accidental impacts. Think about the backdrop – a painted seascape or a photographic print adds context. Proper display elevates your build from a model to a captivating piece of maritime art, deserving admiration.

Resources and Community

Connect with fellow modelers for support and inspiration! Model Ship World Forums offer invaluable build logs, tips, and a vibrant community specifically focused on ship modeling. Explore online resources for detailed tutorials and shared experiences with the Lindberg Jolly Roger kit – many builders have documented their progress.

Searching for Lindberg Kit Reviews provides insights into potential challenges and successful techniques. These online communities are excellent for troubleshooting, sharing weathering techniques, and discovering innovative rigging methods. Leverage the collective knowledge to enhance your build and enjoy the camaraderie of passionate hobbyists.

Model Ship World Forums

Model Ship World is an indispensable resource for Lindberg Jolly Roger builders. Numerous threads detail complete builds of this specific kit, offering a wealth of practical advice and visual guides. Experienced modelers share their techniques for hull construction, rigging, and painting, providing solutions to common challenges.

These forums foster a supportive community where you can ask questions, receive feedback, and showcase your progress. Search existing topics to find answers to specific issues or start a new thread to connect with fellow enthusiasts. Viewing completed builds provides inspiration and demonstrates the potential of this classic model.

Online Build Logs and Tutorials

Numerous online build logs document the construction of the Lindberg Jolly Roger, offering step-by-step guidance and valuable insights. These logs, often found on sites like Model Ship World and personal blogs, showcase various approaches to assembly, detailing, and finishing. Video tutorials further enhance the learning experience, demonstrating techniques like rigging and weathering.

Following these resources allows you to learn from the successes and mistakes of other modelers. They provide visual references for complex steps and offer alternative solutions to potential problems. Examining different build styles can inspire creativity and help you personalize your own Jolly Roger model.

Lindberg Kit Reviews

Before commencing your Lindberg Jolly Roger build, exploring kit reviews is highly recommended. These reviews, available on modeling forums and websites, provide honest assessments of the kit’s strengths and weaknesses. They often detail the quality of the plastic, the accuracy of the parts, and the clarity of the instructions.

Reviewers frequently discuss potential challenges, such as fit issues or the need for aftermarket parts. Understanding these aspects beforehand allows for better preparation and problem-solving during construction. Examining multiple reviews offers a balanced perspective, helping you make informed decisions about modifications or enhancements.

kraft mac and cheese microwave instructions

Kraft Mac & Cheese Microwave Instructions: A Comprehensive Guide

Navigating the world of microwaved Kraft Mac & Cheese requires understanding variations in preparation, from classic boxed versions to convenient cups, ensuring a delightfully cheesy outcome every time․

Understanding Microwave Mac & Cheese Variations

Kraft Mac & Cheese offers several convenient microwave options, each with unique instructions for optimal results․ The traditional boxed version requires a larger bowl and more water, typically needing 8-10 minutes of cooking time with frequent stirring․

Kraft Easy Mac, designed for single servings, utilizes a smaller bowl and less water – around 2/3 cup – and cooks significantly faster, usually in 3․5 to 4 minutes․

Finally, the Mac & Cheese Dinner Cups provide the ultimate convenience, pre-portioned with a specific water measurement and a shorter cooking duration․ Recognizing these differences is crucial; following the correct instructions for your chosen variety prevents undercooked pasta or a dry, clumpy final product․

Kraft Easy Mac Microwave Instructions

For a quick and easy meal, Kraft Easy Mac is a fantastic choice․ Begin by pouring the macaroni into a 2-cup microwaveable bowl․ Add 2/3 cup of water – accurate measurement is key for the perfect consistency․

Microwave on high for 3․5 to 4 minutes, ensuring the bowl is suitable for microwave use․ After the cooking time, carefully remove the bowl, as it will be hot․

Stir thoroughly to distribute the cheese sauce mix evenly throughout the macaroni; The sauce will finish cooking from the residual heat․ If the sauce isn’t fully melted, microwave for an additional 15-30 seconds, stirring again․ Enjoy this convenient and flavorful single-serving mac and cheese!

Original Kraft Mac & Cheese (Boxed) Microwave Instructions

Microwaving classic boxed Kraft Mac & Cheese is surprisingly simple! Pour the macaroni into a 1- or 2-quart microwaveable bowl․ Add 1 ¾ cups of hot water – using hot water speeds up the cooking process․

Microwave uncovered on high for 8 to 10 minutes, a crucial step for proper cooking․ Remember to stir the mixture every 3 minutes during the microwaving process․ This ensures even heating and prevents sticking․

After the full cooking time, carefully check if all the water has been absorbed․ If not, continue microwaving in 30-second intervals, stirring after each, until the desired consistency is reached․ Stir in the cheese powder and enjoy!

Water Amount for Microwave Cooking

Precise water measurement is key to perfectly cooked microwave mac & cheese․ For the original boxed Kraft Mac & Cheese, utilizing 1 ¾ cups of hot water is recommended․ Hot water significantly reduces overall cooking time and aids in a creamier texture․

However, water needs differ for various Kraft Mac & Cheese products․ Kraft Easy Mac requires only ⅔ cup of water per serving when microwaved․ Mac & Cheese Dinner Cups necessitate following the fill line indicated on the cup itself, typically around ½ cup․

Adjusting water slightly can customize consistency; Less water yields a firmer result, while a bit more creates a saucier dish․ Always start with the recommended amount and adjust incrementally in future attempts․

Microwave Time Guidelines (8-10 Minutes)

For the original boxed Kraft Mac & Cheese, a microwave time of 8 to 10 minutes on high power is generally advised․ This timeframe assumes the use of a standard microwave with approximately 1000 watts of power․ However, microwave wattages vary, so initial timing should be considered a guideline․

Consistent stirring is crucial during this period․ Stirring every 3 minutes ensures even heating and prevents the macaroni from sticking together or drying out․ Observe the water absorption; if most of the water hasn’t been absorbed after 8 minutes, continue microwaving in 30-second intervals․

Always exercise caution when removing the bowl, as it will be hot․ Allow a brief cooling period before handling․ Remember, these times are estimates; visual cues like fully absorbed water and tender pasta are the best indicators of doneness․

Stirring Frequency During Microwaving

Consistent stirring is paramount when preparing Kraft Mac & Cheese in the microwave․ Experts recommend stirring every 3 minutes throughout the 8-10 minute cooking process for the original boxed variety․ This frequent agitation prevents the macaroni from clumping together and ensures even heat distribution․

Stirring also helps to release steam, contributing to a creamier texture․ It allows the hot water to circulate and fully hydrate the pasta, resulting in a more consistent and enjoyable final product․ Neglecting to stir can lead to unevenly cooked macaroni – some pieces may be hard while others are mushy․

Don’t underestimate the importance of this step! It’s a simple action that significantly impacts the quality and consistency of your microwaved mac and cheese․

Kraft Mac & Cheese Dinner Cups Microwave Instructions

Kraft Mac & Cheese Dinner Cups offer a supremely convenient single-serving option․ These cups streamline the process, requiring minimal effort for a quick and satisfying meal․ Preparation is incredibly simple: the cups already contain the macaroni pasta and cheese sauce mix, eliminating the need for separate components․

To begin, ensure the cup is microwave-safe․ Add the appropriate amount of water – typically indicated on the cup itself – and stir thoroughly to combine․ These cups generally require a shorter cooking time than the boxed variety, typically around 3․5 to 4 minutes on high power․

These cups are perfect for a fast lunch or snack, providing a comforting and familiar flavor in a portable package․ Enjoy the cheesy goodness with minimal cleanup!

Preparation Steps for Mac & Cheese Cups

Preparing Kraft Mac & Cheese Dinner Cups is remarkably straightforward, designed for ultimate convenience․ First, carefully remove the lid from the cup, ensuring you don’t discard the lid entirely – it can be useful for stirring․ Next, add the specified amount of water, which is crucial for proper cooking; refer to the cup’s instructions for the exact measurement․

Once the water is added, stir the macaroni and cheese sauce mix thoroughly to ensure even distribution and prevent clumping․ This step is vital for a creamy, consistent texture․ After stirring, replace the lid loosely, allowing steam to escape during microwaving․

Finally, microwave the cup according to the time indicated on the packaging – generally 3․5 to 4 minutes on high power․ Stir again after microwaving and let it stand for a minute before enjoying!

Water Measurement for Cups

Accurate water measurement is paramount when preparing Kraft Mac & Cheese Dinner Cups in the microwave․ Unlike the boxed variety, the cups require a precise water-to-macaroni ratio for optimal texture and creaminess․ Generally, you’ll need approximately 2/3 cup of water per single-serving cup․

This measurement is not an approximation; deviating from it can result in either a watery or overly dry final product․ Always check the specific instructions printed on the cup itself, as slight variations may exist between different product lines or sizes․

Using a liquid measuring cup is highly recommended to ensure accuracy, rather than estimating with household spoons or other utensils․ Adding the correct amount of water guarantees a perfectly cooked, delightfully cheesy meal every time, maximizing your enjoyment of this convenient comfort food․

Microwave Time for Cups (3․5-4 Minutes)

When utilizing the microwave for Kraft Mac & Cheese Dinner Cups, a cooking time of 3․5 to 4 minutes is generally recommended․ This timeframe assumes a standard microwave operating at approximately 1000 watts․ However, microwave power levels vary, so adjustments may be necessary․

Begin with 3․5 minutes, and if the macaroni isn’t fully tender and the cheese sauce isn’t completely melted and creamy, continue microwaving in 30-second intervals․ Avoid overcooking, as this can lead to a dry and rubbery texture․

Always allow the cup to stand for a minute after microwaving before stirring․ This allows the heat to distribute evenly, ensuring a consistently delicious result․ Careful monitoring and slight adjustments to the time will yield the perfect, comforting cup of mac & cheese․

Addressing Common Microwave Mac & Cheese Issues

Microwaving Kraft Mac & Cheese can sometimes present challenges, but these are easily overcome with a few simple strategies․ A frequent concern is condensation build-up, leading to a watery consistency․ Utilizing a loose-fitting lid or microwave-safe vented cover allows steam to escape while preventing excessive drying․

Another common issue is the mac & cheese drying out during cooking․ This can be mitigated by ensuring sufficient water is added initially and stirring frequently – every one to two minutes – to redistribute moisture․

For those preparing larger quantities, consider using a deeper bowl to prevent boil-overs and ensure even heating․ Addressing these issues proactively guarantees a creamy, satisfying microwave mac & cheese experience․

Condensation Build-Up & Prevention

Condensation is a typical occurrence when microwaving Kraft Mac & Cheese, stemming from the rapid heating of water․ This moisture often collects on the microwave walls and can result in a somewhat watery final product․ However, this is easily managed with preventative measures․

The most effective technique is to employ a loose cover․ A microwave-safe lid, plastic wrap with vents, or even a paper towel draped loosely over the bowl allows steam to escape, preventing excessive condensation․ This allows the water to drip back into the mac & cheese, maintaining optimal moisture levels․

Avoiding a tightly sealed container is crucial, as it traps steam and exacerbates the problem․ By allowing for ventilation, you’ll enjoy a creamier, less watery dish․

Preventing Mac & Cheese from Drying Out

A common concern when microwaving Kraft Mac & Cheese is the potential for it to become dry, especially during longer cooking times․ This happens when too much moisture evaporates before the pasta is fully cooked and the cheese sauce is properly emulsified․

Consistent stirring is key to preventing dryness․ The recommended frequency is every three minutes during the 8-10 minute cooking process for the boxed variety․ Stirring redistributes the heat and moisture, ensuring even cooking and preventing the pasta from sticking and drying out․

Adding the correct amount of water is also vital․ Insufficient water will lead to a dry result․ Utilizing a loose cover, as previously mentioned, also helps retain moisture during the microwaving process, contributing to a creamier texture․

Microwave Power Level Considerations

While most Kraft Mac & Cheese microwave instructions assume a high power level (100%), understanding your microwave’s wattage is crucial for optimal results․ Microwaves vary significantly in power, impacting cooking times and potentially leading to unevenly heated or dried-out mac and cheese․

If your microwave has adjustable power levels, starting with high is generally recommended․ However, if you notice the mac and cheese is cooking too quickly or drying out, reducing the power level to 70-80% and extending the cooking time slightly can help․

Lower wattage microwaves (600-800 watts) may require longer cooking times, even on high․ It’s always best to monitor the mac and cheese closely and adjust the cooking time as needed to ensure the pasta is tender and the cheese sauce is smooth and creamy․

Container Selection for Microwave Mac & Cheese

Choosing the right container is vital for successful microwave mac and cheese preparation․ Avoid metal containers, as they can cause sparks and damage your microwave․ Opt for microwave-safe materials like glass or plastic specifically labeled for microwave use․

Recommended bowl sizes generally range from 1 to 2 quarts, providing ample space for the macaroni and water to expand during cooking․ A larger bowl also minimizes the risk of boil-overs․ Ensure the container is deep enough to prevent splattering․

Look for containers with vented lids or use a microwave-safe plate loosely covering the bowl to allow steam to escape, preventing condensation build-up and ensuring even cooking․ Always check the container’s temperature before handling, as it may become hot․

Recommended Bowl Sizes (1-2 Quart)

When microwaving Kraft Mac & Cheese, selecting the appropriate bowl size is crucial for optimal results․ A 1- or 2-quart capacity bowl provides sufficient room for the macaroni to cook evenly and prevents potential boil-overs during the heating process․

Smaller bowls may not accommodate the expansion of the pasta and water, leading to messy splatters and unevenly cooked macaroni․ Conversely, excessively large bowls can cause the water to evaporate too quickly, resulting in dry, clumpy cheese sauce․

The ideal bowl depth should also be considered, ensuring enough space for stirring without spillage․ Glass or microwave-safe plastic bowls within this size range are highly recommended for consistent and convenient mac & cheese preparation․

Microwave-Safe Materials

Ensuring you use microwave-safe materials is paramount when preparing Kraft Mac & Cheese․ Avoid metal containers, as they can cause sparks and damage your microwave․ Similarly, certain plastics are not designed for microwave heating and may melt or leach chemicals into your food․

Glass bowls are an excellent choice, offering durability and even heating․ If using plastic, verify it’s labeled “microwave-safe” – look for the microwave-safe symbol, typically resembling waves․ Some plastics can warp or become brittle with repeated microwave use․

Ceramic bowls are also suitable, provided they don’t have metallic trim․ Always double-check the manufacturer’s instructions for any dishware before microwaving․ Prioritizing safe materials guarantees a worry-free and delicious mac & cheese experience․

Tips for Creamier Microwave Mac & Cheese

Achieving a luxuriously creamy texture in your microwaved Kraft Mac & Cheese is easily attainable with a few simple techniques․ Don’t skimp on the water – proper hydration is key to a smooth sauce․ Consider adding a small pat of butter (about a tablespoon) after microwaving and stirring thoroughly; this enriches the sauce and adds gloss․

A splash of milk or cream (1-2 tablespoons) can also elevate the creaminess, but be mindful not to overdo it, as it may thin the sauce․ Stirring frequently during the microwaving process helps emulsify the cheese sauce, preventing it from separating and becoming grainy․

Finally, letting the mac & cheese stand for a minute after microwaving allows the sauce to thicken slightly, resulting in a more satisfyingly creamy consistency․

Safety Precautions When Microwaving Mac & Cheese

Microwaving food, including Kraft Mac & Cheese, requires adherence to safety guidelines․ Always use a microwave-safe bowl; avoid metal or containers with metallic trim, as these can cause sparks and damage the microwave․ Be extremely cautious when removing the bowl, as it will be hot!

Hot steam can build up, so lift the bowl away from you and use oven mitts or pot holders․ Ensure the macaroni and cheese is thoroughly heated to prevent potential bacterial growth, but avoid overheating, which can cause burns․

Stirring the mac & cheese distributes heat evenly and helps identify any cold spots․ Never microwave sealed containers, as they may explode․ Supervise children closely when they are using the microwave․

Alternative Microwave Mac & Cheese Brands & Instructions

Beyond Kraft, several brands offer convenient microwave mac & cheese options․ Velveeta Shells & Cheese cups typically require adding ½ cup of water and microwaving for 3-3․5 minutes, stirring halfway through․ Annie’s Homegrown Mac & Cheese cups often need ¾ cup of water and 3․5-4 minutes of microwaving․

Amy’s Kitchen also provides microwaveable mac & cheese, generally needing 2-3 minutes after adding water․ Always consult the specific package instructions, as water amounts and cooking times vary significantly between brands․

These alternatives often prioritize different ingredients – organic, gluten-free, or different cheese blends – offering choices beyond the classic Kraft flavor․ Remember to prioritize microwave-safe containers regardless of the brand․

Troubleshooting: Mac & Cheese Not Cooking Properly

If your mac & cheese isn’t cooking evenly, ensure you’re using a microwave-safe bowl and the correct water amount․ Insufficient water leads to dryness, while excessive water results in a watery consistency․ Stirring every 3 minutes, as recommended, is crucial for even heating․

If the macaroni remains firm, increase microwaving time in 30-second intervals, stirring after each․ Conversely, if it’s too watery, continue microwaving uncovered for shorter bursts to evaporate excess liquid․

Microwave wattage varies; lower wattage microwaves require longer cooking times․ Check your microwave’s power level and adjust accordingly․ If issues persist, try a different bowl or consider alternative cooking methods․

epic instruction llc

Epic Instruction LLC: A Comprehensive Overview (as of 02/07/2026)

Epic Instruction LLC, as of today’s date, faces significant scrutiny with a 2.7/5 rating based on employee reviews, indicating generally subpar experiences.

The company, directed by Jaehee, advertises extensively, yet appears to operate with a deceptive claim of novelty, despite years of activity.

Company Background and History

Epic Instruction LLC’s background is somewhat obscured by its marketing, which consistently presents the company as relatively new despite evidence suggesting years of operation as of February 7th, 2026. The available information points to Jaehee as the owner and director, a pivotal figure in the company’s development and overall direction.

While a precise founding date remains unclear, online reviews indicate the company has been active for a considerable period. The core of its history appears intertwined with curriculum development, initially attracting individuals with promises of growth, which, according to former employees, often proved to be misleading. This pattern of recruitment and subsequent dissatisfaction forms a recurring theme in the available employee feedback, suggesting a potentially problematic historical trend within the organization’s operational practices.

Further investigation is needed to establish a definitive timeline.

Founding and Core Values

Determining the explicit founding principles and stated core values of Epic Instruction LLC proves challenging, as publicly available information is limited. However, analyzing employee reviews reveals a significant disconnect between perceived promises and actual operational realities. The company seemingly attracts individuals based on potential for professional development and contribution to curriculum creation.

Yet, numerous accounts describe an exploitative environment and a lack of psychological safety, directly contradicting any implied values of employee well-being or ethical practice. The emphasis on curriculum development, while initially presented as a growth opportunity, appears to be utilized as a means of leveraging labor, particularly within the “PT role,” without commensurate recognition or advancement. This suggests a core value prioritizing cost-effectiveness over employee satisfaction and genuine professional growth.

Services Offered by Epic Instruction LLC

Epic Instruction LLC primarily focuses on educational services, delivering content through an “award-winning platform” featuring a “huge variety” of learning videos and materials. While the specific subject matter isn’t detailed in the available information, the company’s operations heavily rely on continuous curriculum development and updates. This suggests a dynamic content library, potentially catering to multiple educational levels or specialized subjects.

However, a significant portion of the workforce is dedicated to the creation and revision of this curriculum, often within a “PT role” that appears to be central to the service delivery. The company’s advertising emphasizes innovation and quality, yet employee reviews indicate a potential disparity between marketing claims and the actual resources allocated to content creation and employee support. The core service, therefore, appears to be content provision fueled by potentially under-resourced curriculum development.

Curriculum Development Focus

Epic Instruction LLC’s operations are heavily centered around curriculum development, with a substantial portion of staff, particularly those in “PT roles,” dedicated to creating and updating learning materials. Reviews suggest this isn’t a supplementary task, but rather the primary function of these positions – a “bait and switch” as one employee described it.

This focus implies a commitment to a constantly evolving educational product, potentially adapting to new standards or learner needs. However, the same reviews raise concerns about the sustainability of this model, hinting at potential exploitation and a lack of resources allocated to adequately support curriculum developers. The emphasis on continuous updates, coupled with negative feedback, suggests a high-pressure environment focused on quantity over quality, potentially impacting the overall effectiveness of the learning materials.

Employee Reviews and Workplace Culture

Epic Instruction LLC demonstrates a concerning workplace culture, evidenced by predominantly negative employee reviews, highlighting issues of exploitation and psychological unsafety within the company.

Overall Employee Sentiment (Based on Available Reviews)

Epic Instruction LLC currently exhibits a largely negative employee sentiment, substantiated by available online reviews. The overall rating stands at a concerning 2.7 out of 5 stars, derived from numerous employee accounts. This suggests a widespread dissatisfaction amongst those employed by the organization.

A recurring theme within these reviews points towards a disconnect between initial expectations and the actual work experience. Many individuals express having “high hopes of growth” that ultimately devolved into a “bait and switch” scenario. This indicates potential misrepresentation during the recruitment process or a failure to deliver on promised opportunities. The prevailing mood appears to be one of disillusionment and frustration, painting a picture of a challenging work environment.

Reported Issues: Exploitation and Psychological Safety

Epic Instruction LLC faces serious allegations concerning workplace exploitation and a lack of psychological safety, as detailed in employee reviews. A Project Manager explicitly described the company as “exploitative and psychologically unsafe,” a damning indictment of the internal culture. This suggests a potentially hostile environment where employees feel vulnerable and unsupported.

The core of the issue appears to stem from the structure of the Part-Time (PT) role, which many describe as primarily focused on curriculum development and updates, without commensurate compensation or career progression. This perceived imbalance contributes to feelings of being undervalued and taken advantage of. The lack of a safe environment hinders open communication and likely exacerbates these concerns, creating a cycle of negativity and disengagement.

Concerns Regarding PT Role and Curriculum Development

A significant portion of negative feedback surrounding Epic Instruction LLC centers on the Part-Time (PT) position and its primary function: curriculum development. Employees report a “bait and switch” scenario, where the role is advertised with promises of growth, but in reality, largely consists of updating and creating educational materials.

This discrepancy leads to dissatisfaction, as PT employees feel their skills are underutilized and their career aspirations are stifled. The focus on curriculum work, without opportunities for advancement or increased responsibility, fosters a sense of being exploited. This situation is compounded by the perception that the company relies heavily on PT staff for core functions, without providing equitable benefits or recognition. The lack of clarity regarding role expectations further exacerbates these concerns.

Growth Opportunities (or Lack Thereof)

Employee reviews consistently highlight a severe lack of growth opportunities within Epic Instruction LLC. The advertised potential for career advancement appears largely illusory, contributing significantly to negative employee sentiment. Individuals express feeling trapped in their roles, particularly those in Part-Time positions focused on curriculum development, with limited pathways for promotion or skill diversification.

This stagnation is a recurring theme, suggesting a systemic issue within the company’s structure. The absence of clear career ladders and professional development programs further reinforces the perception that Epic Instruction LLC does not invest in its employees’ long-term growth. Consequently, many individuals report seeking opportunities elsewhere, leading to potential talent loss and decreased morale.

Detailed Analysis of Employee Feedback

Epic Instruction LLC receives predominantly negative feedback, centering on exploitative practices and psychological safety concerns, particularly from Project Managers and those in Part-Time roles.

Project Manager Reviews: Specific Concerns

Project Manager reviews for Epic Instruction LLC consistently highlight a deeply concerning workplace environment. A core issue revolves around a perceived lack of psychological safety, with one review explicitly labeling the company as “exploitative and psychologically unsafe.”

These concerns aren’t isolated; the pattern suggests systemic problems within the management structure. Project Managers appear burdened with responsibilities exceeding their roles, potentially contributing to stress and burnout. The advertised company image clashes sharply with the lived experiences of these employees.

Furthermore, there’s a sense of disillusionment, with individuals expressing that Epic Instruction LLC had the potential to be a positive work environment, but ultimately failed to deliver on that promise. This suggests a disconnect between the company’s aspirations and its operational reality;

Common Themes in Negative Reviews

Epic Instruction LLC’s negative reviews coalesce around several recurring themes. A prominent complaint centers on the “bait and switch” tactic regarding career progression, where promised growth opportunities fail to materialize. Employees report feeling misled about the potential for advancement within the company.

The Part-Time (PT) role is frequently criticized, described as primarily focused on curriculum development and updates, rather than offering a pathway to full-time employment or skill diversification. This suggests a reliance on underpaid labor for essential tasks.

Beyond career concerns, a pervasive sense of exploitation and a lack of psychological safety dominate the feedback. The overall sentiment points to a toxic work environment, impacting employee well-being and hindering professional development.

Positive Aspects (If Any) Mentioned by Employees

Despite the overwhelmingly negative sentiment surrounding Epic Instruction LLC, identifying concrete positive aspects from available reviews proves challenging. The provided data primarily highlights concerns and criticisms, with limited mention of beneficial experiences.

One potential, albeit indirect, positive lies in the company’s platform itself. Epic advertises an “award-winning platform” featuring a “huge variety” of learning videos and resources. While employee reviews don’t directly praise the platform’s functionality, its existence suggests investment in learning technology.

However, it’s crucial to note this is a feature of the product, not necessarily the workplace. The single review mentioning Jaehee, while overall positive, focuses on personal interaction and doesn’t address broader company culture or employee satisfaction. Truly positive employee feedback remains scarce.

Review Date Distribution and Trends (2024-2026)

Analyzing the available review dates reveals a concerning trend for Epic Instruction LLC. A significant number of negative reviews surfaced in 2024, with a notable spike in May of that year. This suggests potential issues were present, and perhaps escalating, early in the period under review.

Review activity continued into 2025, maintaining a consistently low overall rating. December 2nd, 2025, shows a specific rating distribution snapshot, though detailed numbers are unavailable. The most recent data point, a review from December 18th, 2025, reinforces the negative sentiment.

As of February 7th, 2026, there’s a noticeable gap in recent reviews. This could indicate a decline in employee turnover, or potentially, a chilling effect discouraging further feedback. Further investigation is needed to determine the cause.

Epic Instruction LLC’s Online Presence

Epic Instruction LLC heavily utilizes online advertising, promoting a platform featuring learning videos and a “huge variety” of content, despite questionable practices.

Website and Marketing Materials Analysis

Epic Instruction LLC’s website and marketing materials present a polished image, emphasizing innovative learning solutions and a commitment to educational excellence. However, a closer examination reveals a potential disconnect between the advertised brand and reported employee experiences. The company consistently promotes itself as a relatively new entity, despite evidence suggesting years of operation – a tactic that raises concerns about transparency.

Marketing copy focuses heavily on the platform’s features, particularly its “award-winning” status and extensive library of learning videos. The messaging aims to attract both students and potential employees with promises of growth and a dynamic learning environment. Yet, employee reviews paint a different picture, suggesting a discrepancy between the marketing narrative and the reality of the workplace. This discrepancy warrants further investigation into the authenticity and accuracy of the company’s public-facing communications.

Advertising Strategies and Claims

Epic Instruction LLC employs aggressive advertising strategies, consistently portraying itself as a fresh and innovative educational provider. A key claim centers around an “award-winning platform” offering a “huge variety” of learning videos and resources. However, the longevity of the company is deliberately obscured, with advertising implying a recent launch despite evidence of years of operation. This tactic suggests a calculated effort to attract customers and employees under false pretenses.

The marketing materials heavily emphasize growth opportunities, a claim directly contradicted by numerous employee reviews detailing a “bait and switch” scenario. The company appears to leverage aspirational messaging to attract talent, while simultaneously failing to deliver on promised career advancement. This disconnect between advertising claims and employee reality raises ethical concerns regarding the company’s marketing practices and overall transparency.

Platform Features: Learning Videos and More

Epic Instruction LLC’s core offering revolves around its online learning platform, prominently featuring a diverse library of learning videos. While advertised as “award-winning” and boasting a “huge variety,” specific details regarding the quality and pedagogical approach of these videos remain largely undisclosed in publicly available information. The platform’s functionality beyond video content is also unclear, with marketing materials offering limited insight into interactive elements or personalized learning pathways.

Employee reviews indirectly suggest a significant portion of employee effort is dedicated to developing and updating this curriculum, specifically within the Part-Time (PT) role. This implies a constant cycle of content creation, potentially driven by the need to maintain the illusion of a continually expanding and innovative platform. The focus on video production, coupled with reported issues regarding curriculum development, raises questions about the platform’s overall effectiveness and sustainability.

Financial and Operational Aspects

Epic Instruction LLC’s structure and revenue model are not publicly detailed, but employee feedback suggests potential exploitation, hinting at cost-cutting measures impacting operations.

Company Size and Structure

Determining the precise company size of Epic Instruction LLC proves challenging due to limited publicly available information. However, the presence of both Project Manager and Part-Time (PT) roles, as highlighted in employee reviews, suggests a tiered structure. The PT positions primarily focus on curriculum development and updates, potentially indicating a reliance on contract or temporary labor.

The company appears to be centrally directed by Jaehee, who functions as the owner and director, implying a relatively flat organizational hierarchy. This centralized leadership could contribute to the reported issues regarding psychological safety and exploitative practices, as decisions likely flow directly from the top. The lack of transparency regarding overall staffing numbers further complicates understanding the company’s operational scale and internal divisions.

Revenue Model and Business Strategy

Epic Instruction LLC’s revenue model centers around its “award-winning platform” offering learning videos and educational materials. The company heavily invests in advertising, promoting its services as innovative and comprehensive. However, the business strategy appears somewhat paradoxical; while aggressively marketing itself, it simultaneously maintains a facade of being a “brand new” entity, despite years of operation.

A key component of their strategy involves utilizing Part-Time employees for continuous curriculum development, potentially minimizing labor costs. This reliance on PT staff, coupled with reported exploitative practices, suggests a cost-optimization approach. The focus on digital content delivery indicates a scalable model, but the negative employee feedback raises concerns about long-term sustainability and brand reputation, potentially hindering revenue growth.

Leadership and Management Team

Epic Instruction LLC is currently led by Jaehee, who holds the position of owner and director. Available information suggests Jaehee is a pivotal figure within the organization, heavily involved in its overall direction. However, employee reviews paint a concerning picture regarding the leadership style and management practices.

Specifically, reviews characterize the company as “exploitative and psychologically unsafe,” directly implicating leadership in fostering a negative work environment. The reported issues suggest a potential disconnect between the advertised company values and the actual experiences of employees under Jaehee’s direction. Further investigation is needed to understand the broader management team structure and whether these concerns are isolated or systemic within the organization’s leadership hierarchy.

Comparison with Competitors

Epic Instruction LLC currently lags behind industry standards, evidenced by its low employee ratings. Competitors generally offer more positive workplace cultures and growth opportunities.

Industry Benchmarks and Standards

Epic Instruction LLC operates within an educational technology sector defined by benchmarks prioritizing employee well-being and transparent operational practices. Generally, companies achieving high ratings – above 4.0 out of 5 – demonstrate robust psychological safety, clear career progression paths, and fair compensation.

Standard curriculum development roles typically involve collaborative environments and opportunities for professional development, contrasting with reports of exploitation and limited growth at Epic. Furthermore, ethical advertising is paramount; misleading claims regarding company age or innovation are frowned upon.

Successful competitors prioritize positive workplace cultures, fostering innovation and attracting top talent. Epic’s current standing suggests a significant deviation from these established norms, potentially hindering its long-term sustainability and competitive edge.

Epic Instruction LLC’s Competitive Advantages (If Any)

Identifying distinct competitive advantages for Epic Instruction LLC proves challenging given the overwhelmingly negative employee feedback and lack of publicly available information detailing unique offerings. The company’s website mentions an “award-winning platform” and a “huge variety” of learning videos, but specifics remain vague and unsubstantiated.

While a broad range of learning materials could be a benefit, this is a common feature among competitors. Without demonstrable quality or innovative pedagogical approaches, this advantage is minimal. The persistent advertising, despite reported internal issues, suggests a focus on marketing, but doesn’t translate to a sustainable competitive edge.

Currently, Epic lacks clear differentiators and appears to rely on potentially misleading marketing tactics rather than genuine innovation or employee satisfaction to attract and retain customers.

Areas for Improvement Compared to Competitors

Epic Instruction LLC faces substantial areas needing improvement to align with industry standards. Foremost is addressing the reported “exploitative” and “psychologically unsafe” work environment, a stark contrast to competitors prioritizing employee well-being. The “bait and switch” tactic regarding the PT role and curriculum development needs immediate correction.

Transparency is crucial; Epic should substantiate claims about its “award-winning platform” and provide concrete details about its learning materials. Competitors typically offer clear curriculum information and demonstrate pedagogical expertise. Improving leadership and fostering genuine growth opportunities, currently lacking, are vital.

Ultimately, Epic must shift from aggressive marketing to building a positive reputation based on quality, ethical practices, and employee satisfaction to compete effectively.

Future Outlook and Potential Changes

Epic Instruction LLC’s future hinges on addressing employee concerns and its current reputation; substantial changes are needed to foster growth and regain trust.

Potential for Growth and Expansion

Epic Instruction LLC’s potential for growth appears limited without significant internal reform. While the company boasts an “award-winning platform” featuring learning videos and diverse content, its exploitative practices and psychologically unsafe environment, as reported by employees, severely hinder sustainable expansion.

Attracting and retaining qualified personnel is crucial for any educational company, and Epic’s current trajectory suggests a struggle in this area. The bait-and-switch tactics regarding the PT role – primarily curriculum development without commensurate compensation or opportunity – create a revolving door of dissatisfied employees.

Expansion into new markets or the development of new curriculum offerings will be challenging without a demonstrable commitment to improving workplace culture and addressing the concerns raised in numerous reviews. A focus on ethical practices and employee well-being is paramount for long-term success.

Addressing Employee Concerns for Future Success

Epic Instruction LLC must prioritize addressing the deeply rooted issues of exploitation and psychological safety to secure its future. The consistent negative feedback, particularly regarding the Project Manager role and the deceptive nature of the PT position, demands immediate attention.

Transparency regarding career progression and fair compensation are essential. Simply advertising a “huge variety” of learning materials won’t suffice if the individuals creating that content feel undervalued and insecure. A genuine commitment to employee well-being, beyond superficial marketing claims, is vital.

Implementing clear pathways for growth, fostering a supportive work environment, and actively soliciting and responding to employee feedback are crucial steps. Ignoring these concerns will perpetuate the cycle of dissatisfaction and ultimately impede any potential for sustainable growth or positive reputation change.

Impact of Current Reputation on Future Prospects

Epic Instruction LLC’s current reputation, marred by consistently negative employee reviews – averaging 2.7/5 – poses a significant threat to its future prospects. The allegations of exploitative practices and a psychologically unsafe work environment create a substantial barrier to attracting and retaining qualified personnel.

Potential clients and partners may hesitate to collaborate with a company perceived as mistreating its employees, impacting revenue and growth opportunities. The deceptive advertising, presenting itself as a “brand new” entity despite years of operation, further erodes trust.

Without substantial and demonstrable improvements in workplace culture and ethical business practices, Epic Instruction LLC risks continued decline and potential damage to its brand image, hindering long-term sustainability and market competitiveness.

knex instructions for roller coaster

Knex roller coasters offer a fantastic blend of creativity and engineering! Explore detailed knex instructions online at knex.com/instructions, alongside resources like Instructables.

These kits, such as the Amazin’ 8 (12476) and Neon Lightning, provide hours of building fun and thrilling rides for all ages.

What are Knex Roller Coasters?

Knex roller coasters are construction toys allowing builders to design and create their own functioning roller coaster systems. Utilizing interconnected plastic rods and connectors, these sets enable the construction of complex tracks, support structures, and thrilling rides.

Detailed knex instructions are readily available, often found on the official Knex website (knex.com/instructions) and platforms like Instructables. These guides range from simple beginner models to advanced designs like the Steel Python, offering step-by-step visual aids.

Models such as the Amazin’ 8 (12476) and Neon Lightning demonstrate the potential for intricate builds, sometimes requiring components from multiple sets. The core principle involves harnessing gravity and momentum to propel a car along the constructed track.

Why Build a Knex Roller Coaster?

Building a Knex roller coaster offers a uniquely rewarding experience, blending creative design with fundamental physics principles. Following knex instructions – easily accessible via knex.com/instructions and sites like Instructables – fosters problem-solving skills and spatial reasoning.

The process encourages experimentation with track layouts, lift hill mechanisms, and support structures. Successfully completing a build, like the Neon Lightning or Steel Python, provides a tangible sense of accomplishment.

Beyond the fun of construction, a working Knex coaster demonstrates concepts like momentum, gravity, and energy transfer. It’s an engaging way to learn STEM principles, making it both entertaining and educational for builders of all ages.

Essential Knex Parts for Roller Coaster Construction

Knex roller coasters rely on diverse parts! Utilize instructions to effectively combine connectors, rods, and track pieces for stable, exciting builds.

Support structures are also vital.

Connectors and Rods

Knex connectors and rods are the foundational building blocks for any successful roller coaster project. Instructions often emphasize the importance of selecting the correct connector type – from standard two-way connectors to more complex multi-directional joints – to achieve desired angles and structural integrity.

Rods come in various lengths, and understanding how to combine them effectively, as shown in many online guides like those found on Instructables, is crucial. Proper rod placement dictates the coaster’s stability and the smoothness of the track. Referencing Knex manuals (available at knex.com/instructions) will demonstrate optimal connection techniques for robust construction.

Mastering these elements is key to a thrilling ride!

Track Pieces

Knex track pieces are the heart of your roller coaster, dictating the ride’s path and excitement. Instructions frequently highlight the need for precise alignment of these pieces to minimize friction and prevent derailments. Different track types – straight, curved, and specialized pieces for loops – require specific connection methods.

Many Knex models, like the Amazin’ 8, utilize unique track configurations. Online resources, including knex.com/instructions and Instructables tutorials, provide visual guidance on assembling these complex sections. Careful attention to track support is vital; flimsy track leads to instability.

Smooth, well-connected track ensures a thrilling, uninterrupted ride!

Support Structures

Knex support structures are crucial for maintaining roller coaster track integrity and preventing collapses. Instructions emphasize building robust foundations using a combination of rods and connectors, creating a stable framework. Triangles are key – they distribute weight effectively and enhance structural rigidity.

Models like the Steel Python Knex Roller Coaster require carefully planned supports, especially during curves and inclines. Resources like Instructables demonstrate various support techniques.

Insufficient support leads to track instability and potential derailments. Always double-check connections and reinforce weak points. A solid support system guarantees a safe and exhilarating ride!

Popular Knex Roller Coaster Models & Instructions

Knex offers diverse roller coaster models! Find instructions for the Amazin’ 8 (12476), Neon Lightning, and Steel Python on knex.com/instructions and Instructables.

KNEX Amazin’ 8 Roller Coaster (Model 12476)

The KNEX Amazin’ 8 Roller Coaster (Model 12476) is a classic, offering a fantastic introduction to coaster building. Detailed instructions are readily available on the official Knex website – knex.com/instructions – spanning 32 pages.

This model features an 80-foot track and a working chain lift, providing a thrilling ride. Builders should carefully follow the manual’s step-by-step guidance to ensure structural integrity and smooth operation. Pay close attention to connector placement and support structure alignment.

Online resources, including community forums, can offer additional tips and troubleshooting advice for this popular Knex set. Successfully completing this build fosters problem-solving skills and engineering understanding.

KNEX Neon Lightning Coaster

The KNEX Neon Lightning Coaster presents a more advanced building experience, requiring the Vertical Vengeance and Loopin’ Lightning coaster sets for full functionality. Instructions and a helpful video tutorial are available on Instructables, detailing its 11 construction steps.

This model utilizes a unique tire-drive system, eliminating the need for a traditional motor. However, builders may encounter minor glitches, addressed in a bonus step for resolving car stalls. Careful attention to track alignment is crucial for smooth operation.

The Neon Lightning offers a visually striking build with its vibrant colors and dynamic track layout, providing a rewarding challenge for experienced Knex enthusiasts.

Steel Python Knex Roller Coaster

The Steel Python Knex Roller Coaster, detailed in a 13-step Instructables guide, is a recreation of an earlier design with minor improvements. As the original lacked specific photographic documentation, this version represents a refined interpretation.

Builders should anticipate some inherent design flaws, potentially requiring adjustments and fine-tuning for optimal performance. The instructions emphasize the importance of careful assembly and track alignment to minimize issues;

Despite these potential challenges, the Steel Python offers a satisfying build, showcasing a complex track layout and providing a thrilling ride once properly calibrated.

Building Techniques for Smooth Roller Coaster Operation

Knex instructions highlight the importance of stable foundations, effective lift hill designs, and smooth curves for optimal performance and a thrilling ride experience.

Creating Stable Foundations

Knex instructions consistently emphasize a robust base as crucial for successful roller coaster builds. Begin by constructing a wide, rectangular platform using connectors and rods, ensuring all connections are firm and secure.

Reinforce corners and stress points with additional pieces to prevent wobbling or collapse during operation. Distribute weight evenly across the foundation to maintain balance.

Consider incorporating cross-bracing for added stability, especially for taller or more complex designs. A solid foundation minimizes track instability and ensures a smoother, more reliable ride, as detailed in various Instructables tutorials.

Designing Effective Lift Hills

Knex instructions highlight the importance of gradual inclines for lift hills. Avoid steep ascents, as they require excessive force and can cause car stalls. Utilize a consistent angle throughout the lift, ensuring smooth and reliable operation.

Employ a chain lift mechanism, constructed with connectors and flexible rods, to pull the coaster car upwards. Securely anchor the chain to both the car and the top of the lift hill.

Test the lift hill thoroughly to verify sufficient momentum is gained for a complete circuit, addressing potential stalls as noted in some Instructables guides.

Constructing Smooth Curves and Turns

Knex instructions emphasize the use of gradual curves for seamless transitions. Avoid sharp angles, which can derail the coaster car. Employ a generous radius when building turns, utilizing flexible connectors to maintain a consistent path.

Support structures are crucial for stabilizing curves, preventing track deformation. Reinforce turns with additional rods and connectors, ensuring structural integrity.

Carefully align track pieces to minimize friction and maintain momentum. Refer to Instructables tutorials for advanced techniques in creating fluid, engaging turns within your Knex coaster design.

Troubleshooting Common Knex Roller Coaster Problems

Knex instructions often address stalls and derailments. Check for track instability, insufficient momentum, and ensure proper alignment of pieces for smooth operation!

Car Stalls and Derailments

Car stalls are a frequent issue when building Knex roller coasters, often addressed within detailed Knex instructions and online tutorials like those found on Instructables. A common cause is insufficient momentum, requiring adjustments to the lift hill or initial drop height.

Derailments typically stem from track instability or misaligned pieces. Carefully review the instruction manuals to ensure correct connections and a smooth, continuous path. The Neon Lightning Coaster instructions specifically mention fixing car stalls in a bonus step. Ensure all connectors are firmly secured, and the track is level to prevent unwanted interruptions during the ride. Minor adjustments can make a significant difference!

Track Instability

Track instability is a common challenge in Knex roller coaster construction, often requiring careful attention to foundational support as detailed in Knex instructions. Ensuring a stable base is crucial; wobbly sections can lead to derailments and disrupt the ride’s flow.

Referencing guides on sites like Instructables can provide valuable insights into reinforcing structures. Pay close attention to connector placement and rod alignment. The Steel Python Coaster instructions emphasize the need for adjustments, as designs may have inherent flaws. Regularly check for loose connections and reinforce weak points to maintain a smooth and secure track for optimal performance.

Insufficient Momentum

Insufficient momentum frequently causes Knex roller coaster cars to stall, a problem often addressed within detailed Knex instructions and online tutorials. A successful launch relies on a properly designed lift hill and a smooth, uninterrupted track. The Neon Lightning Coaster instructions highlight potential car stalls and offer bonus steps for correction.

Reviewing builds on Instructables can reveal techniques for optimizing track angles and minimizing friction. Ensure the initial drop is steep enough to generate sufficient speed. Regularly inspect the track for obstructions and smooth out any curves to maintain momentum throughout the ride’s duration.

Advanced Knex Roller Coaster Concepts

Knex instructions enable complex builds! Explore looping structures, multiple car systems, and chain lift mechanisms for thrilling designs, pushing creative and engineering boundaries.

Looping Structures

Knex instructions are crucial for successfully building looping structures in your roller coaster designs. Achieving a smooth, continuous loop requires precise angles and robust support. Begin by studying existing Knex models, like the Neon Lightning Coaster, for inspiration on loop construction techniques.

Carefully consider the entry and exit points of the loop, ensuring a gradual transition to maintain momentum. Utilize strong connectors and reinforced track sections to withstand the forces involved. Experiment with different loop radii and heights, referencing online tutorials and Instructables guides for optimal performance. Remember, stability is paramount – a well-supported loop is a thrilling loop!

Multiple Car Systems

Implementing multiple car systems in your Knex roller coaster adds complexity and excitement! Knex instructions don’t always detail this, so careful planning is essential. Ensure sufficient spacing between cars to prevent collisions, and a robust chain lift or tire-drive mechanism (as seen in the Neon Lightning Coaster) to haul them uphill.

Consider the weight distribution and momentum required to maintain a consistent flow. Test thoroughly after each addition, checking for stalls or derailments. Online resources, like Instructables, often showcase advanced techniques for synchronizing car movements. A well-executed multiple car system dramatically enhances the ride experience!

Chain Lift Mechanisms

Chain lift mechanisms are crucial for elevating Knex roller coaster cars to the initial drop. While basic Knex instructions cover simple lifts, advanced designs require ingenuity. Utilize flexible rods and connectors to create a continuous chain, ensuring smooth engagement with the car’s undercarriage.

Powering the lift can be achieved manually or with a motor. Consider gear ratios for optimal speed and torque. The Neon Lightning Coaster demonstrates a tire-drive alternative, but chains offer reliable vertical ascent. Regularly inspect the chain for wear and tear, and reinforce the supporting structure for stability.

Finding Knex Instructions and Manuals

Knex instructions are readily available! Visit knex.com/instructions, Instructables, and Knex.Parts for manuals and building guides, including those for model 77078.

Official Knex Website (knex.com/instructions)

Knex.com/instructions serves as the primary hub for official Knex instructions, offering a comprehensive archive of building guides for numerous sets, including various roller coaster models. Users can easily navigate the site to locate manuals for specific model numbers, like the Amazin’ 8 (12476), ensuring a straightforward building experience.

The website provides downloadable PDF manuals, often spanning dozens of pages, detailing each step of the construction process with clear diagrams. This resource is invaluable for those seeking authentic instructions and ensuring accurate assembly of their Knex creations. It’s the first place to check when embarking on a new build!

Accessing these manuals is generally free and requires no registration.

Instructables Tutorials

Instructables is a vibrant online community where builders share their Knex roller coaster creations and detailed, step-by-step instructions. You’ll find user-generated guides for models like the KNEX Neon Lightning Coaster, often including video demonstrations and troubleshooting tips for common issues like car stalls.

These tutorials frequently showcase innovative designs and modifications beyond the official Knex manuals, offering inspiration for advanced builders. The Neon Lightning instructions, for example, detail a tire-drive system. Instructables provides a collaborative learning environment, allowing builders to ask questions and share their experiences.

It’s a fantastic resource for expanding your Knex building skills!

Knex.Parts ー Instruction Manual Downloads

Knex.Parts serves as a valuable archive for Knex instruction manuals, offering a convenient way to download guides for various sets, including roller coasters. Specifically, you can find the instruction manual for the KNEX EDUCATION STEM Explorations Roller Coaster (Model 77078) readily available for download.

This platform simplifies finding replacements for lost manuals or accessing instructions for older, discontinued sets. Knex.Parts provides easy, step-by-step guidance, ensuring a smooth building experience. It’s a dedicated resource for Knex enthusiasts seeking to rebuild or explore different models.

Accessing these manuals is straightforward and free!

Knex Education STEM Explorations Roller Coaster

Knex Model 77078 provides additional builds and instructions, fostering STEM learning through roller coaster design. Download manuals from Knex;Parts!

Additional Builds and Instructions (Model 77078)

Knex Education STEM Explorations Roller Coaster (Model 77078) expands beyond a single build, offering diverse challenges for young engineers; Knex.Parts is a valuable resource, providing downloadable instruction manuals for these additional builds, ensuring easy, step-by-step guidance.

This model is designed to enhance problem-solving skills and understanding of physics principles. The supplementary instructions unlock new coaster designs, encouraging experimentation with track layouts, support structures, and car dynamics. Accessing these manuals simplifies the construction process, allowing builders to focus on the creative aspects of roller coaster engineering.

Successfully completing these builds reinforces STEM concepts in a fun and engaging way, making learning an exciting adventure!

Safety Considerations When Building Knex Roller Coasters

Knex instructions emphasize building with structural integrity. Avoid sharp edges and provide supervision for younger builders to ensure a safe, enjoyable experience!

Structural Integrity

Knex instructions consistently highlight the importance of a robust foundation for your roller coaster. A shaky base leads to derailments and frustrating rebuilds! Prioritize secure connections between knex pieces, especially at joints and support structures.

Carefully follow the diagrams in the manuals, ensuring rods are fully inserted into connectors. Reinforce critical areas with extra pieces where possible. Remember, a well-built framework is the key to a smooth, reliable ride. Don’t underestimate the power of a solid build – it’s the cornerstone of any successful Knex coaster!

Referencing online resources, like Instructables, can offer additional tips for strengthening your design.

Avoiding Sharp Edges

When following Knex instructions for roller coaster construction, always be mindful of potential sharp edges. While Knex pieces are generally safe, improper connections or broken parts can create hazards.

Carefully inspect all components before building, discarding any damaged or cracked pieces. Ensure rods are fully seated within connectors to prevent protruding ends; Smooth out any rough areas with gentle filing if necessary, prioritizing safety during the build process.

Supervision is crucial, especially for younger builders. A safe building environment ensures a fun and injury-free experience while enjoying your completed Knex creation!

Supervision for Younger Builders

When utilizing Knex instructions to build roller coasters, constant supervision is vital for younger children. Knex sets contain small parts that could pose a choking hazard if ingested. Adult guidance ensures safe assembly and prevents accidental swallowing of components.

Assistance with complex steps, as outlined in the Knex manuals, is also beneficial. Adults can help ensure proper connections and structural integrity, reducing the risk of collapse or injury during operation. Encourage collaborative building to foster learning and teamwork.

Prioritize a safe and enjoyable experience by actively participating in the construction process.

Resources for Knex Roller Coaster Inspiration

Knex enthusiasts find inspiration through YouTube tutorials, online communities, and image galleries. Explore knex instructions and builds shared by fellow creators!

Online Communities and Forums

Knex fans actively share designs, troubleshooting tips, and knex instructions within dedicated online communities and forums. These platforms are invaluable resources for builders of all skill levels, offering a space to connect and collaborate.

Users frequently post detailed build guides, modifications to existing models like the Amazin’ 8 or Neon Lightning, and even entirely original roller coaster concepts. Seeking advice on car stalls or track instability? These forums are brimming with experienced builders eager to help.

Discover innovative techniques, access shared knex instructions, and gain inspiration from a passionate community dedicated to the art of Knex roller coaster construction!

YouTube Tutorials

YouTube is a treasure trove of visual knex instructions and building guides for roller coaster enthusiasts! Numerous creators demonstrate step-by-step construction processes, making complex builds like the Steel Python or custom designs accessible to everyone.

These tutorials often showcase innovative techniques for creating smooth curves, stable foundations, and effective lift hills. Many videos address common issues, such as car stalls, offering practical solutions and troubleshooting advice.

Visual learners will especially benefit from these resources, gaining a clear understanding of how to interpret knex instructions and bring their roller coaster visions to life. Search for specific models or building challenges to find relevant content!

Image Galleries

Image galleries serve as excellent supplemental resources when following knex instructions for roller coaster construction. They provide visual references beyond standard manuals, showcasing completed models from various angles and highlighting key building details.

These galleries often feature user-submitted creations, inspiring builders with innovative designs and modifications; Examining images of successful builds can clarify ambiguous steps in written knex instructions and offer alternative approaches to problem-solving.

Browsing these collections can spark creativity and provide a deeper understanding of structural integrity and aesthetic possibilities. They’re a fantastic way to visualize the final product and gain confidence before starting your own build!

neocate jr mixing instructions

Neocate Jr Mixing Instructions: A Comprehensive Guide

Neocate Junior is a hypoallergenic formula, crucial for toddlers with allergies, requiring careful preparation for optimal nutritional benefit.
This guide details essential steps,
from hygiene to storage,
ensuring safe and effective feeding practices.

Understanding Neocate Jr

Neocate Jr is a specialized amino acid-based formula meticulously crafted for children who experience significant food allergies, particularly to cow’s milk protein. Unlike standard formulas, Neocate Jr breaks down proteins into their fundamental building blocks – amino acids – minimizing the risk of allergic reactions. This makes it an invaluable nutritional source for those with severe allergies, eosinophilic esophagitis, or multiple food protein intolerances.

It’s designed to meet the evolving nutritional demands of toddlers and older children, providing a complete and balanced diet. The formula supports healthy growth and development, ensuring children receive essential vitamins and minerals. However, Neocate Jr isn’t simply a substitute for regular formula; it’s a medical food intended for use under the guidance of a healthcare professional. Proper understanding of its purpose and appropriate preparation are paramount to maximizing its benefits and ensuring the child’s well-being. Always consult with a pediatrician or registered dietitian before initiating Neocate Jr.

What is Neocate Jr?

Neocate Jr is a nutritionally complete amino acid-based formula specifically designed for children from one year of age and older who have diagnosed food allergies or require a hypoallergenic diet. It differs significantly from traditional formulas as its protein source isn’t derived from whole proteins, but rather from free amino acids. This unique composition drastically reduces the potential for allergic reactions, making it suitable for those with severe cow’s milk protein allergy (CMPA), multiple food protein intolerances, or eosinophilic esophagitis.

The formula provides a balanced profile of essential nutrients, including vitamins, minerals, and fats, to support healthy growth and development. Neocate Jr is available in powder form, requiring careful mixing with water according to specific instructions to ensure optimal nutritional value and safety. It’s crucial to remember that Neocate Jr is a medical food and should be used under the supervision of a healthcare professional. It’s not intended as a general-purpose formula for children without diagnosed dietary needs.

Medical Supervision & Neocate Jr

Neocate Jr is specifically formulated for children with diagnosed food allergies or gastrointestinal issues and, therefore, must be used under strict medical supervision. A healthcare professional – typically a pediatrician, allergist, or gastroenterologist – should determine if Neocate Jr is the appropriate formula for your child’s specific needs. They will also guide you on the correct dosage and monitor your child’s response to the formula.

Self-treating allergies or intolerances can be dangerous, and improper use of Neocate Jr may not provide adequate nutrition. Your doctor will provide personalized instructions, considering your child’s age, weight, and overall health status. Regular follow-up appointments are essential to assess the effectiveness of the formula and address any potential concerns. Always discuss any changes in your child’s symptoms or feeding habits with their healthcare provider. Remember, Neocate Jr is a medical food, not a replacement for professional medical advice.

Essential Preparation Guidelines

Prior to preparing Neocate Jr, meticulous attention to preparation guidelines is paramount for ensuring your child receives a safe and nutritious feed. Begin by thoroughly washing your hands with soap and warm water for at least 20 seconds. Subsequently, sanitize the entire preparation area – countertops, sinks, and any surfaces that will come into contact with the formula or equipment.

Utilize only clean equipment; bottles, nipples, measuring scoops, and mixing utensils must be meticulously washed and sterilized before each use. Inspect all equipment for any signs of damage or wear. Accurate measurement is crucial, and only the provided Neocate Jr scoop should be used. Always use cool or warm, previously boiled water that has been cooled to the appropriate temperature. Following these guidelines minimizes the risk of contamination and ensures the formula’s integrity.

Hygiene Practices for Safe Preparation

Maintaining impeccable hygiene is non-negotiable when preparing Neocate Jr, safeguarding your child from potential harm. Always begin with thoroughly washed hands – a minimum of 20 seconds with soap and warm water is essential. This removes transient microorganisms that could contaminate the formula. The preparation surface must also be meticulously cleaned and sanitized before commencing.

Sterilization of all equipment – bottles, nipples, measuring scoops, and mixing utensils – is crucial, especially for infants with compromised immune systems. This eliminates harmful bacteria. Ensure all items are completely dry before use to prevent bacterial growth. Avoid sharing bottles or nipples between children. Proper handwashing should also occur after handling used bottles or formula containers. Consistent adherence to these practices minimizes the risk of infection and ensures a safe feeding experience for your child.

Clean Equipment Requirements

Preparing Neocate Jr demands specific equipment standards to guarantee your child’s safety and well-being. Bottles must be thoroughly cleaned after each use, removing all milk residue. Sterilization is highly recommended, particularly for newborns and infants with allergies or weakened immune systems. Nipples require equally diligent cleaning and sterilization, as they harbor bacteria easily.

The measuring scoop provided with the Neocate Jr powder must be washed with warm, soapy water after each use and allowed to air dry completely. Avoid boiling or sterilizing the scoop, as this can damage it. Mixing utensils, such as spoons or whisks, should also be cleaned and sanitized. Dishwashers with a sanitizing cycle are effective, or manual washing with hot, soapy water followed by sterilization is acceptable. Ensure all equipment is completely dry before use to prevent bacterial contamination. Regularly inspect bottles and nipples for cracks or damage, replacing them as needed.

Measuring Neocate Jr Powder Accurately

Precise measurement of Neocate Jr powder is critical for ensuring your child receives the correct nutritional balance. Always use the scoop provided with the formula; do not use kitchen spoons, as they vary in size. Gently level the scoop with a clean, dry knife or the leveling edge on the Neocate Jr container – avoid packing the powder down, as this can lead to overconcentration.

Carefully add the measured powder to the bottle. Double-check the amount against the mixing instructions to prevent errors. Incorrect measurements can disrupt the formula’s delicate balance of nutrients, potentially affecting your child’s growth and development. Consistency is key; maintain accurate measurements with each preparation. If you are unsure about the correct amount, consult with your pediatrician or a registered dietitian. Never estimate or guess the quantity of powder needed.

Water Temperature Recommendations

When preparing Neocate Jr, the water temperature plays a vital role in dissolving the powder effectively and preserving the formula’s nutritional integrity. It is generally recommended to use either warm or cool, previously boiled water. Avoid using hot water, as it can destroy some of the heat-sensitive vitamins and nutrients present in the formula.

If using warm water, ensure it has cooled slightly after boiling – ideally around body temperature. Cool water is also perfectly acceptable and may even be preferred, especially if serving the formula chilled. Always check the water temperature before mixing to avoid burns. Using water that is too cold might not dissolve the powder completely, resulting in a grainy texture. Prioritize safety and nutritional value by adhering to these temperature guidelines for optimal Neocate Jr preparation.

Mixing Ratios: Powder to Water

Achieving the correct Neocate Jr formula concentration is paramount for your child’s health and development. Incorrect ratios can lead to nutritional imbalances, either providing insufficient nutrients or placing undue stress on their digestive system. Always adhere strictly to the manufacturer’s recommended powder-to-water ratio, as detailed on the product packaging.

Generally, the standard mixing ratio involves using a specific scoop measure of Neocate Jr powder for every predetermined volume of water. It’s crucial to use the scoop provided with the formula, as scoop sizes can vary between brands. Deviating from these precise measurements can significantly alter the formula’s osmolality. Carefully measure both the powder and water to ensure accurate preparation. Consistency is key – always use the same ratio for each feeding to maintain optimal nutritional balance.

Step-by-Step Mixing Instructions

Preparation is key! Begin by thoroughly washing and sanitizing all equipment – bottle, nipple, and measuring scoop – with hot, soapy water, followed by a sterilizing rinse. Measure the correct amount of cool or lukewarm water into the sterilized bottle. Never use hot water, as it can destroy vital nutrients within the Neocate Jr formula.

Using the scoop provided, carefully add the precise amount of Neocate Jr powder to the water. Level off each scoop with a clean, dry knife to ensure accurate measurement. Secure the bottle nipple tightly onto the bottle. Gently swirl or shake the bottle until the powder is completely dissolved. Avoid vigorous shaking, which can create bubbles and potentially cause discomfort for your child. Always check the temperature before feeding – it should be lukewarm, similar to body temperature.

Shaking vs. Stirring: Which is Best?

When preparing Neocate Jr, both shaking and stirring can effectively dissolve the powder, but gentle swirling or stirring is generally preferred. Vigorous shaking introduces air bubbles into the formula, potentially leading to gas, bloating, or discomfort for your child. These bubbles can also cause increased spit-up after feeding.

Stirring with a clean spoon or using a gentle swirling motion ensures thorough mixing while minimizing air incorporation. If you choose to shake, do so gently and briefly. Always ensure the powder is fully dissolved, with no clumps remaining at the bottom of the bottle. A properly mixed formula will have a smooth, consistent texture. Regardless of the method, always test the temperature before serving to ensure it’s lukewarm and comfortable for your little one. Prioritize a smooth, bubble-free experience for optimal digestion.

Serving Temperature: Chilled is Ideal

While Neocate Jr can be served at room temperature, offering it chilled is often preferred, particularly for oral consumption. Many children find the taste more palatable when the formula is cool, potentially encouraging better intake. Chilling doesn’t affect the nutritional value of the formula, but it can enhance the overall feeding experience.

To chill Neocate Jr, prepare the formula according to the instructions and then place the bottle or feeding container in the refrigerator for a short period. Avoid freezing the formula, as this can alter its texture and composition. Always check the temperature before serving to ensure it’s comfortable for your child – lukewarm or cool is ideal. Never serve formula that is too cold, as this can cause discomfort. Remember, individual preferences vary, so observe your child’s cues and adjust the temperature accordingly.

Storage of Prepared Formula

Proper storage of prepared Neocate Jr formula is vital to maintain its safety and nutritional quality. Once mixed, the formula should be immediately refrigerated to inhibit bacterial growth. Always store prepared formula in a clean, covered container specifically designed for food storage. This prevents contamination and preserves freshness.

Refrigeration slows down bacterial proliferation, but it doesn’t eliminate it entirely. Therefore, strict adherence to time limits is crucial. Once prepared, Neocate Jr must be consumed within 24 hours. Any unused portion remaining after this timeframe should be discarded to minimize the risk of illness. Do not refreeze previously refrigerated formula. Always check for any signs of spoilage, such as changes in color or odor, before feeding. Maintaining these storage guidelines ensures your child receives safe and nourishing formula with each feeding.

Refrigeration & Consumption Timeframe

Following preparation, immediate refrigeration of Neocate Jr formula is paramount for safety. The chilling process significantly slows bacterial growth, but doesn’t halt it completely. Store the prepared formula in a sealed, clean container within a refrigerator maintained at a consistent temperature – ideally below 40°F (4°C). This minimizes the risk of contamination and preserves the formula’s nutritional integrity.

A strict consumption timeframe is essential. Once prepared, Neocate Jr should be used within a 24-hour period. Any formula left in the bottle or container after this timeframe must be discarded, even if it appears visually normal. Bacteria can multiply rapidly, posing a health risk to your child. Furthermore, any formula remaining in the container after one hour of feeding should also be discarded. Adhering to these guidelines ensures your child receives a safe and nutritious feed every time.

Discarding Remaining Formula

Proper disposal of leftover Neocate Jr formula is a critical aspect of safe infant feeding. Once a feeding has commenced, bacteria from the baby’s mouth can contaminate the remaining formula. Therefore, any portion left in the bottle or container after one hour of feeding must be discarded without exception, regardless of how small the amount.

Do not attempt to re-refrigerate or reuse partially consumed formula. This practice encourages bacterial proliferation, potentially leading to illness. Instead, promptly dispose of the remaining formula down the drain or in a designated waste receptacle. Thoroughly rinse the bottle and nipple with hot, soapy water after each use to prevent bacterial buildup. Maintaining this strict disposal protocol safeguards your child’s health and minimizes the risk of gastrointestinal distress. Remember, when in doubt, throw it out!