Category Archives: Guide

juliana jewelry reference identification and value guide

Juliana Jewelry: A Comprehensive Reference & Value Guide (2026)

Ann Mitchell Pitman’s detailed guide, published by Collector Books, is invaluable for D&E identification. It focuses on construction, designs, and materials, becoming a collector’s essential resource.

Juliana jewelry, a captivating realm within vintage costume jewelry, represents a brief but brilliant period of design innovation from the renowned firm of DeLizza & Elster (D&E). Produced primarily between 1964 and 1966, these pieces are celebrated for their exceptional sparkle, intricate designs, and the masterful use of high-quality crystals and stones. However, the ephemeral nature of the “Juliana” branding – a mere two-year venture – adds to the allure and complexity of identifying authentic pieces.

Because D&E rarely signed their creations, including those sold under the “Juliana” name, accurate identification relies heavily on understanding their unique construction techniques, design motifs, and the specific materials employed. This is where resources like Ann Mitchell Pitman’s comprehensive reference guide become absolutely crucial. Pitman’s work provides collectors with the tools to navigate the world of Juliana jewelry, deciphering the hallmarks of authenticity and appreciating the artistry behind each piece. The enduring appeal of Juliana jewelry lies in its blend of affordability, beauty, and the challenge of uncovering these hidden treasures.

The History of DeLizza & Elster (D&E)

DeLizza & Elster, established in Providence, Rhode Island, was a prolific costume jewelry manufacturer operating from the 1940s through the 1970s. Founded by Albert DeLizza and Frank Elster, the company initially produced jewelry for other labels before establishing its own distinct style. They became known for their innovative designs and exceptional craftsmanship, quickly gaining a reputation for quality within the industry.

Unlike many of their contemporaries, D&E consistently avoided overt signatures, making attribution challenging. Their focus remained on producing high-quality pieces, relying on word-of-mouth and retailer relationships. The brief “Juliana” branding period (1964-1966) represented a limited attempt at direct consumer recognition. Despite the lack of consistent markings, Ann Mitchell Pitman’s research has meticulously documented their construction methods and design characteristics, allowing collectors to confidently identify D&E pieces, including those from the Juliana line. Their legacy continues to captivate jewelry enthusiasts today.

Why “Juliana” – The Brief Branding Period (1964-1966)

The “Juliana” name emerged in 1964 as a short-lived branding effort by DeLizza & Elster. This decision stemmed from a desire to gain more direct consumer recognition and potentially compete with established brands. However, the branding proved to be a relatively unsuccessful venture, lasting only until 1966. The company quickly reverted to producing unsigned pieces, their preferred method of operation.

Despite its brevity, the “Juliana” period is significant for collectors. It provides a distinct marker, albeit a limited one, for identifying D&E jewelry from that specific timeframe. Ann Mitchell Pitman’s research extensively covers this era, detailing the styles and characteristics unique to the “Juliana” line. While D&E ultimately favored anonymity, the “Juliana” pieces remain highly sought after, representing a fascinating chapter in the company’s history and a key focus for identification guides.

Ann Mitchell Pitman’s Reference Book: A Cornerstone Resource

Ann Mitchell Pitman’s “Juliana Jewelry Reference, DeLizza & Elster: Identification & Price Guide” (Collector Books, 2009) stands as the definitive resource for collectors. Published in a large format (Quatro, 320 pages), it meticulously catalogs the diverse range of jewelry produced by D&E, despite their lack of signatures. The book’s strength lies in its focus on identifying pieces through construction techniques, design groups, and the unique materials used – particularly specialty stones and findings.

Collectors consistently praise Pitman’s work for its thoroughness and accessible style. Her passion for the subject shines through, making the identification process less daunting. The book includes valuable insights from fellow collectors and provides a foundational price guide, though market values fluctuate. It’s considered a “must-have” for anyone seriously interested in vintage jewelry, offering an invaluable starting point for building a collection and understanding the artistry of D&E.

Understanding the Importance of Identification

Accurate identification is paramount when dealing with Juliana jewelry, primarily because DeLizza & Elster (D&E) pieces were rarely, if ever, signed. This absence necessitates a deep understanding of their construction methods, design characteristics, and material choices. Relying solely on aesthetics can be misleading, as other manufacturers imitated D&E’s style.

Ann Mitchell Pitman’s reference book becomes crucial in bridging this gap, providing the tools to discern authentic Juliana pieces. Identifying a piece correctly impacts its value significantly. Knowing the specific design group, the type of stones used, and the quality of the findings allows for a more accurate assessment. Without proper identification, a valuable piece might be undervalued, or a reproduction mistaken for a genuine vintage treasure. Mastering these identification skills empowers collectors and ensures fair market transactions.

Identifying Juliana Jewelry: Key Characteristics

Juliana identification relies on construction attributes, design groups, and materials—especially specialty stones and findings—as D&E rarely signed their exquisite, vintage creations;

Construction Techniques: The D&E Hallmark

DeLizza & Elster (D&E) jewelry is renowned for its meticulous construction, serving as a primary identification method since pieces were typically unsigned. Ann Mitchell Pitman’s reference guide emphasizes examining how pieces are assembled. A key characteristic is the secure setting of stones, often utilizing a unique foil-backed technique that enhances their brilliance.

The construction frequently involves a layered approach, with stones carefully applied and secured with prongs or glue. Pay close attention to the metalwork; D&E favored a specific type of pot metal, and the quality of the plating is a significant indicator. The way clasps and pinbacks are attached also provides clues.

Pitman’s work details how to differentiate D&E construction from similar pieces by other manufacturers. Collectors learn to recognize the specific techniques employed, such as the precise application of rhinestones and the robust nature of the settings. Understanding these construction details is crucial for authenticating Juliana jewelry and appreciating the craftsmanship involved.

Pinbacks, Earrings, and Brooches: Common Forms

Juliana jewelry, produced by DeLizza & Elster, manifested in several popular forms, with pinbacks, earrings, and brooches being the most frequently encountered. Ann Mitchell Pitman’s guide extensively catalogs these variations, highlighting the diverse designs within each category. Pinbacks often feature floral motifs or whimsical figures, secured with a traditional pin and clasp mechanism.

Earrings typically come as clip-ons, reflecting the fashion of the era, though some post earrings exist. Brooches showcase a wider range of complexity, from simple floral sprays to elaborate three-dimensional designs. Pitman details how to identify subtle differences in these forms, aiding in accurate attribution.

The prevalence of these forms makes them accessible to collectors, but also means careful examination is needed to distinguish authentic Juliana pieces. Understanding the typical construction and design elements within each form, as outlined in Pitman’s reference, is essential for building a valuable collection.

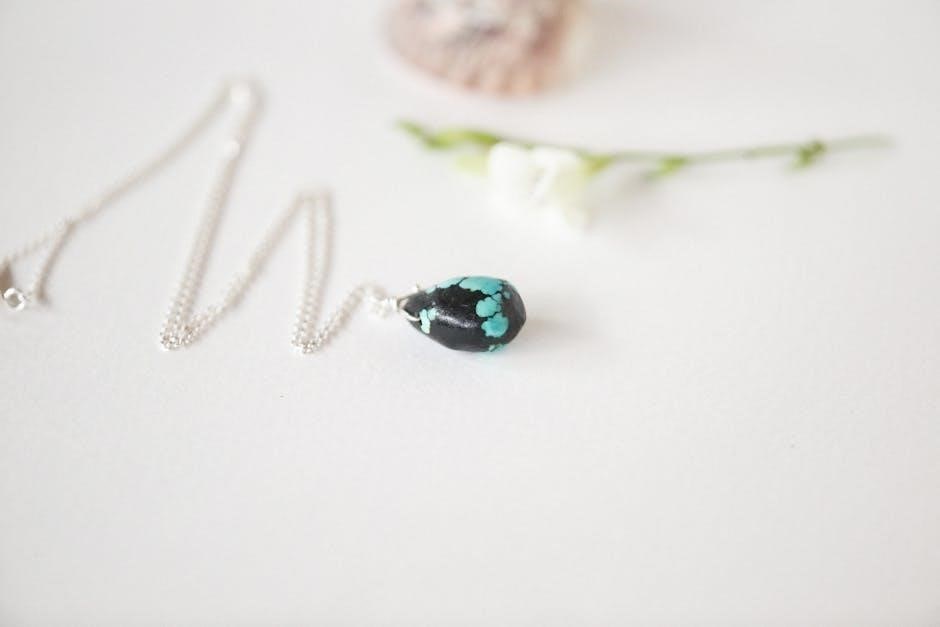
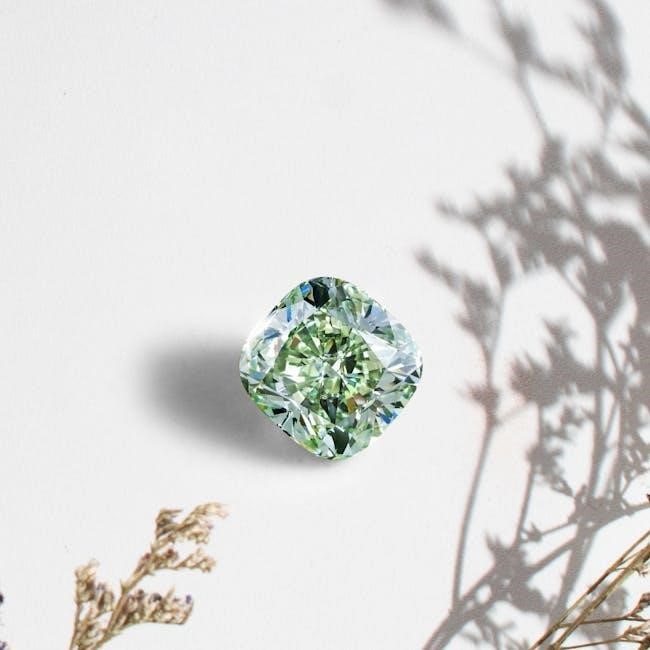
Specialty Stones & Crystals: A Defining Feature

Juliana jewelry is renowned for its innovative use of stones and crystals, a key element in identifying authentic pieces. DeLizza & Elster weren’t limited to standard rhinestones; they incorporated a wide array of specialty stones, including chatons, navettes, and uniquely cut crystals, often sourced from Austria and other European manufacturers.

Ann Mitchell Pitman’s reference meticulously details these stones, providing collectors with visual guides to recognize their distinct characteristics. The color and arrangement of these stones are crucial; Juliana frequently employed vibrant color combinations and intricate settings. Identifying these specialty stones is paramount, as they significantly contribute to a piece’s value.

The quality and variety of the stones used are hallmarks of D&E’s craftsmanship. Pitman’s work emphasizes that recognizing these details is essential for differentiating Juliana from similar vintage jewelry, solidifying its unique position in the market.

Findings & Clasps: Clues to Authenticity

Because DeLizza & Elster pieces were rarely marked, examining findings and clasps becomes critical for authentication. Ann Mitchell Pitman’s guide highlights specific clasp types – including rolling clasps, safety clasps, and hook-and-eye closures – commonly used during the Juliana branding period (1964-1966) and beyond.

The quality and construction of these findings offer valuable clues. D&E utilized specific metals and soldering techniques; observing these details can help distinguish genuine pieces. Pinbacks often feature a particular style of pin stem and safety catch. Earring findings, too, exhibit characteristic features.

Pitman’s reference provides detailed photographs and descriptions of these components, enabling collectors to compare findings on their pieces. While not foolproof, analyzing clasps and findings, alongside other identifying factors, significantly aids in determining authenticity and value within the Juliana jewelry world.

Design Groups & Styles

Juliana jewelry showcases diverse designs, from popular floral motifs and charming animal figurines to bold abstract patterns and festive holiday-themed creations, as detailed in Pitman’s guide.

Floral Designs: A Popular Motif

Floral designs consistently rank among the most beloved and frequently encountered styles within the world of Juliana jewelry. Ann Mitchell Pitman’s comprehensive reference meticulously catalogs a stunning array of floral pieces, showcasing the remarkable artistry and attention to detail characteristic of DeLizza & Elster creations.

These floral representations aren’t limited to simple, single blooms. Collectors will discover elaborate bouquets, delicate sprigs, and stylized floral abstractions, often incorporating a vibrant palette of colors and a dazzling selection of specialty stones. The use of rhinestones to mimic dew drops or petal textures is particularly noteworthy, adding a layer of realism and sophistication.

Pitman’s book highlights how floral motifs appear across various forms – brooches, pins, earrings, and even necklaces – demonstrating the versatility of this design theme. Identifying these pieces often relies on recognizing specific flower types, color combinations, and the unique construction techniques employed by D&E, as thoroughly explained within the guide. The enduring appeal of floral jewelry ensures continued demand among collectors.

Animal Figurines: Birds, Cats, and More

Juliana jewelry frequently features charming animal figurines, adding a playful and whimsical touch to the collection. Ann Mitchell Pitman’s reference dedicates significant attention to these designs, showcasing the breadth of DeLizza & Elster’s creativity. Birds, particularly vibrant songbirds and elegant swans, are common subjects, often depicted in flight or perched amongst floral elements;

Cats, with their graceful forms and expressive eyes, also appear frequently, ranging from realistic portrayals to more stylized interpretations. Beyond these, collectors can find pieces representing a diverse range of creatures – playful puppies, majestic horses, and even more exotic animals. The skillful use of rhinestones and enamel work brings these miniature animals to life.

Pitman’s guide assists in identifying these pieces by detailing specific characteristics, such as the type of stones used for the eyes, the overall construction, and any unique design features. Recognizing these nuances is crucial for accurate attribution and valuation within the vintage jewelry market.

Abstract & Geometric Patterns

Alongside floral and animal motifs, Juliana jewelry showcases a striking array of abstract and geometric designs, demonstrating DeLizza & Elster’s versatility. These pieces often feature bold color combinations and innovative arrangements of rhinestones, creating visually dynamic statements. Ann Mitchell Pitman’s comprehensive reference meticulously catalogs these patterns, aiding collectors in identification.

Common geometric forms include stylized leaves, sunbursts, and cascading lines, frequently arranged in symmetrical or asymmetrical compositions. Abstract designs lean towards more free-flowing shapes and textures, often incorporating unusual stone settings and metallic accents. The use of contrasting colors – such as sapphire blue with emerald green, or ruby red with crystal clear – enhances the impact of these designs.

Pitman’s guide highlights the importance of examining the construction techniques used in these pieces, as they often differ from those employed in more representational designs. This detailed analysis is essential for authenticating and valuing these unique examples of vintage jewelry.

Holiday-Themed Juliana Pieces

Juliana jewelry extends its artistry to seasonal celebrations, with a delightful range of holiday-themed pieces. These collectible items, produced by DeLizza & Elster, capture the spirit of Christmas, Halloween, and other festive occasions. Ann Mitchell Pitman’s reference book provides crucial documentation for identifying these often-sought-after designs.

Christmas pieces frequently feature depictions of Santa Claus, snowmen, Christmas trees, and ornaments, adorned with vibrant red, green, and white rhinestones. Halloween designs showcase pumpkins, black cats, bats, and spooky motifs, utilizing orange, black, and purple color palettes. These pieces demonstrate the company’s ability to adapt its signature style to specific themes.

Pitman’s guide emphasizes the importance of recognizing the unique characteristics of these holiday pieces, including specific color combinations, stone arrangements, and design elements. Identifying these details is key to determining authenticity and assessing their value within the collector’s market.

Valuation & Pricing

Juliana value hinges on rarity, condition, and demand. Ann Pitman’s guide serves as a starting point, but market dynamics significantly influence pricing for these vintage pieces.

Factors Influencing Juliana Jewelry Value

Determining the value of Juliana jewelry is a multifaceted process, extending beyond simple identification. Several key factors intertwine to establish a piece’s worth in the vintage market. Rarity plays a crucial role; limited production runs or unique designs command higher prices. The condition of the jewelry is paramount – pieces exhibiting minimal wear and damage are significantly more valuable than those with noticeable flaws.

Demand, driven by collector interest and current trends, also heavily influences pricing. Certain design groups, like floral motifs or holiday-themed pieces, may experience surges in popularity, impacting their value. The presence of specialty stones or crystals, particularly those in excellent condition, adds to a piece’s desirability. Furthermore, understanding the construction techniques employed by DeLizza & Elster, as detailed in Ann Mitchell Pitman’s guide, aids in assessing authenticity and quality, both of which contribute to value.

Finally, the overall aesthetic appeal and the piece’s ability to capture the essence of the 1960s era contribute to its collectibility and, consequently, its market value.

Condition & Wear: Impact on Price

The condition of Juliana jewelry is a primary determinant of its value, directly correlating with its desirability among collectors. Pieces in pristine, “like-new” condition command a substantial premium. However, given their age, most Juliana pieces will exhibit some degree of wear. Minor wear, such as light surface scratches on stones or slight discoloration of metal, typically has a moderate impact on price.

More significant damage – chipped stones, missing crystals, heavily tarnished metal, or compromised clasps – drastically reduces value. Repairs, if professionally done and discreet, can mitigate some loss, but often don’t restore the piece to its original worth. Ann Mitchell Pitman’s reference guide emphasizes careful examination for these flaws.

Collectors prioritize originality; therefore, extensive restoration can sometimes detract from value. Understanding the nuances of wear and its impact, as outlined in valuation resources, is crucial for both buyers and sellers in the Juliana jewelry market.

Rarity & Demand: The Market Dynamics

The value of Juliana jewelry is heavily influenced by market dynamics – specifically, the interplay between rarity and collector demand. Pieces featuring unusual color combinations, unique stone arrangements, or limited production runs are inherently more valuable. Ann Mitchell Pitman’s guide aids in identifying these less common variations.

Demand fluctuates based on current trends and collector preferences. Floral designs consistently remain popular, while certain animal figurines or abstract patterns may experience surges in interest. The short branding period (1964-1966) contributes to the overall scarcity of marked Juliana pieces, increasing their desirability.

Auction results and online marketplace listings provide real-time insights into current market values. Understanding these dynamics, coupled with accurate identification, empowers collectors to make informed purchasing and selling decisions within the vintage jewelry landscape;

Using Price Guides: Pitman’s Book as a Starting Point

Ann Mitchell Pitman’s Juliana Jewelry Reference, DeLizza & Elster: Identification & Price Guide serves as the foundational resource for valuation, though it’s crucial to understand its limitations. Published in 2009, the listed prices reflect the market at that time and require adjustment for current conditions.

The book provides a comprehensive catalog of designs, categorized by style and construction, offering a baseline for comparison. However, condition, rarity, and current demand significantly impact actual selling prices. Pitman’s work excels at identifying key characteristics, enabling accurate comparisons.

Collectors should supplement the guide with recent auction results and marketplace data to establish a realistic price range. Consider the book a starting point, not a definitive price list, and factor in individual piece attributes for a more precise valuation.

Resources for Collectors

Online forums and auction sites offer valuable insights and market data. Pitman’s book remains central, alongside expert appraisals for complex or high-value Juliana pieces.

Online Forums & Communities

Engaging with online communities dedicated to vintage jewelry, and specifically Juliana pieces, provides a dynamic learning environment. These platforms are invaluable for collectors seeking assistance with identification, sharing discoveries, and gaining insights into current market trends. Members often contribute detailed photographs and descriptions, fostering collaborative knowledge-building.

Forums serve as excellent spaces to pose questions about potentially misattributed pieces, receive feedback on valuations, and connect with experienced collectors willing to share their expertise. Discussions frequently revolve around nuanced details of construction techniques, stone variations, and the subtle differences that distinguish authentic Juliana jewelry from similar pieces.

Social media groups, particularly on platforms like Facebook, offer another avenue for connecting with fellow enthusiasts. These groups often host virtual “show and tell” events, allowing members to showcase their collections and receive constructive criticism. Participating in these communities not only enhances one’s understanding of Juliana jewelry but also cultivates a sense of camaraderie among collectors.

Auction Sites & Marketplaces

Online auction platforms, such as eBay, represent significant marketplaces for buying and selling Juliana jewelry. However, careful scrutiny is crucial, as misattribution and inaccurate descriptions are common. Utilizing Ann Mitchell Pitman’s reference guide is paramount when evaluating listings, enabling informed bidding decisions based on construction details and design characteristics.

Marketplaces like Etsy often feature vintage jewelry sellers specializing in Juliana pieces. These sellers may offer more curated selections and detailed descriptions, potentially reducing the risk of purchasing misrepresented items. Thoroughly reviewing seller feedback and examining high-resolution photographs are essential steps.

Comparing prices across multiple platforms is vital for establishing fair market value. Observing completed auction results provides valuable data points, revealing what similar pieces have actually sold for. Remember to factor in condition, rarity, and the presence of desirable specialty stones when assessing value. Patience and diligent research are key to successful acquisitions.

Books & Publications (Focus on Pitman’s Work)

Ann Mitchell Pitman’s Juliana Jewelry Reference, DeLizza & Elster: Identification & Price Guide (9781574326291) remains the cornerstone resource for collectors. Published in 2009 by Collector Books Publishing, this 320-page guide meticulously details construction techniques, design groups, and materials used by D&E, crucial since their pieces were often unsigned.

The book’s strength lies in its comprehensive approach to identification, emphasizing attributes over markings. Pitman’s engaging writing style, described as “funny and informative,” makes complex details accessible. It includes collector perspectives on the appeal of Juliana jewelry and showcases numerous examples with detailed information.

While other vintage jewelry books may touch upon D&E, Pitman’s work is uniquely dedicated to this specific brand. It’s considered a “must-have” for enthusiasts, providing a foundational understanding of Juliana’s history and value. Regularly updated price guides are essential for accurate valuations.

Expert Appraisals: When to Seek Professional Help

Determining the value of Juliana jewelry can be complex, even with resources like Ann Mitchell Pitman’s guide. While price guides offer a starting point, they cannot account for unique variations, exceptional condition, or current market fluctuations. Seeking a professional appraisal is advisable for pieces of significant perceived value, insurance purposes, or estate settlements.

A qualified appraiser specializing in vintage costume jewelry possesses the expertise to accurately assess a piece, considering its rarity, design, materials, and condition. They can differentiate authentic Juliana from similar pieces and provide a detailed written appraisal report.

Consider an appraisal if you’ve inherited a large collection, discovered a particularly unusual piece, or are considering a high-value sale. Remember that appraisal fees vary, so inquire about costs beforehand. Utilizing a reputable appraiser ensures a fair and accurate valuation of your treasured Juliana jewelry.

tv guide logan utah

TV Guide Logan‚ Utah: Comprehensive Viewing Information (Updated 02/07/2026)

Today’s date is February 7th‚ 2026. Local viewers can access Aggie TV‚ Utah State University’s channel‚ via Zap2it using zip code 84322.
Food Network’s “Unwrapped 2.0” filmed locally!

Local Channels Available in Logan‚ Utah

Logan‚ Utah‚ and the surrounding Cache County‚ benefits from a diverse range of local television channels‚ offering residents a variety of programming options. Beyond the major national networks‚ several locally-focused stations provide news‚ community events coverage‚ and specialized content. Aggie TV‚ the broadcasting arm of Utah State University‚ is a significant local presence‚ delivering programming tailored to the student body and the broader community;

Accessing specific channel lineups can vary depending on your provider – cable‚ satellite‚ or over-the-air antenna. Zap2it listings‚ when searched with the 84322 zip code‚ will detail the current schedules for these local channels. Furthermore‚ public access television channels offer a platform for local voices and productions. Recent activity includes filming for the Food Network show “Unwrapped 2.0” within the area‚ potentially leading to local features on national television.

Residents should also be aware of potential signal issues‚ particularly with digital antennas‚ and resources are available for troubleshooting. Local tech support may also be able to assist with issues related to vehicle electrical systems‚ as reported by Dacia Logan owners experiencing battery problems.

Aggie TV: Utah State University’s Channel

Aggie TV serves as Utah State University’s dedicated television channel‚ providing a unique blend of student-produced content‚ university news‚ and community programming. It’s a vital communication tool for the USU campus‚ broadcasting information relevant to students‚ faculty‚ and staff. The channel’s programming reflects the academic and extracurricular life of the university‚ showcasing student projects‚ sporting events‚ and university-sponsored events.

Accessing Aggie TV programming requires specific steps‚ as it isn’t always included in standard cable or satellite packages. Zap2it listings can be utilized; users should enter zip code 84322 and specifically select “Aggie TV ー Utah State University (Logan)” as their provider to view the channel’s schedule. This ensures accurate listings for USU-specific broadcasts.

Beyond traditional television viewing‚ Aggie TV may also offer streaming options or on-demand content through the university’s website or dedicated platforms. The channel’s content often complements university events‚ providing coverage and highlights. Recent local filming for “Unwrapped 2.0” may even feature USU students or locations‚ further integrating the university with broader media.

Accessing Aggie TV Programming

Viewing Aggie TV requires a nuanced approach‚ differing from mainstream channels. Direct cable or satellite inclusion isn’t guaranteed; therefore‚ specific methods are necessary for Logan residents. The primary method involves utilizing the Zap2it TV listings service. Users must input the Logan zip code‚ 84322‚ and crucially‚ select “Aggie TV ⎼ Utah State University (Logan)” as their designated provider within the Zap2it system.

This provider selection is paramount‚ ensuring the listings accurately reflect Aggie TV’s unique schedule‚ distinct from national or local broadcast schedules. Beyond Zap2it‚ explore USU’s official website. Often‚ Aggie TV broadcasts are streamed live or made available on-demand through the university’s online platforms‚ offering flexibility for viewers.

Furthermore‚ investigate potential campus television systems within USU housing. These systems may directly carry Aggie TV programming. Keep an eye out for announcements regarding special broadcasts‚ particularly those related to university events or the recent “Unwrapped 2.0” filming‚ which might have exclusive airings on the channel.

Zap2it Listings for Logan‚ Utah (Zip Code 84322)

Zap2it serves as a crucial resource for Logan‚ Utah (84322) residents seeking detailed television schedules‚ particularly for accessing Aggie TV‚ Utah State University’s channel. To effectively utilize Zap2it‚ users must first enter the correct zip code – 84322 – to localize the listings. A critical step follows: selecting “Aggie TV ⎼ Utah State University (Logan)” as their preferred provider. This ensures the displayed schedule accurately reflects Aggie TV’s programming‚ which differs significantly from national networks.

Without specifying Aggie TV as the provider‚ the listings will default to broader regional or national channels‚ omitting the university’s unique content. Zap2it provides program titles‚ descriptions‚ start times‚ and channel numbers (where applicable). It’s important to note that Aggie TV’s schedule often features student productions‚ university events coverage‚ and potentially‚ locally-filmed segments like those from the “Unwrapped 2.0” Food Network show.

Regularly checking Zap2it is recommended‚ as Aggie TV’s schedule can be dynamic and subject to change.

Cable and Satellite Provider Options for Logan Residents

Logan‚ Utah residents have several options for cable and satellite television service‚ impacting access to both national networks and local programming‚ including potential access to Aggie TV through specific packages. Major providers serving the area typically include Spectrum‚ Dish Network‚ and DIRECTV. Spectrum offers a range of cable television packages‚ often bundled with internet and phone services‚ providing a comprehensive entertainment solution.

Dish Network and DIRECTV‚ as satellite providers‚ offer extensive channel lineups‚ reaching households beyond the immediate cable infrastructure. However‚ accessing local channels and specialized services like Aggie TV may require specific equipment or subscription levels. It’s crucial to verify if these providers carry Aggie TV‚ as it’s a locally-focused channel.

Furthermore‚ residents should compare pricing‚ channel packages‚ and promotional offers from each provider to determine the best fit for their viewing preferences and budget. Checking Zap2it listings (using zip code 84322) alongside provider channel lineups will confirm availability of desired programming.

Streaming Services Available in the Logan Area

Logan‚ Utah residents enjoy a wide array of streaming services offering alternatives to traditional cable and satellite television. Popular options include Netflix‚ Hulu‚ Disney+‚ and Max‚ each providing extensive libraries of on-demand movies and television shows. These services generally require a stable internet connection‚ readily available through providers servicing Cache County.

For live television streaming‚ services like YouTube TV‚ Sling TV‚ and FuboTV offer packages mimicking traditional cable lineups‚ potentially including local channels. However‚ verifying the availability of specific local stations‚ including access to Utah State University programming via Aggie TV‚ is essential before subscribing.

Many streaming services allow users to customize their channel selections‚ offering a more tailored viewing experience. Utilizing the Zap2it listings for zip code 84322 can help determine which streaming services carry desired programs. Furthermore‚ some providers offer free trials‚ enabling residents to test services before committing to a subscription.

National Broadcast Networks in Logan‚ Utah

Logan‚ Utah receives reliable access to all major national broadcast networks‚ providing residents with a diverse range of programming options. These networks include ABC‚ CBS‚ NBC‚ FOX‚ and PBS‚ delivering news‚ entertainment‚ and sports content. Over-the-air reception‚ utilizing a digital antenna‚ is a viable option for accessing these channels‚ particularly within Cache County.

Cable and satellite providers operating in the Logan area also carry these networks as part of their standard channel packages. However‚ channel lineups and availability may vary depending on the specific provider and subscription level. Checking with providers like Dish Network or DIRECTV is recommended to confirm channel availability.

Streaming services‚ while offering on-demand content‚ often include live broadcasts of national network programming. Utilizing services like YouTube TV or Hulu + Live TV can provide access to these networks without a traditional cable or satellite subscription. Referencing Zap2it listings (zip code 84322) can help pinpoint specific broadcast times and channel availability.

Local News Channels and Broadcast Times

Logan‚ Utah‚ benefits from several local news channels dedicated to covering Cache Valley and surrounding areas. These channels provide up-to-date information on local events‚ weather‚ and community happenings. Key local news providers include KSL-TV (ABC affiliate)‚ KUTV (CBS affiliate)‚ and KTVX (UTV‚ independent station with local news programming).

Typical local news broadcast times follow a standard format: weekday mornings from 6:00 AM to 9:00 AM‚ midday updates at noon‚ and evening news broadcasts at 5:00 PM‚ 6:00 PM‚ and 10:00 PM. Weekend news coverage is generally offered during the evening hours. Specific broadcast schedules can be verified through Zap2it listings using zip code 84322.

Additionally‚ Utah State University’s Aggie TV occasionally features local news segments and coverage of university-related events. Residents can also access news updates through the channels’ respective websites and social media platforms for breaking news and real-time information.

Sports Programming Options in Logan‚ Utah

Logan‚ Utah‚ offers a robust selection of sports programming‚ catering to fans of both collegiate and professional athletics. Utah State University (USU) plays a central role‚ with Aggie sports – including football‚ basketball‚ and volleyball – prominently featured on Aggie TV‚ USU’s private television system. Accessing Aggie TV programming through Zap2it (zip code 84322) provides schedules for live games and related sports content.

National sports networks like ESPN‚ Fox Sports‚ and CBS Sports are widely available through cable‚ satellite‚ and streaming services in the Logan area. These channels broadcast a diverse range of professional leagues‚ including the NFL‚ NBA‚ MLB‚ and NHL. Local sports bars also offer viewing options for major sporting events.

Furthermore‚ regional sports networks provide coverage of college sports conferences and local teams. Residents can stay updated on game schedules and channel availability through TV guide listings and provider websites. Streaming services increasingly offer live sports streaming options‚ providing flexibility for viewers.

Weather Channel Availability and Forecasts

Logan‚ Utah‚ residents have multiple avenues for accessing reliable weather information. The Weather Channel is a staple on most cable and satellite TV packages‚ providing continuous updates‚ forecasts‚ and severe weather alerts. Digital antenna reception also typically includes access to local channels broadcasting weather segments.

Beyond traditional television‚ numerous streaming services incorporate live weather feeds and detailed forecasts. Utilizing Zap2it with zip code 84322 can help pinpoint specific channel listings for weather programming. Online weather websites and mobile apps offer hyper-local forecasts tailored to Cache County‚ including Logan.

Given Utah’s diverse climate‚ staying informed about potential weather changes is crucial; Local news channels also dedicate significant airtime to weather reports‚ particularly during winter storms or summer heat waves. Regularly checking forecasts ensures residents are prepared for any conditions.

Children’s Programming Schedules

Logan‚ Utah‚ families have a variety of options for children’s television programming. Cable and satellite providers typically offer dedicated children’s channels like Disney Channel‚ Nickelodeon‚ and Cartoon Network. These channels broadcast age-appropriate content throughout the day‚ with specific blocks dedicated to preschool-aged viewers.

Aggie TV‚ Utah State University’s channel‚ may occasionally feature educational programming suitable for children‚ particularly during school breaks or special events. Utilizing the Zap2it TV guide with zip code 84322 allows parents to search for specific shows and timeslots. Streaming services like Netflix‚ Hulu‚ and Disney+ also provide extensive libraries of children’s content.

Parents should always review program ratings and content descriptions to ensure suitability for their children. Local channels may also air children’s programs on weekend mornings. Checking weekly TV listings is recommended to stay informed about new shows and premiere dates.

Movie Channel Lineups and Premiere Dates

Logan‚ Utah residents have access to several movie channels through cable and satellite providers. Popular options include HBO‚ Showtime‚ Cinemax‚ and Starz‚ each offering a rotating selection of films‚ from recent blockbusters to classic favorites. These channels frequently announce premiere dates for new releases‚ often a month in advance‚ through their online guides and TV listings.

Streaming services such as Netflix‚ Amazon Prime Video‚ and Hulu also provide extensive movie libraries‚ with new titles added regularly. Zap2it (using zip code 84322) can assist in locating movie schedules on local cable and satellite offerings. Aggie TV‚ while primarily focused on university-related content‚ may occasionally broadcast films during special events.

Staying updated on premiere dates requires checking channel websites or utilizing a comprehensive TV guide. Many providers offer on-demand movie services‚ allowing viewers to rent or purchase films directly through their set-top boxes.

Public Access Television in Logan

Logan‚ Utah‚ offers limited but valuable public access television (PATV) opportunities for local residents. These channels‚ often operated by community organizations or local government entities‚ provide a platform for citizen-produced content. Programming typically includes local government meetings‚ community events coverage‚ and shows created by individuals within Cache County.

Access to PATV production facilities and airtime usually requires completing a training course and adhering to specific guidelines. Content is generally non-commercial in nature‚ focusing on local issues and interests. While not extensively promoted through mainstream TV guides like Zap2it‚ schedules are often available on the city or county website‚ or through local community centers.

Aggie TV‚ while affiliated with Utah State University‚ sometimes collaborates with local public access groups. Residents interested in contributing to PATV should investigate opportunities through the Logan City Corporation or Cache County government websites for details on access procedures and programming schedules.

Troubleshooting TV Signal Issues in Logan

Logan‚ Utah‚ residents experiencing TV signal problems have several troubleshooting steps to consider. Initial checks should include verifying cable connections for tightness and ensuring the TV antenna (if used) is properly positioned and free from obstructions. Weather conditions‚ particularly during Cache Valley’s winter storms‚ can significantly impact over-the-air signal reception.

For cable or satellite subscribers‚ contacting your provider (see provider options listed elsewhere) is the first course of action. They can diagnose issues remotely or dispatch a technician. Digital antenna users should rescan channels periodically‚ as broadcast frequencies can change. Interference from other electronic devices can also be a culprit; try relocating the antenna or TV.

Regarding electrical issues‚ as reported with Dacia Logan vehicles‚ while unrelated to TV signals directly‚ local tech support may be familiar with general electrical interference patterns. If problems persist‚ consider professional TV repair services available in Logan. Remember to check online forums for common issues specific to your provider or antenna type.

Digital Antenna Reception in Cache County

Cache County’s topography presents unique challenges and opportunities for digital antenna reception. Logan’s valley location can create signal shadows‚ while higher elevations generally offer clearer reception. Antenna placement is crucial; attics or exterior mounts often outperform indoor antennas. Directional antennas‚ aimed towards the broadcast towers (locations available online)‚ are recommended for optimal signal strength.

Regular channel rescans are essential‚ as broadcast frequencies can shift. Interference from trees‚ buildings‚ and even other electronic devices can degrade the signal. Experiment with antenna positioning and shielding to minimize interference. Weather conditions‚ particularly during winter storms‚ can temporarily disrupt reception.

Residents should consult websites like AntennaWeb to determine the likely signal strength and direction of local channels. Remember that a strong signal isn’t always guaranteed‚ and occasional dropouts may occur. Utilizing a signal meter can aid in precise antenna alignment. For persistent issues‚ professional antenna installation services are available throughout Cache County.

TV Repair Services in Logan‚ Utah

Logan residents have several options for television repair services‚ ranging from independent technicians to national chains. Common issues include screen damage‚ power supply failures‚ and backlight problems. Before seeking repair‚ consider the age of your TV; repairs may not be cost-effective for older models.

Local repair shops often offer free diagnostics‚ providing an estimate before commencing work. It’s advisable to obtain quotes from multiple providers to compare pricing and turnaround times. Many services specialize in specific brands‚ such as Samsung‚ LG‚ or Sony. Ensure the technician is certified and insured for peace of mind.

Some retailers offering TV sales also provide repair services. Online marketplaces connect consumers with local technicians. When describing the issue‚ be as detailed as possible. Remember to inquire about warranty options on both parts and labor. A Dacia Logan’s electrical issues‚ while automotive‚ highlight the importance of skilled local tech support‚ mirroring the need for qualified TV repair professionals.

Understanding TV Guide Listings

Navigating TV guide listings‚ whether in print or online via platforms like Zap2it‚ requires understanding common abbreviations and symbols. Listings detail program titles‚ channels‚ start and end times‚ and ratings. Pay attention to HD or 4K indicators for higher resolution broadcasts.

“CC” signifies closed captioning availability‚ crucial for accessibility. “SAP” denotes a Secondary Audio Program‚ often offering a different language track. Listings may also indicate program genres – comedy‚ drama‚ sports‚ news – aiding in selection. Understanding these codes streamlines your viewing experience.

For Logan‚ Utah‚ specifically‚ remember to input zip code 84322 on Zap2it to filter listings for local channels‚ including Aggie TV. Listings often include brief program descriptions. Be aware that schedules can change‚ so verifying times is recommended. The recent “Unwrapped 2.0” filming demonstrates the dynamic nature of TV programming‚ necessitating frequent guide checks. GMX email login often provides TV-related promotional information‚ further emphasizing the interconnectedness of digital entertainment.

Programming Specific to Utah State University Events

Aggie TV‚ Utah State University’s private television system‚ dedicates significant airtime to broadcasting events relevant to students‚ faculty‚ and the broader Logan community. This includes live coverage of USU athletic competitions – football‚ basketball‚ volleyball‚ and more – offering an alternative to national broadcasts.

Beyond sports‚ Aggie TV frequently airs university-sponsored lectures‚ debates‚ and performances. Student-produced content‚ showcasing film‚ journalism‚ and communication studies projects‚ is also a staple. University announcements and emergency notifications are often broadcast on the channel‚ ensuring campus-wide awareness.

Accessing this programming requires specific configuration on platforms like Zap2it; selecting “Aggie TV ー Utah State University (Logan)” as your provider is essential. Recent local filming for “Unwrapped 2.0” highlights USU’s growing presence in media production. Information regarding USU events is sometimes cross-promoted through GMX email‚ connecting students with relevant broadcasts.

Recent Local TV Show Filings (Food Network ⎼ Unwrapped 2.0)

Exciting news for Logan‚ Utah! The Food Network’s popular show‚ “Unwrapped 2.0‚” recently completed filming segments within the local area. This marks a significant moment for the region’s visibility on national television‚ showcasing local businesses and culinary talent.

The production team selected several establishments to feature‚ highlighting unique food creations and the stories behind them. While specific locations remain partially undisclosed‚ anticipation is building among residents eager to spot familiar landmarks during the broadcast. The filming process generated considerable buzz‚ with social media abuzz with sightings of the crew and host.

The premiere date for the Logan-featured episodes is yet to be announced‚ but viewers can anticipate a broadcast sometime in late 2026 or early 2027. Keep an eye on local TV listings and the Food Network’s schedule for updates. This event underscores Logan’s growing appeal as a filming location and boosts local pride.

GMX Email Login and TV Related Information

Staying connected in Logan‚ Utah‚ extends beyond television! Many residents utilize GMX email for managing their digital lives‚ including receiving important updates about local TV schedules and streaming service promotions. Accessing your GMX account is straightforward – simply visit the GMX login page and enter your credentials.

GMX offers a secure and reliable email platform‚ often used for subscription confirmations from TV providers and streaming services like Netflix‚ Hulu‚ and Disney+. These emails frequently contain personalized viewing recommendations based on your preferences‚ ensuring you don’t miss out on new shows or movie releases.

Furthermore‚ GMX can be used to manage accounts with Zap2it‚ allowing for customized TV listings specific to the 84322 zip code and Aggie TV (Utah State University). Regularly checking your GMX inbox can help you stay informed about channel changes‚ program updates‚ and special offers from local cable and satellite providers. Don’t forget to check your spam folder!

Dacia Logan Vehicle Electrical Issues (Relevance to Local Tech Support)

Interestingly‚ reported electrical issues in Dacia Logan vehicles within the Logan‚ Utah area may subtly correlate with local television reception challenges. Several online forums detail battery drain and lighting malfunctions in Logan models‚ potentially indicating broader electrical system sensitivities.

This isn’t a direct link‚ but it highlights a concentration of tech-related concerns within the community. Local tech support businesses‚ often equipped to handle automotive electrical diagnostics‚ may also possess expertise relevant to troubleshooting home TV signal problems. Fluctuations in power supply‚ even minor ones‚ can disrupt both vehicle electronics and television reception‚ particularly for those relying on digital antennas.

Residents experiencing both car electrical issues and TV signal problems might find a single‚ locally-based technician capable of addressing both. The shared skillset could prove valuable‚ especially in Cache County where digital antenna reception can be variable. It’s a niche connection‚ but worth considering when seeking assistance.

a beginner’s guide to day trading online 2nd edition

A Beginner’s Guide to Day Trading Online (2nd edition) provides essential knowledge for newcomers, detailing strategies and tools for navigating today’s stock market.

This resource, updated for 2026, explores the fundamentals and offers practical guidance for potential day traders seeking success.

What is Day Trading?

Day trading involves buying and selling financial instruments within the same trading day, aiming to profit from small price movements. Unlike long-term investing, positions are rarely held overnight, mitigating overnight risk.

A Beginner’s Guide to Day Trading Online (2nd edition) clarifies this fast-paced world, explaining how traders capitalize on intraday volatility. It’s a highly active strategy demanding significant time, discipline, and a thorough understanding of market dynamics.

The guide emphasizes that successful day trading isn’t about get-rich-quick schemes, but rather a skill honed through education, practice, and robust risk management. It’s a challenging pursuit, requiring constant market analysis and quick decision-making, as highlighted in recent updates for 2026.

Essentially, it’s a short-term trading style focused on exploiting opportunities within a single day.

The Appeal and Risks of Day Trading

Day trading’s appeal lies in the potential for rapid profits and the independence it offers. A Beginner’s Guide to Day Trading Online (2nd edition) acknowledges this allure, but strongly emphasizes the inherent risks. The guide details how leverage can amplify both gains and losses, potentially leading to substantial financial setbacks.

It’s crucial to understand that day trading isn’t suitable for everyone. The 2026 edition stresses the need for substantial capital, emotional control, and a dedicated learning curve. Market volatility, unpredictable news events, and the speed of execution all contribute to the risk profile.

The book highlights that many aspiring day traders underestimate the challenges, leading to significant losses. Prudent risk management, as detailed within, is paramount for survival and potential success.

Getting Started: Essential Foundations

A Beginner’s Guide to Day Trading Online (2nd edition) emphasizes building a solid base: selecting a brokerage, mastering platforms, and properly funding your trading account.

Choosing a Brokerage Account

A Beginner’s Guide to Day Trading Online (2nd edition) stresses the importance of careful brokerage selection. Consider factors like commission fees, platform stability, and available research tools. Look for brokers offering direct access routing for potentially faster order execution.

Evaluate margin rates, as day trading often utilizes leverage. Ensure the brokerage is regulated by reputable authorities, such as the SEC or FINRA, for investor protection. Some brokers specialize in active trading, providing advanced charting and analysis features.

Compare account minimums and assess the quality of customer support. A responsive and knowledgeable support team is crucial when issues arise. Research the broker’s educational resources; many offer tutorials and webinars for beginners. Ultimately, the best brokerage aligns with your individual trading style and financial goals.

Understanding Trading Platforms

A Beginner’s Guide to Day Trading Online (2nd edition) emphasizes mastering your trading platform. These platforms are your primary interface for executing trades and analyzing market data. Familiarize yourself with order entry systems, charting tools, and real-time quotes.

Look for platforms offering customizable layouts and technical indicators. Practice using simulated trading accounts (“paper trading”) to test strategies without risking capital. Understand the platform’s order types – market, limit, and stop-loss – and how to utilize them effectively.

Ensure the platform is reliable and offers fast execution speeds. Mobile trading apps provide flexibility, but prioritize platforms with robust security features to protect your account.

Funding Your Account

A Beginner’s Guide to Day Trading Online (2nd edition) stresses the importance of responsible funding. Determine a capital amount you’re comfortable risking – never trade with money you cannot afford to lose. Understand the Pattern Day Trader (PDT) rule, requiring a minimum of $25,000 for day trading stocks in the US.

Explore various funding methods offered by your brokerage, including bank transfers, wire transfers, and potentially, cryptocurrency deposits. Be aware of any associated fees or transfer times.

Prioritize security when linking bank accounts. Start with a smaller amount to gain experience before committing larger sums. Proper capital allocation is crucial for effective risk management.

Key Trading Concepts & Terminology

A Beginner’s Guide to Day Trading Online (2nd edition) clarifies essential terms like order types, chart reading, and technical analysis for successful trading.

Order Types: Market, Limit, Stop-Loss

Understanding order types is crucial for any aspiring day trader, and A Beginner’s Guide to Day Trading Online (2nd edition) thoroughly explains these fundamentals.

Market orders execute trades immediately at the best available price, prioritizing speed over precision. Limit orders allow traders to specify a maximum buying or selling price, ensuring favorable execution but with no guarantee of fulfillment.

Stop-loss orders are vital for risk management, automatically selling a security when it reaches a predetermined price, limiting potential losses. Mastering these order types – market, limit, and stop-loss – empowers traders to control their entries and exits, protecting capital and maximizing profitability within the dynamic day trading environment.

Reading Stock Charts: Basics

A Beginner’s Guide to Day Trading Online (2nd edition) emphasizes the importance of chart reading for informed decision-making. Charts visually represent price movements over time, revealing patterns and potential trading opportunities.

Basic chart types include line charts, showing closing prices, and bar charts, displaying open, high, low, and closing prices. Understanding candlestick charts is particularly valuable, as they offer a more nuanced view of price action.

Traders learn to identify support and resistance levels, key areas where price tends to bounce or reverse. Recognizing these patterns, alongside volume analysis, forms the foundation of technical analysis and successful day trading strategies.

Technical Analysis Fundamentals

A Beginner’s Guide to Day Trading Online (2nd edition) introduces technical analysis as a core skill for traders. It’s the process of evaluating investments by analyzing past market data, primarily price and volume.

Key concepts include identifying trends – whether prices are moving up, down, or sideways. Traders use technical indicators, mathematical calculations based on price data, to generate trading signals. Common indicators include moving averages and the Relative Strength Index (RSI).

Understanding chart patterns, like head and shoulders or double tops, can also predict future price movements. Mastering these fundamentals empowers traders to make data-driven decisions and manage risk effectively.

Developing a Day Trading Strategy

A Beginner’s Guide to Day Trading Online (2nd edition) emphasizes crafting a plan, incorporating risk management, and identifying opportunities for profitable trades.

Success relies on discipline and adapting to market conditions.

Identifying Potential Trading Opportunities

A Beginner’s Guide to Day Trading Online (2nd edition) stresses the importance of recognizing setups with high probability for profit. This involves actively scanning markets for volatility and emerging trends, utilizing technical analysis as a core component.

The guide likely details how to spot breakouts, reversals, and continuation patterns on stock charts; Furthermore, it probably covers the significance of volume confirmation alongside price action, ensuring that movements are supported by genuine market interest.

Understanding news events and economic calendars, as highlighted in related resources, is also crucial for anticipating market reactions and capitalizing on short-term price swings. The book likely encourages a systematic approach to opportunity identification, avoiding impulsive decisions based on speculation.

Risk Management Techniques

A Beginner’s Guide to Day Trading Online (2nd edition) undoubtedly emphasizes robust risk management as paramount for survival and profitability. Protecting capital is presented as more important than maximizing gains, especially for novices.

The guide likely details the implementation of stop-loss orders to limit potential losses on each trade, alongside position sizing strategies to control exposure based on account balance and risk tolerance. Diversification, even within day trading, might be discussed to mitigate the impact of any single trade.

Furthermore, the book probably stresses the importance of never risking more than a small percentage of trading capital on any single setup, fostering discipline and preventing emotional decision-making.

Position Sizing and Capital Allocation

A Beginner’s Guide to Day Trading Online (2nd edition) likely dedicates significant attention to position sizing and capital allocation, crucial elements for long-term success. It probably advocates for a conservative approach, particularly for beginners, to preserve trading capital.

The guide likely explains how to calculate appropriate position sizes based on individual risk tolerance, account size, and the volatility of the traded asset. A common rule of thumb, potentially discussed, is risking no more than 1-2% of capital per trade.

Effective capital allocation strategies, ensuring sufficient funds remain for multiple trading opportunities, are also likely covered, preventing over-leveraging and impulsive decisions.

Advanced Strategies & Tools

A Beginner’s Guide to Day Trading Online (2nd edition) expands beyond basics, potentially covering technical indicators, scalping, momentum trading, and news-driven strategies for skilled traders.

Using Technical Indicators

A Beginner’s Guide to Day Trading Online (2nd edition) likely delves into the world of technical indicators, crucial tools for analyzing price movements and identifying potential trading opportunities. These indicators transform raw price data into digestible signals.

Expect coverage of popular indicators like Moving Averages, used to smooth price data and identify trends; the Relative Strength Index (RSI), measuring the magnitude of recent price changes to evaluate overbought or oversold conditions; and MACD (Moving Average Convergence Divergence), revealing changes in the strength, direction, momentum, and duration of a trend in a stock’s price.

Understanding how these indicators work, their limitations, and how to combine them effectively is key to developing a robust day trading strategy. The guide probably emphasizes that no single indicator is foolproof and encourages a holistic approach to analysis.

Scalping vs. Momentum Trading

A Beginner’s Guide to Day Trading Online (2nd edition) would likely differentiate between two popular, yet distinct, day trading styles: scalping and momentum trading; Scalping aims to profit from tiny price changes, often holding positions for mere seconds, requiring high frequency and precision.

Conversely, momentum trading focuses on capitalizing on strong price trends, holding positions for minutes or even hours, seeking larger gains from sustained movements. The guide probably explains that scalping demands intense focus and quick decision-making, while momentum trading requires identifying stocks with significant upward or downward force.

It would likely discuss the risk profiles of each, with scalping offering smaller potential profits but also limited risk per trade, and momentum trading presenting larger rewards but also greater potential losses.

News Trading and Economic Calendars

A Beginner’s Guide to Day Trading Online (2nd edition) would emphasize the crucial role of news events and economic data releases in influencing market volatility. It would likely detail how to interpret economic calendars, highlighting key indicators like GDP, employment figures, and interest rate decisions.

The guide would explain how these announcements can create immediate price swings, presenting both opportunities and risks for day traders. It would likely advise beginners to understand the potential impact of different news types and to avoid trading immediately during major releases, due to increased uncertainty.

Furthermore, it would probably cover resources for staying informed about breaking news and analyzing its potential market consequences.

Psychology of Day Trading

A Beginner’s Guide to Day Trading Online (2nd edition) stresses emotional control, discipline, and patience as vital skills for navigating the pressures of daily trading.

Controlling Emotions

A Beginner’s Guide to Day Trading Online (2nd edition) emphasizes that mastering your emotions is paramount to success. The volatile nature of day trading can trigger fear, greed, and impulsiveness, leading to poor decisions.

Recognizing these emotional responses is the first step. The guide likely advocates for developing a pre-defined trading plan and sticking to it, regardless of market fluctuations. Avoiding revenge trading – attempting to recoup losses with reckless bets – is crucial.

Furthermore, understanding your risk tolerance and accepting losses as a natural part of trading are key components of emotional control. Detachment from the outcome and focusing on the process, rather than solely on profits, can foster a more rational and disciplined approach.

Discipline and Patience

A Beginner’s Guide to Day Trading Online (2nd edition) undoubtedly highlights discipline and patience as cornerstones of a successful trading strategy. Consistent application of a well-defined trading plan, even during tempting deviations, is essential.

Impulsive decisions, driven by market noise or fleeting opportunities, often lead to losses. The guide likely stresses the importance of waiting for setups that align with your pre-determined criteria, resisting the urge to force trades.

Patience is equally vital; not every day presents profitable opportunities. Accepting periods of inactivity and avoiding overtrading are crucial for preserving capital and maintaining a long-term perspective. Successful day trading demands a methodical, patient approach.

Resources for Continued Learning

A Beginner’s Guide to Day Trading Online (2nd edition) suggests exploring recommended books, websites, and online communities for ongoing education and support.

These resources enhance skills and provide valuable insights into the dynamic world of day trading.

Recommended Books and Websites

A Beginner’s Guide to Day Trading Online (2nd edition) serves as a strong foundation, but continuous learning is crucial. Supplement your knowledge with additional resources to stay ahead in the fast-paced trading world.

Consider exploring books focusing on technical analysis, risk management, and trading psychology. Websites like Investopedia offer comprehensive definitions and educational articles. Look into financial news sources for market updates and analysis.

Capterra provides reviews of hospitality property management software, which, while seemingly unrelated, demonstrates the importance of informed decision-making – a skill transferable to trading. Online forums and communities can offer valuable peer-to-peer learning opportunities, but always verify information independently. Remember to critically evaluate all sources and adapt strategies to your individual trading style.

Online Trading Communities and Forums

Following A Beginner’s Guide to Day Trading Online (2nd edition), engaging with online communities can accelerate your learning. Numerous forums and platforms connect traders of all levels, fostering knowledge sharing and support.

These spaces allow you to discuss strategies, analyze market trends, and learn from experienced traders. However, exercise caution; information quality varies significantly. Always independently verify advice before implementing it in your trading.

Be wary of “pump and dump” schemes or overly optimistic predictions. Remember that successful trading requires discipline and critical thinking. While communities offer valuable insights, they shouldn’t replace your own research and analysis. Consider platforms focused on hospitality management software reviews as a parallel – discerning reliable information is key in any field.

Review of “A Beginner’s Guide to Day Trading Online (2nd Edition)”

“A Beginner’s Guide to Day Trading Online (2nd edition)” serves as a solid foundation for aspiring traders, effectively demystifying complex concepts. The book’s strength lies in its accessible language and practical approach, guiding readers through essential strategies and risk management techniques.

While it doesn’t guarantee profits – a crucial disclaimer – it equips beginners with the necessary tools to navigate the market. The 2026 updates are valuable, reflecting current market dynamics and technological advancements, much like current hospitality property management software reviews.

However, some advanced topics could benefit from further elaboration. Overall, it’s a worthwhile investment for those serious about learning the fundamentals of day trading.

wotlk classic leveling guide 1-80

Wrath of the Lich King Classic leveling presents a unique journey from 1 to 80, differing significantly from previous expansions;
Several classes excel, offering varied experiences,
with Frost Mage and Combat Rogue being particularly efficient choices for a swift ascent.

Overview of Leveling in WotLK Classic

Leveling in Wrath of the Lich King Classic is generally faster than in Vanilla or The Burning Crusade, benefiting from increased experience gains and streamlined questing. Players can expect a more fluid progression, especially between levels 60-80 in Northrend.
Dungeons offer substantial experience, but queue times can vary.
Efficient leveling relies on optimizing quest routes, utilizing AoE capabilities where possible, and strategically choosing talents.
The journey emphasizes a balance between questing and dungeon runs for optimal results.

Changes from Classic/TBC Leveling

WotLK Classic introduces significant changes compared to its predecessors. Experience gains are notably increased, accelerating the leveling process. Questing becomes more focused and less reliant on extensive grinding. Dungeon leveling is more viable, offering substantial rewards. The introduction of the Death Knight class provides a unique leveling experience. Travel systems are improved, reducing downtime. Overall, WotLK offers a more accessible and engaging leveling experience, prioritizing efficiency and player agency over arduous tasks.

Class Leveling Viability (1-80)

WotLK Classic offers diverse class leveling experiences. Frost Mage, Combat Rogue, Beast Mastery Hunter, and Affliction Warlock stand out for speed and efficiency.

Frost Mage Leveling Guide

Frost Mage leveling in Wrath of the Lich King Classic is remarkably strong, particularly due to potent Area of Effect (AoE) capabilities. Players can efficiently clear packs of enemies, making questing swift. While an AoE build is popular, single-target remains viable.

Soloing challenging content is achievable with critical strike and proc luck. Dungeon groups, when available, amplify AoE damage. This class offers a balance of survivability and damage, making it a consistently good choice throughout the 1-80 leveling process.

Combat Rogue Leveling Guide

Combat Rogue in Wrath of the Lich King Classic provides a fast-paced leveling experience focused on sustained damage. This specialization excels at quickly dispatching enemies, making quest completion efficient. The guide covers optimal talent builds, leveling rotations, and crucial cooldowns to maximize progress.

Understanding new abilities and prioritizing appropriate gear are key. Leveling professions and consumables further enhance the rogue’s capabilities. Mastering these elements ensures a smooth and powerful journey from levels 1 to 80.

Beast Mastery Hunter Leveling Guide

Beast Mastery Hunter shines in Wrath of the Lich King Classic leveling due to its consistent damage output and mobility. This guide details the best talent builds for efficient questing, focusing on pet management and maximizing damage potential. Learn optimal leveling rotations and understand key cooldowns for tougher encounters.

Prioritize gear that boosts pet damage and survivability. Selecting appropriate professions and utilizing consumables will significantly speed up your journey to level 80, making the Hunter a formidable solo leveler.

Affliction Warlock Leveling Guide

Affliction Warlock offers a strong, albeit slower-paced, leveling experience in Wrath of the Lich King Classic. This guide focuses on maximizing damage-over-time effects and efficient mana management. Discover the best talent builds for sustained damage and survivability while questing.

Understanding key cooldowns and new abilities is crucial. Prioritize gear with stats that enhance DoT damage and mana regeneration. Utilizing professions and consumables will optimize your path to level 80.

Leveling Zones and Questing Strategies

Optimal questing involves efficient zone selection, prioritizing areas with dense quest hubs and minimizing travel. Northrend zones offer the fastest experience from levels 60-80.

Optimal Leveling Zones by Level Range (1-60)

For levels 1-20, focus on your starting zone, completing all available quests to establish a solid foundation. Levels 20-30 benefit from exploring Dun Morogh or Elwynn Forest, maximizing quest efficiency.

Levels 30-40 should be spent in Westfall and Redridge Highlands, offering a good balance of quests and experience; Levels 40-50 are best tackled in Stranglethorn Vale, despite its PvP focus.

Finally, levels 50-60 are efficiently leveled in the Burning Steppes and Searing Gorge, preparing you for the journey into Northrend.

Northrend Zones and Questing Efficiency (60-80)

Borean Tundra and Howling Fjord are excellent starting points in Northrend (60-70), offering dense quest hubs. Prioritize completing the initial zone storylines for substantial experience gains.

Dragonblight (70-74) provides a compelling narrative and efficient questing, while Grizzly Hills (74-77) boasts a more open-world experience.

Zul’Drak (77-80) and Sholazar Basin (78-80) offer the fastest leveling, but may require grouping for certain quests. Efficient pathing and quest selection are crucial.

Talent Builds for Efficient Leveling

Optimal talent builds prioritize consistent damage output and survivability. AoE builds excel in dungeon scenarios, while single-target builds are ideal for questing efficiently.

Core Talents for Faster Quest Completion

For maximizing questing speed, focus on talents that enhance damage output and reduce downtime. Frost Mages benefit from talents boosting Ice Lance and reducing mana costs. Combat Rogues should prioritize talents increasing energy regeneration and finishing move damage. Beast Mastery Hunters thrive with talents improving pet damage and reducing cooldowns. Affliction Warlocks should focus on talents that enhance damage over time effects and survivability. These core talents ensure swift dispatch of quest mobs, minimizing wasted time and maximizing experience gains throughout Northrend and beyond.

AoE vs. Single-Target Builds

Leveling build choice depends on playstyle and class. Frost Mages excel with AoE, efficiently clearing dense quest hubs, though single-target is viable. Combat Rogues lean towards single-target burst, effective for elite quests. Beast Mastery Hunters benefit from consistent single-target damage, enhanced by pet abilities. Affliction Warlocks thrive with sustained AoE damage over time. Consider quest density; AoE shines in crowded areas, while single-target excels against tougher, isolated mobs. Adapt your build to optimize efficiency.

Gear and Stat Priorities

Stamina is paramount for survivability while leveling. Agility, Strength, and Intellect boost damage output, depending on your class. Prioritize item level initially, then refine for stats.

Best in Slot (BiS) Leveling Gear

Truly “BiS” gear is less critical during leveling than consistent upgrades. However, seeking out specific items can accelerate progress. For example, crafted gear from professions like Jewelcrafting and Enchanting often provides significant stat boosts. Dungeon drops, particularly from Heroic difficulties, frequently offer superior stats compared to quest rewards.

Focus on acquiring gear with Stamina and your primary stat (Agility, Strength, or Intellect). Don’t obsess over perfect pieces; prioritize consistent upgrades to maintain a smooth leveling experience. Remember that gear is frequently replaced as you level.

Stat Weights for Leveling

Stamina reigns supreme for survivability, directly impacting your ability to withstand damage and minimize downtime. Following stamina, your primary stat – Agility for Hunters/Rogues, Strength for Warriors/Paladins, and Intellect for Mages/Warlocks – significantly boosts damage output.

Critical Strike and Haste offer noticeable benefits, but are less impactful than the core stats. Spirit is generally lower priority, except for classes that utilize mana efficiently. Prioritize a balanced approach, ensuring adequate stamina while maximizing your damage-dealing stat.

Professions for Leveling

Gathering professions like Herbalism, Mining, and Skinning provide consistent gold income while leveling. Crafting professions, such as Alchemy and Enchanting, offer useful consumables and gear upgrades.

Gathering Professions (Herbalism, Mining, Skinning)

Herbalism and Mining are exceptionally valuable during the leveling process, providing a steady stream of gold from selling gathered materials on the Auction House. Skinning, while less consistently profitable, offers a reliable income source from creature kills, complementing questing nicely.

These professions minimize downtime, turning travel time into productive gold-making opportunities. They also reduce reliance on purchased consumables, saving gold in the long run. Combining two gathering professions maximizes efficiency, allowing for diverse resource collection throughout Northrend and beyond.

Crafting Professions (Alchemy, Enchanting, Jewelcrafting)

Alchemy provides valuable potions and elixirs for increased experience gain and combat effectiveness, boosting leveling speed. Enchanting allows for self-sufficiency in gear upgrades, reducing gold expenditure on enhancements. Jewelcrafting offers powerful gems to further optimize equipment, enhancing character stats.

While requiring initial investment, crafting professions become increasingly profitable as you level. They offer opportunities to create sought-after items for other players, generating substantial gold income alongside personal benefits.

Consumables and Buffs

Food and potions significantly increase experience gains, while elixirs and flasks enhance combat efficiency. Strategically utilizing these boosts accelerates your leveling progress considerably.

Food and Potions for Increased XP Gain

Maximizing experience per hour requires consistent consumable usage. Prioritize foods offering a Spirit bonus, as this directly translates to increased mana regeneration, crucial for sustained questing. Consider utilizing Potions of Expedience for a temporary haste boost, allowing faster kill times.

Regularly consuming these items, even during downtime, compounds their effect over time. While expensive, the investment in consumables can drastically reduce overall leveling duration; Remember to stack food buffs with any available world events or guild perks for optimal results.

Elixirs and Flasks for Combat Efficiency

Sustained combat performance is vital for efficient leveling. Elixirs of Firepower or similar damage-enhancing elixirs provide a noticeable boost to DPS, speeding up kill times. For classes reliant on mana, Flasks of Supreme Power offer a significant, prolonged mana regeneration increase.

These consumables are particularly valuable during challenging questlines or elite mob encounters. While costly, the reduced combat duration and increased survivability justify the expense, ultimately accelerating your progress towards level 80.

Dungeons and Group Leveling

Dungeons offer substantial XP gains and gear upgrades, but queue times can vary. AoE-focused classes, like Frost Mages, thrive in dungeon environments, maximizing efficiency.

Efficient Dungeon Runs for Leveling

Dungeon runs are a cornerstone of efficient leveling in Wrath of the Lich King Classic. Prioritize dungeons that offer quick completion times and high experience rewards. Focus on grouping with players who understand their roles and prioritize speed.

Stocking up on consumables, like potions and food, can significantly boost your performance within dungeons.
Classes with strong Area of Effect (AoE) capabilities, such as Frost Mages, excel at clearing packs of enemies quickly, maximizing XP gains per run. Remember to efficiently pull mobs and minimize downtime.

Optimal Dungeon Queue Strategy

Queueing as a tank or healer drastically reduces wait times in Wrath of the Lich King Classic dungeons. If playing a DPS class, consider having a friend queue as tank/healer for faster entry. Prioritize dungeons appropriate for your level to avoid wasted time.

Be prepared before entering; know the dungeon layout and boss mechanics; Efficient groups complete runs faster, increasing XP per hour. Avoid prolonged dungeon queues by supplementing with questing when wait times are excessive.

Tips and Tricks for Faster Leveling

Maximize XP gains by utilizing available buffs and participating in in-game events. Minimize travel time through efficient flight path usage and strategic quest selection.

Utilizing XP Buffs and Events

Leveraging experience buffs is crucial for accelerated leveling in WotLK Classic. Keep an eye out for Darkmoon Faire events, offering a significant +10% XP boost. Consumables like Elixirs of Experience and scrolls can further amplify gains.

Additionally, pay attention to server-wide events or holiday celebrations that may introduce temporary XP bonuses. Coordinating leveling during these periods can dramatically reduce the time required to reach the level cap, maximizing efficiency and enjoyment.

Minimizing Travel Time

Efficient travel is paramount for swift leveling in WotLK Classic. Utilize the Hearthstone strategically, setting it to major cities or inns near desired quest hubs. Invest in appropriate riding skills as quickly as possible – faster mounts drastically reduce travel durations.

Consider utilizing flight paths extensively, planning routes to minimize ground travel. Grouping with others can also share mount speeds, and understanding zone layouts will help optimize questing paths.

Avoiding Common Leveling Pitfalls

Leveling challenges include elite mobs and resource management. Prioritize quest completion, utilize proper tactics against elites, and carefully manage gold for optimal progression.

Dealing with Elite Mobs

Elite mobs pose significant challenges during WotLK Classic leveling. Avoid engaging them solo unless adequately prepared with consumables and a solid understanding of your class’s defensive capabilities. Consider kiting strategies, utilizing terrain to your advantage, or seeking assistance from fellow players.

Prioritize quests that minimize encounters with elites, and always assess the risk versus reward before attempting to tackle them. Remember, patience and strategic planning are key to overcoming these obstacles efficiently and safely, ensuring a smoother leveling experience.

Managing Gold and Resources

Gold and resource management are crucial for a smooth WotLK Classic leveling experience. Prioritize essential expenses like skills, training, and necessary repairs. Utilize gathering professions – Herbalism, Mining, and Skinning – to supplement income while questing.

Avoid unnecessary purchases and carefully evaluate auction house prices. Efficiently managing your resources allows for consistent access to vital consumables and gear upgrades, ultimately accelerating your journey to level 80 without significant financial setbacks.

f01 fire guard study guide

F01 Fire Guard Study Guide: A Comprehensive Plan

This guide prepares individuals for the NYC F01 exam, focusing on fire hazard prevention and effective response, essential for impairment fire guard duties.

The F01 Certification of Fitness (C of F), administered by the FDNY, is a crucial requirement for individuals designated to perform impairment fire guard duties within New York City buildings. This certification specifically authorizes holders to maintain vigilant fire watch responsibilities when required fire protection systems are temporarily out of service. Obtaining the F01 certification demonstrates a foundational understanding of fire safety principles, preventative measures, and emergency response protocols.

It’s designed to equip individuals with the necessary skills to identify potential fire hazards, understand proper procedures during system impairments, and effectively respond should a fire event occur, ensuring building safety and compliance with city regulations. Successful completion of the F01 exam is a testament to one’s commitment to fire safety.

What is the F01 Certificate of Fitness?

The F01 Certificate of Fitness is a license issued by the New York City Fire Department (FDNY) that permits individuals to serve as impairment fire guards. This role is critical when a building’s fire protection systems – such as sprinklers, alarms, or standpipes – are temporarily disabled for maintenance, repairs, or construction. Holding this certification signifies that the individual has demonstrated knowledge of fire prevention, detection, and suppression techniques.

Specifically, the F01 C of F authorizes the holder to conduct continuous fire watch, ensuring early detection of any fire hazards and prompt reporting of any emergencies, safeguarding occupants and property during system impairments. It’s a vital component of maintaining fire safety standards in NYC.

Importance of Fire Guard Certification in NYC

Fire Guard certification, particularly the F01, is paramount in New York City due to the density of buildings and complex fire safety regulations. When fire protection systems are impaired, a certified fire guard is legally required to maintain constant vigilance, mitigating risks during vulnerable periods. This certification ensures individuals possess the necessary training to identify hazards, implement preventative measures, and respond effectively to emergencies.

NYC’s stringent fire codes necessitate qualified personnel to oversee fire watch, protecting lives and property. The F01 certification demonstrates a commitment to fire safety, fulfilling legal obligations and contributing to a safer urban environment for residents and businesses alike.

Fire Safety Principles

Understanding fire dynamics is crucial; the F01 curriculum emphasizes the fire triangle, common causes, and proactive measures for prevention and effective response.

Understanding Fire Dynamics

Fire dynamics encompass the complex behaviors of fire, including its development, spread, and impact on structures and occupants. The F01 Fire Guard certification prioritizes a thorough grasp of these principles. Key aspects include heat transfer – conduction, convection, and radiation – and how they influence fire growth.

Understanding fuel loads, ventilation, and the impact of building construction are also vital. Fire dynamics aren’t static; they evolve rapidly, demanding constant assessment. The F01 training equips guards to predict fire behavior based on observed conditions, enabling informed decision-making during emergencies and effective fire prevention strategies. This knowledge is fundamental for safeguarding life and property.

The Fire Triangle and Fire Tetrahedron

The fire triangle illustrates the three essential elements for combustion: heat, fuel, and an oxidizing agent (typically oxygen). Removing any one of these elements extinguishes the fire. The F01 curriculum heavily emphasizes this foundational concept. However, modern fire dynamics incorporate the fire tetrahedron, adding a fourth element – the chemical chain reaction.

Understanding the chain reaction is crucial for selecting appropriate extinguishing agents. Interrupting this chain reaction suppresses combustion. F01 training details how different extinguishing methods target these elements. Mastering these models allows fire guards to effectively assess fire hazards, implement preventative measures, and respond appropriately during fire emergencies, ensuring safety and minimizing damage.

Common Causes of Fires

The F01 Fire Guard certification prioritizes recognizing prevalent fire ignition sources. Electrical malfunctions, including faulty wiring and overloaded circuits, are leading causes. Cooking equipment left unattended poses a significant risk, alongside improper storage of flammable liquids and materials. Heating equipment, particularly space heaters, demands careful monitoring.

Intentional acts, like arson, and accidental ignition from smoking materials also contribute. The curriculum stresses hazard identification and risk assessment to proactively mitigate these dangers. Understanding these common causes empowers fire guards to implement preventative measures, conduct thorough inspections, and maintain a vigilant watch, ultimately safeguarding lives and property.

Fire Prevention Methods

Effective fire prevention involves hazard identification, proper storage of flammables, electrical safety protocols, and diligent housekeeping – key elements of the F01 curriculum.

Hazard Identification and Risk Assessment

A core component of F01 training centers on proactively identifying potential fire hazards within a building or work environment. This involves a systematic assessment of all areas, looking for combustible materials, ignition sources, and potential obstructions to egress.

Risk assessment follows hazard identification, evaluating the likelihood and severity of a fire occurring. Factors considered include the quantity and type of flammable materials, the presence of ignition sources (electrical equipment, open flames), and the building’s occupancy and construction type.

Understanding building layouts, emergency exits, and fire protection systems is crucial. Regular inspections and documentation of identified hazards and assessed risks are essential for maintaining a safe environment and fulfilling the responsibilities of an impairment fire guard, as outlined in the F01 certification.

Proper Storage of Flammable Materials

The F01 curriculum emphasizes the critical importance of correctly storing flammable and combustible liquids and materials to minimize fire risks. This includes adhering to strict guidelines regarding container types, labeling, and quantity limits.

Flammable liquids must be stored in approved safety cabinets designed to contain spills and prevent ignition. These cabinets should be properly ventilated and located away from ignition sources like electrical outlets or open flames.

Materials like paints, solvents, and aerosols require specific storage conditions, often involving temperature control and segregation from incompatible substances. Regular inspections are vital to ensure compliance with storage regulations and maintain a safe environment, a key responsibility for those holding the F01 Certificate of Fitness.

Electrical Safety and Fire Prevention

The F01 Fire Guard training highlights electrical hazards as a leading cause of fires, emphasizing proactive prevention measures. Overloaded circuits, damaged wiring, and improper use of extension cords are key areas of concern; Regular inspection of electrical equipment is crucial, identifying frayed wires, loose connections, and malfunctioning devices.

It’s vital to ensure electrical panels have adequate clearance and are not obstructed. The use of Ground Fault Circuit Interrupters (GFCIs) in wet locations is mandatory, preventing shocks and reducing fire risks.

Personnel must be trained to recognize electrical hazards and report any issues immediately. Never attempt to repair electrical equipment without proper qualifications; a qualified electrician should handle all repairs, safeguarding against potential fire incidents.

Housekeeping and Fire Safety

The F01 curriculum stresses that good housekeeping is fundamental to fire prevention. Accumulation of combustible materials – like dust, trash, and cardboard – significantly increases fire hazards. Regular cleaning and waste disposal are essential practices, minimizing fuel for potential fires.

Storage areas must be organized, ensuring clear aisles and access to fire protection equipment. Properly storing flammable liquids in approved containers, away from ignition sources, is paramount.

Maintaining clear exit pathways is critical for safe evacuation. Promptly addressing spills and leaks prevents slippery surfaces and reduces fire risks. A clean and orderly environment not only enhances safety but also facilitates quicker fire detection and suppression efforts.

Fire Detection and Alarm Systems

F01 training covers various fire detectors, manual pull stations, and alarm components. Understanding these systems is vital for early fire identification and response.

Types of Fire Detectors

The F01 curriculum details several fire detector types, each utilizing distinct sensing technologies. Ionization smoke detectors are generally more responsive to flaming fires, while photoelectric detectors excel at detecting smoldering combustion. Heat detectors, conversely, activate upon reaching a predetermined temperature, making them suitable for areas prone to false alarms from smoke.

Furthermore, flame detectors respond to the infrared or ultraviolet radiation emitted by flames. Beam detectors project a beam of light across a large area, triggering an alarm if the beam is interrupted. Understanding the operational principles, advantages, and limitations of each type is crucial for proper fire detection system management and effective impairment fire guard duties, as outlined in the F01 certification requirements.

Manual Pull Stations

Manual pull stations are a critical component of fire alarm systems, enabling immediate activation in emergency situations. These devices, typically located along egress paths, require a deliberate action – pulling a lever or breaking glass – to initiate an alarm signal. The F01 certification emphasizes recognizing different pull station types and understanding their proper operation.

Impairment fire guards must ensure these stations remain unobstructed and accessible. Regular inspection confirms they are not damaged or compromised. Knowing the system’s response upon activation, including notification procedures and potential system lockdowns, is vital. Proper functionality is paramount for a swift and effective emergency response, a key focus of the F01 Fire Guard training.

Fire Alarm System Components

A comprehensive understanding of fire alarm system components is crucial for F01 certified individuals. These systems typically include control panels – the “brain” – initiating devices like smoke and heat detectors, notification appliances (horns, strobes), and power supplies. The F01 curriculum stresses recognizing these elements and their interconnectedness.

Impairment fire guards must be familiar with system layouts and the location of key components. Knowing how to identify a malfunctioning component and report it promptly is essential. Understanding the difference between addressable and conventional systems is also important. Proper system knowledge ensures effective monitoring and a rapid response to any fire-related event, aligning with F01 certification objectives.

Fire Extinguishing Equipment

F01 training covers various extinguisher types (A, B, C, D, K), proper usage via the PASS method, and crucial maintenance/inspection procedures for safety.

Types of Fire Extinguishers (Class A, B, C, D, K)

Understanding extinguisher classifications is vital for F01 certification. Class A extinguishers combat ordinary combustibles like wood and paper with water. Class B tackles flammable liquids – gasoline, oil – using foam or CO2. Class C extinguishers are for electrical fires, employing non-conductive agents.

More specialized types exist: Class D extinguishers handle combustible metals like magnesium, requiring dry powder agents. Finally, Class K extinguishers are specifically designed for kitchen fires involving cooking oils and fats, utilizing wet chemical agents.

Proper selection is key; using the wrong extinguisher can worsen a fire. F01 training emphasizes identifying the fuel source to choose the appropriate extinguishing agent, ensuring effective and safe fire suppression.

Proper Use of Fire Extinguishers (PASS Method)

The PASS method is crucial for effective fire extinguisher operation, a core component of F01 certification. P stands for Pull the pin, breaking the tamper seal. A means Aim the nozzle at the base of the fire, not the flames. S instructs you to Squeeze the handle, releasing the extinguishing agent.

Finally, S stands for Sweep from side to side, covering the burning material.

Remember to maintain a safe distance and always have an escape route. F01 training stresses practicing this method to ensure quick and confident response during a fire emergency, maximizing safety and minimizing damage.

Maintenance and Inspection of Fire Extinguishers

Regular maintenance and inspection of fire extinguishers are vital for ensuring their reliability, a key aspect of F01 Fire Guard certification. Monthly visual inspections should verify the extinguisher is in its designated location, accessible, and undamaged. Check the pressure gauge to confirm it’s within the operable range.

Annual professional inspections, conducted by licensed technicians, are legally required. These involve a more thorough examination, including hydrostatic testing and recharging if necessary.

Proper documentation of all inspections is essential for compliance and demonstrates a commitment to fire safety, a critical responsibility for any F01 certified individual.

Fire Watch Responsibilities

F01 holders maintain fire watch during system impairments, diligently patrolling for hazards, documenting conditions, and promptly reporting any fire-related issues.

When is a Fire Watch Required?

A fire watch, necessitating an F01 certified individual, becomes mandatory whenever a building’s required fire protection systems are compromised or out of service. This includes scenarios like sprinkler system shutdowns for maintenance, fire alarm system malfunctions, or any situation where a critical safety component isn’t fully operational. The purpose is to provide continuous monitoring and immediate response capabilities.

Specifically, if a sprinkler system is impaired – even partially – a dedicated fire watch is essential. Similarly, any disruption to the fire alarm system, including disabled detectors or control panels, triggers the need for vigilant observation. Essentially, any condition that reduces the building’s fire safety level demands the presence of a qualified impairment fire guard.

Duties of an Impairment Fire Guard

The impairment fire guard, holding an F01 Certificate of Fitness, assumes critical responsibilities during fire protection system impairments. These duties center around continuous fire watch, diligently patrolling assigned areas to detect any signs of fire – smoke, unusual smells, or visible flames. Immediate reporting of any detected hazards is paramount, utilizing established communication protocols to alert the fire department and building management.

Guards must also prevent the re-introduction of ignition sources into the affected area and ensure proper housekeeping to minimize fire risks. Detailed documentation of patrol rounds, observations, and any actions taken is essential, providing a clear record of fire watch activities throughout the impairment period.

Documentation and Reporting During Fire Watch

Meticulous documentation is a cornerstone of impairment fire guard duties. A detailed log must record each patrol round, including the time, area covered, and any observations – even if nothing unusual is noted. Any detected hazards, like smoke or unusual odors, require immediate and precise reporting, specifying the location, nature of the hazard, and actions taken.

This log serves as a critical record for the FDNY and building management, demonstrating diligent fire watch coverage. Reports should include the start and end times of the impairment, the specific systems affected, and any communication with emergency services. Accuracy and completeness are vital for accountability and safety.

Emergency Procedures

Effective emergency response involves swift evacuation, accurate fire reporting to the FDNY, and providing assistance, especially to individuals facing mobility challenges.

Evacuation Procedures

During a fire emergency, a calm and orderly evacuation is paramount. Fire guards must understand building-specific evacuation plans, including primary and secondary exit routes. Clear communication is vital; utilize verbal instructions and, if available, the building’s public address system to direct occupants.

Prioritize assisting those needing help, such as individuals with disabilities or limited mobility. Ensure all occupants are accounted for at designated assembly points, and report any missing persons to the responding fire department personnel. Regular fire drills are crucial for familiarizing occupants with procedures, minimizing panic, and ensuring a swift, safe evacuation.

Fire guards should actively prevent re-entry into the building until authorized by the FDNY, maintaining a secure perimeter and assisting emergency responders.

Reporting a Fire

Prompt and accurate fire reporting is critical. Upon discovering a fire, immediately activate the nearest manual pull station to alert occupants and the fire department. Dial 911 and provide the operator with a clear and concise report, including the building’s address, the fire’s exact location (floor, room number), and the nature of the fire if known.

Remain calm and speak clearly, answering all questions from the dispatcher. Do not hang up until instructed to do so. After reporting, notify building management and assist with evacuation procedures. Accurate information aids the FDNY in a rapid and effective response, potentially saving lives and minimizing property damage.

Assisting Individuals with Disabilities

During an evacuation, prioritize assisting individuals with disabilities. Be aware of those who may require help, such as individuals using wheelchairs, those with visual or hearing impairments, or those with mobility limitations. Offer verbal assistance and guidance, clearly stating the evacuation route and potential hazards.

If safe, physically assist with evacuation, utilizing appropriate techniques. Never attempt to move someone if it could cause further injury. Designate a safe waiting area for those unable to evacuate immediately, and inform the fire department of their location upon arrival. Patience and clear communication are vital during emergency situations.

FDNY F01 Exam Preparation

Success requires dedicated study using available resources, including practice exams and quizzes. Understand the exam’s content outline for focused preparation.

Study Materials and Resources

Preparing for the FDNY F01 exam demands utilizing a variety of study materials. A clear, concise review guide specifically designed for the F-01 Fire Guard Certificate of Fitness is invaluable. These guides, often recently updated, frequently include full-length practice exams mirroring the actual test format.

Furthermore, explore online resources and practice test applications – some are specifically tailored to the F01 certification. Citywide examination study materials are also available, providing a comprehensive overview of the required knowledge. Don’t underestimate the power of reviewing official FDNY publications and safety codes to solidify your understanding of fire safety principles and regulations.

Practice Exams and Quizzes

Consistent practice is crucial for success on the FDNY F01 exam. Utilizing practice exams allows you to familiarize yourself with the exam format, question types, and time constraints. Several resources offer full-length practice tests designed to simulate the actual testing environment.

Dedicated F01 practice test apps are available, specifically engineered to help candidates prepare effectively. Regularly taking quizzes focused on key concepts reinforces your understanding of fire safety principles, prevention methods, and emergency procedures. Analyzing your performance on these assessments identifies areas needing further study, maximizing your chances of passing the certification exam.

Exam Format and Content Outline

The FDNY F01 exam comprehensively assesses your knowledge of fire safety regulations and procedures. Expect a multiple-choice format, testing your understanding of key concepts covered in the study guide. The content heavily emphasizes practical application of fire prevention techniques and emergency response protocols.

Core areas include fire dynamics, hazard identification, fire extinguishing equipment, and fire watch responsibilities; Familiarity with NYC fire codes and the duties of an impairment fire guard is essential. The exam evaluates your ability to apply this knowledge to real-world scenarios, ensuring you’re prepared to maintain fire safety in buildings with impaired systems.

Troubleshooting Common Fire Safety Issues

Effective responses to electrical hazards, flammable spills, and alarms are crucial; this section details procedures for safe and prompt issue resolution.

Addressing Electrical Hazards

Electrical malfunctions are significant fire risks, demanding immediate attention. Recognizing overloaded circuits – indicated by tripped breakers or blown fuses – is paramount. Never attempt repairs without proper training and authorization; always report such issues to qualified personnel. Inspect power cords for damage, replacing frayed or cracked ones immediately.

Ensure electrical panels are unobstructed and accessible. Avoid using extension cords as permanent wiring solutions, as they can overheat. Water and electricity pose a severe hazard; never operate electrical equipment with wet hands or in damp environments. Promptly address sparking outlets or unusual burning smells, initiating evacuation if necessary. Prioritize safety and report all electrical concerns diligently.

Dealing with Flammable Liquid Spills

Flammable liquid spills require swift and decisive action to prevent ignition. Immediately eliminate all ignition sources – open flames, sparks, and electrical equipment – in the vicinity. Ventilate the area thoroughly to disperse vapors. Small spills can be absorbed with inert materials like sand, vermiculite, or commercially available absorbent pads; never use combustible materials like sawdust.

For larger spills, contain the liquid to prevent it from spreading and notify the appropriate authorities. Ensure proper personal protective equipment (PPE) – gloves, eye protection, and respirators – is worn during cleanup. Dispose of contaminated materials according to established procedures. Report all spills, regardless of size, to maintain a safe environment.

Responding to Smoke or Fire Alarms

Upon hearing a smoke or fire alarm, immediate action is crucial. Initiate the building’s evacuation procedures, ensuring clear and calm communication to occupants. Investigate the alarm’s source if safe to do so, but prioritize evacuation. Never disregard an alarm – treat every activation as a potential emergency. If smoke or fire is detected, activate the manual pull station to alert others.

Report the alarm’s location and details to the fire department immediately. Assist individuals needing help with evacuation, and maintain a headcount to confirm everyone has safely exited. Document the incident, including the time, location, and actions taken, for accurate reporting.

rgp fitting guide

RGP Fitting Guide: A Comprehensive Overview (Updated 02/07/2026)

Today’s date is 02/07/2026. This guide details the intricacies of RGP lens fitting, encompassing modern techniques like AI and remote consultations for optimal vision correction.

Rigid Gas Permeable (RGP) lenses represent a significant advancement in contact lens technology, offering a compelling alternative to soft lenses for numerous patients. Understanding their unique properties is crucial for successful fitting. These lenses, crafted from durable, oxygen-permeable materials, provide exceptional clarity and long-term eye health benefits.

The fitting process demands a meticulous approach, considering individual corneal characteristics and lifestyle factors. Modern advancements, including artificial intelligence, are increasingly utilized to refine the fitting process, particularly for complex cases like keratoconus and post-refractive surgery eyes. Remote consultations, leveraging smartphone technology, are also expanding access to specialized RGP fitting expertise. Careful evaluation and precise lens selection are paramount to achieving optimal comfort and visual acuity.

What are Rigid Gas Permeable (RGP) Contact Lenses?

Rigid Gas Permeable (RGP) lenses are a type of contact lens made from firm, durable plastic that allows oxygen to pass through to the cornea. Unlike soft lenses, RGPs hold their shape on the eye, creating a smooth refracting surface for sharper vision. They are often preferred for correcting higher or irregular astigmatism and certain corneal conditions.

These lenses offer excellent durability and resistance to deposit buildup, contributing to long-term eye health. The 3rd and 9th hours of the mid-periphery are critical for lens support and base curve determination. Proper fitting requires careful assessment of corneal topography and tear film quality, ensuring optimal oxygen transmission and comfort for the wearer.

Benefits of RGP Lenses

RGP lenses offer several advantages over soft contact lenses. They provide sharper, crisper vision, particularly for individuals with astigmatism or keratoconus, due to their rigid structure creating a consistent refractive surface. RGPs are also more durable and resistant to deposits, leading to potentially lower replacement costs and improved long-term eye health.

Furthermore, they allow for greater oxygen permeability, reducing the risk of corneal hypoxia. Post-refractive surgery patients, especially those with decentered ablations, can often benefit from RGP fitting. Remote evaluations utilizing smartphones are now possible, increasing accessibility. Ultimately, RGPs can deliver superior visual acuity and comfort when properly fitted.

The RGP Fitting Process

A successful RGP fit requires a thorough patient evaluation, careful lens selection based on corneal topography, and precise trial lens assessment with fluorescein.

Initial Patient Evaluation

The cornerstone of successful RGP fitting lies in a comprehensive initial patient evaluation. This begins with a detailed case history, focusing on ocular surface health and previous contact lens experiences. A precise refraction is crucial, but equally important is corneal topography to map the corneal surface accurately.

Assessment of the tear film is paramount, as inadequate lubrication can significantly impact RGP lens comfort and fit. Practitioners must evaluate tear volume, breakup time, and overall quality. Slit-lamp evaluation is vital, especially post-refractive surgery, where classic fitting findings may not apply. Understanding the patient’s visual needs and lifestyle factors further refines the evaluation process, ensuring a tailored approach to lens selection and fitting.

Refraction and Corneal Topography

Accurate refraction is fundamental, establishing the starting point for RGP lens power selection. However, relying solely on refraction is insufficient. Corneal topography provides a detailed map of the corneal surface, revealing irregularities like astigmatism or corneal distortion that impact lens fit.

Topography is especially critical post-refractive surgery, identifying decentered ablations. Analyzing the topography helps determine appropriate lens diameters to ensure adequate coverage and prevent decentration. The 3rd and 9th-hour corneal points are key, defining lens support and base curve selection. Combining refraction and topography data allows for a precise and individualized lens design, maximizing visual acuity and comfort.

Assessment of Tear Film

A stable tear film is crucial for successful RGP lens wear. Insufficient or unstable tear film leads to discomfort, dryness, and potential corneal complications. Thorough assessment involves evaluating tear volume, osmolarity, and breakup time (TBUT). Reduced tear volume or a short TBUT indicates dry eye, requiring pre-fitting management.

Consider using dyes like Lissamine Green or Rose Bengal to identify corneal surface staining, revealing areas of epithelial stress. Addressing tear film deficiencies before lens fitting—with artificial tears or punctal plugs—improves lens adaptation and patient comfort. A healthy tear film ensures optimal lens movement, oxygen permeability, and overall visual performance, vital for long-term RGP lens success.

Lens Selection

Careful lens selection is paramount for successful RGP fitting. Initial choices depend on refraction, corneal curvature, and patient lifestyle. Material selection impacts oxygen transmissibility and comfort; modern silicone acrylate materials are often preferred. Determining the appropriate diameter and base curve are critical steps.

Diameter influences lens stability and comfort; larger diameters can aid decentration post-LASIK. Base curve dictates corneal coverage and oxygen flow, assessed at the 3rd and 9th hours. Trial lens sets allow for precise refinement. Consider edge design—aspheric edges often enhance comfort. Proper lens selection maximizes vision, comfort, and corneal health, leading to satisfied patients.

Diameter Considerations

Lens diameter significantly impacts RGP fit and performance. Larger diameters generally provide greater stability, particularly beneficial after refractive surgery with decentered ablations, aiding in centration. However, excessively large diameters can compromise oxygen permeability and induce corneal warp. Conversely, smaller diameters may decenter more easily, causing discomfort and reduced vision.

Corneal topography guides diameter selection, accounting for individual corneal eccentricity. Peripheral corneal curves influence the optimal diameter. A well-fitted lens should cover sufficient corneal surface without excessive bearing, ensuring adequate tear exchange. Careful consideration of diameter is crucial for both initial fitting and subsequent refinements, optimizing both comfort and visual acuity.

Base Curve Determination (3rd & 9th Hour Focus)

Accurate base curve selection is paramount for successful RGP fitting. The 3rd and 9th hours of the mid-periphery are critical support points, dictating lens alignment and movement. Assessing these zones determines the base curve needed for optimal fit. A steeper curve creates apical clearance, while a flatter curve results in apical touch.

Initial base curve estimation relies on keratometry and corneal topography readings. Evaluating fluorescein patterns reveals areas of impingement or pooling. Adjustments are made based on these observations, aiming for a balanced fit with minimal edge lift. Proper base curve ensures comfortable wear, optimal oxygen transmission, and clear vision, avoiding corneal stress.

Trial Lens Fitting

Trial lens fitting is a crucial step in RGP adaptation. Diagnostic lenses allow for precise evaluation of fit, comfort, and visual acuity before final ordering. Initial assessment involves slit-lamp biomicroscopy to observe lens centration, movement, and corneal clearance.

Fluorescein staining highlights areas of impingement or thinning, indicating potential issues. Patient feedback regarding comfort and vision is essential. Lens movement should be assessed during primary gaze and with blink. Adjustments to lens parameters – diameter, base curve, and power – are made iteratively until optimal fit is achieved, ensuring corneal health and visual satisfaction.

Slit-Lamp Evaluation of Lens Fit

Slit-lamp biomicroscopy is paramount during RGP fitting, especially post-refractive surgery where classic findings may be atypical. Assess lens centration – ideally centered over the pupil – and observe for decentration, which could indicate improper parameters; Evaluate corneal clearance under the lens; excessive or insufficient clearance can cause discomfort or hypoxia.

Look for fluorescein pooling, indicating areas of impingement, or thinning, suggesting excessive pressure. Assess lid interaction, noting any compression or blanching. Careful observation of these factors guides necessary adjustments to achieve a comfortable, healthy, and visually optimal fit for the patient.

Fluorescein Pattern Interpretation

A preferred fluorescein pattern reveals a 3-9-12 o’clock staining pattern with a clear, quiet periphery, indicating optimal lens-cornea relationship. However, interpretation requires nuance. A broad, uniform stain suggests a flat fit, potentially causing corneal abrasion or discomfort. Conversely, a dark, narrow band indicates a steep fit, risking hypoxia and epithelial edema.

Pooling at specific points signals localized impingement, requiring parameter adjustments. Absence of staining doesn’t always equate to a perfect fit; assess overall comfort and corneal physiology. Careful pattern analysis, combined with slit-lamp observation, is crucial for refining the RGP lens fit.

Special Considerations in RGP Fitting

Fitting post-refractive surgery, keratoconus, and toric corneas demands specialized approaches, often leveraging AI and larger diameter lenses for optimal visual outcomes.

RGP Fitting After Refractive Surgery

RGP fitting post-surgery requires meticulous slit-lamp evaluation, recognizing that traditional fitting principles may not directly apply due to altered corneal topography. Practitioners must anticipate potential challenges stemming from decentered ablations, a common complication impacting lens centration and overall fit.

Large diameter lenses are often crucial for achieving stable centration in these cases, effectively vaulting the ablation zone and providing a more consistent support surface. Careful consideration of base curve and lens material is also paramount to minimize corneal warpage and ensure patient comfort.

Remember, classic fluorescein patterns may be atypical, necessitating a nuanced interpretation of the fitting assessment. Successful RGP fitting after refractive surgery hinges on a thorough understanding of the surgical procedure and its potential impact on corneal physiology.

Addressing Decentered Ablations (Large Diameter Lenses)

Decentered LASIK ablations present unique RGP fitting challenges, primarily related to inconsistent corneal support and potential for lens decentration. Employing larger diameter lenses is a key strategy, effectively increasing the contact area with the cornea and bypassing the ablation zone. This provides enhanced stability and reduces the likelihood of lens displacement.

Careful base curve selection is also vital; steeper curves may improve centration, but can also induce corneal bearing. A balance must be struck to optimize both comfort and stability.

Posterior optic zone design plays a role, and specialized designs may be necessary to address irregular astigmatism induced by the ablation. Monitoring fluorescein patterns closely is crucial to assess the fit and identify areas of stress or impingement.

RGP Fitting for Keratoconus

RGP lenses are often the preferred vision correction method for keratoconus, offering superior optics and structural support compared to soft lenses. Fitting requires meticulous attention to detail due to the irregular corneal shape. Initial lens selection prioritizes achieving complete corneal coverage, aiming to mask the cone and create a smooth refracting surface.

Artificial Intelligence (AI) is emerging as a valuable tool, assisting in analyzing corneal topography and predicting optimal lens parameters. This can significantly reduce chair time and improve fitting success rates.

Frequent monitoring is essential to detect changes in corneal shape and adjust the lens fit accordingly, ensuring continued comfort and visual acuity.

Utilizing Artificial Intelligence (AI) in Fitting

Artificial intelligence demonstrates significant promise in revolutionizing RGP fitting for keratoconus patients, offering a more precise and efficient approach. AI algorithms analyze complex corneal topography maps, identifying subtle irregularities often missed by conventional methods. This allows for more accurate prediction of optimal base curve and diameter parameters, minimizing trial lens adjustments.

Compared to traditional fitting techniques, AI methods can significantly reduce chair time and improve first-fit success rates, enhancing both practitioner efficiency and patient satisfaction.

AI’s predictive capabilities also aid in anticipating potential fitting challenges, leading to more stable and comfortable lens wear.

Toric RGP Fitting

Fitting toric RGP lenses presents unique challenges due to the irregular corneal surfaces often associated with astigmatism. Successful fitting requires careful consideration of both corneal and lenticular toricity. When attempting to fit a toric cornea with a spherical RGP lens, the area of alignment becomes crucial, potentially leading to areas of steep or flat fitting.

Precise corneal topography is essential to accurately map the astigmatic profile and guide lens selection.

Specialized toric RGP designs are available to address these complexities, offering improved visual acuity and comfort compared to spherical lenses in these cases.

Fitting Toric Corneas with Spherical Lenses

Attempting to fit a toric cornea with a spherical RGP lens is often suboptimal, leading to unpredictable fitting relationships and compromised visual performance. The lens will typically align with the flatter meridians of the cornea, resulting in areas of steep or flat fitting in the steeper meridians.

This misalignment can cause corneal warpage, increased epithelial stress, and reduced oxygen permeability. Consequently, patients may experience discomfort, fluctuating vision, and a higher risk of complications.

Careful evaluation of the degree of toricity is crucial; mild astigmatism might be manageable with spherical lenses, but significant toricity necessitates a toric RGP design for optimal fit and vision.

Advanced Techniques & Modern Approaches

Modern RGP fitting utilizes remote consultations via smartphones, AI for keratoconus, and examination under anesthesia for infants, enhancing precision and accessibility in care.

Remote RGP Consultations

RGP wearers facing accessibility challenges can now benefit significantly from remote contact lens evaluations. Utilizing smartphone technology and readily available materials, practitioners can conduct comprehensive fittings without requiring in-person visits. This approach expands access to quality eye care, particularly for patients in remote locations or with mobility limitations.

A successful remote rigid gas permeable (RGP) consultation relies on clear communication and detailed patient self-assessment. Practitioners guide patients through necessary measurements and observations, leveraging the smartphone’s camera for visual assessment. This method streamlines the fitting process, offering a convenient and efficient alternative to traditional office visits, while maintaining a high standard of care.

Smartphone-Based Evaluations

Leveraging smartphone capabilities is revolutionizing remote RGP fitting. Patients can utilize their phone’s camera to capture images and videos of lens alignment, movement, and overall fit under the guidance of the practitioner. Specific protocols ensure standardized data collection for accurate assessment.

These evaluations often involve patients performing simple tasks, like looking in specific directions, while recording the lens behavior. The practitioner then analyzes these recordings remotely, identifying areas of concern and adjusting the lens parameters accordingly. This technology minimizes the need for in-person visits, offering convenience and efficiency. Successful implementation relies on clear instructions and patient compliance.

RGP Fitting in Infants

Fitting RGP lenses in infants (1-6 months) presents unique challenges, necessitating specialized protocols. A randomized study involved 57 infants, utilizing examination under anesthesia (EUA) for initial assessment and follow-up around one year of age. EUA allows for thorough evaluation of corneal health and lens fit without the challenges of a non-cooperative patient.

Careful consideration must be given to lens diameter and edge design to minimize discomfort and ensure adequate oxygen transmission. A traveling protocol facilitated consistent data collection across multiple sites. This approach is crucial for managing conditions like congenital corneal opacity, offering a pathway to improved vision during critical developmental stages.

Examination Under Anesthesia Protocols

Examination Under Anesthesia (EUA) is paramount when fitting RGP lenses in infants, ensuring accurate measurements and assessment of corneal health. Prior to EUA, a comprehensive medical history is vital, alongside careful monitoring of the infant’s vital signs throughout the procedure. Topical anesthetic drops are administered to numb the eye, allowing for detailed evaluation without discomfort.

Key components of the EUA include keratometry, corneal topography, and assessment of tear film dynamics. Lens fitting is then performed, observing fluorescein patterns to evaluate fit and oxygen permeability. Post-EUA, close observation for any adverse reactions is crucial, with parental guidance on lens care and follow-up appointments scheduled accordingly.

Comparing RGP vs. Soft Contact Lenses

Rigid Gas Permeable (RGP) and soft contact lenses offer distinct advantages. RGPs provide sharper vision, particularly for irregular corneas like keratoconus, and boast superior durability and longevity. However, they initially offer less comfort and require a longer adaptation period compared to soft lenses.

Soft lenses prioritize initial comfort and ease of handling, making them popular for everyday wear. Yet, they often deliver less crisp vision and are more prone to deposit buildup, necessitating frequent replacement. The choice depends on individual needs – RGPs excel in specialized cases, while soft lenses suit general vision correction. Considering pros and cons ensures optimal lens selection.

Pros and Cons of Each Lens Type

RGP lenses offer exceptional oxygen permeability, promoting corneal health, and provide superior vision correction for astigmatism and irregular corneal shapes. Their durability translates to cost savings long-term, but initial adaptation can be challenging, and they may feel less comfortable initially.

Soft lenses excel in comfort and ease of handling, ideal for first-time wearers. They offer a wider range of parameters for a better fit, but generally have lower oxygen permeability and require more frequent replacement. Deposits can accumulate more readily, potentially impacting vision and comfort. Ultimately, the best choice balances visual needs, lifestyle, and comfort preferences.

boat trailer guide post lights

Boat Trailer Guide Post Lights: A Comprehensive Guide

Navigating trailer lighting regulations‚ selecting appropriate lights (LED or incandescent)‚ and ensuring safe towing are crucial for boat owners.
Properly functioning guide post lights enhance visibility and legal compliance during transport.

Understanding the Importance of Guide Post Lights

Guide post lights are paramount for safe boat trailering‚ significantly enhancing visibility for approaching drivers‚ especially during low-light conditions or inclement weather. These lights clearly delineate the trailer’s width and length‚ preventing potential accidents.
Legal compliance is another key aspect; most jurisdictions require functional guide post lights on trailers exceeding specific dimensions.
Ignoring these regulations can lead to fines and safety hazards. Ensuring all lights – brake‚ turn‚ and running – operate correctly is vital for a secure journey.

Legal Requirements for Boat Trailer Lights

Boat trailer lighting regulations vary by state‚ but generally‚ trailers exceeding a certain weight (often 3‚000 lbs) or width require specific lighting. Red tail lights‚ brake lights‚ and amber clearance lights are commonly mandated. Turn signals are also essential for safe maneuvering.
Compliance ensures legal operation and minimizes risks. Resources like Boat US offer guidance‚ but checking state-specific regulations is crucial. Failure to adhere can result in citations and compromised road safety.

Types of Boat Trailer Guide Post Lights

Boat trailer guide post lights primarily fall into two categories: LED and incandescent. LED lights are increasingly popular due to their longevity‚ energy efficiency‚ and resistance to vibration. Incandescent lights‚ while more affordable initially‚ require frequent bulb replacements and consume more power. Choosing between them depends on budget‚ maintenance preferences‚ and desired lifespan. Both types must meet legal requirements for color and visibility.

LED Guide Post Lights

LED guide post lights offer significant advantages for boat trailers. They boast a much longer lifespan than incandescent bulbs‚ reducing maintenance and replacement costs. LEDs consume considerably less energy‚ minimizing strain on the trailer’s electrical system. Their inherent durability makes them highly resistant to shock and vibration‚ common on roadways. Furthermore‚ LEDs provide instant-on illumination and superior brightness‚ enhancing safety and visibility.

Incandescent Guide Post Lights

Incandescent guide post lights represent a traditional‚ and generally more affordable‚ option for boat trailer illumination. While less expensive upfront‚ they require more frequent bulb replacements due to their shorter lifespan. Incandescent bulbs also consume more power than LEDs‚ potentially impacting the trailer’s electrical system. They are susceptible to damage from vibrations and impacts‚ and offer a slightly slower response time to illumination compared to LEDs.

Choosing the Right Lights for Your Trailer

Selecting the ideal guide post lights demands careful consideration of several factors. Trailer length and boat size directly influence the number and intensity of lights needed for adequate visibility. Voltage compatibility is paramount; ensure the lights match your trailer’s electrical system (typically 12V). Prioritize durability and weather resistance‚ as trailer lights endure harsh conditions. Budget constraints also play a role‚ balancing initial cost with long-term reliability.

Considering Trailer Length and Boat Size

Longer trailers and larger boats necessitate more guide post lights to ensure comprehensive visibility for following drivers. A general rule suggests lights spaced evenly along the trailer’s perimeter. The boat’s width also dictates light placement; wider boats require lights extending further outward. Consider the overall height of the load‚ as taller profiles demand increased illumination. Prioritize brighter lights for nighttime towing‚ enhancing safety and legal compliance;

Voltage Compatibility (12V vs. Other Systems)

Most boat trailers utilize a 12-volt (12V) electrical system‚ standard for automotive applications. However‚ some boats may have different voltage systems. Ensure your guide post lights are compatible with the trailer’s wiring. Using incompatible voltage can damage the lights or the trailer’s electrical system. Verify the light’s voltage rating before installation‚ and consider a voltage converter if necessary for seamless integration.

Installation Process: A Step-by-Step Guide

Begin by disconnecting the trailer’s battery to prevent shorts. Next‚ carefully route the wiring from the trailer harness to the light mounting locations. Securely mount the guide post lights using appropriate hardware‚ ensuring they are firmly attached. Connect the wires‚ matching colors (typically white for ground‚ brown for running lights‚ and yellow for brake/turn signals). Finally‚ test all functions before hitting the road!

Wiring Guide Post Lights to the Trailer Harness

Locate the trailer’s existing wiring harness‚ typically a 7-pin or 5-pin connector. Identify the corresponding wires for running lights‚ brake lights‚ and turn signals. Use butt connectors or solder to create secure connections between the light wires and the harness wires. Ensure proper insulation to prevent shorts and corrosion. A wiring diagram is invaluable for accurate connections.

Mounting the Lights Securely

Utilize stainless steel hardware to resist corrosion when attaching guide post lights to the trailer frame. Ensure lights are positioned to be clearly visible from both the front and rear‚ adhering to legal requirements. Avoid obstructing the lights with boat components during transport. Secure mounting prevents damage from vibrations and road debris‚ maintaining functionality and safety.

Troubleshooting Common Issues

Addressing light malfunctions promptly is vital for safety. Begin by checking the fuse – a frequent culprit for complete light failure. Inspect wiring connections for looseness or corrosion‚ especially after saltwater exposure. If individual lights fail‚ test bulbs or LED components. Verify proper grounding‚ as inadequate grounding can cause intermittent issues. Remember to disconnect the battery before any electrical work!

Lights Not Working: Checking the Fuse

When all trailer lights cease functioning‚ the fuse is the first component to inspect. Locate the fuse box‚ typically near the trailer’s connector or battery. Visually examine the fuse for a broken filament. Use a multimeter to confirm continuity; a lack of continuity indicates a blown fuse. Replace with a fuse of the exact same amperage rating to avoid further electrical damage and ensure safe operation.

Corrosion and Weatherproofing Solutions

Boat trailers are exposed to harsh elements‚ leading to corrosion. Regularly clean lights with fresh water and apply dielectric grease to connections. Silicone sealant around light housings prevents water intrusion. Consider lights with sealed lenses and corrosion-resistant materials. Inspect wiring for damage and replace corroded sections promptly. Protective coatings‚ like marine-grade spray‚ can extend light lifespan and maintain functionality‚ ensuring safe towing.

Maintenance and Care

Consistent upkeep extends the life of your boat trailer guide post lights. Regularly inspect lights for cracks‚ damage‚ or loose connections. Clean lenses with mild soap and water to maintain brightness. Check wiring for corrosion‚ and apply dielectric grease. Replace bulbs promptly when they burn out‚ and consider upgrading to long-lasting LEDs. Periodic inspection prevents failures and ensures safe‚ legal transport.

Cleaning and Inspecting Lights Regularly

Routine cleaning is vital for optimal light performance. Use a mild soap solution and soft cloth to remove road grime and salt spray. Inspect lenses for cracks or discoloration‚ replacing damaged units immediately. Check wiring connections for corrosion‚ applying dielectric grease as needed. Look for loose mounting hardware and tighten securely. Regular inspections prevent failures and ensure visibility.

Replacing Bulbs and Components

When replacing bulbs‚ ensure you use the correct voltage and wattage specified by the manufacturer. For LED lights‚ replace entire units‚ as bulbs aren’t typically replaceable. Disconnect the battery before any electrical work. Inspect the bulb socket for corrosion and clean if necessary. Damaged housings or lenses should also be replaced to maintain weather resistance and light output.

Understanding Light Color Codes and Regulations

Regulations mandate red tail lights and brake lights for visibility‚ while amber clearance lights indicate the trailer’s width and presence. White lights illuminate the rear for added safety. Compliance with these color codes is vital for legal road travel. State laws vary‚ so check local requirements. Proper light placement and function are essential for preventing accidents and ensuring safe towing practices.

Red Tail Lights and Brake Lights

Essential for visibility‚ red tail lights must be consistently illuminated during towing. Brake lights‚ also red‚ activate upon braking‚ alerting following drivers. These lights are legally required on all boat trailers. Ensuring they function correctly is paramount for preventing rear-end collisions. Regular inspection for bulb failures or damaged lenses is crucial. Proper wiring and a functioning fuse box are vital for reliable operation.

Amber Clearance Lights

Strategically positioned‚ amber clearance lights define a trailer’s width and height‚ enhancing visibility‚ especially for wider loads. These lights are mandatory when a trailer exceeds specific dimensions‚ as dictated by state regulations. They must be visible from both sides and the rear. Proper placement and consistent illumination are key to safe towing. Inspect for cracked lenses or burnt-out bulbs before each trip‚ ensuring compliance and preventing accidents.

Wiring Diagrams and Connections

Understanding trailer wiring is vital for proper light function. The standard 7-pin connector handles all lighting and auxiliary functions‚ while the 5-pin flat connector is simpler‚ typically for lights and brakes. Correctly matching wire colors – white for ground‚ brown for running lights‚ yellow for left turn/brake‚ and red for right turn/brake – is essential. Always consult a wiring diagram specific to your vehicle and trailer for accurate connections.

Standard 7-Pin Connector Wiring

The 7-pin connector offers comprehensive functionality. Pin 1 is typically ground‚ providing a return path for all circuits. Pin 2 powers the running lights‚ while pins 3 and 4 control left and right turn signals‚ also serving as brake lights. Pin 5 activates electric trailer brakes‚ and pin 6 is auxiliary power. Pin 7 is often reserved for reverse lights‚ ensuring safe maneuvering.

5-Pin Flat Connector Wiring

A 5-pin flat connector is a simpler system. Pin 1 is ground‚ essential for circuit completion. Pin 2 powers the tail lights‚ providing basic visibility. Pins 3 and 4 handle left and right turn signals‚ doubling as stop lights for enhanced safety. Pin 5 is dedicated to the reverse light‚ aiding in backing maneuvers. This setup is common for smaller trailers and straightforward lighting needs.

Safety Considerations During Installation and Use

Prioritize safety by disconnecting the vehicle battery before any wiring work to prevent shorts. Ensure a solid ground connection for reliable light function and to avoid electrical hazards. Inspect wiring for damage before each trip. Securely mount lights to withstand vibrations and weather. Never tow with malfunctioning lights; it’s illegal and dangerous. Regular checks are vital for road safety.

Disconnecting the Battery Before Wiring

Always disconnect the negative terminal of your vehicle’s battery before commencing any electrical work on the boat trailer lights. This crucial step prevents accidental short circuits‚ which could damage the trailer’s wiring‚ your vehicle’s electrical system‚ or even cause personal injury. It’s a simple precaution that safeguards against unexpected electrical surges during installation or repair processes.

Ensuring Proper Grounding

A solid electrical ground is paramount for reliable boat trailer light operation. Connect the ground wire securely to the trailer frame‚ ensuring a clean‚ corrosion-free metal-to-metal contact. Poor grounding leads to dim lights‚ flickering‚ or complete failure. Regularly inspect ground connections for rust or looseness‚ and clean or tighten as needed. Proper grounding completes the circuit‚ enabling safe and visible trailering.

Best Brands and Models of Boat Trailer Guide Post Lights

Peterson Manufacturing offers durable‚ highly-rated trailer lights known for their brightness and longevity. Optronics International provides a wide range of LED and incandescent options‚ focusing on innovative designs and weatherproof seals. Consider models with submersible capabilities for added protection. Both brands deliver reliable performance‚ ensuring compliance and enhancing safety during transport‚ making them popular choices among boat owners.

Peterson Manufacturing Lights

Peterson Manufacturing consistently delivers robust trailer lighting solutions‚ specializing in LED and incandescent guide post lights. Their products are praised for exceptional durability and brightness‚ even in challenging conditions. They offer a diverse catalog‚ including submersible options for enhanced weather protection. Peterson lights are known for easy installation and reliable performance‚ making them a trusted choice for boat trailer owners seeking long-lasting illumination.

Optronics International Lights

Optronics International stands as a leading innovator in vehicle and trailer lighting‚ offering a comprehensive range of boat trailer guide post lights. Their focus on cutting-edge technology results in highly efficient LED options with superior light output and extended lifespan. Optronics prioritizes safety and compliance‚ ensuring their products meet or exceed industry standards. They are recognized for their commitment to quality and innovative designs‚ providing reliable illumination for secure towing.

Cost Analysis: Budgeting for Guide Post Lights

Budgeting for boat trailer guide post lights involves considering both initial purchase costs and long-term maintenance. Basic incandescent lights are cheaper upfront‚ ranging from $10-$30 per light. However‚ LED lights‚ costing $30-$80 each‚ offer significant long-term savings due to their durability and reduced energy consumption. Factor in wiring‚ connectors‚ and potential installation fees. Regular inspection and bulb replacements contribute to ongoing expenses‚ making LED a cost-effective choice.

Initial Purchase Costs

The initial investment for boat trailer guide post lights varies significantly based on type and quality. Incandescent lights typically range from $10 to $30 per light‚ making them the most affordable option. LED lights‚ while more expensive‚ generally fall between $30 and $80 per unit. Additional costs include wiring harnesses‚ mounting hardware‚ and necessary connectors.
Consider purchasing complete kits for streamlined installation and potential cost savings.

Long-Term Maintenance Costs

While LED lights boast a longer lifespan‚ reducing replacement frequency‚ both types require periodic maintenance. Incandescent bulbs need occasional replacement due to filament failure‚ costing a few dollars per bulb. LED lights‚ though durable‚ may require eventual diode replacement. Corrosion‚ especially in saltwater environments‚ necessitates regular cleaning and protective treatments.
Budgeting for dielectric grease and corrosion inhibitors is wise‚ alongside potential wiring repairs.

DIY vs. Professional Installation

DIY installation saves labor costs but demands electrical knowledge and proper tools. Incorrect wiring can lead to malfunctions or safety hazards. Professional installation ensures compliance with regulations and offers peace of mind‚ though at a higher upfront cost.
Consider your skill level; simple replacements are DIY-friendly‚ while complex wiring or mounting might warrant a professional’s expertise. Always prioritize safety and correct functionality.

Pros and Cons of Each Approach

DIY installation’s advantages include cost savings and a sense of accomplishment‚ but risks include improper wiring and voided warranties. Professional installation guarantees correct functionality and adherence to safety standards‚ yet it’s more expensive.
Consider your electrical expertise; a mistake could create hazards. Professionals offer expertise‚ while DIY requires research and careful execution. Weigh the cost versus risk.

Frequently Asked Questions (FAQ)

Q: Are LED lights worth the investment? A: Yes‚ LEDs offer longer life and lower energy consumption. Q: Can I use incandescent bulbs? A: Yes‚ but they require more frequent replacement. Q: What if my lights don’t work? A: Check the fuse first! Q: How often should I inspect the lights? Regularly‚ for corrosion and damage.

Resources for Further Information

For comprehensive guidance‚ explore Boat US trailer lighting resources and insurance options‚ potentially saving on towing services. Consult state-specific regulations for legal requirements. Peterson Manufacturing and Optronics International websites offer detailed product information and wiring diagrams. Online forums dedicated to boating and trailers provide valuable user experiences and troubleshooting tips. Remember to prioritize safety and compliance.

Boat US Trailer Lighting Guides

Boat US provides accessible resources detailing trailer light maintenance‚ troubleshooting‚ and legal compliance. Their guides cover wiring diagrams‚ bulb replacement‚ and corrosion prevention. They also offer insights into connector types (7-pin‚ 5-pin) and proper grounding techniques. Furthermore‚ Boat US membership can unlock discounts on TowBoat US services‚ offering peace of mind during boating excursions and potential trailer emergencies.

State-Specific Trailer Lighting Regulations

Trailer lighting laws vary significantly by state‚ impacting guide post light requirements. Some states mandate specific color coding‚ while others dictate minimum visibility distances. Regulations cover the number of lights‚ mounting heights‚ and acceptable bulb types. It’s crucial to consult your state’s Department of Motor Vehicles or boating authority to ensure full compliance‚ avoiding potential fines and ensuring safe transport.

Impact of Light Failure on Road Safety

Failed boat trailer lights dramatically increase accident risk‚ especially during low-light conditions or inclement weather. Non-functional brake lights‚ turn signals‚ or running lights can lead to rear-end collisions or miscommunication with other drivers. Diminished visibility of the trailer’s presence poses a significant hazard. Regular inspection and maintenance of guide post lights are paramount for preventing these dangerous situations and ensuring road safety for everyone.

Future Trends in Boat Trailer Lighting Technology

Emerging trends in boat trailer lighting focus on smart technology and enhanced safety features. Expect to see more integrated systems with self-diagnostics‚ alerting drivers to failures before they become critical. Wireless control and synchronization with vehicle systems are also on the horizon. Advancements in LED technology will yield brighter‚ more energy-efficient‚ and longer-lasting lights‚ improving overall trailer visibility and reliability.

tv guide for savannah georgia

Savannah, Georgia TV Guide: Comprehensive Listings (February 7, 2026)

Discover comprehensive TV listings for Savannah, GA, on February 7, 2026! Explore local channels, cable, and streaming options with detailed schedules.

Savannah, Georgia, offers a diverse range of television viewing options, encompassing traditional broadcast, cable, satellite, and increasingly popular streaming services. This guide provides a comprehensive overview of what’s available to viewers in the Savannah area on February 7, 2026. From local news and sports coverage provided by Fox 28, to educational programming on ETV World and children’s content on ETVK PBS Kids, there’s something for everyone.

Cable providers like Xfinity and Sparklight (serving Bluffton) deliver extensive channel lineups, while satellite services such as fubo and Hulu Live TV offer alternative viewing experiences. For those preferring over-the-air reception, resources like AntennaWeb and Channel Master can help locate local signals. Don’t forget specialized options like Armstrong State University campus TV and access at Hunter Army Airfield!

Accessing Complete Television Listings

For the most detailed and up-to-date TV listings in Savannah, Georgia, several online resources are readily available. TitanTV.com stands out as a premier destination, offering comprehensive schedules for all broadcast, cable, and satellite providers. Alternatively, TVTV.us provides an American TV schedule, allowing users to filter by location and provider to pinpoint specific programming.

These websites enable viewers to easily search for shows, movies, and events airing on local channels like Fox 28, as well as national networks. Remember to specify your zip code (e.g., 31405, 31412) for accurate, localized results. Utilizing these resources ensures you won’t miss your favorite programs on February 7, 2026, and beyond!

Local Broadcast Channels in Savannah

Savannah viewers enjoy access to local channels like Fox 28 and ETV World 16.3, offering news, entertainment, and educational programming options;

Fox 28 Savannah: News and Programming

Fox 28 Savannah is a leading source for local news, weather, and sports coverage in southeast Georgia, including communities like Richmond Hill and Pooler. Viewers can expect up-to-the-minute reports on critical local events, alongside in-depth investigations and community-focused stories. The station’s programming lineup features a mix of locally produced news segments and syndicated entertainment shows.

On February 7, 2026, anticipate comprehensive coverage of regional happenings, detailed weather forecasts, and engaging sports analysis. Check local listings for specific showtimes and breaking news updates. Fox 28 Savannah strives to keep residents informed and connected to the issues that matter most within their communities, delivering reliable information when it’s needed most.

ETV World 16.3: Schedule Highlights

ETV World 16.3 offers a diverse programming schedule focusing on international news and cultural content. On February 7, 2026, viewers can anticipate insightful programs like “DW The Day” at 6:00 PM, providing a global perspective on current events. Following this, “NHK Newsline” at 6:30 PM delivers news directly from Japan, offering a unique international viewpoint.

ETV World aims to broaden horizons and foster understanding through its carefully curated selection of programs. The channel provides an alternative to mainstream media, presenting news and perspectives often overlooked elsewhere. Check local listings for potential schedule adjustments and additional programming details. It’s a valuable resource for globally-minded viewers in the Savannah area.

ETVK PBS Kids 16.4: Children’s Programming

ETVK PBS Kids 16.4 is dedicated to providing educational and entertaining content for young viewers in the Savannah area. On February 7, 2026, the schedule features engaging programs like “Wild Kratts” at 6:00 PM, inspiring a love for zoology and adventure. Following this, “Weather Hunters” airs at 6:30 PM, introducing children to the fascinating world of meteorology in an accessible way.

ETVK PBS Kids prioritizes age-appropriate programming that supports learning and development. Parents can trust the channel to offer safe and enriching content. Check local listings for any schedule changes or additional kid-friendly shows. It’s a fantastic resource for families seeking quality television options for their children, fostering curiosity and a lifelong love of learning.

Cable TV Listings in Savannah

Savannah residents enjoy diverse cable options! Explore listings from Xfinity, Sparklight (Bluffton), and Armstrong State University’s campus TV for complete channel guides.

Xfinity Savannah: Digital Cable Options

Xfinity delivers a wide array of digital cable packages to Savannah viewers, offering something for every entertainment preference. Customers can choose from various tiers, including basic, silver, gold, and platinum, each providing an expanding selection of channels. These packages typically encompass local broadcast networks, popular cable channels like ESPN, CNN, and Discovery, plus premium movie channels such as HBO and Showtime (with additional subscriptions).

Xfinity also provides on-demand services, allowing viewers to access a vast library of movies and TV shows at their convenience. Interactive features, like a digital program guide, make navigating the channel lineup and scheduling recordings effortless. Furthermore, Xfinity often bundles cable services with internet and phone options, presenting potential cost savings for customers. To access the most current and detailed channel listings and package information, visit the official Xfinity website or contact a local Savannah representative.

Sparklight (Genre Lineup) ― Bluffton: Channel Guide

Sparklight, serving the Savannah area including Bluffton, organizes its channel lineup by genre for easy browsing. Viewers can quickly locate channels based on their interests, such as news, sports, entertainment, movies, and children’s programming. Core channel offerings include major networks like ABC, CBS, NBC, and FOX, alongside popular cable staples like CNN, ESPN, and Disney Channel.

Sparklight also provides access to a variety of specialty channels catering to niche interests, including lifestyle, music, and religious programming. Digital cable packages often include HD channels and on-demand options, enhancing the viewing experience. For the most up-to-date and comprehensive channel guide, including specific channel numbers and package availability, customers are encouraged to visit the Sparklight website or consult their local channel lineup guide.

Armstrong State University ⎼ Savannah: Campus TV

Armstrong State University in Savannah maintains a campus TV system primarily geared towards students, faculty, and staff. While not a traditional broadcast TV provider, it offers internal channels displaying university announcements, event schedules, and student-produced content. These channels are typically accessible within campus residence halls and select common areas.

The programming focuses on campus life, academic information, and emergency notifications. Students involved in media production programs often utilize the campus TV system as a platform for showcasing their work. While a detailed program guide isn’t generally published like commercial TV, information regarding scheduled events and announcements broadcast on campus TV can be found on the university’s website and digital signage throughout the campus.

Satellite TV Listings for Savannah

Explore satellite TV options like fubo and Hulu Live TV in the Savannah area, offering diverse channel lineups and streaming capabilities for viewers.

fubo ― Savannah Area, GA: Streaming Options

fubo delivers a robust streaming experience to the Savannah area, offering a compelling alternative to traditional cable and satellite television. This platform specializes in live sports, news, and entertainment, providing a comprehensive channel lineup tailored for diverse viewing preferences. Residents can access popular networks, regional sports channels, and international programming, all streamed directly to their devices.

fubo’s channel availability includes options for families, news enthusiasts, and sports fans alike. Beyond live TV, fubo often incorporates features like cloud DVR, allowing users to record and re-watch their favorite programs. The service is accessible on a wide range of devices, including smart TVs, smartphones, tablets, and computers, ensuring flexibility and convenience for Savannah viewers. Check their website for the most current channel list and subscription details.

Hulu Live TV: Channel Availability

Hulu Live TV presents a dynamic streaming solution for Savannah, Georgia viewers, combining live television with Hulu’s extensive on-demand library; This service offers a diverse channel lineup, encompassing news, sports, entertainment, and lifestyle programming. Subscribers gain access to major broadcast networks, cable channels, and specialized content, providing a comprehensive viewing experience.

Channel availability with Hulu Live TV typically includes ESPN, Fox, NBC, CNN, and many more, catering to a broad range of interests. A key benefit is the inclusion of Disney+ and ESPN+ with certain subscription tiers, enhancing the value proposition. Viewers can enjoy live sports, breaking news, and popular shows on various devices, including smart TVs, smartphones, and tablets. Regularly check Hulu’s website for the most up-to-date channel list and package details for the Savannah area.

Over-the-Air TV Listings

Access free, local TV channels in Savannah using an antenna! Utilize tools like AntennaWeb and Channel Master to locate available signals easily.

AntennaWeb: Signal Locator for Savannah

AntennaWeb is an invaluable, free resource for Savannah residents seeking to maximize their over-the-air TV reception. This online tool allows users to input their precise location – a crucial step for accurate results – and generates a customized report detailing available broadcast channels. The report not only lists the channels receivable in your area but also estimates signal strength, indicating whether an antenna will likely provide a clear picture.

Furthermore, AntennaWeb offers recommendations on antenna types and placement, helping you choose the most suitable equipment for your specific needs and environment. Factors like distance from broadcast towers and potential obstructions (buildings, trees) are considered. By utilizing AntennaWeb, Savannah viewers can enjoy free, high-definition TV without the expense of cable or satellite subscriptions, accessing local news, entertainment, and sports programming.

Channel Master: Finding Local Channels

Channel Master provides a robust suite of tools and resources for Savannah viewers aiming to discover available local TV channels via an antenna. Beyond a simple channel locator, Channel Master offers detailed maps illustrating broadcast tower locations relative to your address, providing a visual understanding of signal coverage. Their website features a comprehensive database of TV channels, allowing users to identify which networks are broadcast locally.

Moreover, Channel Master isn’t solely a locator; they are also a leading manufacturer of antennas and related equipment. This allows them to offer tailored recommendations based on your location and desired channels, ensuring optimal reception. Whether you’re a first-time cord-cutter or an experienced over-the-air enthusiast, Channel Master equips Savannah residents with the knowledge and tools to unlock free, local TV broadcasts.

Specific Location TV Listings

Access tailored TV guides for specific Savannah locations, including Hunter Army Airfield and zip code 31405, for precise channel availability.

Hunter Army Airfield ― Savannah: TV Access

For personnel and residents at Hunter Army Airfield in Savannah, accessing television programming involves a mix of options. Over-the-air reception is possible, utilizing an antenna to capture local broadcast signals. However, signal strength can vary depending on location within the base and surrounding areas.

Many residents opt for cable or satellite services, with providers like Xfinity and fubo serving the Savannah area. These services offer a wider range of channels and reliable reception. Streaming services, such as Hulu Live TV, also present a viable alternative, providing access to live television and on-demand content via internet connection.

Checking specific channel lineups through TitanTV.com or TVTV.us is recommended to confirm availability based on your chosen provider. Remember to explore options for accessing local Savannah news and programming alongside national networks.

Savannah, GA 31405: Local TV Guide

Residents of the 31405 zip code in Savannah, Georgia, have numerous options for staying informed and entertained through television. Local broadcast channels, accessible via antenna, provide news, weather, and community programming. Fox 28 Savannah is a key source for local coverage, reporting on events throughout southeast Georgia.

For expanded channel selections, cable providers like Xfinity and Sparklight (serving nearby Bluffton) offer digital cable packages. Satellite services, including fubo and Hulu Live TV, are also popular choices. Online resources like TitanTV.com and TVTV.us provide detailed, up-to-date listings for all available options.

Don’t forget to explore ETV World 16.3 and ETVK PBS Kids 16.4 for diverse programming choices within the Savannah area.

Resources for TV Schedules

TitanTV.com and TVTV.us are excellent online resources for detailed Savannah, Georgia, television listings, offering comprehensive schedules and channel information.

TitanTV.com: Detailed TV Listings

TitanTV.com stands out as a premier resource for accessing incredibly detailed television listings specifically tailored for the Savannah, Georgia area. This platform provides a user-friendly interface allowing viewers to easily navigate through a comprehensive schedule of programs airing across various channels.

You can find listings for local broadcast stations, cable providers like Xfinity and Sparklight, and streaming services such as fubo and Hulu Live TV. TitanTV doesn’t just show what’s on; it often includes program descriptions, ratings, and even links to further information about shows and movies.

For Savannah residents seeking a complete overview of their entertainment options on February 7, 2026, TitanTV.com is an invaluable tool, ensuring you never miss your favorite programs. It’s a consistently updated source for accurate and reliable TV scheduling.

TVTV.us: American TV Schedule

TVTV.us serves as a robust national platform, offering a comprehensive American TV schedule with specific filtering capabilities for Savannah, Georgia. Users can pinpoint listings based on their preferred TV provider – be it cable, satellite, broadcast, or internet-based streaming services. This ensures a personalized viewing experience tailored to their specific setup.

The site allows viewers to “find out what’s on TV tonight” with ease, presenting a clear and organized schedule. TVTV.us is particularly useful for discovering programs across a wide range of channels available in the 31405 zip code and surrounding areas.

For Savannah viewers on February 7, 2026, TVTV.us provides a convenient way to explore all available entertainment options, making it simple to plan your evening’s viewing.

Additional Information

JCB North America and RFD-TV offer local business insights alongside television programming in the Savannah area, enhancing your viewing experience.

JCB North America & RFD-TV: Local Business & TV

JCB North America, a significant employer with over 1,000 personnel, maintains its headquarters right here in Savannah, Georgia. Their presence contributes substantially to the local economy and community. Recently, JCB collaborated with RFD-TV, a network focused on rural lifestyle programming, for a segment showcasing their operations and impact.

This partnership highlights a connection between local business and accessible television content. RFD-TV’s broadcasts often feature stories relevant to agricultural communities and rural America, aligning with JCB’s customer base. Viewers in the Savannah area can potentially find related programming on RFD-TV, offering a unique blend of entertainment and local business awareness. Exploring these connections provides a broader understanding of the region’s economic landscape.

Contact Information for Savannah TV Stations

For inquiries regarding programming, news coverage, or public affairs, reaching out directly to Savannah’s local television stations is essential. While specific details vary, general contact information is often available online. Many stations, including Fox 28 Savannah, maintain websites with contact forms and phone numbers for different departments.

Furthermore, the FCC Public File, accessible through station websites (e.g., Savannah, GA 31412; (912) 234-1111), provides valuable information and contact details. Email addresses, often protected against spam, are sometimes listed. Direct communication ensures accurate information regarding schedules, community events, and potential programming suggestions. Utilizing these resources fosters a stronger connection between viewers and their local TV providers.

honeywell focuspro 6000 user guide

Honeywell FocusPro 6000 User Guide: Comprehensive Overview

This guide details the Honeywell FocusPro 6000 thermostat, covering installation, operation, programming, and troubleshooting. It includes RedLink connectivity details and safety precautions.

Welcome to the Honeywell FocusPro 6000 thermostat! This advanced system offers precise temperature control and energy-saving features for optimal home comfort. This user guide provides comprehensive instructions for installation, operation, and troubleshooting, ensuring a seamless experience. The FocusPro 6000 boasts RedLink enabled connectivity, allowing for remote access and control via compatible devices.

Whether you’re a homeowner or a professional installer, this manual will equip you with the knowledge to maximize the thermostat’s capabilities. Explore detailed programming schedules, humidity control settings, and solutions to common issues. Enjoy a smarter, more comfortable home environment!

Understanding the System Components

The Honeywell FocusPro 6000 system comprises several key components. Primarily, the thermostat unit itself features a user-friendly interface for intuitive control. The RedLink wireless receiver enables communication with compatible Honeywell systems. Wiring harnesses facilitate connection to your HVAC equipment – heating, cooling, and potentially humidity control systems.

Additionally, a programmable kit (like YTH6320R1001) may be included for advanced scheduling. Understanding these components and their interactions is crucial for successful installation and operation. Refer to the wiring diagrams for correct connections and ensure compatibility with your existing setup for optimal performance.

Installation Guide

Proper installation ensures optimal performance. This section provides a pre-installation checklist, detailed wiring diagrams, and mounting instructions for your Honeywell FocusPro 6000 thermostat.

Pre-Installation Checklist

Before beginning the installation process, carefully review this checklist to ensure a smooth and successful setup of your Honeywell FocusPro 6000 thermostat. First, verify compatibility with your existing HVAC system – confirm voltage requirements and system type. Gather necessary tools, including screwdrivers, wire strippers, and a level.

Turn off power to your HVAC system at the breaker box to prevent electrical shock. Identify and label existing thermostat wires accurately; a photograph can be helpful. Review the wiring diagrams provided in this guide to understand the correct connections. Finally, ensure you have a stable Wi-Fi connection if utilizing remote access features.

Wiring Diagrams and Connections

Proper wiring is crucial for the correct operation of your Honeywell FocusPro 6000 thermostat. Refer to the detailed wiring diagrams included in this manual, matching your specific HVAC system configuration. Common terminals include Rh, Rc, W, Y, G, and C. The ‘C’ wire, providing 24V common power, is often required for optimal performance and RedLink connectivity.

Ensure wires are securely connected to the appropriate terminals, avoiding loose connections. Incorrect wiring can damage the thermostat or your HVAC system. If unsure, consult a qualified HVAC technician. Double-check all connections before restoring power.

Mounting the Thermostat

Securely mounting your Honeywell FocusPro 6000 is essential for accurate temperature sensing and stable operation. Choose a location away from direct sunlight, drafts, and heat-generating appliances. Use the provided mounting screws to attach the baseplate to the wall, ensuring it’s level.

Carefully connect the wires to the terminal block, referencing the wiring diagram. Snap the thermostat onto the baseplate until it clicks securely. Verify a firm connection. Avoid forcing it. Proper mounting prevents damage and ensures reliable performance.

Basic Operation

The FocusPro 6000 offers intuitive control. Users can easily navigate the interface, adjust temperatures, and select heating/cooling modes for comfortable home climate management.

Navigating the User Interface

The Honeywell FocusPro 6000 boasts a user-friendly interface designed for simplicity and ease of use. The main screen displays current temperature, setpoint, and operating mode. Utilize the up and down arrow buttons to adjust the desired temperature. The ‘Menu’ button grants access to scheduling, settings, and advanced features.

Pressing ‘Hold’ allows temporary temperature overrides. The display clearly indicates system status – heating, cooling, or auto. Familiarize yourself with the icons representing each function for quick identification. A brief press of any button illuminates the screen, while a longer press confirms selections. The interface is logically organized for intuitive operation.

Setting the Date and Time

Accurate date and time settings are crucial for proper scheduling functionality on your Honeywell FocusPro 6000. Access the ‘Menu’ button, then navigate to the ‘Date/Time’ option using the arrow keys. The current date will be highlighted; adjust the month, day, and year using the up and down arrows, confirming each selection.

Repeat this process for setting the correct time, including hours and minutes. Ensure AM/PM is correctly selected. Saving the changes is vital; confirm your entries before exiting the menu. Incorrect settings will affect programmed schedules and potentially remote access features.

Temperature Control Modes (Heat, Cool, Auto)

The Honeywell FocusPro 6000 offers three primary temperature control modes: Heat, Cool, and Auto. In ‘Heat’ mode, the system activates heating when the temperature falls below the setpoint. ‘Cool’ mode activates cooling when the temperature exceeds the setpoint. ‘Auto’ mode intelligently switches between heating and cooling to maintain the desired temperature, based on both setpoints.

Selecting the appropriate mode is done through the main menu. Understanding these modes ensures optimal comfort and energy efficiency. Regularly check the selected mode to align with seasonal changes and personal preferences.

Programming Schedules

The FocusPro 6000 allows customized temperature schedules, optimizing comfort and energy savings. Create daily or weekly plans, and utilize vacation mode for extended absences.

Creating a Daily Schedule

To establish a daily heating and cooling plan with your Honeywell FocusPro 6000, begin by accessing the programming section via the thermostat’s user interface; You’ll define specific time periods and corresponding temperature settings for each day. Commonly, users set ‘Wake,’ ‘Leave,’ ‘Return,’ and ‘Sleep’ periods.

For each period, input the desired start time and temperature. The thermostat will automatically adjust based on this schedule. Remember to save your changes after configuring each day’s settings. Review the schedule to ensure accuracy and optimal comfort throughout the day, adjusting as needed for personal preferences.

Setting Up Weekly Schedules

The Honeywell FocusPro 6000 allows for convenient weekly schedule programming. After creating a daily schedule, you can copy it to other days of the week, streamlining the setup process. Access the weekly schedule option within the programming menu. Select the days you want to apply the schedule to – individually or in groups (weekdays/weekends).

Verify that the copied schedule aligns with your needs for each day. Make any necessary adjustments to accommodate varying routines. Saving the weekly schedule ensures consistent temperature control throughout the entire week, optimizing comfort and energy efficiency.

Using Vacation Mode

The Honeywell FocusPro 6000’s Vacation Mode is ideal for extended absences. This feature overrides your regular programming, maintaining a constant, energy-saving temperature while you’re away. Access Vacation Mode through the thermostat’s menu. Set a start date and duration for your trip.

Specify a hold temperature – a lower setting in winter and a higher one in summer – to minimize energy consumption. Upon your return, the thermostat automatically reverts to your programmed schedule. Vacation Mode provides peace of mind and significant energy savings during prolonged periods of vacancy.

Advanced Features

Explore RedLink enabled connectivity, remote access capabilities, and customizable humidity control settings for enhanced comfort and energy efficiency with your FocusPro 6000.

RedLink Enabled Connectivity

RedLink is Honeywell’s wireless technology enabling seamless communication between your FocusPro 6000 thermostat and compatible Honeywell systems. This allows for easy integration of additional sensors and accessories without the need for new wiring.

Benefits include simplified installation, enhanced system performance, and the ability to expand your home comfort system as needed. RedLink provides a secure and reliable connection, ensuring accurate temperature readings and efficient operation. The FocusPRO 6000 utilizes RedLink for convenient remote control and monitoring capabilities, offering a truly connected home experience.

Remote Access and Control

With RedLink enabled, the Honeywell FocusPro 6000 offers convenient remote access and control via the Honeywell Home app. This allows you to manage your home’s temperature from anywhere with an internet connection, using your smartphone or tablet.

Adjust settings, view current temperatures, and create schedules remotely. Receive alerts for extreme temperatures or system malfunctions. Remote access enhances energy savings and provides peace of mind, ensuring optimal comfort even when you’re away. The app simplifies thermostat management, offering a user-friendly interface for complete control.

Humidity Control Settings

The FocusPro 6000, when paired with compatible systems, allows for humidity control settings. This feature enables you to maintain optimal indoor humidity levels for enhanced comfort and health. Adjust humidity settings to prevent dryness during winter or excessive moisture during summer months.

Proper humidity control can reduce allergy symptoms and protect your home’s structure. The thermostat allows setting desired humidity percentages, automatically activating or deactivating humidification/dehumidification equipment. Explore these settings to personalize your home environment and improve overall air quality.

Troubleshooting

This section provides solutions for common error codes, resetting procedures, and resolving connectivity issues with your Honeywell FocusPro 6000 thermostat system.

Common Error Codes and Solutions

Encountering error codes on your Honeywell FocusPro 6000? This guide offers solutions for frequently displayed issues. “E1” often indicates a sensor malfunction, requiring professional inspection. “E2” suggests a wiring problem – double-check connections. A “Low Battery” alert necessitates immediate replacement. If you see “Rh Empty,” verify the R terminal wiring.

For communication errors, ensure RedLink compatibility. If the display shows “Cannot Connect,” reset the thermostat and router. Consult the full user manual (available online as a PDF) for a comprehensive list and detailed troubleshooting steps. Remember safety first; disconnect power before inspecting wiring.

Resetting the Thermostat

Need to reset your Honeywell FocusPro 6000? A soft reset, achieved by cycling the power (turning off the breaker for 30 seconds), resolves minor glitches. For a factory reset – erasing all settings – navigate to the settings menu on the thermostat’s interface. Select “Reset” or “Factory Defaults,” confirming your choice.

Be aware this will revert to original settings, requiring re-programming. Before resetting, document your current schedule. If the thermostat remains unresponsive, consult the downloadable PDF user manual for detailed instructions and diagrams. Always prioritize safety; disconnect power if unsure.

Addressing Connectivity Issues

Experiencing connection problems with your Honeywell FocusPro 6000? First, verify your home’s Wi-Fi network is functioning correctly. Ensure the thermostat is within range of the router. Check the RedLink status – a stable connection is crucial for remote access. Restart both the thermostat and your router.

If issues persist, consult the user manual’s troubleshooting section (available as a PDF download). Confirm correct account linking within the Honeywell Home app. Contact Honeywell support if problems remain unresolved, providing your model number for assistance.

Technical Specifications

The FocusPro 6000 operates on standard power, with a wide temperature range. Dimensions and weight vary by model; consult the detailed specifications online.

Power Requirements

The Honeywell FocusPro 6000 thermostat is designed for compatibility with standard 24VAC heating and cooling systems. It typically does not require a separate power supply, drawing its power directly from the HVAC equipment. However, some advanced features, like remote access, may necessitate a consistent power connection.

Ensure your HVAC system provides a stable 24VAC power source to guarantee optimal thermostat performance. Incorrect voltage or intermittent power can lead to inaccurate readings or system malfunctions. Always consult a qualified HVAC technician if you are unsure about your system’s power capabilities before installation.

Temperature Range

The Honeywell FocusPro 6000 thermostat effectively operates within a broad temperature range, typically spanning from 32°F to 90°F (0°C to 32°C) for accurate heating and cooling control. However, the display itself may function outside these limits, though with potentially reduced accuracy.

It’s crucial to note that extreme temperatures, either very high or very low, can impact sensor performance. Ensure the thermostat is installed in a location shielded from direct sunlight or drafts to maintain consistent and reliable temperature readings throughout the year.

Dimensions and Weight

The Honeywell FocusPro 6000 thermostat boasts a compact design, generally measuring approximately 4.7 x 3.1 x 1.2 inches (119 x 79 x 30 mm). This streamlined form factor allows for discreet installation in various home environments.

Regarding weight, the unit is relatively lightweight, typically around 0.5 pounds (227 grams) without packaging. These dimensions and weight contribute to ease of handling during installation and minimize visual intrusion on your wall space. Precise measurements may vary slightly depending on the specific model.

Safety Information

Always disconnect power before installation or maintenance. Follow all electrical codes and instructions carefully to prevent shock or fire hazards during operation.

Important Precautions

Prior to any installation or servicing, always disconnect the power supply to the heating and cooling system at the breaker box to avoid electrical shock. Installation should be performed by a qualified technician familiar with HVAC systems and electrical wiring.

Ensure all wiring connections are secure and comply with local electrical codes. Do not expose the thermostat to excessive moisture or extreme temperatures. Avoid using abrasive cleaners, as they may damage the display or housing.

Regularly inspect the wiring for any signs of damage or wear. If any issues are detected, immediately discontinue use and consult a qualified professional. This device is intended for indoor use only.

Warranty Information

Honeywell warrants this FocusPro 6000 thermostat against defects in materials and workmanship for a period of one (1) year from the date of purchase. This warranty applies to normal residential use and does not cover damage resulting from misuse, abuse, improper installation, or unauthorized modifications.

To obtain warranty service, contact Honeywell Support with proof of purchase. The warranty does not cover labor costs associated with replacement or repair.

This warranty gives you specific legal rights, and you may have other rights which vary by location. Honeywell is not responsible for consequential damages.

Resources

Access the FocusPro 6000 PDF manual online, explore frequently asked questions, and contact Honeywell Support for assistance with your thermostat setup and operation.

Downloading the User Manual (PDF)

For a comprehensive understanding of your Honeywell FocusPro 6000 thermostat, downloading the official user manual in PDF format is highly recommended. This detailed document, spanning approximately 80 pages, provides in-depth instructions covering every aspect of the system. You’ll find detailed explanations of installation procedures, wiring diagrams, and user interface navigation.

The PDF manual also includes extensive programming guidance, advanced feature explanations like RedLink connectivity, and a dedicated troubleshooting section addressing common error codes. Accessing the manual ensures you have a readily available resource for resolving any questions or issues that may arise during operation. It’s a valuable tool for maximizing your thermostat’s functionality.

Frequently Asked Questions (FAQ)

This section addresses common inquiries regarding the Honeywell FocusPro 6000 thermostat. Users often ask about initial setup, programming schedules, and understanding error codes. Questions regarding RedLink enabled connectivity and remote access are also frequent. Many seek clarification on humidity control settings and troubleshooting connectivity issues.

Further inquiries involve resetting the thermostat to factory defaults and ensuring proper wiring during installation. This FAQ aims to provide concise answers to these typical questions, helping users quickly resolve issues and optimize their thermostat’s performance. Detailed answers can also be found within the full user manual.

Contacting Honeywell Support

For further assistance with your Honeywell FocusPro 6000 thermostat, Honeywell offers multiple support channels. Users can access a comprehensive online resource center, including detailed FAQs and downloadable manuals, directly from the Honeywell Home website. Additionally, a dedicated support team is available via phone during business hours to address specific concerns.

Live chat support may also be available for immediate assistance. When contacting support, have your thermostat model number readily available for faster service. Honeywell’s commitment is to provide excellent customer care and ensure a seamless user experience.

fe awakening lunatic guide

Fire Emblem Awakening: Lunatic Mode ⸺ A Comprehensive Guide

This comprehensive guide details strategies for conquering Fire Emblem Awakening’s Lunatic Mode‚ offering expert tips and builds to overcome its intense challenges.

It’s a multi-step approach‚ focusing on early-game hurdles and maximizing the Second Seal’s potential‚ demanding outside-the-box thinking for success.

Prepare to master precise tactics‚ minimal error tolerance‚ and efficient resource management to dominate this notoriously difficult game mode.

Understanding Lunatic Mode

Lunatic Mode in Fire Emblem Awakening represents the pinnacle of strategic challenge‚ demanding meticulous planning and flawless execution. Unlike other difficulties‚ Lunatic offers minimal forgiveness‚ punishing even slight miscalculations.

Enemies boast significantly enhanced stats‚ aggressive AI‚ and often‚ superior weaponry‚ creating a relentlessly difficult experience. Success hinges on exploiting every advantage‚ mastering the weapon triangle‚ and optimizing unit builds.

Prepare for a demanding campaign where resource management and strategic foresight are paramount to survival.

The Core Challenges of Lunatic Difficulty

The primary hurdles in Awakening’s Lunatic Mode stem from amplified enemy strength‚ coupled with limited resources and unforgiving map designs. Early chapters present a steep learning curve‚ requiring precise unit positioning and careful consideration of every engagement.

Unit survivability is constantly threatened‚ demanding proactive defense and efficient healing. Furthermore‚ randomized enemy skills (post-game) introduce unpredictable elements‚ necessitating adaptable strategies.

Overcoming these challenges demands mastery of core mechanics and a willingness to learn from inevitable setbacks.

Early Game Strategies (Chapters 1-10)

Initial chapters demand meticulous planning due to limited unit options and powerful enemies. Prioritize Stahl’s early recruitment and development‚ leveraging his growth potential. Focus on carefully navigating maps‚ minimizing losses‚ and securing key positional advantages.

Conserve resources like weapons and healing items‚ as they are scarce. Aggressively pursue support conversations to bolster unit stats and unlock valuable combat bonuses.

Early leveling is crucial for establishing a foundation for later success.

Managing Limited Resources

Early Lunatic Mode presents a significant resource scarcity. Weapons degrade rapidly‚ and healing items are precious. Avoid unnecessary engagements and prioritize finishing maps quickly to conserve supplies; Utilize weapon skills cautiously‚ and consider strategically withdrawing units to prevent weapon breakage.

Focus on securing stat-boosting items from maps and support conversations. Carefully evaluate whether to repair or replace weapons‚ considering long-term costs.

Prioritizing Unit Leveling

Effective leveling is crucial in Lunatic Mode. Focus on a core group of units‚ particularly Stahl‚ Chrom‚ and Lissa‚ early on. Utilize grinding spots strategically to boost their stats quickly. Don’t spread experience too thinly; concentrate on units with strong growth rates and class potential.

Pairings and supports significantly impact leveling‚ so prioritize building relationships alongside combat training.

Key Units for Lunatic Mode

Certain units excel in Lunatic Mode due to their early availability and growth potential. Stahl stands out as a remarkably reliable choice‚ offering versatile class options and strong marriage candidates like Panne‚ Nowi‚ or Cordelia.

Chrom and Lissa provide early-game power‚ establishing a solid foundation for later challenges. Prioritizing these units streamlines progression and maximizes your chances of success.

Stahl: A Lunatic Mode Staple

Stahl’s consistent performance makes him invaluable in Lunatic Mode. His early access and respectable growths‚ particularly in Defense and Strength‚ provide a sturdy frontline presence. He boasts excellent class options‚ transitioning effectively into Mercenary‚ Warrior‚ or even Great Knight.

Strategic pairings with units like Panne‚ Nowi‚ Cordelia‚ or Lissa further enhance his capabilities‚ solidifying his role as a dependable and adaptable unit.

Chrom and Lissa: Early Game Powerhouses

Chrom and Lissa’s early availability and strong base stats make them crucial for navigating the initial chapters of Lunatic Mode. Chrom’s offensive prowess and Lissa’s healing capabilities provide a potent combination‚ easing the pressure of limited resources.

Leveraging their strengths early on establishes a solid foundation for success‚ allowing players to overcome challenging encounters and secure vital experience gains.

The Importance of Pairings and Supports

Strategic pairings and maximized support bonuses are paramount in Fire Emblem Awakening’s Lunatic Mode. Supports grant stat boosts during battle‚ significantly enhancing unit survivability and combat effectiveness. Careful consideration of marriage candidates unlocks powerful inherited skills.

Prioritizing support conversations and optimizing pairings is essential for overcoming the difficulty‚ creating a synergistic team capable of handling formidable foes.

Maximizing Support Bonuses

To truly excel‚ consistently engage units in battles alongside their support partners. Reaching ‘A’ rank support provides the largest stat boosts‚ crucial for surviving Lunatic Mode’s punishing encounters. Prioritize supports between core units and those needing stat enhancements.

Don’t neglect opportunities for casual conversations; these build relationships and unlock vital combat advantages‚ turning the tide in challenging battles.

Optimal Marriage Candidates

Strategic pairings are vital; Stahl benefits immensely from Panne‚ Nowi‚ Cordelia‚ or Lissa‚ inheriting valuable skills and stat boosts. Chrom and Lissa’s offspring often gain advantageous traits. Consider Sully for strength-based units‚ and Tharja for magical prowess.

Prioritize pairings that address unit weaknesses and complement existing strengths‚ creating a well-rounded and resilient army capable of withstanding Lunatic’s challenges.

Second Seal Mastery

The Second Seal is crucial for adapting units to Lunatic Mode’s demands. Reclassifying allows correcting poor stat distributions or unlocking powerful classes. Prioritize transforming weaker units into niche roles‚ like dedicated healers or speedy fliers.

Abuse the system to create optimal builds‚ focusing on maximizing strengths and mitigating weaknesses. Careful planning with the Second Seal dramatically increases your chances of success.

Utilizing the Second Seal Effectively

Strategic reclassing is key; don’t waste Seals on minor improvements. Identify units with potential for strong growth in new classes. Consider Stahl‚ benefiting from diverse options like Mercenary or Wyvern Lord.

Prioritize units lacking natural strengths‚ transforming them into valuable assets. Experiment‚ but always have a clear endgame build in mind to maximize the Second Seal’s impact.

Class Changes for Lunatic Mode

Prioritize classes offering survivability and strong skill inheritance. Wyvern Lord for Stahl provides bulk and powerful offensive capabilities. Consider Dark Mage for potent magic damage‚ or Khan for mounted utility.

Avoid fragile glass cannon builds; Lunatic Mode punishes mistakes severely. Focus on classes that can consistently withstand enemy attacks and contribute reliably to battlefield control and unit preservation.

Skill Inheritance and Optimization

Skill inheritance is crucial for Lunatic Mode success. Prioritize skills like Vantage‚ Sol‚ and Aegis for survivability. Galeforce enables crucial extra turns‚ while skills boosting speed and skill activation are invaluable.

Carefully select inheritable skills from retiring units‚ focusing on those that address unit weaknesses and synergize with their class and intended role on the battlefield.

Essential Skills for Lunatic Mode

Vantage is paramount‚ guaranteeing doubles and bypassing enemy speed. Sol and Aegis provide vital damage reduction and survivability against powerful foes. Galeforce offers crucial extra turns for repositioning or finishing off threats.

Skills boosting skill activation rates‚ like Rally Plus‚ are invaluable. Prioritize skills that mitigate common Lunatic Mode challenges‚ such as high enemy critical rates and potent offensive stats.

Prioritizing Skill Inheritance

Inherit Vantage first‚ as it’s a game-changer for many units. Next‚ focus on skills boosting survivability like Sol or Aegis‚ especially for frontline fighters. Galeforce is a high priority for mobile offensive units.

Consider skills that patch unit weaknesses; speed for slower units‚ or defense for frail ones. Don’t waste inheritance on redundant skills – maximize each opportunity.

Advanced Combat Tactics

Master enemy phase manipulation by baiting with sacrificial units and utilizing terrain advantages. Exploit enemy weaknesses – use effective weapons and target vulnerable stats. Repositioning is crucial; create chokepoints and isolate threats.

Don’t be afraid to retreat and regroup. Utilize dancers strategically to grant extra turns and secure critical victories. Careful planning and calculated risks are essential for success.

Enemy Phase Manipulation

Baiting is paramount; strategically position weaker units to draw enemy attacks‚ allowing stronger units to counter effectively. Utilize terrain like forests and forts to limit enemy movement and create favorable engagements.

Predict enemy AI patterns and exploit them. Carefully consider enemy range and movement types to control the battlefield and minimize damage taken during the enemy turn.

Exploiting Enemy Weaknesses

Master the weapon triangle – swords beat axes‚ axes beat lances‚ and lances beat swords – for significant damage bonuses. Target enemies with low resistance using magical attacks‚ and physically weak foes with strong units.

Prioritize eliminating dangerous enemy units like mages and archers first. Utilize skills like Galeforce to quickly dispatch threats and reposition for further advantage.

Weapon Triangle and Status Effects

Understanding the weapon triangle – swords over axes‚ axes over lances‚ lances over swords – is crucial for maximizing damage output in Fire Emblem Awakening. Strategically utilize status effects like poison and sleep to debilitate powerful enemies.

Exploiting these vulnerabilities can turn the tide of battle‚ especially on Lunatic Mode where every advantage counts. Master these mechanics for consistent victories.

Mastering the Weapon Triangle

The weapon triangle is fundamental: swords beat axes‚ axes beat lances‚ and lances beat swords. Positioning units to exploit these matchups is vital for consistent damage and minimizing losses on Lunatic Mode.

Always consider weapon advantages during combat‚ prioritizing attacks against weaker defenses. Ignoring this core mechanic will lead to significant difficulties and potential unit failures.

Utilizing Status Effects Strategically

Status effects are powerful tools in Fire Emblem Awakening‚ especially on Lunatic Mode. Poison‚ sleep‚ and silence can cripple enemy units‚ turning difficult encounters manageable. Prioritize skills and weapons that inflict these conditions.

However‚ be mindful of enemy resistance and immunity; some foes are less susceptible. Strategic application of status effects can dramatically shift battles in your favor.

Grinding and Leveling Strategies

Efficient leveling is crucial for Lunatic Mode success. Utilize optimal grinding spots‚ such as early chapters with repeatable battles‚ to boost under-leveled units. Focus on experience gain‚ prioritizing weaker characters initially.

Consider using the “Pair Up” mechanic for bonus experience. While tedious‚ strategic grinding minimizes risk and ensures a stronger‚ more resilient army capable of tackling later challenges.

Optimal Grinding Spots

Early chapters offer excellent grinding opportunities. Chapter 6‚ with its abundance of weaker enemies‚ is ideal for leveling low-ranking units. Repeatedly challenge the enemies for consistent experience gains.

Later‚ Chapter 14 provides a good balance of experience and resources. Remember to utilize the “wait” command to allow enemies to approach‚ maximizing battle frequency and leveling efficiency.

Efficient Leveling Techniques

Prioritize units with strong growth rates‚ like Stahl‚ for rapid leveling. Utilize the “pair up” system to boost stats and experience gain. Don’t be afraid to lower the difficulty temporarily for focused grinding‚ then revert to Lunatic.

Exploit enemy weaknesses and focus fire to quickly dispatch opponents‚ accelerating the leveling process. Remember‚ consistent battles are key to overcoming Lunatic Mode’s challenges.

Mid-Game Transition (Chapters 11-20)

Chapters 11-20 demand adaptation as enemy compositions and map designs become more complex. Integrate newly acquired units strategically‚ leveraging their unique skills and potential pairings. Focus on solidifying core team builds and refining combat tactics.

Expect increased difficulty and prepare for more challenging encounters. Consistent support investment and careful resource management are crucial for navigating this pivotal stage.

Adapting to Increased Difficulty

The mid-game introduces significantly tougher enemies‚ requiring a shift in strategy. Prioritize unit positioning and anticipate enemy movements meticulously. Accept that losses may occur‚ learning from each setback to refine your approach.

Aggressive grinding becomes less viable; focus on efficient experience gain through carefully selected battles. Embrace calculated risks and exploit enemy weaknesses relentlessly.

New Unit Acquisition and Integration

As the story progresses‚ new allies join your cause‚ offering fresh tactical options. Carefully assess their strengths and weaknesses‚ identifying optimal class paths for Lunatic Mode viability. Don’t immediately rely on them; build their levels strategically.

Pairing these newcomers with experienced veterans through supports accelerates their growth and unlocks valuable combat bonuses‚ bolstering your overall team strength.

Late Game Strategies (Chapters 21+)

The endgame demands meticulous preparation for formidable final bosses. Focus on refining your core team‚ maximizing skill inheritance‚ and optimizing unit builds for peak performance. Endgame units‚ fully developed‚ become crucial assets.

Prioritize strategic positioning and exploit enemy weaknesses. Don’t hesitate to utilize powerful weapons and carefully planned support combinations to overcome the escalating difficulty.

Preparing for Final Bosses

Final bosses require a fully optimized team and strategic planning. Maximize unit levels‚ refine skills‚ and equip powerful weapons. Prioritize healers and defensive units to withstand relentless attacks.

Exploit boss weaknesses‚ utilize terrain advantages‚ and carefully manage unit positioning. Don’t underestimate the power of pair-up bonuses and support relationships for increased survivability.

Utilizing Endgame Units

Endgame units‚ often highly specialized‚ become crucial for final challenges. Characters like Laurent‚ with his potent magic‚ and Frederick‚ a resilient tank‚ shine. Optimize their skills for maximum impact‚ focusing on critical hits or damage reduction.

Pair them strategically with support partners to amplify their strengths and cover weaknesses. Don’t hesitate to reclass with a Second Seal for optimal builds.

Avoiding Common Pitfalls

Lunatic Mode punishes mistakes severely; preventing unit deaths is paramount. Overextension and reckless attacks lead to swift defeats. Carefully consider enemy range and utilize terrain for defensive advantages.

Manage stamina diligently to avoid fatigue penalties‚ hindering unit performance. Prioritize healing and strategic retreats over aggressive pushes‚ preserving your core team.

Preventing Unit Deaths

Unit survival is crucial in Lunatic Mode. Avoid isolating units‚ ensuring support range is maintained. Prioritize defensive positioning‚ utilizing forests and forts for cover. Always assess enemy attack patterns before initiating engagement.

Don’t hesitate to withdraw if a battle looks unfavorable; preserving a unit is better than a risky‚ potentially fatal attack. Utilize healers proactively‚ anticipating damage.

Managing Stamina and Fatigue

Stamina and fatigue significantly impact performance in Fire Emblem Awakening’s Lunatic Mode. Rotate units frequently to prevent exhaustion‚ reducing hit and avoid rates. Utilize the wait command strategically to conserve stamina during enemy phases.

Consider the terrain; rougher terrain drains stamina faster. Prioritize resting fatigued units before critical battles‚ maximizing their effectiveness and minimizing potential errors.

Dealing with Randomized Enemy Skills (Post-Game)

Post-game Lunatic Mode introduces randomized enemy skills‚ demanding adaptability. Scout enemy compositions carefully‚ identifying potentially dangerous skill combinations. Be prepared to adjust strategies on the fly‚ as pre-planned tactics may become ineffective.

Prioritize units with high speed and skill to mitigate the impact of unpredictable enemy attacks. Embrace flexibility and exploit any weaknesses revealed during combat.

Adapting to Unpredictable Opponents

Randomized skills necessitate constant evaluation of enemy threats. Forget rigid plans; prioritize reactive gameplay‚ assessing each foe’s unique abilities before engagement. Utilize terrain to your advantage‚ minimizing exposure to dangerous skills like Luna or Sol.

Don’t hesitate to reposition units‚ sacrificing minor advantages for safety. Anticipate unexpected outcomes and be ready to adjust your strategy mid-battle.

Adjusting Strategies on the Fly

Lunatic Mode’s randomized skills demand flexibility. Initial plans often crumble; swiftly reassess unit positioning and target priorities based on revealed enemy capabilities. Don’t commit to attacks if a more pressing threat emerges.

Prioritize unit safety‚ even if it means delaying offensive pushes. Embrace calculated retreats and exploit enemy movement patterns to create advantageous engagements.

Resources and Further Learning

Numerous online guides and communities offer invaluable support for Fire Emblem Awakening’s Lunatic Mode. Explore dedicated forums and websites for detailed strategies‚ build recommendations‚ and shared experiences from veteran players.

Utilize available tools and calculators to optimize unit stats‚ inheritance‚ and potential pairings. These resources can significantly streamline your planning and enhance your success rate.

Online Guides and Communities

Dedicated online resources are crucial for navigating Fire Emblem Awakening’s Lunatic Mode. Explore forums like GameFAQs and Reddit’s r/FireEmblem‚ brimming with player discussions‚ FAQs‚ and detailed guides.

Websites offering build guides‚ tier lists‚ and strategy breakdowns provide valuable insights. Engaging with the community fosters learning and allows you to share experiences with fellow players;

Useful Tools and Calculators

Several online tools significantly aid Lunatic Mode planning. Stat calculators help predict unit growth and refine builds‚ while damage calculators assess combat outcomes.

Pairing guides showcase optimal marriage candidates for desired stat inheritance. Utilize these resources to maximize unit potential and strategically prepare for challenging battles‚ enhancing your overall success rate.