Author Archives: ruby

hockey stick size guide

Hockey Stick Size Guide: A Comprehensive Overview (Updated 02/07/2026)

Navigating hockey stick sizing is crucial for performance and comfort; this guide details lengths from youth (31-48 inches) to senior (51-61 inches), aiding players of all ages.

Selecting the correct hockey stick size is paramount for maximizing a player’s on-ice capabilities. This comprehensive guide, updated as of February 7th, 2026, aims to demystify the process. Proper sizing impacts puck control, shooting accuracy, and overall comfort. Considerations extend beyond simple height charts, encompassing age, skill level, and playing position. We’ll explore key measurements – length, blade length, flex, and lie – to ensure an optimal fit. Understanding these elements is the first step towards enhancing your game and preventing injury.

II. Why Proper Hockey Stick Size Matters

An ill-fitting hockey stick significantly hinders performance. Too long a stick reduces control and quickness, while a stick that’s too short limits reach and shooting power. Correct length enables a proper shooting motion and efficient puck handling. Incorrect flex impacts shot velocity and accuracy, potentially leading to fatigue. Furthermore, improper sizing can contribute to poor posture and increased risk of injury. Investing time in finding the right fit translates to improved skills, greater confidence, and a more enjoyable hockey experience.

III. Key Measurements for Hockey Sticks

Several critical measurements determine a hockey stick’s suitability. Overall length, measured from the heel to the toe, impacts reach and control. Blade length influences puck handling and shooting capabilities. Shaft flex, indicating stiffness, affects shot power and accuracy based on player weight. Finally, lie angle, the angle between the shaft and blade, dictates puck positioning and shooting comfort. Understanding these measurements is fundamental to selecting a stick optimized for individual needs and playing style.

A. Overall Length

Overall length is the primary measurement for hockey stick sizing, ranging from youth sticks at approximately 31-48 inches to senior models extending to 51-61 inches. A proper length allows players to maintain control and reach the puck effectively. Generally, shorter sticks enhance maneuverability, while longer sticks offer greater reach and power. Determining the ideal length often correlates with a player’s height, but individual preference and playing style also play significant roles in optimal selection.

B. Blade Length

Blade length significantly impacts puck handling and shooting capabilities. Shorter blades, favored by skilled dekeing players, provide enhanced puck control and quick release. Conversely, longer blades offer a larger surface area for powerful shots and improved accuracy. Blade lengths vary, influencing a player’s ability to lift the puck and maintain possession. Selecting the appropriate blade length depends on individual playing style and position, balancing maneuverability with shooting power.

C. Shaft Flex

Shaft flex, measured in units of resistance to bending, is critical for shot power and accuracy. Lower flex (softer sticks) are easier to load, ideal for players prioritizing quick releases and wrist shots. Medium flex offers a balance, suitable for versatile players. Higher flex (stiffer sticks) require more strength to load but deliver maximum power, favored by hard shooters. Flex selection should align with player weight and strength, optimizing energy transfer during shooting.

D. Lie

Lie angle determines how a stick sits on the ice and impacts puck control and shooting accuracy. Right-handed lie angles are positioned for players who hold the stick on their right side, while left-handed lie angles are for those holding it on the left. An incorrect lie angle can cause missed passes or shots, as the blade won’t maintain consistent contact with the ice. Proper lie ensures optimal puck handling and a more efficient shooting motion.

IV. Hockey Stick Sizing Charts by Age Group

Accurate sizing varies significantly with age and physical development. Youth players (6-8 years) typically require sticks between 31-48 inches, while juniors (7-13 years) generally use 44-51 inch sticks. Intermediate players (13-15 years) often fit into the 51-59 inch range. Senior players (15+ years) usually need sticks from 55-61 inches, though individual height and playing style are crucial considerations beyond just age.

A. Youth Hockey Stick Sizes (6-8 years)

For young players aged 6-8, selecting the correct stick is paramount for skill development. Recommended lengths generally fall between 31 and 48 inches (97cm ‒ 142cm), with blade lengths around 45-49 inches (114cm ౼ 124cm). Prioritize lighter-weight sticks with lower flex to allow for easier handling and shooting. Proper fit encourages confidence and fosters a positive early hockey experience, aiding fundamental skill acquisition.

B. Junior Hockey Stick Sizes (7-13 years)

As players grow between 7 and 13 years old, their equipment needs evolve. Junior sticks typically range from 44 to 51 inches (132cm ౼ 155cm) in length, with blade lengths spanning 50 inches and beyond. Flex becomes increasingly important, balancing power and control as strength develops. Consider the player’s growing body and skill level when choosing, ensuring a comfortable and effective fit that supports continued progress on the ice.

C. Intermediate Hockey Stick Sizes (13-15 years)

For players aged 13 to 15, transitioning to intermediate sizes is key. Sticks generally measure between 51 and 59 inches (130cm ‒ 150cm), offering a balance between youth and senior models. Flex selection is critical during this period of rapid physical development, influencing shot power and accuracy. Careful consideration of height, weight, and skill level ensures optimal performance and prevents hindering growth or technique development on the ice.

D. Senior Hockey Stick Sizes (15+ years)

Senior hockey sticks cater to players aged 15 and above, offering the widest range of customization. Lengths typically span from 55 to 63 inches (140cm ‒ 160cm), with flexes varying significantly to accommodate diverse player weights and shooting styles. Experienced players often fine-tune their stick choice based on position, preferring stiffer flexes for powerful shots or softer flexes for enhanced puck control. Proper fitting is paramount for maximizing performance and minimizing injury risk.

V. Determining Stick Length Based on Height

Height is a primary factor in selecting the correct stick length, though individual preference plays a role. Players under 5’0” generally benefit from a 50-inch stick, while those between 5’0” and 5’4” often use a 54-inch model. Individuals ranging from 5’4” to 5’8” typically find a 56-inch stick suitable, and those exceeding 5’8” often opt for 58-60 inch sticks. Remember to consider reach and comfort when making your final decision.

A. Players Under 5 Feet Tall

For players under 5 feet tall, prioritizing control and maneuverability is key. A 50-inch hockey stick is generally recommended, providing a comfortable reach without sacrificing agility. Younger or smaller players will find this length easier to handle during skating and stickhandling drills. Ensuring the stick isn’t overly long prevents awkwardness and promotes proper technique development. Consider a lighter weight stick for enhanced control.

B. Players Between 5’0″ and 5’4″

Players ranging from 5’0″ to 5’4″ typically benefit from a 54-inch hockey stick, offering a balance between reach and control. This length allows for effective puck handling and shooting while maintaining maneuverability. It’s crucial to consider individual skill level and playing style; a slightly shorter stick (52-53 inches) might suit players prioritizing quick dekes. Proper stick length ensures a comfortable shooting position and efficient power transfer.

C. Players Between 5’4″ and 5’8″

For players between 5’4″ and 5’8″, a 56-inch hockey stick is generally recommended, providing a good balance of reach and control for various playing styles. Some may find a 55-inch stick preferable for enhanced agility. Consider your position; defensemen often favor slightly longer sticks for increased reach during puck battles. Ensuring the stick allows for a comfortable bend in the elbows during shooting is paramount for maximizing power and accuracy on the ice.

D. Players Over 5’8″

Players exceeding 5’8″ typically benefit from a 58 to 61-inch hockey stick, offering extended reach for puck handling and shooting. Taller individuals may even require a 61-inch stick. Defensive players often lean towards the longer end of this range for superior gap control. Proper sizing ensures a comfortable shooting position, with slightly bent elbows, maximizing power transfer. Experimentation within this range is encouraged to find the optimal length for individual preference and playing style.

VI. Understanding Shaft Flex and Player Weight

Shaft flex, measured in numbers, indicates how much force bends the stick; lower numbers (softer flex) suit lighter players (under 150lbs), enabling easier puck loading and quicker releases. Medium flex (50-60) is ideal for players between 150-180lbs, offering a balance of power and control. Heavier players (over 180lbs) benefit from high flex (60+), providing maximum power and preventing excessive bending, crucial for strong, accurate shots.

A. Low Flex (Softer Sticks)

Low flex hockey sticks, typically ranging from 30 to 50, are designed for players with lighter builds or those prioritizing quick releases and puck feel. These sticks bend easily, requiring less force to load a shot, making them excellent for developing players or those focusing on finesse. They’re often favored by younger players and those under 150 pounds, enhancing their ability to control the puck and generate wrist shots effectively.

B. Medium Flex

Medium flex hockey sticks, generally falling between 50 and 70, represent a versatile option suitable for a broad range of players. Offering a balance between responsiveness and power, these sticks accommodate players weighing between 150 and 180 pounds. They provide a good compromise for those seeking both quick releases and the ability to generate harder shots, making them popular among intermediate and developing players across various positions.

C. High Flex (Stiffer Sticks)

High flex hockey sticks, typically ranging from 70 to 90 or higher, are designed for powerful players who prioritize shot velocity over quick release. These stiffer shafts require more strength to load but deliver substantial energy transfer, ideal for players exceeding 180 pounds. Commonly favored by experienced players and those with strong upper body strength, high flex sticks enhance shooting accuracy and power, particularly for slap shots;

VII. Lie Angle Explained

Lie angle refers to the angle between the shaft of the stick and the blade. It’s crucial for proper puck handling and shooting. Right-handed sticks have a lie angle that allows the blade to lie flat when the player is in their shooting stance, with the heel elevated. Conversely, left-handed sticks are mirrored. An incorrect lie angle hinders puck control, leading to missed passes and inaccurate shots; proper alignment ensures optimal performance.

A. Right-Handed vs. Left-Handed Lie

Determining handedness is the first step in selecting the correct lie angle. Right-handed players hold the stick with their left hand at the top, while left-handed players do the opposite. A right-handed lie has the blade angled so the heel is higher during a shooting stance, facilitating power. Left-handed lies mirror this. Choosing the wrong handedness dramatically impacts shooting accuracy and puck control, making comfortable and effective play difficult.

B. Impact of Lie Angle on Puck Control

The lie angle significantly influences a player’s ability to maintain puck control. An incorrect lie causes the blade to either lift off the ice too easily or dig in excessively. This results in inconsistent puck handling, difficulty receiving passes, and reduced responsiveness during quick movements. A proper lie ensures the blade remains flat on the ice, providing optimal control for stickhandling, passing, and shooting, ultimately enhancing overall game performance.

VIII. Blade Length Considerations

Blade length is a key factor influencing a player’s style. Shorter blades (around 10-12 inches) excel in quick dekes and close-quarters puck handling, favored by skilled playmakers. Conversely, longer blades (12-15 inches) provide a larger surface area for powerful shots and improved reach during battles for the puck. Selecting the appropriate blade length depends on individual preferences and the demands of their playing position, optimizing both offensive and defensive capabilities.

A. Shorter Blades for Dekeing

Shorter hockey stick blades, typically ranging from 10 to 12 inches, significantly enhance a player’s ability to perform quick and deceptive dekes. The reduced blade surface area allows for faster puck movement and tighter control, enabling agile maneuvers around opponents. This blade length is particularly beneficial for players prioritizing puck handling skills and creative offensive plays, facilitating rapid changes in direction and elusive stickwork.

B. Longer Blades for Shooting

Longer hockey stick blades, generally between 12 and 15 inches, are favored by players who prioritize shooting power and accuracy. The extended surface area provides a larger sweet spot for puck contact, maximizing energy transfer and resulting in harder, more precise shots. This blade length offers increased leverage and control during shooting motions, making it ideal for players focused on offensive firepower and scoring goals from distance.

IX. Adjusting Stick Length: Cutting the Shaft

Carefully cutting a hockey stick shaft allows for personalized length adjustments, optimizing performance. It’s crucial to measure precisely and cut conservatively, as shortening is permanent. Professionals recommend having a qualified hockey equipment retailer perform the cut to ensure a clean, even edge and prevent damage to the shaft’s integrity. Always consider your playing style and height when determining the ideal length before making any cuts.

X. Grip Tape and its Influence on Feel

Grip tape significantly impacts a player’s control and comfort, influencing the overall feel of the stick. Different thicknesses and textures cater to varying preferences; thicker tape provides a more cushioned grip, while thinner tape offers enhanced stick feel. Applying tape correctly, overlapping layers strategically, is vital for durability and optimal performance. Regularly replacing worn grip tape maintains a secure hold and prevents slippage during play.

XI. Common Mistakes in Hockey Stick Sizing

Incorrect sizing is a frequent issue, often stemming from relying solely on age rather than height and weight. Players often choose sticks too long, hindering maneuverability, or too short, reducing reach and power. Ignoring shaft flex – matching it to weight – is another error. Failing to consider position-specific needs, like longer reach for defensemen, also impacts performance. Prioritizing brand over fit, and neglecting professional fitting advice, leads to suboptimal results.

XII. Hockey Stick Size Guide for Different Positions

Position significantly influences optimal stick size. Forwards generally prefer shorter sticks (52-54 inches) for quicker puck handling and agility. Defensemen often opt for longer sticks (56-60 inches) to extend their reach for poke checks and passing lanes. Goalies require specialized, larger paddle goal sticks, prioritizing blocking ability over shooting. Considering these positional nuances ensures players have equipment tailored to their role, maximizing on-ice effectiveness.

A. Forward Sizing

Forwards typically benefit from sticks enabling quick release and maneuverability. A common range is 52 to 54 inches, though individual height and playing style are key. Shorter sticks (around 52 inches) aid in close-quarters deking and fast shots in tight spaces. Players prioritizing reach might lean towards 54 inches. Flex should complement weight; lighter players favor lower flex for easier puck handling, while stronger players can manage higher flex for power.

B. Defenseman Sizing

Defensemen generally require sticks offering reach and shot power for clearing the zone and delivering slap shots. Lengths often fall between 54 and 60 inches, depending on height. A longer stick provides a greater reach for poke checks and intercepting passes. Higher flex is common, allowing defensemen to load up for powerful shots. Consider a stick that balances reach with maneuverability for effective puck movement and defensive coverage.

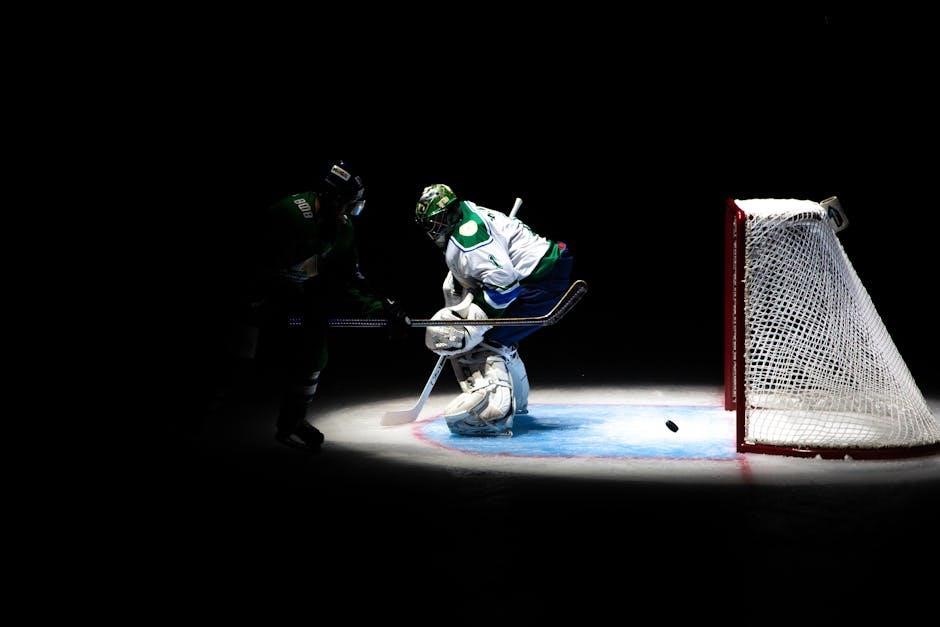
C. Goalie Stick Sizing

Goalie sticks differ significantly, prioritizing paddle size and lie angle over overall length. Lengths typically range from 45 to 52 inches. Paddle width impacts net coverage, with wider paddles favored by some. Lie angle is crucial for puck handling and directing rebounds. Goalies often prefer a lower flex for quicker reaction time and control. Proper sizing ensures optimal puck control and effective blocking, vital for defensive success.

XIII. The Hockey Stick Chart Pattern in Trading (Brief Mention)

Interestingly, a “hockey stick” pattern appears in financial trading, mirroring the stick’s shape. This signifies a period of flatness followed by a rapid, steep increase. Traders identify this pattern to anticipate potential upward momentum in asset prices. While unrelated to equipment sizing, the term’s visual similarity highlights pattern recognition’s importance across diverse fields, from sports to finance.

XIV. Resources for Finding Hockey Stick Size Guides

Numerous online resources assist in finding the perfect fit. Retailers like Grays Hockey offer detailed guides alongside their equipment, including shoes. Google Docs provides templates for tracking sizes, enhancing organization. Exploring online learning centers offers tutorials and tips for customization. Websites dedicated to hockey equipment reviews often feature comprehensive sizing charts, ensuring players select appropriate sticks for optimal performance and comfort.

XV. Grays Hockey Guides and Equipment

Grays Hockey provides extensive sizing guidance alongside its premium equipment range. Their resources detail stick lengths correlated with age and height, ensuring a proper fit for developing players. Beyond sticks, Grays offers specialized hockey shoes, complementing overall performance. Detailed charts assist in selecting the correct flex and lie angle, maximizing control and shot power. Grays’ commitment extends to comprehensive support, helping players optimize their gear selection.

XVI. Kookaburra Hockey Equipment

Kookaburra Hockey delivers a diverse range of equipment, with sizing guides to match. They emphasize selecting the appropriate stick length based on player height, mirroring industry standards. Kookaburra’s resources cover youth, junior, and senior categories, ensuring accurate fits for all skill levels. Alongside sticks, they offer protective gear and apparel, completing a player’s setup. Their focus is on providing quality equipment and clear guidance for optimal performance on the field.

XVII. Using Google Docs for Tracking Equipment Sizes

Google Docs provides a convenient, collaborative platform for managing hockey equipment sizes. Create a spreadsheet to record player heights, preferred stick lengths, flex, and lie angles. This centralized document allows coaches and team managers to easily track and update information. Utilize shared access for seamless collaboration, ensuring everyone has the latest data. Google Docs’ accessibility features further enhance usability, making it ideal for organizing team equipment efficiently.

XVIII. Accessibility in Google Docs for Size Charts

Google Docs prioritizes accessibility when creating hockey stick size charts. Utilize headings, alt text for images, and clear table structures for screen reader compatibility. Employ sufficient color contrast for readability and ensure keyboard navigation is functional. Leverage Google’s built-in accessibility checker to identify and resolve potential issues. These features guarantee that size guides are inclusive, benefiting players and staff with diverse needs, fostering equitable access to vital equipment information.

XIX. Troubleshooting Issues with Hockey Stick Size

Common sizing problems include incorrect length leading to poor control, or unsuitable flex impacting shot power. If a stick feels too long, consider cutting it (professionally!). Flex issues manifest as difficulty bending the stick; adjust based on weight. Incorrect lie causes blade instability – assess puck handling. Regularly review charts, and don’t hesitate to seek a professional fitting to resolve persistent discomfort or performance limitations. Accurate sizing prevents injury and maximizes play.

XX. Tips for Formatting and Customizing Hockey Stick Size Charts

Effective charts utilize clear columns for age, height, and recommended length/flex. Employ bolding for key data points and consider color-coding for different age groups. Google Docs allows easy table creation and customization. Add notes regarding individual preferences (e.g., shooting style). Ensure accessibility with alt text for images. Regularly update charts with current sizing standards. Prioritize readability; a well-formatted chart simplifies the selection process, boosting confidence and performance.

XXI. Hockey Stick Size and Skill Level

Beginners often benefit from slightly longer sticks for increased control and a wider shooting platform. As skill develops, players may transition to shorter sticks for enhanced maneuverability and quicker releases. More advanced players often fine-tune flex based on shot power and preference. Consider a lower flex for developing players, allowing easier puck loading. Experimentation is key; skill level dictates the optimal balance between power, control, and responsiveness in stick selection.

XXII. The Importance of a Professional Fitting

While charts offer guidance, a professional fitting is invaluable. Experts assess stance, shooting style, and physical attributes for a truly customized recommendation. They’ll analyze lie angle, flex, and curve to optimize performance and prevent injury. A proper fit maximizes energy transfer, improves puck control, and boosts confidence on the ice. Don’t rely solely on estimations; invest in a fitting for a stick perfectly tailored to your unique needs and abilities.

XXIII. Conclusion: Finding Your Perfect Hockey Stick

Selecting the right hockey stick is a journey, not a destination. Consider age, height, weight, skill level, and playing position. Utilize sizing charts as a starting point, but prioritize a professional fitting for optimal results. Remember, shaft flex and lie angle significantly impact performance. Experimentation and adjustments are key to unlocking your full potential on the ice. Ultimately, the perfect stick enhances your game and fosters a love for hockey!

hunter ceiling fan manual

Hunter Ceiling Fan Manual: A Comprehensive Guide

This comprehensive guide details everything you need to know about your Hunter ceiling fan, from installation to maintenance, ensuring years of reliable performance.

Understanding Your Hunter Ceiling Fan

Your new Hunter ceiling fan represents a blend of comfort, performance, and style designed to enhance any room. This section provides a foundational understanding of your fan’s components and capabilities. Familiarizing yourself with these aspects will streamline the installation process and maximize its operational benefits.

Hunter fans are engineered for longevity, offering years of dependable service. The instruction manual included with your purchase contains complete guidance. Understanding the fan’s features – including blade pitch, motor type, and control options – is crucial. Whether you’re seeking to improve air circulation, reduce energy costs, or simply add a decorative element, your Hunter fan is equipped to deliver. Proper use and maintenance, as outlined in this guide, will ensure optimal performance.

Safety Precautions

Prior to installation and operation, carefully review these essential safety precautions. Electrical shock hazard exists – always disconnect power at the circuit breaker or fuse box before commencing any work on the fan. Ensure the mounting structure is capable of supporting the fan’s weight; improper installation can lead to falls and injuries.

Never operate the fan with damaged wires or components. Use appropriate safety gear, including eye protection, during installation. Keep children and pets away from the work area. If you are uncomfortable with electrical work, consult a qualified electrician. Adherence to these guidelines is paramount for a safe and successful installation. Failure to follow these instructions could result in personal injury or property damage. Always prioritize safety throughout the entire process.

Package Contents & Parts Identification

Verify all components are present before beginning installation. Your Hunter ceiling fan package should include the motor assembly, fan blades (quantity varies by model), a mounting bracket, a downrod (length may vary), a canopy, a light kit (if applicable), a receiver (for remote control models), and a bag containing all necessary hardware – screws, wire connectors, and blade balancing kit.

Carefully identify each part using the parts diagram included in this manual. Familiarize yourself with the function of each component. If any parts are missing or damaged, do not proceed with installation; contact Hunter customer support immediately. Proper identification of parts ensures a smooth and accurate assembly process. Retain this parts list for future reference, particularly when performing maintenance or troubleshooting.

Installation Guide

Follow these steps for a safe and secure installation of your Hunter ceiling fan, ensuring optimal performance and years of comfortable operation within your home.

Preparing for Installation

Before you begin, carefully unpack all components and verify that everything listed in the package contents is present. Ensure the mounting location can safely support the fan’s weight – a securely fastened ceiling junction box is crucial. Turn off the power to the circuit at the breaker box to prevent electrical shock during installation.

Review the manual thoroughly, familiarizing yourself with the parts and installation process. Gather necessary tools, including a screwdriver, wire strippers, and a ladder; Consider the ceiling height; fans require a minimum clearance from the floor. If replacing an existing fixture, carefully disconnect and remove it, noting the wiring configuration. Proper preparation minimizes complications and ensures a smooth, safe installation of your new Hunter ceiling fan.

Mounting the Fan

Securely attaching the mounting bracket to the ceiling junction box is paramount for safe operation. Ensure the box is rated to support the fan’s weight; if not, reinforcement or replacement is necessary. Align the bracket properly, using screws designed for ceiling fan installation.

Carefully lift the fan motor assembly and hang it on the bracket using the provided hook or cable, freeing your hands for wiring. Double-check that the fan is securely seated on the bracket before proceeding. Follow the manual’s diagrams precisely, as incorrect mounting can lead to wobbling or even detachment. A stable and properly mounted fan is essential for years of quiet, reliable performance. Confirm all screws are tightened before continuing to the next step.

Wiring the Fan

Before beginning, disconnect power at the circuit breaker! Identify the wires – typically black (hot), white (neutral), and green or bare copper (ground). Connect the fan’s wires to the corresponding house wires using wire connectors, ensuring a secure connection. If your fan includes a receiver, refer to the section on connecting the receiver first.

Carefully tuck the wires into the junction box, avoiding any pinching or strain. Improper wiring can cause the fan to malfunction or create a safety hazard. Double-check all connections against the wiring diagram in the manual. Once confident, restore power at the breaker and test the fan’s operation. If issues arise, immediately disconnect power and re-examine the wiring.

Connecting the Receiver (if applicable)

If your Hunter fan includes a receiver for remote control or wall control functionality, it must be connected before wiring the fan to the power supply. Typically, the receiver fits neatly within the mounting bracket. Match the colored wires from the fan to the corresponding colored wires on the receiver – black to black, white to white, and ground to ground.

Use the provided wire connectors to secure these connections. Then, connect the receiver’s output wires (usually also black, white, and ground) to the house wiring. Ensure all connections are snug and secure. Improper receiver connection can prevent remote or wall control operation. Refer to the wiring diagram included with your fan for specific guidance, as wiring configurations can vary slightly between models.

Wiring the Power Supply

Before wiring, ensure the power is completely shut off at the circuit breaker. Identify the hot (usually black), neutral (usually white), and ground (usually green or bare copper) wires in your ceiling’s electrical box. Connect the fan’s hot wire (typically black) to the house’s hot wire using a wire connector. Similarly, connect the fan’s neutral wire (typically white) to the house’s neutral wire.

Crucially, connect the fan’s ground wire (green or bare copper) to the house’s ground wire. This is a vital safety measure. If a receiver is installed, connect the power supply wires to the receiver’s input wires as described previously. Double-check all connections to ensure they are secure and no bare wire is exposed. Carefully tuck the wires into the electrical box, avoiding any pinching or strain.

Attaching the Blades

Begin by carefully unpacking all blade components. Locate the blade brackets and attach them securely to each fan blade using the provided screws. Ensure the screws are tightened firmly, but avoid over-tightening, which could damage the blades. Next, align each blade assembly with the motor housing’s blade irons.

Securely fasten each blade assembly to the blade irons using the appropriate screws. Again, ensure a snug fit without over-tightening. It’s often helpful to have an assistant during this step to support the blade while you secure it. Double-check that all blades are attached correctly and are balanced. An unbalanced fan can cause wobbling and noise, so proper blade attachment is crucial for optimal performance and longevity.

Installing the Light Kit (if applicable)

Before starting, ensure the fan’s power is completely switched off at the breaker box. Carefully remove the cover plate from the bottom of the fan housing to access the wiring compartment. Connect the light kit wiring harness to the fan’s wiring, matching the colors – typically black to black, white to white, and ground to ground. Secure the connections with wire connectors, ensuring they are firmly attached.

Gently raise the light kit into position and align it with the mounting holes on the fan housing. Secure the light kit using the provided screws, tightening them evenly to ensure a stable and flush fit. Install the light bulbs according to the kit’s specifications, being careful not to exceed the maximum wattage. Finally, attach the light kit’s glass shade or cover, securing it with the appropriate hardware.

Operating Your Hunter Fan

Enjoy comfortable airflow with intuitive controls! Utilize pull chains, a remote, or wall control to adjust speed and lighting, maximizing your fan’s benefits.

Using the Pull Chains

Hunter ceiling fans often feature pull chains for simple operation. Typically, one pull chain controls the fan’s speed – offering selections like low, medium, and high, or even off. Each pull advances to the next speed setting. A separate pull chain manages the light kit, allowing you to cycle through on, off, and dimming options if your model includes a dimmable light.

Locate these chains hanging below the fan’s motor housing. Gentle pulls are all that’s needed; avoid forceful yanking. If the fan doesn’t respond, ensure the pull chain isn’t tangled or obstructed. Remember the sequence – a specific number of pulls might be required to reach your desired setting. Familiarize yourself with the chain functions to effortlessly control your fan’s comfort and illumination.

For models with reversible motors, a third pull chain may exist to control the direction of the blades. This is crucial for optimizing airflow for summer or winter comfort.

Remote Control Operation

Hunter ceiling fans equipped with remote controls offer convenient, long-distance operation. The remote typically manages fan speed, light intensity (if dimmable), and the reverse function. Before use, ensure the remote is properly paired with the fan receiver – a process detailed in the ‘Pairing the Remote’ section. Most remotes utilize buttons clearly labeled for each function, providing intuitive control.

To adjust fan speed, use the designated speed buttons. Light control often involves separate on/off and dimmer buttons. The reverse function button alters blade direction for seasonal comfort. Some advanced remotes feature programmable settings or timers for automated operation. Always ensure fresh batteries are installed for optimal performance and range.

Keep the remote within a reasonable distance of the fan receiver for reliable communication. Avoid obstructions that might interfere with the signal.

Pairing the Remote

Pairing your Hunter fan’s remote is crucial for establishing communication between the remote and the fan’s receiver unit. Typically, this involves a specific sequence of actions performed within a short timeframe after power-up. Begin by ensuring the fan is powered off, then turn it on. Locate the ‘learn’ or ‘sync’ button on the receiver unit – often a small button inside the fan’s canopy.

Within 60 seconds of powering on the fan, press and hold the ‘learn’ button. Simultaneously, press and hold the desired function button (or a combination, as specified in your model’s instructions) on the remote. A successful pairing is usually indicated by the fan’s lights blinking or a confirmation signal from the receiver. If pairing fails, repeat the process, ensuring correct timing and button presses;

Refer to your specific model’s instructions for precise pairing steps, as procedures can vary.

Remote Control Functions

Your Hunter fan’s remote offers convenient control over various fan functions. The primary buttons typically include power on/off, fan speed adjustment (Low, Medium, High), and light control (on/off, dimming if applicable). Some remotes feature a ‘reverse’ function, altering the fan’s direction for seasonal comfort – clockwise for winter to circulate warm air, and counter-clockwise for summer to create a cooling breeze.

Advanced remotes may include timer settings, allowing you to program the fan to automatically turn off after a specified duration. Certain models also support ‘smart’ features, enabling integration with home automation systems. Familiarize yourself with each button’s function by testing them individually.

Ensure the remote has fresh batteries for optimal performance. If a button isn’t responding, try replacing the batteries or re-pairing the remote with the fan’s receiver.

Wall Control Operation

Hunter wall controls provide a permanent, convenient alternative to remote operation. These controls, typically replacing a standard light switch, offer similar functionality – power on/off, fan speed adjustment (Low, Medium, High), and light control (on/off, dimming). Installation requires basic electrical knowledge; if unsure, consult a qualified electrician.

Most wall controls feature a slider or buttons for speed selection and a separate control for the light kit. Some advanced models include a timer function or compatibility with smart home systems. Ensure the wall control is properly wired to the fan’s receiver unit, following the wiring diagram in this manual.

If the wall control isn’t functioning, check the circuit breaker and ensure all wiring connections are secure. Refer to the troubleshooting section for further assistance.

Maintenance & Troubleshooting

Regular cleaning and addressing common issues will ensure your Hunter ceiling fan operates efficiently and safely for years to come, providing lasting comfort.

Cleaning Your Fan

Maintaining a clean fan is crucial for optimal performance and longevity. Before any cleaning, always turn off the power to the fan at the circuit breaker or by removing the switch. Dust accumulation can significantly reduce airflow and cause imbalance, leading to wobbling.

For routine cleaning, use a soft brush or microfiber cloth to gently wipe down the fan blades. Avoid using liquids directly on the motor housing; instead, dampen a cloth with a mild cleaning solution and wipe carefully.

For stubborn dirt, a slightly damp cloth with a small amount of dish soap can be used, but ensure it’s thoroughly dried afterward. Never use abrasive cleaners or scouring pads, as these can damage the finish. Periodically check and tighten all screws and connections to prevent loosening due to vibration. Regular cleaning not only improves performance but also extends the life of your Hunter ceiling fan.

Troubleshooting Common Issues

Encountering problems with your Hunter ceiling fan? This section addresses frequent concerns. If the fan doesn’t start, first verify the power supply at the breaker and ensure all wiring connections are secure. Check the pull chains or remote control batteries. A wobbling fan often indicates unbalanced blades; use the balancing kit included with your fan to adjust blade weight.

Loose screws are another common cause – tighten all blade and bracket screws. If the light kit isn’t working, confirm the bulb is properly installed and functional. For remote control issues, try re-pairing the remote with the receiver.

If problems persist, consult a qualified electrician. Never attempt repairs while the power is on. Always prioritize safety and refer to the complete manual for detailed diagrams and instructions before attempting any troubleshooting steps.

Fan Doesn’t Start

If your Hunter ceiling fan fails to operate, begin by verifying the power source. Check the circuit breaker or fuse box to ensure the circuit hasn’t tripped or blown. Confirm the wall switch controlling the fan is in the “on” position. Next, inspect all wiring connections within the fan’s housing and at the electrical junction box, ensuring they are secure and properly connected.

If using a remote control, replace the batteries and attempt to re-pair the remote with the fan’s receiver unit. For fans with pull chains, ensure the speed settings haven’t been set to “off”. A faulty receiver or motor capacitor could also be the culprit; these components may require professional diagnosis and replacement.

Always disconnect power before inspecting wiring. If the issue persists, consult a qualified electrician.

Fan Wobbles

Excessive wobbling in your Hunter ceiling fan can be addressed with a few simple checks. First, ensure all blade screws are tightened securely. Loose blades are a common cause of imbalance. Next, verify that the blade holders are firmly attached to the motor housing, also tightening any associated screws.

Utilize the included balancing kit, which typically contains weights and clips. Attach a clip to one blade, then power the fan and observe. If wobbling improves, permanently affix a weight to the top of that blade. Repeat this process, moving the clip to each blade until the optimal position is found.

Confirm the mounting bracket is securely fastened to the ceiling joist. A loose bracket will exacerbate wobbling. If problems persist, consult a professional.

Replacing Bulbs

Before replacing any bulbs in your Hunter ceiling fan, always disconnect the power at the circuit breaker to prevent electrical shock. Allow the bulbs to cool completely before handling them to avoid burns. Consult your fan’s documentation to determine the correct bulb type and wattage – using incorrect bulbs can damage the fixture or create a fire hazard.

Carefully remove the light kit cover, typically held in place by screws or a twisting mechanism. Gently unscrew the old bulb, being mindful of any fragile components. Install the new bulb, ensuring it’s securely seated in the socket but not overtightened.

Reattach the light kit cover and restore power at the breaker. Test the new bulb to confirm functionality. If the bulb doesn’t illuminate, double-check the connection and bulb compatibility.

Advanced Features & Settings

Explore enhanced functionalities like the reverse function for seasonal comfort, adjustable fan speeds, and potential smart home integration for ultimate control.

Reverse Function (Summer/Winter Mode)

Your Hunter ceiling fan is equipped with a convenient reverse function, allowing you to adapt its operation to suit the changing seasons and maximize comfort throughout the year. In summer mode, the fan blades rotate counter-clockwise, creating a downward airflow that generates a cooling breeze. This direct wind chill effect helps you feel cooler and more comfortable, potentially reducing your air conditioning costs.

Conversely, in winter mode, the blades rotate clockwise at a lower speed. This gentle upward airflow redistributes warm air that naturally rises to the ceiling, preventing it from layering and creating a more even temperature distribution throughout the room. By circulating this warm air, the fan can help you feel warmer without increasing your heating bills. To activate the reverse function, simply use the reverse switch located on the fan motor housing – a small, easily accessible control.

Adjusting Fan Speed

Hunter ceiling fans offer multiple speed settings to customize airflow and comfort levels to your preference. The method for adjusting fan speed depends on your fan’s control system. If your fan utilizes pull chains, each chain typically controls a different speed – low, medium, and high – allowing for manual adjustments. Simply pull the appropriate chain to cycle through the available speeds.

For fans equipped with a remote control or wall control, speed adjustment is even more convenient. The remote or wall control will feature dedicated buttons or a slider to increase or decrease the fan speed. Some advanced models offer precise speed control, allowing you to fine-tune the airflow to your exact liking. Experiment with different speeds to find the optimal setting for various activities and weather conditions, maximizing both comfort and energy efficiency.

Smart Fan Integration (if applicable)

Hunter offers select ceiling fans with Smart Home integration, enabling control via voice commands and smartphone apps. These fans are typically compatible with platforms like Amazon Alexa, Google Assistant, and Apple HomeKit. To connect your smart fan, download the Hunter SimpleConnect app and follow the on-screen instructions to pair the fan with your home’s Wi-Fi network.

Once connected, you can adjust fan speed, turn the fan on/off, and even set schedules using voice commands or the app. Smart features also allow for automated control based on room temperature or other smart home devices. Explore the app’s settings to customize your fan’s behavior and create a comfortable, energy-efficient environment. Ensure your home network meets the fan’s connectivity requirements for optimal performance and seamless integration.

solos for young violists volume 2 pdf

Solos for Young Violists Volume 2 PDF: A Comprehensive Guide

Solos for Young Violists, Volume 2, compiled by Barbara Barber, offers a valuable resource for students. PDF versions, alongside piano accompaniments, are readily available online.

Understanding the Publication

Solos for Young Violists, Volume 2, represents a carefully curated collection designed to nurture developing viola players. Compiled and edited by Barbara Barber, this publication builds upon the foundation laid by Volume 1, offering progressively challenging pieces. The readily available PDF format facilitates easy access for students and teachers alike.

The publication isn’t solely a collection of solos; it’s a pedagogical tool. It aims to bridge the gap between student repertoire and more advanced literature. Digital downloads, including piano accompaniment parts, enhance the learning experience. Resources like Sheila M. Nelson’s accompaniments complement the solos, providing a richer musical context. The availability of these materials online streamlines practice and performance preparation.

Barbara Barber and the “Solos for Young Violists” Series

Barbara Barber is a highly respected name in string education, renowned for her thoughtfully arranged collections. The “Solos for Young Violists” series, including Volume 2, exemplifies her commitment to providing accessible yet musically rewarding repertoire for students. Her arrangements prioritize pedagogical value, focusing on developing essential techniques and musicality.

Barber’s work addresses a crucial need in viola education – a lack of suitable solo material for intermediate players. The series’ popularity stems from its progressive difficulty levels and the inclusion of diverse musical styles. PDF availability of Volume 2 ensures widespread access to her arrangements, supporting teachers and students globally. Her dedication to quality makes this series a cornerstone of viola pedagogy.

Volume 2: What Sets it Apart?

Solos for Young Violists, Volume 2, builds upon the foundation of Volume 1, offering a slightly more challenging selection of pieces. It distinguishes itself through a blend of traditional melodies and carefully crafted arrangements, catering to developing violists. The PDF format facilitates easy access and printing for both students and educators.

This volume notably includes piano accompaniment parts, enhancing the musical experience and aiding in performance practice. Compared to other collections, Barber’s focus remains on musicality alongside technical development. The availability of digital resources, including the PDF, makes this volume particularly convenient and supports a wider range of learning styles.

Content Overview & Musical Selections

Solos for Young Violists Volume 2 PDF features diverse pieces, including traditional tunes, folk arrangements, and selections designed for progressive skill development.

Traditional Pieces Included in Volume 2

Solos for Young Violists, Volume 2, presents a carefully curated selection of traditional pieces ideal for developing young violists. While specific titles aren’t explicitly detailed in readily available snippets, the compilation aims to build a strong foundation in classical repertoire. The focus is on providing accessible arrangements of well-known melodies, fostering both technical proficiency and musical understanding.

These pieces likely serve as stepping stones, preparing students for more complex works. The inclusion of traditional material allows for familiarity and encourages expressive playing; The PDF format facilitates easy access to these arrangements, supporting practice and performance. Further research into the complete table of contents would reveal the exact traditional pieces included within this volume.

Folk Tunes and Arrangements

Solos for Young Violists, Volume 2, expands beyond traditional classical pieces to incorporate delightful folk tunes and arrangements. These selections offer a refreshing change of pace and introduce students to diverse musical styles. The inclusion of folk melodies enhances musicality and encourages a broader understanding of musical heritage.

Arrangements within the volume are likely tailored to suit the technical capabilities of young violists, making these tunes accessible and enjoyable. The PDF availability ensures convenient access for practice and performance. Exploring these arrangements fosters creativity and allows students to connect with music on a more personal level, enriching their overall musical experience.

Progressive Difficulty Levels Within the Volume

Solos for Young Violists, Volume 2, is thoughtfully structured with progressive difficulty levels, catering to a range of skill sets. This careful arrangement allows students to build confidence and technique gradually. The PDF format facilitates easy navigation between pieces of varying complexity, enabling teachers to select appropriate repertoire.

Starting with simpler arrangements, the volume progresses to more challenging solos, introducing new technical demands and musical concepts. This systematic approach ensures a rewarding learning experience, fostering growth and encouraging continued development. Accessing the PDF allows for focused practice on specific areas, supporting individual student needs.

Accessing the PDF & Digital Resources

Solos for Young Violists Volume 2 PDFs are available through free downloads and official purchases on platforms like Amazon and Sheet Music Plus.

Free Download Options and Legality

Finding free PDF downloads of Solos for Young Violists, Volume 2 requires careful consideration of copyright laws. While some websites offer these scores without cost, downloading from unofficial sources can be illegal and unethical, potentially violating the composer and publisher’s rights.

It’s crucial to prioritize legally obtained resources. Many online repositories may host illegally distributed materials, and supporting these sites undermines the music community. Always verify the legitimacy of the source before downloading. Consider exploring options like library access or utilizing free trials offered by digital sheet music platforms as alternatives to potentially unlawful downloads. Respecting copyright ensures continued creation and availability of musical resources for all.

Official Purchase Links (Amazon, Music Stores)

To legally acquire Solos for Young Violists, Volume 2, several official purchase options are available. Amazon consistently stocks the publication, offering both new and used copies with varying shipping options. Local music stores frequently carry the series, providing an opportunity to browse and support businesses within your community.

Checking with reputable sheet music retailers is also recommended. These stores often provide access to the physical book and potentially digital versions. Purchasing directly from the publisher or authorized distributors guarantees authenticity and supports the creators of this valuable resource for young violists. Avoid unofficial sources to ensure quality and legality.

Digital Sheet Music Platforms (Sheet Music Plus, etc.)

Several digital sheet music platforms offer convenient access to Solos for Young Violists, Volume 2 in PDF format. Sheet Music Plus is a prominent provider, typically featuring individual pieces or the complete volume for immediate download. Musicnotes.com represents another reliable source, often presenting arrangements optimized for digital viewing and printing.

These platforms frequently offer previews, allowing you to assess the suitability of the arrangements before purchasing. Digital downloads eliminate shipping costs and provide instant access to the music. Ensure the platform is reputable to guarantee a secure transaction and a high-quality PDF file suitable for practice and performance.

Technical Aspects of the PDF

Solos for Young Violists Volume 2 PDFs vary in file size. Compatibility across devices is generally good, but printing quality depends on your printer settings.

File Size and Compatibility

The Solos for Young Violists Volume 2 PDF file size fluctuates depending on the source and included piano accompaniment. Generally, the solo viola part PDF is relatively compact, around 100 pages, making it easily downloadable and storable. However, complete editions with both viola and piano scores can be significantly larger, potentially exceeding 50 pages.

Compatibility is broad; the PDFs open seamlessly on most modern devices – computers, tablets, and smartphones – utilizing standard PDF readers like Adobe Acrobat Reader. Ensure your PDF viewer is updated for optimal viewing. While generally accessible, complex formatting or embedded fonts might occasionally cause minor display issues on older software versions. The documents are designed for clear readability across various screen sizes.

Printing Considerations for Home Use

When printing Solos for Young Violists Volume 2 from its PDF format, consider your printer settings for optimal results. Standard paper size (8.5 x 11 inches) works well, but ensure margins are sufficient to avoid cropping musical notation. Black and white printing is perfectly acceptable, conserving color ink.

For clarity, a higher print quality setting is recommended, especially for intricate passages. Double-sided printing saves paper, but verify page order after printing. Binding the pages professionally or using sheet protectors enhances durability. Be mindful of potential page alignment issues; a test print is advisable before committing to the entire volume.

Navigation Features within the PDF Document

The Solos for Young Violists Volume 2 PDF typically includes embedded navigation features for ease of use. A clickable table of contents allows direct access to individual solos, streamlining practice sessions. Hyperlinks within the document may connect to related resources or composer information.

Most PDF readers support page thumbnails, providing a visual overview of the entire volume. The search function enables quick location of specific musical terms or passages. Zoom capabilities facilitate detailed examination of notation. Utilizing these features enhances the learning experience, making it simpler to navigate and study the repertoire within the digital format.

Accompaniment & Performance Practice

Solos for Young Violists, Volume 2 often includes available piano accompaniment parts, crucial for collaborative performance and musical development of the violist.

Piano Accompaniment Availability

Solos for Young Violists, Volume 2, significantly benefits from readily available piano accompaniment parts. These are often found alongside the viola solo PDF, facilitating a richer musical experience for students. Resources like Sheila M. Nelson’s “The Essential String Accompaniments” provide further support, offering comprehensive accompaniments for string repertoire.

The availability of these piano parts is vital, encouraging collaboration between violists and pianists. Searching online reveals downloadable piano scores specifically designed for pieces within the volume. These accompaniments aren’t merely supportive; they enhance the musicality and interpretive possibilities of each solo, allowing young violists to develop ensemble skills alongside their solo technique. Finding these resources ensures a complete and fulfilling performance practice.

Importance of Accompanist Collaboration

Successfully performing pieces from Solos for Young Violists, Volume 2 hinges on strong collaboration with an accompanist. The piano part isn’t simply background support; it’s an integral component of the musical interpretation. Effective communication between violist and pianist is crucial for achieving balanced dynamics, cohesive phrasing, and a unified musical vision.

Working with an accompanist fosters valuable ensemble skills, teaching young violists to listen attentively and adjust their playing accordingly. Resources like Sheila M. Nelson’s accompaniments emphasize this partnership. Rehearsals should focus on establishing clear cues, discussing tempo and stylistic choices, and building a shared understanding of the music. This collaborative process elevates the performance beyond individual skill.

Tempo and Interpretation Guidelines

While Solos for Young Violists, Volume 2 doesn’t prescribe rigid tempos, a sensitive approach to interpretation is vital. Students should prioritize musicality over sheer speed, focusing on conveying the character of each piece. Consider the style – folk tunes demand a different feel than more classical selections.

Encourage exploration of phrasing and dynamics, paying attention to markings within the score. Listening to recordings of similar repertoire can provide valuable insights. However, emphasize that these are guidelines, not rules. The goal is to develop a personal and informed interpretation, fostering musical expression and confidence in performance.

Educational Value & Skill Development

Solos for Young Violists Volume 2 builds technique, focusing on shifting, bowing, and intonation, while nurturing musicality and expressive performance skills.

Target Skill Level for Young Violists

Solos for Young Violists, Volume 2, is thoughtfully designed for intermediate-level viola players. It bridges the gap between beginner collections and more advanced repertoire, offering pieces suitable for students who have a solid foundation in basic technique. The selections within this volume generally cater to violists who are comfortable with first position and are beginning to explore simple shifting.

The progressive nature of the book allows students to gradually increase their technical and musical challenges. While specific grade levels aren’t explicitly stated, the repertoire is often appropriate for students around ABRSM Grade 3-5 or equivalent. Teachers can utilize the collection to reinforce existing skills and introduce new concepts in a manageable and engaging way, fostering continued growth and confidence.

Technique Focus (Shifting, Bowing, Intonation)

Solos for Young Violists, Volume 2, provides excellent opportunities to refine essential viola techniques. The pieces subtly introduce and reinforce shifting, encouraging students to move smoothly between positions while maintaining a clear tone. Bowing exercises are naturally integrated through varied musical styles, promoting control and articulation.

Intonation work is paramount, as the selections demand accurate pitch and careful listening. Students will develop their ear and refine their finger placement. The repertoire encourages a focused approach to these core skills, building a strong technical foundation. Careful practice with a teacher will maximize the benefits of this volume.

Musicality and Expression Development

Solos for Young Violists, Volume 2, isn’t solely about technical proficiency; it actively fosters musicality. The diverse selection of pieces – including traditional and folk tunes – encourages students to explore different expressive qualities. Students learn to shape phrases, utilize dynamics, and interpret musical markings effectively.

The repertoire allows for personal interpretation, nurturing a connection between the performer and the music. Developing expressive playing is crucial, and this volume provides a supportive environment for experimentation. Careful attention to phrasing and tone color will elevate performances beyond mere technical accuracy.

Related Resources & Supplementary Materials

Solos for Young Violists Volume 1 complements Volume 2, while Sheila M. Nelson’s accompaniments and Shostakovich’s Waltz No. 2 offer further study.

Solos for Young Violists Volume 1

Solos for Young Violists Volume 1, also by Barbara Barber, serves as an excellent foundational resource preceding Volume 2. It establishes essential techniques and musicality crucial for progressing to the more challenging pieces found in the subsequent volume. Both volumes share a similar pedagogical approach, focusing on building a strong technical base alongside expressive performance.

Digital resources indicate availability of both Viola Parts and Piano Accompaniments for Volume 1, mirroring the format of Volume 2. Students utilizing Volume 1 will find a natural transition to the repertoire presented in Volume 2, as it builds upon previously learned skills. Accessing both volumes provides a comprehensive learning pathway for young violists, fostering continued growth and musical development.

Sheila M. Nelson’s String Accompaniments

Sheila M. Nelson’s String Accompaniments, specifically her “Essential String Accompaniments” books (Books 1 & 2), are frequently mentioned alongside resources for Solos for Young Violists Volume 2. These accompaniments provide readily available piano parts, crucial for performance practice and enhancing the musical experience. The availability of these separate accompaniment books simplifies the process of finding suitable partners for young violists.

Online resources confirm the existence of downloadable PDF versions of Nelson’s accompaniments, often sought after to complement the solo viola pieces. Utilizing these accompaniments alongside the Volume 2 PDF ensures a complete and well-rounded musical preparation, fostering collaboration and musical interpretation.

Dimitri Shostakovich’s Waltz No. 2 (Solo Violin Score)

While primarily a solo violin piece, Dimitri Shostakovich’s Waltz No. 2 frequently appears in discussions alongside resources for developing violists, and is sometimes found listed with materials related to Solos for Young Violists Volume 2. PDF versions of the solo violin score are readily available online, offering a challenging yet rewarding piece for advanced students.

Though originally for violin, skilled violists can adapt and perform this waltz, expanding their repertoire and technical abilities. The score’s availability in PDF format facilitates easy access and study, providing a valuable supplementary piece for those progressing beyond the initial stages of the Volume 2 collection.

Exploring Similar Viola Repertoire

Expanding beyond Solos for Young Violists Volume 2, consider works like Pleyel’s duets, Komarovsky’s Concertino, and the Violin/Viola Hrestomatija for further study.

Ignaz Pleyel’s 6 Petits Duos Op.48

Ignaz Pleyel’s 6 Petits Duos Op.48 represent a delightful stepping stone for young violists, offering accessible yet musically rewarding pieces. These duets, designed for violin and viola (or two violins), provide excellent ensemble experience and focus on fundamental techniques. While distinct from the solo focus of Solos for Young Violists Volume 2, they complement skill development. The document detailing these duos provides the title, composer, and opus number, indicating a complete musical work ready for performance. They are particularly beneficial for fostering intonation, rhythmic precision, and collaborative musicianship. Exploring these duets broadens a student’s repertoire and introduces them to classical style, building a strong foundation alongside the solo pieces.

Komarovsky Concertino for Viola

The Komarovsky Concertino for Viola presents a more advanced challenge for progressing young violists, extending beyond the scope of many pieces within Solos for Young Violists Volume 2. A PDF of the complete score is available, offering a substantial work to master. It demands greater technical proficiency and musical maturity, encompassing expressive phrasing and dynamic control. While not directly part of the Barber collection, it serves as an excellent aspirational goal. The Concertino’s complexity encourages focused practice on bowing techniques, shifting, and intonation. It’s a valuable addition to a violist’s library, fostering artistic growth and performance confidence.

Violin/Viola Hrestomatija 1-2 (Moscow 1979)

The Violin/Viola Hrestomatija 1-2, published in Moscow in 1979, represents a historical collection of repertoire, potentially supplementing studies alongside Solos for Young Violists Volume 2. Available as a PDF, it offers a glimpse into Soviet-era string pedagogy. While originally intended for violin, many pieces are adaptable for viola. This resource provides diverse musical styles and challenges, enriching a student’s experience. It’s crucial to assess suitability, as notation may differ from modern standards. Exploring such collections broadens musical horizons and exposes students to varied compositional approaches, fostering a deeper understanding of viola literature.

The Role of the Viola in Music Education

Solos for Young Violists Volume 2 supports viola study, offering accessible repertoire. It encourages technique development and musical expression within educational settings.

Historical Context of Viola Study

Historically, the viola often lacked dedicated repertoire compared to the violin, presenting challenges for aspiring violists. Early viola music frequently involved transcriptions or supplemental parts. However, the 20th and 21st centuries witnessed a surge in original compositions, including pedagogical works like Solos for Young Violists Volume 2.

Barbara Barber’s series addresses this historical gap by providing specifically tailored pieces for developing players. The availability of the PDF format further democratizes access to this crucial repertoire, enabling wider participation in viola study. This volume, alongside resources like Sheila M. Nelson’s accompaniments, contributes to a growing body of material designed to nurture young violists and elevate the instrument’s profile within music education.

Contemporary Trends in Viola Performance

Modern viola performance emphasizes both technical proficiency and expressive artistry. Increasingly, educators utilize accessible repertoire like Solos for Young Violists Volume 2 to foster these qualities early on. The PDF availability streamlines access, supporting remote learning and independent practice.

A trend towards diversifying repertoire is also evident, moving beyond traditional classical pieces. While works like Komarovsky’s Concertino remain staples, collections like Barber’s provide a foundation for exploring varied styles. The ease of digital distribution, including PDF sheet music, fuels this trend, empowering young violists to engage with a broader musical landscape and develop their unique voices.

Resources for Viola Teachers and Students

For educators, Solos for Young Violists Volume 2’s PDF format offers convenient lesson planning and student material distribution. Supplementary resources, such as Sheila M. Nelson’s string accompaniments, enhance the learning experience. Digital platforms like Sheet Music Plus provide access to additional repertoire and arrangements.

Students benefit from the progressive difficulty levels within the volume, fostering gradual skill development. Access to the PDF allows for independent practice and exploration. Exploring related works, like Pleyel’s duets, broadens musical understanding. Utilizing online resources alongside Barber’s collection empowers students to become well-rounded violists.

old maytag washer manual pdf

Navigating older Maytag washer models often requires accessing PDF manuals online‚ offering crucial operational insights and repair guidance. These resources detail features‚
maintenance‚ and troubleshooting steps for vintage appliances.

Why Use a Manual?

For older Maytag washers‚ a manual is invaluable. It unlocks the specific operational nuances of your model‚ often absent from generalized online advice.
PDF manuals provide detailed diagrams for parts identification‚ crucial for repairs‚ and offer troubleshooting steps for error codes or common issues like drainage problems.
Understanding the original maintenance schedules extends the washer’s lifespan‚ preventing costly repairs. Accessing these PDFs ensures correct detergent usage and safe operation‚ maximizing performance and avoiding damage to your vintage appliance.

Locating Your Specific Model Number

Finding your Maytag washer’s model number is essential for accessing the correct PDF manual. Typically‚ it’s located on a sticker or plate within the washer; Check inside the lid‚ around the door opening (for front-loaders)‚ or on the back panel.
The model number is a combination of letters and numbers – crucial for accurate searches on the official Maytag website or third-party databases. Without it‚ you risk downloading an incompatible manual‚ hindering effective troubleshooting or repair efforts.

Understanding Maytag Washer Model Variations

Maytag washers evolved significantly over time; older models differ greatly from newer HE designs‚ necessitating specific manuals for accurate operation and repair guidance.

Top-Load Washer Manuals

Older Maytag top-load washer manuals (PDF format) are invaluable for understanding mechanical operations‚ unlike modern electronic controls. These guides detail agitator function‚ water level settings‚ and traditional timer mechanisms.
Troubleshooting sections address common issues like failing agitators‚ pump problems‚ and lid switch malfunctions. Finding these manuals often involves searching model-specific numbers online‚ as Maytag’s historical documentation can be fragmented.
Detailed parts diagrams within these PDFs aid in identifying components for repair‚ extending the lifespan of these durable machines.

Front-Load Washer Manuals

Locating PDF manuals for older Maytag front-load washers is essential for diagnosing issues beyond simple detergent overuse. These guides explain the function of door locks‚ drain pumps‚ and the complex water inlet valve systems common in these models.
Technical bulletins‚ like the ITDL-0017-B‚ address specific problems encountered in early front-load designs. Manuals detail error code interpretations and troubleshooting steps for resolving leaks or drainage issues‚ aiding in effective repair and maintenance.

High-Efficiency (HE) Washer Manuals

Older Maytag HE washer manuals (PDF format) are vital for understanding specialized features like automatic load sensing and reduced water usage. These guides detail proper HE detergent usage – crucial to avoid excessive suds and residue buildup. Manuals explain cleaning the dispenser drawers and maintaining the internal components. Troubleshooting sections address common issues like slow drain times or error codes specific to HE technology‚ ensuring optimal performance and longevity.

Accessing Maytag Washer Manuals Online

Locating older Maytag washer manuals in PDF format involves utilizing the official Maytag website‚ third-party databases‚ and effective search engine strategies.

Official Maytag Website

The official Maytag website (maytag.com/services/manuals) serves as a primary resource for downloading washer manuals‚ including those for older models. While comprehensive‚ finding discontinued model PDFs can sometimes be challenging. Users may need to navigate through various support sections or utilize the site’s search function with specific model numbers.

Persistence is key; older manuals might be archived or require more detailed search queries. The website also provides contact information for direct customer support assistance in locating specific documentation for legacy Maytag washers.

Third-Party Manual Databases

Numerous third-party websites specialize in archiving appliance manuals‚ offering a potential avenue for locating old Maytag washer PDFs. These databases often compile manuals from various manufacturers and model years‚ increasing the chances of finding discontinued documentation.

However‚ exercise caution when downloading from these sources‚ verifying the file’s safety and authenticity before opening. ManualsLib and similar platforms can be valuable‚ but always prioritize security and confirm the manual matches your specific Maytag model.

Using Search Engines Effectively

Leveraging search engines like Google requires a strategic approach when seeking old Maytag washer manuals in PDF format. Utilize precise keywords‚ including the model number‚ “manual‚” and “PDF.” Combine terms like “Maytag [model number] service manual PDF” or “Maytag [model number] operating instructions.”

Refine searches using advanced operators like filetype:pdf to specifically target PDF documents. Explore image search for diagrams or snippets from manuals‚ potentially leading to download links.

Common Issues Addressed in Maytag Washer Manuals

Older manuals detail solutions for frequent problems‚ like drainage issues‚ error code interpretations‚ and leak diagnosis‚ aiding in self-repair and extending appliance life.

Troubleshooting Error Codes

Maytag washer manuals‚ even older PDF versions‚ are invaluable for deciphering error codes. These codes signal specific malfunctions‚ ranging from water inlet issues to motor problems. Manuals provide a detailed list‚ explaining each code’s meaning and offering step-by-step troubleshooting guidance.

Often‚ simple fixes like checking connections or resetting the machine are outlined‚ preventing costly service calls. Older models may have fewer sophisticated codes‚ but the principle remains: the manual is the key to understanding the washer’s diagnostic language and resolving issues efficiently.

Addressing Drainage Problems

Old Maytag washer manuals (PDF format) frequently dedicate sections to resolving drainage issues‚ a common problem in older machines. These guides detail how to check the drain pump‚ hoses for kinks or clogs‚ and the drain filter for obstructions.

Manuals often include diagrams illustrating the drainage system’s components. They’ll advise on safely disconnecting and cleaning these parts‚ and provide troubleshooting steps if water isn’t draining correctly‚ helping restore proper washer function.

Dealing with Leaks

Old Maytag washer manuals (PDF versions) provide detailed guidance on identifying and resolving leaks‚ a frequent concern with aging appliances. They illustrate common leak points – hoses‚ connections‚ the tub seal‚ and the pump – and explain how to inspect them for damage or looseness.

Manuals emphasize safety precautions when dealing with water and electrical components. They offer step-by-step instructions for tightening connections or replacing worn parts‚ aiming to restore a leak-free operation.

Decoding the Maytag Washer Manual PDF

Older PDFs contain vital sections on safety‚ parts identification via diagrams‚ and recommended maintenance schedules‚ ensuring proper appliance function and longevity.

Safety Precautions

Vintage Maytag washer manuals emphasize disconnecting power before servicing. Always heed warnings about water and electrical hazards‚ as older models lack modern safety features. Manuals detail proper grounding procedures and caution against modifying components. Never operate a damaged washer; consult the manual for inspection guidelines. Pay close attention to instructions regarding child safety and preventing accidental operation. Ignoring these precautions can lead to serious injury or appliance damage. Thoroughly review all safety notices before any maintenance or repair work.

Parts Diagrams

Old Maytag washer manuals frequently include detailed exploded-view parts diagrams. These illustrations are invaluable for identifying components during repairs‚ showcasing their precise location and relationship to others. Diagrams often list part numbers‚ simplifying ordering replacements. Understanding these visuals is crucial‚ especially for older models where parts aren’t readily identifiable. Manuals may contain multiple diagrams for different sections – agitators‚ pumps‚ or control panels – aiding comprehensive disassembly and reassembly;

Maintenance Schedules

Old Maytag washer manuals outline regular maintenance schedules to prolong appliance life. These typically include recommendations for cleaning lint filters‚ inspecting hoses for cracks‚ and checking for leaks. Manuals detail frequency – monthly‚ quarterly‚ or annually – for each task. Adhering to these schedules prevents costly repairs and ensures optimal performance. Older models may require specific lubrication or adjustments detailed within the manual‚ crucial for maintaining functionality over time.

Specific Model Manuals (Examples)

Examples include the Maytag A106 operating instructions and the technical bulletin ITDL-0017-B‚ readily available as PDF downloads for older models.

Maytag A106 Washer Operating Instructions

The Maytag A106 washer manual provides detailed guidance for operating this classic appliance. Available as a free PDF download‚ it covers everything from initial setup and loading procedures to selecting appropriate wash cycles and detergent types.
Users can find instructions on utilizing various features‚ understanding control panel functions‚ and performing basic maintenance tasks. This manual is invaluable for anyone owning or restoring an A106‚ ensuring optimal performance and longevity. It’s a key resource for troubleshooting common issues and maximizing the washer’s lifespan.

Maytag ITDL-0017-B Technical Bulletin

Maytag ITDL-0017-B is a technical bulletin specifically addressing front-load washer issues‚ often found as a downloadable PDF. This document details a problem where front-load washers experienced specific malfunctions. It provides technicians and knowledgeable users with diagnostic steps and repair procedures to resolve the identified issue.
The bulletin outlines necessary part replacements and detailed instructions‚ ensuring correct repairs. It’s a crucial resource for servicing older Maytag front-load models‚ offering targeted solutions beyond the standard owner’s manual.

Maytag MAH9700AW Service Manual

The Maytag MAH9700AW Service Manual is a comprehensive PDF resource for technicians‚ detailing the internal workings of this specific washer model. It includes detailed parts diagrams‚ wiring schematics‚ and troubleshooting guides for complex repairs. This manual goes beyond user instructions‚ offering in-depth information on component testing and replacement procedures. Accessing this PDF allows for advanced diagnostics and effective servicing of the MAH9700AW‚ extending its lifespan and resolving intricate issues not covered in standard manuals.

Maintenance & Care Based on Manual Instructions

Old Maytag manuals emphasize regular cleaning‚ hose checks‚ and proper detergent use to maintain performance and prevent issues‚ ensuring longevity.

Cleaning the Washer

Older Maytag washer manuals consistently highlight the importance of routine cleaning. This includes wiping down the exterior with a damp cloth and mild detergent.
More crucially‚ manuals detail cleaning the wash basket‚ often recommending a specific cycle with hot water and a washing machine cleaner.
Regularly inspect and clean the detergent dispenser to prevent buildup and ensure proper functionality.
Additionally‚ older models may require periodic cleaning of the drain pump filter‚ as outlined in the PDF documentation‚ to maintain optimal drainage performance and prevent odors.

Checking Hoses and Connections

Old Maytag washer manuals emphasize frequent inspection of all hoses and connections to prevent leaks and water damage. PDF guides detail how to check for cracks‚ bulges‚ or signs of wear on the fill and drain hoses.
Tighten connections as needed‚ but avoid over-tightening.
Manuals also advise verifying the water inlet valve connections are secure.
Regularly inspecting these components‚ as per the manual’s instructions‚ is vital for maintaining the washer’s functionality and preventing costly repairs.

Using the Correct Detergent

Older Maytag washer manuals often specify detergent types suitable for their machines‚ differing from modern HE recommendations. PDF guides frequently caution against using excessive sudsing detergents‚ as they can interfere with the wash cycle and cause overflow.
Manuals may detail recommended detergent amounts based on load size and water hardness.
Following these guidelines‚ found within the PDF‚ ensures optimal cleaning performance and prevents potential damage to the washer’s internal components.

Advanced Troubleshooting (Referencing Manuals)

Old Maytag washer PDF manuals provide detailed schematics and diagnostic steps for complex issues like motor failures or pump malfunctions‚ aiding repair efforts.

Motor Issues

Older Maytag washer manuals‚ often available as PDFs‚ are invaluable when diagnosing motor problems. They detail testing procedures for windings‚ brushes‚ and the motor control board.
Troubleshooting sections outline common failure points and provide guidance on checking for continuity or shorts. Diagrams illustrate component locations for easier access during inspection.
Referencing these manuals helps determine if the motor requires repair‚ replacement‚ or if the issue lies elsewhere in the drive system‚ saving time and expense.

Pump Problems

Old Maytag washer manuals in PDF format are essential for addressing pump-related issues. They provide detailed diagrams illustrating pump disassembly and component locations. Troubleshooting guides help identify causes of pump failure‚ such as obstructions or worn impellers.
Manuals outline procedures for checking voltage to the pump motor and testing for continuity. They also specify correct replacement parts‚ ensuring compatibility with older models‚ and preventing further damage.

Control Panel Malfunctions

Old Maytag washer manuals (PDF) are invaluable when diagnosing control panel issues. They contain schematics detailing the wiring connections for buttons‚ timers‚ and electronic controls. Troubleshooting sections guide users through testing switches for continuity and identifying faulty control boards. Manuals often include voltage charts for various control panel components‚ aiding in accurate diagnosis. Finding the correct manual ensures compatibility with the specific model’s unique control system.

Understanding Warranty Information (Manual Details)

Older Maytag washer manuals (PDF) may contain original warranty details‚ outlining coverage periods and claim procedures‚ though these warranties have likely expired.

Warranty Coverage

Examining older Maytag washer manuals in PDF format reveals the original warranty terms offered at the time of manufacture. Typically‚ these covered defects in materials and workmanship for a limited period‚ often one year for parts and labor.

Extended warranties were sometimes available for purchase. However‚ it’s crucial to understand that these warranties have almost certainly expired for vintage models. The manuals detail what components were covered and any exclusions‚ providing historical context but limited practical benefit today regarding current repairs.

Claim Procedures

Old Maytag washer manuals (PDF) outline the original claim procedures for warranty service‚ typically involving contacting an authorized Maytag service center or the retailer where the appliance was purchased. These manuals detail required documentation‚ such as proof of purchase and a description of the defect.

However‚ attempting to utilize these procedures for a vintage washer is unlikely to be successful‚ as the original warranty period has long passed. The manuals serve as historical documentation of past customer support processes rather than a viable path for current repairs.

Downloading and Saving PDF Manuals

Downloading old Maytag washer manuals (PDF) requires a reliable PDF reader; saving them locally ensures access even without an internet connection for future reference.

PDF Reader Requirements

Accessing older Maytag washer manuals in PDF format necessitates a compatible PDF reader application. Adobe Acrobat Reader is a widely used‚ free option‚ ensuring proper display of diagrams and text. Alternative readers like Foxit Reader or built-in browser viewers also function effectively.
Ensure your chosen reader is updated to the latest version for optimal performance and security. Older manuals may contain complex layouts‚ so a robust reader is crucial for clear viewing and printing. Compatibility across devices—computers‚ tablets‚ and smartphones—is also beneficial for convenient access.

File Management Tips

Effectively managing downloaded Maytag washer manuals (PDFs) ensures easy retrieval. Create a dedicated folder on your computer labeled “Maytag Washers” or similar. Within this‚ subfolders organized by model number are highly recommended. Use descriptive filenames‚ including the model number and manual type (e.g.‚ “MaytagA106_OwnersManual.pdf”).
Regularly back up these files to an external drive or cloud storage to prevent data loss. Consider tagging files with keywords for quicker searches.

Manuals for Older Maytag Washer Models

Finding PDFs for discontinued Maytag washers can be challenging; utilize online archives‚ third-party databases‚ and generic Maytag manuals as alternatives.

Finding Discontinued Model Manuals

Locating manuals for older‚ discontinued Maytag washers requires resourceful searching. The official Maytag website may have archived resources‚ but often‚ third-party manual databases become essential. Explore sites specializing in appliance documentation‚ and utilize specific model numbers in your searches.

If direct matches prove elusive‚ consider searching for generic Maytag manuals covering similar eras or technologies. Online appliance repair forums and communities can also be valuable sources‚ as members frequently share scanned copies or links to obscure manuals. Remember to verify the manual’s compatibility with your specific model before relying on its instructions.

Using Generic Maytag Manuals

When a specific manual for your vintage Maytag washer is unavailable‚ a generic Maytag manual from the same era can be helpful‚ though caution is advised. These manuals share common components and troubleshooting steps applicable across multiple models.

However‚ always cross-reference information with your washer’s specific features and avoid applying instructions that clearly don’t align. Prioritize safety and understand that generic manuals may not cover all nuances of your particular machine. They serve as a supplementary resource‚ not a direct replacement.

Resources for Maytag Washer Repair

Online forums and appliance repair websites offer valuable support‚ complementing your manual’s guidance for diagnosing and resolving issues with older Maytag washers.

Maytag Support Forums

Dedicated Maytag support forums are invaluable resources for owners of older washers. These online communities allow users to share experiences‚ troubleshooting tips‚ and even locate scanned copies of discontinued manuals.
Often‚ members have successfully repaired similar models and can offer specific advice related to your machine’s issue. Searching these forums with your model number and problem description can quickly yield helpful solutions‚
supplementing the information found in your PDF manual. They provide a collaborative environment for appliance repair enthusiasts and seasoned technicians alike‚ fostering a wealth of practical knowledge.

Appliance Repair Websites

Numerous appliance repair websites offer detailed guides and diagrams‚ often complementing older Maytag washer manuals. These platforms frequently feature model-specific troubleshooting steps and exploded views of parts‚ aiding in diagnosis and repair. Many sites host downloadable resources‚ including partial manuals or supplemental documentation for discontinued models.
Utilizing these websites alongside your PDF manual can provide a more comprehensive understanding of your washer’s components and potential issues‚ empowering you to tackle repairs confidently.

The Role of Manuals in Extending Washer Lifespan

Old Maytag washer manuals provide preventative maintenance schedules and proper usage guidelines‚ crucial for maximizing appliance longevity and avoiding costly repairs.

Preventative Maintenance

Old Maytag washer manuals emphasize regular preventative maintenance for optimal performance. These PDFs detail cleaning procedures – including drum and dispenser upkeep – to prevent mold and residue buildup. They also outline inspection schedules for hoses‚ connections‚ and belts‚ identifying potential leaks or wear before they escalate.
Following these guidelines‚ found within the manual‚ significantly extends the washer’s lifespan‚ reducing the need for frequent repairs and ensuring efficient operation for years to come. Consistent care‚ as directed‚ is key.

Proper Usage Guidelines

Old Maytag washer manuals provide essential usage guidelines often overlooked today. These PDFs detail proper load sizes‚ detergent types‚ and cycle selections for various fabrics. Understanding these recommendations prevents damage to both the machine and your clothes. Manuals also clarify specific features unique to older models‚ ensuring correct operation. Adhering to these guidelines‚ detailed within the PDF‚ maximizes washing efficiency and minimizes strain on the appliance‚ contributing to its longevity and reliable performance.

Beyond the Manual: Additional Support

If the PDF manual lacks solutions‚ explore Maytag customer service and local repair technicians for specialized assistance with older washer models.

Maytag Customer Service

Contacting Maytag’s customer service provides direct support‚ even for older models where manuals might be incomplete. Their representatives can offer troubleshooting advice‚
potentially locate archived documentation‚ or guide you toward authorized service centers familiar with vintage Maytag washers. Be prepared to provide your model number
and a detailed description of the issue. While older parts may be scarce‚ they can sometimes suggest viable alternatives or direct you to specialized repair resources.
Remember to check the Maytag website for current contact information and support options.

Local Appliance Repair Technicians

Engaging a local appliance repair technician is invaluable when dealing with older Maytag washers and limited manual information. Experienced technicians possess practical knowledge
of vintage models‚ often diagnosing issues beyond what a manual covers. They can source hard-to-find parts or suggest suitable replacements. While a PDF manual aids
self-diagnosis‚ a professional offers hands-on expertise‚ ensuring safe and effective repairs. Seek technicians with proven experience servicing Maytag appliances‚
and discuss potential costs before authorizing any work. Their insights complement manual guidance.

the cock down the block pdf

The “Cock Down the Block” PDF: A Comprehensive Overview (as of 02/07/2026)

The circulating PDF‚ dated today‚ 02/07/2026‚ details a narrative involving unexpected relationships and mature themes‚ spanning 122 pages and 1MB in size.

Origins and Initial Discovery

The emergence of the “Cock Down the Block” PDF is shrouded in online obscurity‚ initially surfacing in late 2024‚ with increased attention throughout 2025. Early mentions appear within forums dedicated to sharing and discussing explicit gay male content‚ specifically referencing searches for “free gay male cock video” and related keywords.

The document’s initial distribution seems to have occurred through file-sharing platforms and direct links posted on websites offering adult material. References to the DXB170H Manual‚ oddly connected to the PDF‚ suggest a possible origin point linked to technical documentation‚ perhaps repurposed or falsely associated.

The text gained traction following mentions on social media‚ with users discussing its provocative title and content‚ alongside the related novel‚ “the Cock down the block”. The initial discovery wasn’t tied to a formal publication or author announcement‚ contributing to its underground circulation and mystique.

The Core Narrative: A Summary

The “Cock Down the Block” PDF centers around a female protagonist consistently overlooked romantically‚ until an intervention by her assertive‚ “cocky” best friend and his partner—referred to as a “rooster”. The narrative explores themes of sexual awakening and power dynamics‚ with explicit content detailing intimate encounters.

The story unfolds with a focus on the protagonist’s exploration of her desires‚ facilitated by the confident actions of the two male characters. Dialogue excerpts reveal a frank discussion of sexual experiences and preferences‚ including references to anatomical terms and suggestive language.

A recurring element involves a symbolic “cherry pie”‚ hinting at lost innocence or a desired experience. The narrative‚ while explicit‚ also touches upon emotional vulnerability and the complexities of unexpected relationships‚ as evidenced by online interpretations.

Character Analysis: Key Figures

The PDF’s characters are defined by distinct roles within the unfolding narrative. The protagonist embodies initial naiveté and a longing for romantic connection‚ evolving through interactions with the other figures. Her “cocky” best friend serves as a catalyst‚ initiating her sexual exploration with assertive confidence. His partner‚ described as a “rooster”‚ completes the dynamic‚ representing a bold and uninhibited presence.

A simplistic character‚ named Mike‚ identifies as a “cock”‚ expressing enjoyment in activities like singing‚ dancing‚ and cycling‚ highlighting a peculiar self-identification.

These characters‚ though presented with varying degrees of complexity‚ primarily function to drive the plot forward‚ focusing on themes of desire‚ control‚ and the disruption of established social norms within the story’s explicit context.

The Protagonist’s Journey

The protagonist’s arc within the “Cock Down the Block” PDF centers on a transformation from perceived inadequacy to sexual awakening. Initially depicted as “the nerdy girl‚ never the girlfriend‚” she experiences a shift in agency instigated by her best friend and his partner. This journey involves navigating unfamiliar desires and relinquishing control‚ as suggested by the narrative’s focus on power dynamics.

Her evolution is marked by a willingness to explore previously unconsidered experiences‚ culminating in explicit encounters detailed within the text. The protagonist’s internal monologue‚ though not extensively documented‚ implies a growing confidence and acceptance of her newfound sexuality.

Ultimately‚ her path represents a liberation from societal expectations‚ albeit within a highly charged and explicit framework.

The “Cocky” Best Friend

The “cocky” best friend functions as a catalyst for the protagonist’s sexual exploration within the “Cock Down the Block” PDF. Described as possessing a confident and assertive personality‚ he initiates the events that propel the narrative forward. His character embodies a dominant role‚ actively “taking charge” as indicated in available summaries.

He is presented alongside his “rooster‚” a partner who further emphasizes the power imbalance and explicit nature of their interactions. The friend’s motivations remain somewhat ambiguous‚ though his actions suggest a desire to liberate the protagonist from her inhibitions.

His persona is crucial to the story’s dynamic‚ representing a force of disruption and a source of both pleasure and potential exploitation.

Themes Explored in the Text

The “Cock Down the Block” PDF delves into complex themes of power dynamics‚ control‚ and the exploration of unexpected relationships. The narrative consistently highlights imbalances‚ particularly through the interactions between characters and the assertive actions of the “cocky” best friend.

Sexual liberation and the breaking of societal norms are also prominent‚ as the protagonist navigates uncharted territory. The text appears to examine the boundaries of consent and the potential for exploitation within intimate encounters.

Furthermore‚ the story touches upon identity and self-discovery‚ as characters grapple with their desires and challenge conventional expectations. The explicit content serves to underscore these themes‚ prompting reflection on societal attitudes towards sexuality.

Power Dynamics and Control

Within the “Cock Down the Block” PDF‚ power dynamics and control are central‚ manifesting through character interactions and narrative events. The assertive nature of the “cocky” best friend‚ and his influence over the protagonist‚ establishes a clear imbalance of power.

The text explores how control can be exerted through sexual encounters‚ potentially blurring the lines of consent. References to anatomical terms and explicit content contribute to this exploration‚ highlighting the vulnerability of certain characters.

The narrative suggests a deliberate manipulation of the protagonist‚ with the “rooster” figure embodying a dominant force. This dynamic raises questions about agency and the consequences of surrendering control.

Unexpected Relationships

The “Cock Down the Block” PDF centers around unconventional and surprising relational dynamics‚ deviating from traditional romantic norms. The core narrative revolves around the protagonist’s evolving connection with her “cocky” best friend and‚ unexpectedly‚ his assertive companion‚ referred to as a “rooster.”

These relationships challenge conventional expectations‚ introducing elements of sexual exploration and power imbalances. The text hints at a shift from platonic friendship to a more intimate‚ potentially exploitative‚ connection.

The PDF’s content‚ including references to explicit encounters‚ suggests a blurring of boundaries and a willingness to explore taboo subjects. The narrative’s focus on these unexpected connections drives the plot and fuels online discussions.

Content Warnings and Mature Themes

The “Cock Down the Block” PDF contains extremely explicit and potentially disturbing content‚ necessitating significant content warnings. The document features detailed descriptions of sexual acts‚ including references to anatomical terms like “clamshell” and “cock alley‚” alongside graphic depictions of sexual encounters.

Mature themes explored include power dynamics‚ control‚ and potentially non-consensual acts‚ as evidenced by online discussions referencing “gagging” and exploitative scenarios. The text includes references to “gay male content” and explicit depictions of male genitalia‚ making it unsuitable for minors.

Readers should exercise extreme caution when accessing this PDF due to its graphic nature and potentially triggering content.

The PDF Format and Distribution

The “Cock Down the Block” narrative is primarily disseminated as a PDF file‚ approximately 1MB in size‚ readily available through various online channels. It’s often shared via direct links and file-sharing websites‚ bypassing traditional publishing routes.

Accessibility is relatively high‚ though downloading carries inherent risks. The PDF’s origin is often untraceable‚ raising concerns about malware or viruses. The document is associated with the “DXB170H Manual‚” potentially used as a deceptive filename to mask its true content.

Users should exercise caution and employ robust antivirus software before opening the PDF. The distribution method suggests a deliberate attempt to circulate the content discreetly‚ avoiding mainstream platforms.

Accessibility and Availability

The “Cock Down the Block” PDF demonstrates a surprisingly broad‚ yet clandestine‚ accessibility. While absent from major ebook retailers‚ it’s widely available through numerous online sources‚ including file-sharing platforms and direct download links. The document’s 1MB size facilitates relatively quick downloads‚ even on slower connections.

However‚ access isn’t without caveats. The PDF’s distribution relies heavily on unofficial channels‚ often disguised with filenames like “DXB170H Manual” to evade detection. Searching for “free gay male cock video” or related keywords frequently yields results leading to the PDF.

Availability is further complicated by potential takedown requests and fluctuating link stability. Despite these challenges‚ the content remains persistently accessible to those actively seeking it.

Potential Risks Associated with Downloading

Downloading the “Cock Down the Block” PDF carries significant risks beyond its explicit content. Sourcing the file from unofficial channels exposes users to potential malware‚ viruses‚ and other malicious software disguised within the document or embedded in the download site itself.

The prevalence of deceptive filenames‚ like “DXB170H Manual‚” suggests deliberate attempts to mask the file’s true nature and bypass security measures. Furthermore‚ accessing such content may violate local laws and terms of service‚ leading to legal repercussions.

Users also risk exposure to unwanted advertising‚ phishing attempts‚ and data harvesting through compromised websites. Exercising extreme caution and employing robust antivirus software are crucial when considering downloading this PDF.

Online Discussions and Fan Reception

Online discourse surrounding the “Cock Down the Block” PDF is fragmented and largely occurs within niche online communities. Social media buzz‚ while present‚ is often obscured by coded language and quickly removed due to content restrictions. Reviews are scarce‚ existing primarily on private forums and encrypted messaging apps.

Discussions frequently center on the narrative’s explicit nature and the power dynamics portrayed within. Some interpretations focus on the “cocky” best friend’s role‚ while others analyze the protagonist’s journey. The text’s connection to folklore‚ specifically “The Legend of Sleepy Hollow‚” has also sparked debate.

Notably‚ searches for “gay male content” and related keywords correlate with increased interest in the PDF‚ indicating a specific audience demographic. Fan reception appears polarized‚ ranging from enthusiastic endorsement to critical condemnation.

Social Media Buzz and Reviews

Social media mentions of “Cock Down the Block” are heavily moderated and often utilize euphemisms to circumvent platform restrictions. Direct links to the PDF are swiftly removed‚ leading to circulation via private channels and coded language. Buzz primarily exists within smaller‚ dedicated online groups.

Formal reviews are virtually nonexistent‚ with commentary largely confined to anonymous forum posts and encrypted messaging apps. User reactions are intensely polarized; some praise the work’s boldness‚ while others express strong disapproval of its explicit content.

Scattered references allude to the narrative’s impact‚ with some users sharing personal interpretations and others seeking out related works. The presence of keywords like “gay male” in search trends suggests a targeted audience.

Common Interpretations and Debates

Interpretations of “Cock Down the Block” center on the exploration of power dynamics and control within the narrative‚ alongside the unexpected development of relationships. Debate frequently arises regarding the author’s intent and the justification for the graphic content.

Some readers view the work as a provocative commentary on societal norms‚ while others criticize it as exploitative and gratuitous. The symbolic weight of elements like the “cherry pie” is a recurring point of discussion‚ with varying theories proposed.

A significant debate revolves around the text’s connection to folklore‚ specifically “The Legend of Sleepy Hollow‚” and the potential allegorical meaning of the “cock” figure. The inclusion of anatomical terms also sparks discussion about artistic license versus sensationalism.

Related Works by the Author

Information regarding other publications by the author of “Cock Down the Block” remains scarce‚ contributing to the mystique surrounding this particular work. However‚ online discussions reveal mentions of a subsequent novel and a holiday-themed story.

Readers report encountering a book that precedes “Cock Down the Block‚” often described as the “actual first book” in a series‚ suggesting a connected universe or recurring characters. Details about these other works are fragmented‚ primarily circulating through online forums and reviews.

The limited availability of information fuels speculation about the author’s overall body of work‚ and whether “Cock Down the Block” represents a departure or a consistent style. Further research is needed to establish a comprehensive bibliography;

The “Cock Down the Block” and its Place in Contemporary Literature

Positioning “Cock Down the Block” within contemporary literature presents a complex challenge‚ given its explicit content and underground distribution via PDF format. The work’s themes of power dynamics‚ unexpected relationships‚ and mature subject matter resonate with trends in erotica and new adult fiction.

However‚ its reliance on colloquial language and anatomical references distinguishes it from mainstream publications‚ placing it firmly within a niche online community. The PDF’s accessibility contributes to its viral spread‚ bypassing traditional publishing gatekeepers.

The narrative’s exploration of identity and desire‚ alongside its controversial elements‚ sparks debate about boundaries and representation in contemporary storytelling. Its impact remains largely confined to online spaces‚ yet it demonstrates the power of digital distribution.

Similar Titles and Genre Comparisons

Comparing “Cock Down the Block” to similar titles reveals its positioning within the broader landscape of erotic literature and online fan fiction. Works exploring taboo relationships‚ power imbalances‚ and explicit sexual content share thematic ground‚ though stylistic approaches vary significantly.

The PDF’s focus on mature themes and colloquial language aligns it with certain subgenres of romance and new adult fiction‚ often found on platforms catering to adult audiences. However‚ its raw and unfiltered nature differentiates it from more polished commercial offerings.

Genre comparisons extend to online erotica and amateur writing communities‚ where similar narratives circulate freely. The work’s viral spread through digital channels mirrors the distribution patterns of many independent erotic publications.

Analyzing the Title: “Cock Down the Block”

The title‚ “Cock Down the Block‚” immediately establishes a provocative and attention-grabbing tone‚ utilizing deliberately blunt and colloquial language. Its suggestive nature hints at the explicit content within the PDF and contributes to its notoriety.

The phrase evokes a sense of accessibility and familiarity‚ juxtaposing a crude term with the commonplace image of a neighborhood location. This contrast creates a jarring effect‚ drawing readers in with a mixture of curiosity and shock.

The title’s directness is a key element of its appeal‚ particularly within online communities where explicit content is often sought out. It functions as a clear signal to potential readers regarding the nature of the material.

The Use of Colloquial Language

The “Cock Down the Block” PDF is characterized by a pervasive use of colloquial language‚ extending beyond the provocative title itself. Terms like “cherry pie‚” “churner‚” “clamshell‚” and “cock alley” are integrated throughout the text‚ contributing to its raw and unfiltered style.

This linguistic choice serves multiple purposes. It establishes a specific tone‚ mirroring the vernacular of certain online communities and potentially targeting a particular audience. The informal language also lends a sense of authenticity‚ as if the narrative is being directly recounted from personal experience.

However‚ the reliance on slang and explicit terminology also raises questions about the author’s intent and the overall artistic merit of the work. It’s a deliberate stylistic decision that significantly shapes the reader’s experience.

References to Anatomical Terms

The “Cock Down the Block” PDF demonstrably features frequent and explicit references to anatomical terms‚ particularly those relating to male genitalia. The title itself is a direct example‚ and the content within the 122-page document expands upon this theme extensively.

These references aren’t presented in a clinical or scientific manner; rather‚ they are interwoven into the narrative in a highly charged and often graphic context. Online discussions and search trends indicate a strong association with gay male content and explicit sexual depictions.

The consistent use of such terminology contributes to the PDF’s mature and potentially offensive nature. It’s a key element defining the work’s boundaries and intended audience‚ and a significant factor in the associated content warnings.

The Inclusion of Explicit Content

The “Cock Down the Block” PDF is unequivocally characterized by the inclusion of highly explicit content‚ as evidenced by online descriptions and search queries linking it to “gay male movie sex” and “free gay male cock video.” The document‚ spanning 122 pages‚ doesn’t shy away from detailed depictions of sexual acts.

Reports suggest the presence of graphic scenes and mature themes‚ contributing to the necessity of stringent content warnings. Discussions mention “brutal cock” and “gagging video” associations‚ indicating a potentially disturbing nature for some viewers.

This explicit material is central to the PDF’s notoriety and circulation‚ driving both interest and concern. The content’s accessibility and potential risks associated with downloading underscore the need for caution and responsible online behavior.

The “Cherry Pie” and Other Symbolic References

Within the “Cock Down the Block” PDF‚ the recurring mention of “cherry pie” appears to function as a potent symbolic reference‚ potentially alluding to lost innocence or a metaphorical representation of sexual awakening. The text‚ as described in online discussions‚ utilizes suggestive imagery and colloquial language.

Alongside “cherry pie‚” other anatomical terms and slang – “churner‚” “clamshell‚” “cock alley” – are frequently employed‚ contributing to the document’s explicit and provocative nature. These references aren’t merely descriptive but seem intended to evoke specific responses and interpretations.

The symbolic weight of these elements remains open to debate‚ yet their consistent presence suggests a deliberate attempt to layer meaning beyond the literal depictions within the 122-page PDF.

Technical Aspects of the PDF Document (DXB170H Manual Connection)

The “Cock Down the Block” PDF is reportedly associated with documentation referencing the DXB170H manual‚ specifically mentioning a “nitrogen bottle plug cock” within its instructions. This connection‚ discovered through online sources‚ is unusual and raises questions about the document’s origins and intended purpose.

The PDF format itself allows for easy distribution and accessibility‚ though potential risks are associated with downloading files from unverified sources. The document’s size is approximately 1MB‚ and it’s available as a downloadable file‚ alongside text file versions.

The inclusion of technical manual excerpts within a sexually explicit narrative is a peculiar characteristic‚ suggesting a deliberate juxtaposition or potentially a repurposed document. Further investigation is needed to understand this connection fully.

The “Nitrogen Bottle Plug Cock” Analogy

The phrase “nitrogen bottle plug cock‚” originating from the DXB170H manual found within the PDF‚ presents a jarring and unsettling juxtaposition when considered alongside the narrative’s explicit content. This technical term‚ relating to industrial equipment‚ is unexpectedly interwoven with the story’s themes.

The analogy‚ however disturbing‚ potentially functions as a symbolic representation of control and containment‚ mirroring power dynamics explored within the text. The “plug” suggests a deliberate blocking or restriction‚ while the “cock” itself carries multiple‚ layered meanings.

It’s plausible the author intentionally utilized this phrase to create a sense of discomfort and challenge conventional interpretations‚ forcing readers to confront the unsettling connection between industrial mechanics and intimate acts. The deliberate nature of this inclusion warrants further analysis.

Connections to Folklore and “The Legend of Sleepy Hollow”

Interestingly‚ the provided text references “The Legend of Sleepy Hollow‚” specifically noting imagery of a “weather-cock perched upon his spindle neck.” This connection‚ while seemingly oblique‚ may hint at thematic parallels within the “Cock Down the Block” PDF.

The weather-cock symbolizes direction and change‚ potentially mirroring the narrative’s exploration of shifting power dynamics and unexpected relationships. The image of something precariously balanced also resonates with the story’s potentially unstable emotional landscape.

Furthermore‚ folklore often utilizes animal symbolism‚ and the recurring “cock” motif could draw upon traditional associations with masculinity‚ courage‚ or even boastfulness. The author’s deliberate invocation of Sleepy Hollow suggests a conscious engagement with literary tradition.

The “Cock” as a Character in Children’s Literature

The provided excerpts include a curious dialogue featuring a character simply identifying as “Cock‚” named Mike‚ who enjoys singing‚ dancing‚ and bicycle riding. This starkly contrasts with typical representations of roosters in children’s literature.

Traditionally‚ roosters in children’s stories often embody traits like bravery‚ punctuality‚ or a warning call against danger. However‚ this “Cock” character presents a deliberately mundane and unassuming persona‚ seemingly designed to disrupt expectations.

The juxtaposition of the animal name with human activities and familial inquiries creates a disorienting effect‚ potentially mirroring the PDF’s exploration of unconventional relationships and challenging societal norms. This deliberate subversion of familiar tropes is noteworthy.

Online Search Trends and Keywords (Gay Male Content)

Analysis of online activity reveals a significant correlation between searches for “gay male content” and keywords related to the “Cock Down the Block” PDF. Terms like “gay male movie sex‚” “free gay male cock video‚” and related explicit phrases frequently appear in conjunction with the title.

This suggests a primary driver of interest in the PDF stems from its perceived explicit nature and appeal to a specific demographic. Search results also indicate a demand for related content‚ including “Arab man porn” and references to mature‚ softcore material.

The prevalence of these keywords highlights the PDF’s circulation within online communities focused on adult entertainment‚ and underscores the need for content warnings and responsible discussion surrounding its themes.

zelda ii instruction manual

Zelda II: The Adventure of Link ― Instruction Manual Deep Dive (Updated 02/07/2026)

Today’s date is February 7th, 2026. This deep dive explores the often-overlooked instruction manual accompanying Zelda II: The Adventure of Link, examining its historical significance and current availability.

The Zelda II: The Adventure of Link instruction manual served as a crucial companion to the game, offering players guidance beyond the in-game experience. Released alongside the North American Nintendo Entertainment System version, it wasn’t merely a rulebook; it was a portal into the world of Hyrule, expanding upon the narrative and gameplay mechanics.

This manual provided essential information, from basic controls and character status explanations to detailed insights into the overworld map and combat system. It also included vital precautions for Game Pak care, addressing concerns about temperature, water damage, and cleaning; Beyond the practicalities, the manual fostered a sense of adventure, encouraging exploration and discovery within the game’s expansive landscape.

Its significance lies in its role as a tangible artifact of gaming history, offering a glimpse into how Nintendo presented its games to players in the 1980s. Today, it’s a sought-after collectible, with digital copies readily available in various formats, including high-resolution scans and searchable PDFs.

Historical Context of the Manual

The Zelda II: The Adventure of Link manual emerged during a pivotal era for video game instruction booklets. The mid-1980s saw a shift from sparse, technical guides to more elaborate companions designed to immerse players in the game’s world. Nintendo, in particular, became known for its high-quality manuals, often featuring artwork and storytelling elements.

Zelda II’s manual reflects this trend, offering a blend of practical advice and atmospheric presentation. It was created at a time when online resources were nonexistent, making the physical manual the primary source of information for players. The manual’s design and content were influenced by the game’s unique departure from the original Legend of Zelda, necessitating detailed explanations of its new mechanics, like side-scrolling combat and RPG elements.

Furthermore, the manual’s “Nintendo Seal of Quality” signified a commitment to a certain standard of gameplay and content, reassuring consumers during a period of rapid market growth and varying game quality.

Availability of Original Manuals

Finding a complete, original Zelda II: The Adventure of Link manual today presents a challenge for collectors. Due to the age of the game and the inherent fragility of paper goods, many manuals have been lost, damaged, or discarded over the years. Complete-in-box (CIB) copies, including the manual, command a premium price on the retro gaming market.

Online marketplaces like eBay frequently list Zelda II manuals, but condition varies significantly. Expect to pay a considerable sum for a well-preserved copy, with prices influenced by factors like wear, tears, and overall cleanliness. Loose manuals, without the original game cartridge, are generally more affordable but still sought after by enthusiasts.

Reproduction manuals are also available, offering a more accessible option for those seeking a physical copy without the high cost of an original. However, collectors typically prioritize authentic manuals for their historical value.

Digital Copies & PDF Formats

Fortunately, digital copies of the Zelda II: The Adventure of Link instruction manual are readily available, offering a convenient alternative to sourcing an original physical copy. Several websites archive and distribute these manuals in PDF format, preserving them for future generations of gamers.

These digital versions range in quality. Some are lower-resolution scans, while others boast impressive 600 DPI clarity, faithfully reproducing the original artwork and text. Searchable PDF versions are particularly valuable, allowing users to quickly locate specific information within the manual.

Resources like NES Files and other retro gaming communities host these digital scans. Downloading these PDFs allows players to consult the manual during gameplay or simply appreciate its design and content. The availability of these digital formats ensures the manual’s knowledge remains accessible.

600 DPI Scans and Quality

The pursuit of high-quality digital preservation has led to the creation of Zelda II: The Adventure of Link instruction manual scans at 600 DPI (dots per inch). This resolution represents a significant improvement over lower-quality scans, capturing a remarkable level of detail from the original document.

At 600 DPI, the scans faithfully reproduce the artwork, text, and even subtle paper textures, providing a near-identical visual experience to holding the physical manual. While some 600 DPI scans may be larger in file size, the enhanced clarity is well worth the trade-off for collectors and enthusiasts.

These high-resolution scans are crucial for archival purposes, ensuring the manual’s visual integrity is maintained for years to come. They allow for detailed examination and appreciation of the original design elements, offering a superior experience compared to lower-resolution alternatives.

Searchable PDF Versions

Beyond visual fidelity, the availability of searchable PDF versions of the Zelda II: The Adventure of Link instruction manual significantly enhances its usability. These PDFs utilize Optical Character Recognition (OCR) technology, converting the scanned images of text into machine-readable characters.

This functionality allows users to quickly search for specific keywords or phrases within the manual, eliminating the need to manually browse through each page. Whether you’re looking for information on a particular enemy, item, or game mechanic, a searchable PDF streamlines the process.

The convenience of searchable PDFs makes the manual a more practical resource for gameplay assistance and historical research. They represent a valuable addition to the digital preservation efforts, ensuring the manual’s content remains accessible and easily navigable for future generations of Zelda fans.

Manual Contents Overview

The Zelda II: The Adventure of Link instruction manual serves as a comprehensive guide to navigating the challenging world of Hyrule. It begins with a thank you message and essential precautions regarding Game Pak care – avoiding extreme temperatures, water damage, and providing cleaning instructions.

Core gameplay elements are thoroughly explained, including starting a new game, the name registration process, and understanding the overworld map. Detailed sections cover character status screens, combat mechanics (specifically sword techniques), the magic system, and item inventory management.

The manual also delves into more advanced aspects, such as hidden areas, enemy guides, boss strategies, and even palace maps. Finally, it provides essential information about the Nintendo Entertainment System itself, completing the player’s foundational knowledge.

Front Cover & Back Cover Details

The front cover of the Zelda II: The Adventure of Link manual prominently features Link in a dynamic action pose, showcasing his new, side-scrolling perspective. Boldly displayed is the game’s title and the Nintendo Entertainment System logo, immediately identifying the game and platform. The artwork captures the adventurous spirit of the game, hinting at the challenges within.

The back cover typically includes a captivating screenshot from the game, further illustrating the gameplay. It also features promotional text highlighting key features and enticing players to embark on Link’s quest. Crucially, it displays the Nintendo Seal of Quality, assuring consumers of a certain standard of entertainment.

Both covers utilize a color palette consistent with the game’s aesthetic, creating a cohesive and visually appealing package. The overall design aims to attract potential buyers and establish a strong brand identity.

Inside Front Cover ⸺ Nintendo Seal of Quality

The inside front cover of the Zelda II: The Adventure of Link manual is dedicated to the Nintendo Seal of Quality. This wasn’t merely a branding exercise; it was Nintendo’s commitment to a certain level of gameplay experience for consumers during the NES era.

The Seal’s presence signified that the game had undergone rigorous testing and met Nintendo’s standards for entertainment value and technical quality. It was a reassurance to parents and players alike, especially in a rapidly expanding video game market.

Alongside the Seal, the manual often included a URL – “The NES Files http://www.nesfiles.com” – directing players to an online resource for further information and support. This was an early example of Nintendo leveraging the burgeoning internet to enhance the player experience.

The first page of the Zelda II: The Adventure of Link instruction manual begins with a gracious “Thank you for selecting the Nintendo Entertainment System Zelda II-The…” This opening immediately establishes a direct connection with the player, expressing gratitude for their purchase and initiating their adventure.

The introduction briefly sets the stage for the game, hinting at the epic quest that awaits Link. It’s a concise welcome, designed to quickly immerse the player in the world of Hyrule without revealing too much of the storyline upfront.

Crucially, this page also references “Game Data and Manual for Your Adventures,” subtly emphasizing the importance of the accompanying documentation for a complete and fulfilling gaming experience. It’s a gentle nudge towards utilizing the manual’s resources.

Page 2: Precautions & Game Care

Page 2 of the Zelda II: The Adventure of Link manual is dedicated to vital precautions and game care instructions, ensuring the longevity of the game cartridge and a smooth player experience. It directly addresses potential hazards with three key warnings.

Firstly, the manual cautions against leaving the Game Pak in “extreme temperatures,” highlighting the sensitivity of the electronic components. Secondly, it explicitly warns against immersion in water, a common threat to early game cartridges. Finally, it provides basic “cleaning instructions,” though specifics are limited by the technology of the time.

These instructions weren’t merely legal boilerplate; they were essential for preserving a relatively expensive entertainment investment. The manual’s emphasis on careful handling reflects the fragility of NES cartridges and the value placed on game ownership.

Temperature Considerations

The Zelda II: The Adventure of Link instruction manual specifically warns against exposing the Game Pak to “extreme temperatures.” This precaution, found on Page 2, was crucial for the preservation of the game’s data. The NES cartridges, unlike modern storage media, were susceptible to data corruption and physical damage from heat and cold.

Prolonged exposure to high temperatures, such as leaving the cartridge in direct sunlight or a hot car, could warp the plastic casing and potentially damage the internal circuitry. Conversely, extreme cold could make the plastic brittle and prone to cracking.

Nintendo’s warning aimed to educate players about these risks, encouraging them to store the game in a cool, dry place, away from direct heat sources or freezing conditions, ensuring a reliable gaming experience.

Water Damage Prevention

The Zelda II: The Adventure of Link instruction manual prominently features a warning against immersing the Game Pak in water, found alongside temperature cautions on Page 2. This wasn’t merely a suggestion; water exposure posed a significant threat to the cartridge’s functionality and longevity.

NES cartridges weren’t sealed against liquids. Water could easily penetrate the casing, causing immediate short circuits and corrosion of the delicate electronic components within. Even a small amount of moisture could lead to permanent damage, rendering the game unplayable.

Nintendo’s clear instruction emphasized the importance of keeping the game away from liquids, advising players to avoid playing near drinks or in damp environments. This simple precaution was vital for protecting their investment and enjoying the adventure.

Cleaning Instructions

The Zelda II: The Adventure of Link instruction manual dedicates a section to proper game care, including specific cleaning instructions, found alongside temperature and water damage prevention on Page 2. Maintaining the Game Pak’s cleanliness was crucial for ensuring reliable performance.

Nintendo advised against using liquid cleaners or abrasive materials. These could damage the cartridge’s plastic casing and potentially seep inside, causing the same issues as water exposure – corrosion and short circuits. Instead, a soft, dry cloth was recommended.

Dust and debris could interfere with the connection between the cartridge and the NES console, leading to glitches or a complete failure to load the game. Gentle wiping with a dry cloth helped remove these obstructions, ensuring a stable connection.

Page 3: Game Data & Adventure Information

Page 3 of the Zelda II: The Adventure of Link instruction manual serves as a pivotal transition, moving from general precautions to the specifics of gameplay and data management. It prominently features the phrase “Game Data and Manual for Your Adventures,” setting the stage for a deeper dive into the game’s mechanics.

This page begins to outline the core elements of the adventure, preparing the player for the unique challenges that Zelda II presents. It’s a crucial point where the manual shifts from cautionary advice to practical guidance. The Nintendo Seal of Quality is also referenced here, reinforcing brand trust.

The manual’s layout on this page is designed to be easily digestible, offering a clear pathway for new players to understand the game’s fundamental systems. It’s a foundational element for a successful playthrough, bridging the gap between anticipation and actual gameplay.

Starting a New Game ⸺ File Selection

The manual dedicates specific instructions to initiating a new game in Zelda II: The Adventure of Link, focusing on the file selection process. Upon reaching the title screen, players are directed to press the “START” button to access the file selection screen – a critical first step.

This screen allows players to either continue a previously saved game or begin a fresh adventure. For those embarking on a new quest, the manual emphasizes the importance of registering a name. This personalized touch adds a layer of immersion to the experience.

The “SELECT” button is highlighted as the key to initiating the name registration process. The manual’s clarity ensures even novice players can navigate this initial setup with ease, preparing them for the challenges ahead. It’s a simple, yet vital, instruction for a smooth start.

Name Registration Process

The Zelda II instruction manual meticulously details the name registration process, a unique feature for its time. After selecting “START” on the title screen and accessing the file selection screen, players are prompted to personalize their adventure by entering a name.

This isn’t merely cosmetic; the manual implies a sense of ownership and investment in Link’s journey. The process itself is straightforward, guided by the “SELECT” button as previously indicated. Players can input a name to be associated with their save file.

The manual doesn’t specify character limits, leaving room for creative player expression. Registering a name solidifies the beginning of a new game, marking the start of a personalized quest through Hyrule. It’s a small detail that enhances the overall gaming experience.

Understanding the Overworld Map

The Zelda II instruction manual dedicates space to explaining the game’s unique overworld map, a departure from the top-down perspective of the original Legend of Zelda. It emphasizes the side-scrolling nature of exploration, presenting Hyrule as a series of interconnected screens.

The manual likely illustrates how to navigate between these screens, highlighting key locations like towns, dungeons, and challenging terrain. Understanding the map’s layout is crucial for efficient travel and discovering hidden areas. It’s a non-linear world, encouraging exploration.

Players must learn to interpret visual cues and landmarks to orient themselves. The manual probably details how to identify paths, obstacles, and points of interest. Mastering the overworld map is essential for progressing through the adventure and uncovering its secrets.

Character Status Screens Explained

The Zelda II instruction manual meticulously details the character status screens, vital for monitoring Link’s progress and capabilities. It breaks down each displayed statistic, ensuring players understand their significance in the adventure.

Key elements likely covered include health points (HP), magic points (MP), attack power, and defense. The manual probably explains how these stats are affected by equipment, experience gains, and spell usage. Understanding these values is crucial for optimizing Link’s performance.

Furthermore, the manual likely clarifies the meaning of status effects, such as poison or paralysis, and how to counteract them. It’s a guide to maximizing Link’s potential, allowing players to strategically manage his attributes throughout the challenging quest.

Combat Mechanics ― Sword Techniques

The Zelda II instruction manual dedicates significant attention to the unique combat system, particularly Link’s sword techniques. Unlike previous Zelda titles, The Adventure of Link features a more nuanced, skill-based fighting style.

The manual likely illustrates and explains the various sword maneuvers, including the basic attack, jump attack, and thrust. It probably details how to effectively utilize these techniques against different enemy types, emphasizing timing and positioning.

Mastering these techniques is essential for survival, as enemies pose a considerable threat. The manual likely provides tips on blocking, dodging, and exploiting enemy weaknesses. It’s a crucial resource for players seeking to overcome the game’s challenging combat encounters and progress through the adventure.

Magic System & Spell Usage

The Zelda II instruction manual thoroughly explains Link’s magical abilities, a core component of gameplay. Unlike the first Zelda, magic in The Adventure of Link is learned and utilized through specific spells acquired throughout the quest.

The manual likely details each spell – Fire, Thunder, and Spell – outlining their effects, mana cost, and optimal usage scenarios. It probably illustrates how to execute each spell and provides strategic advice for employing them against various enemies and bosses.

Understanding the magic system is vital for success. The manual likely emphasizes the importance of managing magic power and choosing the right spell for each situation, offering a deeper understanding of this crucial aspect of the game.

Item Inventory & Management

The Zelda II instruction manual dedicates space to explaining Link’s limited, yet crucial, inventory system. Unlike later Zelda titles, The Adventure of Link features a constrained inventory, demanding strategic item selection and usage.

The manual likely details each item’s function – from the essential Candle and Shield to more specialized tools like the Recorder and Red Candle. It probably illustrates how to equip and use each item effectively, emphasizing their roles in puzzle-solving and combat.

Effective inventory management is paramount. The manual likely stresses the importance of discarding unnecessary items to make room for more vital tools, offering guidance on prioritizing items based on current objectives and challenges within the game.

Hidden Areas & Secrets

The Zelda II instruction manual, while not explicitly detailing every secret, likely hints at the game’s penchant for hidden areas and concealed pathways. The Adventure of Link is renowned for its non-linear exploration and abundance of secrets tucked away within its expansive world.

The manual probably encourages players to thoroughly investigate their surroundings, suggesting that seemingly innocuous walls or landscapes might conceal entrances to secret caves, hidden chambers, or valuable item locations. It may offer subtle clues about how to uncover these hidden areas.

Discovering these secrets is crucial for progression and obtaining powerful upgrades. The manual likely emphasizes the rewards awaiting diligent explorers, motivating players to venture off the beaten path and embrace the game’s challenging, yet rewarding, exploration mechanics.

Enemy Guide ― Common Foes

The Zelda II instruction manual likely features a section dedicated to identifying and understanding the common enemies encountered throughout Hyrule. While a comprehensive bestiary isn’t guaranteed, it probably showcases key foes players will face repeatedly during their adventure.

Expect illustrations or descriptions of creatures like Darknuts, Lynels, Stalfos, and Moblin, potentially outlining their attack patterns and vulnerabilities. The manual might offer basic strategies for defeating these enemies, such as timing sword strikes or utilizing specific magic spells effectively;

This section serves as a vital resource for new players, helping them prepare for encounters and learn the nuances of combat. It’s a foundational element for mastering the game’s challenging battle system and surviving the perils of the overworld and palaces.

Boss Strategies ⸺ Key Encounters

The Zelda II instruction manual would almost certainly dedicate space to outlining strategies for overcoming the game’s formidable boss encounters. These sections are crucial, given the game’s difficulty and unique combat system.

Expect detailed descriptions of each boss’s attack patterns, weaknesses, and the optimal methods for inflicting damage. The manual might suggest specific magic spells or sword techniques to exploit vulnerabilities, offering a roadmap to victory.

Illustrations accompanying the text would be invaluable, visually demonstrating attack phases and safe zones. This section is a lifeline for players struggling with these challenging battles, providing essential guidance to progress through the game’s narrative.

The Palace Maps & Layouts

A core component of any Zelda II instruction manual would be detailed maps of each palace. These aren’t simple overviews; Zelda II’s palaces are labyrinthine, demanding precise navigation. The manual would likely feature floor-by-floor diagrams, showcasing room connections and key item locations.

Expect visual cues indicating enemy placements, trap locations, and the paths to hidden areas. These maps would be essential for players to efficiently explore each palace, minimizing frustration and maximizing progress.

Annotations might highlight puzzle solutions or indicate which rooms require specific items or abilities to access. Such detailed cartography would be a significant aid, transforming a daunting challenge into a manageable quest.

Advanced Techniques & Glitches

Interestingly, the original Zelda II instruction manual likely wouldn’t detail advanced techniques or glitches. Nintendo, at the time, generally didn’t document unintended gameplay exploits within their manuals.

However, a modern, updated deep dive acknowledges their existence and impact on the game’s community. Zelda II is renowned for its numerous glitches, including item duplication and sequence breaks.

A contemporary analysis might include a section referencing these discoveries, perhaps with a disclaimer about their potential to disrupt the intended game experience. It could also point players towards online resources dedicated to documenting these techniques, acknowledging the community’s role in uncovering them.

Troubleshooting & Common Issues

The original manual included a basic troubleshooting section, addressing common problems players might encounter with the Nintendo Entertainment System and the game cartridge itself. This focused on ensuring proper connection, cleaning the cartridge contacts, and avoiding extreme temperatures or water damage – precautions detailed elsewhere in the manual.

Typical issues addressed would involve the game not loading, freezing during gameplay, or graphical glitches. The manual’s advice was generally limited to these hardware-related concerns, offering little assistance with in-game challenges.

An updated version might expand this section, referencing known bugs or glitches and offering workarounds discovered by the community. It could also include advice on emulator compatibility and potential issues arising from playing on modern systems.

Nintendo Entertainment System Information

The manual briefly acknowledged the Nintendo Entertainment System itself, primarily through the “Seal of Quality” prominently displayed on the inside front cover. This seal signified that the game met Nintendo’s standards for quality and compatibility with the NES console.

Beyond the seal, the manual offered minimal specific information about the NES hardware. It didn’t delve into technical specifications or detailed explanations of the console’s capabilities. The focus remained firmly on Zelda II and how to enjoy the game.

A modern update could expand this section, providing a concise overview of the NES’s history and significance. It might also include information about the console’s various revisions and accessories, appealing to collectors and retro gaming enthusiasts.

lacoste women’s size guide

Lacoste Women’s Size Guide: A Comprehensive Overview (Updated 02/07/2026)

Lacoste womenswear offers sizes AU XS (10) to XXL (38), correlating to US sizes 5-12 and UK sizes 3-10. This guide details fit and measurements.

Understanding Lacoste Women’s Size Range

Lacoste’s women’s size range is thoughtfully designed to accommodate a diverse spectrum of body shapes and sizes, ensuring a comfortable and stylish fit for every woman. Generally, the collection extends from Australian size XS (which typically equates to a size 10), progressing through standard sizes like S, M, and L, up to XXL (corresponding to a size 38).

This broad range reflects Lacoste’s commitment to inclusivity. When translating these sizes internationally, it’s important to note the conversions: the range typically aligns with US sizes 5 to 12, and UK sizes 3 to 10. However, it’s crucial to remember that sizing can sometimes vary slightly depending on the specific garment style and fabric composition. Therefore, consulting the detailed size charts provided for each item is always recommended to guarantee the perfect fit.

Lacoste prioritizes consistency, but individual preferences for fit (e.g., relaxed versus fitted) should also be considered when selecting a size.

Australian (AU) Size Equivalents

For Australian shoppers, understanding Lacoste’s sizing is straightforward. The brand utilizes a standard Australian size range, beginning with XS (size 10), followed by S (12), M (14), L (16), XL (18), and culminating in XXL (size 38). This system allows for easy identification of the corresponding size based on local measurements.

However, it’s essential to remember that sizing can sometimes differ slightly between brands. Therefore, always refer to the specific garment’s size chart on the Lacoste website or product label; This chart will provide detailed measurements for bust, waist, and hips, ensuring a precise fit.

When comparing Lacoste’s Australian sizes to international standards, remember that AU XS equates to US size 5 and UK size 3, while AU XXL corresponds to US size 12 and UK size 10. Utilizing these conversions, alongside the detailed size charts, will help you find your perfect Lacoste fit.

US Size Conversions for Lacoste Women

American shoppers will find Lacoste’s sizing generally aligns with standard US measurements, ranging from size 5 to 12. However, understanding the nuances is crucial for a perfect fit. A Lacoste size 5 typically corresponds to an Australian XS (size 10) and a UK size 3. As the sizes increase, so does the correlation.

Specifically, a size 8 in Lacoste women’s wear often suits those who typically wear a medium. Size 10 generally equates to a larger medium or a small large, depending on the garment’s cut. Always consult the individual product’s size chart for precise measurements.

Remember that a Lacoste size 12 is equivalent to an Australian XXL (size 38) and a UK size 10. Utilizing these conversions, alongside detailed bust, waist, and hip measurements provided on the Lacoste website, will ensure you select the most flattering and comfortable size.

UK Size Equivalents in Lacoste Women’s Apparel

For UK shoppers, Lacoste women’s sizing spans from a petite size 3 up to a size 10, offering a diverse range to accommodate various body shapes. A UK size 3 directly corresponds to a Lacoste AU XS (size 10) and a US size 5, making cross-referencing straightforward. Understanding these equivalencies is key to online shopping success.

A size 6 in Lacoste typically suits those who wear a small, while a size 8 often aligns with a medium. For those who usually take a large, a Lacoste size 10 is generally a good fit. However, remember that garment styles can influence the fit, so always check the specific size guide.

To ensure accuracy, compare your measurements – bust, waist, and hips – with the detailed charts available on the official Lacoste website. This will help you navigate the sizing and find your perfect Lacoste look with confidence.

Specific Garment Size Charts

Lacoste provides detailed sizing for polos, t-shirts, dresses, skirts, jeans, and trousers. Refer to these charts for accurate measurements and optimal fit guidance.

Lacoste Women’s Polo Shirts ⎯ Size Breakdown

Lacoste women’s polo shirts offer a classic fit, and understanding the size breakdown is crucial for selecting the perfect style. The size range typically includes XXS, XS, S, M, L, and XL, extending to XXL in some styles. Each size corresponds to specific chest and waist measurements, ensuring a comfortable and flattering silhouette.

For example, an XXS polo might fit a chest circumference of approximately 32-33 inches, while a size S generally accommodates a 35-36 inch chest. It’s important to consult the official Lacoste size chart, as slight variations can occur between different polo shirt designs and fabric compositions. Pay attention to the garment’s cut – classic fit, slim fit, or relaxed fit – as this will influence how the polo drapes and feels.

Consider the intended use; a more fitted polo might be preferred for athletic activities, while a relaxed fit offers greater comfort for casual wear. Always check the specific product details on the Lacoste website or retailer page for the most accurate sizing information. Remember that materials like polyamide and elastane blends can affect the stretch and overall fit of the polo shirt.

Women’s T-Shirt & Top Sizing

Lacoste women’s t-shirts and tops generally follow a similar sizing structure to their polo shirts, ranging from XXS to XXL. However, the fit can vary significantly depending on the style – from classic crewnecks to more contemporary, fitted designs. Accurate measurement is key to finding your ideal size.

A size XS typically suits a bust measurement of around 33-34 inches, while a size M often fits a 36-37 inch bust. Always refer to the official Lacoste size guide for precise measurements, as fabric composition plays a role. Cotton blends, for instance, may offer less stretch than those incorporating elastane.

Consider the intended silhouette. Relaxed-fit tees provide a looser, more comfortable feel, while slim-fit tops offer a more streamlined look. When in doubt, it’s often advisable to size up, especially if you prefer a less constricting fit. Check product descriptions for details on length and cut, and compare your measurements to the Lacoste chart before purchasing.

Dress & Skirt Size Guide

Lacoste women’s dresses and skirts require careful attention to sizing, as fit can vary greatly depending on the style – from A-line skirts to fitted sheath dresses. Sizes typically range from XXS to XXL, mirroring the brand’s standard apparel sizing. Accurate waist and hip measurements are crucial for a flattering fit.

For skirts, measure your natural waistline and hips to determine the appropriate size. A size S generally corresponds to a waist measurement of 26-27 inches and hips of 36-37 inches. Dresses require both waist and bust measurements; a size M often fits a 32-33 inch bust and a 28-29 inch waist.

Pay close attention to the dress or skirt’s length and silhouette. Consider whether you prefer a mini, midi, or maxi length, and whether the style is fitted, flared, or straight. Always consult the official Lacoste size chart and product details for specific measurements and fabric composition, as these factors influence the overall fit.

Jeans & Trouser Size Chart

Lacoste women’s jeans and trousers utilize a numerical sizing system, generally ranging from 25 to 38, corresponding to waist measurements in inches. Inseam length is also a critical factor for achieving the perfect fit, with options typically ranging from 30 to 34 inches, though variations exist.

A size 27 typically equates to a 27-inch waist, while a size 30 corresponds to a 30-inch waist. For accurate sizing, measure your natural waistline and inseam. Straight-fit jeans, like the 32W style, are constructed from 100% cotton denim and may exhibit a faded effect.

Consider the rise of the trousers – whether it’s high-waisted, mid-rise, or low-rise – as this impacts where the waistband sits on your body. Always refer to the specific product description and Lacoste’s official size chart for detailed measurements and fabric composition, ensuring a comfortable and stylish fit.

Detailed Measurements & Fit

Accurate body measurements – bust, waist, and hips – are crucial for finding your ideal Lacoste fit. Refer to specific garment charts for precise sizing guidance.

Bust Measurement Guide

Measuring your bust accurately is fundamental to achieving a flattering fit with Lacoste apparel. Begin by wearing a non-padded bra that closely resembles the support you’d wear with your typical Lacoste garments. Stand naturally with your arms relaxed at your sides.

Using a flexible measuring tape, wrap it around the fullest part of your bust, ensuring the tape is level all the way around your back and under your arms. Don’t pull the tape too tightly; it should be snug but comfortable.

Record the measurement in inches or centimeters. If your measurement falls between sizes on a Lacoste size chart, it’s generally recommended to size up for a more comfortable fit, especially with fitted styles like polo shirts or dresses. Consider that different fabrics and garment constructions may influence the fit, so always consult the specific size chart for the item you are purchasing.

For triangle-shaped bras, measure around the fullest part of your bust, and for balconette bras, measure across the fullest part of your bust, keeping the tape parallel to the floor.

Waist Measurement Guide

Accurate waist measurement is crucial for selecting the correct size in Lacoste skirts, trousers, and dresses. Begin by standing naturally with your feet shoulder-width apart and relaxing your abdominal muscles. Do not suck in your stomach during measurement.

Locate your natural waistline – this is typically the narrowest part of your torso, usually about an inch above your belly button. Wrap a flexible measuring tape around your natural waistline, ensuring the tape is level all the way around your body.

The tape should be snug but not constricting. Breathe normally while taking the measurement. Record the measurement in inches or centimeters. If your measurement falls between sizes on a Lacoste size chart, consider the garment’s style. For fitted styles, you might choose the smaller size, while for looser fits, opt for the larger size.

Remember that waistbands can vary in height, so consider this when comparing your measurement to the size chart. Always refer to the specific garment’s size guide for the most accurate fit.

Hip Measurement Guide

Precise hip measurement is essential for achieving a flattering fit with Lacoste bottoms, including skirts, trousers, and dresses. Stand with your feet together and your weight evenly distributed. Ensure your posture is relaxed and natural; avoid arching your back or tilting your hips.

Locate the fullest part of your hips and buttocks. Wrap a flexible measuring tape around this area, keeping the tape level and parallel to the floor. The tape should comfortably skim over your hips, not tightly compress them.

Breathe normally during the measurement process. Record the measurement in inches or centimeters. If your hip measurement is larger than your waist measurement, use your hip measurement to determine your size on the Lacoste size chart.

When comparing your measurement to the size chart, consider the garment’s cut and style. For fitted styles, prioritize the hip measurement, while looser styles may allow for more flexibility. Always consult the specific product’s size guide for optimal results.

Inseam Measurement (for Trousers/Jeans)

Accurate inseam measurement is crucial for selecting Lacoste trousers and jeans with the perfect length. To begin, stand straight with your feet shoulder-width apart, wearing shoes similar to those you’ll pair with the garment.

Measure from the crotch seam (where the legs meet) down the inside of your leg to where you want the trousers to end. A common finishing point is at the top of your shoe or slightly covering it.

It’s helpful to have a friend assist with this measurement to ensure accuracy. Use a flexible measuring tape and avoid pulling it too tightly. Record the measurement in inches.

Lacoste often provides inseam lengths alongside waist sizes on their size charts. Consider your preferred style – cropped, ankle-length, or full-length – when choosing an inseam. If you’re between sizes, opting for a slightly longer inseam allows for tailoring.

Materials & Size Consistency

Lacoste utilizes blends like polyamide/elastane (83/17) and polyamide/cotton (57/43). Fabric composition impacts fit; consider slight variations between materials.

Polyamide & Elastane Blend Sizing

Garments featuring a polyamide and elastane blend, such as those with an 83% polyamide and 17% elastane composition, generally exhibit a higher degree of stretch and a more form-fitting silhouette. This combination provides excellent shape retention and comfort, adapting well to body contours. When selecting a size in these items, it’s advisable to consider your body’s natural curves and choose a size that allows for comfortable movement without feeling restrictive.

Due to the inherent stretch of elastane, these pieces may feel snug initially but will mold to your body with wear. It’s often recommended to avoid sizing up excessively, as the fabric’s elasticity can compensate for minor discrepancies in measurements. However, if you prefer a looser fit or are between sizes, opting for the larger size might be preferable. Always refer to the specific garment’s size chart, as the percentage of elastane can vary, influencing the overall stretch and fit characteristics.

Cotton Blend Sizing Considerations

Lacoste women’s apparel incorporating cotton blends, like those with 57% polyamide and 43% cotton, typically offers a balance between comfort and structure. Cotton provides breathability and a soft feel against the skin, while the polyamide component enhances durability and shape retention. Sizing with these blends often aligns closely with standard measurements, but slight variations can occur depending on the specific weave and construction of the fabric.

Unlike pure cotton, cotton blends tend to resist shrinking significantly after washing, maintaining their original shape and size more effectively. When choosing a size, it’s prudent to prioritize a comfortable yet flattering fit, considering that the fabric won’t loosen considerably with wear. If you’re unsure between sizes, reviewing customer feedback or opting for the larger size can ensure a more relaxed and comfortable experience. Always consult the individual product’s size chart for the most accurate guidance.

Shopping Tips & Troubleshooting

Lacoste sizing can vary; check official charts and reviews. If facing issues, explore international conversions or contact customer support for assistance with fit.

How to Find Your Best Fit

Determining your ideal Lacoste fit begins with accurate self-measurement. Utilize a soft measuring tape and, ideally, have a friend assist for precision. Focus on bust, waist, and hip measurements, ensuring the tape is level and not too tight. Compare these figures against the official Lacoste size charts, readily available on their website.

Remember that Lacoste offers various styles, and fit can differ between polo shirts, dresses, and trousers. Consider the garment’s intended use – a relaxed fit for casual wear versus a more tailored silhouette for a polished look. Pay attention to fabric composition; blends with elastane offer more stretch and flexibility.

Read customer reviews for insights into specific items. Many shoppers share their experiences with sizing, providing valuable real-world feedback. When in doubt, size up rather than down, as alterations are generally easier than trying to expand a garment. Finally, familiarize yourself with Lacoste’s return policy for a stress-free shopping experience.

Dealing with Size Variations

Even within the Lacoste brand, slight size discrepancies can occur due to manufacturing tolerances or variations in fabric batches. It’s common to find minor differences, especially when purchasing online. If an item doesn’t fit perfectly, don’t immediately assume it’s a defect.

First, double-check the garment’s care label for washing instructions; improper care can sometimes affect fit. Compare the item’s measurements against the size chart again, ensuring your initial measurements were accurate. Consider whether the variation is significant enough to warrant a return or exchange.

Lacoste’s customer service team can often provide guidance on specific items. If alterations are necessary, a tailor can usually adjust the fit to your liking. Remember that fabrics with elastane offer some degree of give, potentially resolving minor fit issues. Always retain your proof of purchase for easy returns or exchanges.

International Size Charts & Lacoste

Lacoste utilizes a standardized sizing system, but conversions can be tricky when shopping from different regions. While Lacoste provides core size ranges – AU XS (10) to XXL (38), equating to US 5-12 and UK 3-10 – these are approximate.

European (EU) sizes often differ slightly, so referencing a comprehensive international size chart is crucial. Websites specializing in size conversions can be helpful, but always prioritize Lacoste’s official charts when available. Be mindful that sizing can also vary between garment types; a polo shirt might fit differently than a dress.

When ordering from international retailers, carefully review their return policies. It’s wise to order a size up if you’re unsure, as alterations are often easier than trying to find a larger size. Always double-check the retailer’s specific sizing information before completing your purchase.

Where to Find Official Lacoste Size Charts

Accessing Lacoste’s official size charts is paramount for accurate fitting. The most reliable source is the Lacoste website itself. Navigate to the “Womens” section, and look for a “Size Guide” link, typically found in the footer or within product descriptions. These charts detail specific measurements for various garment types, including polo shirts, t-shirts, dresses, and trousers.

Authorized Lacoste retailers, both online and in-store, should also have access to these charts. Don’t hesitate to ask a sales associate for assistance. Be cautious of third-party websites offering size charts, as these may be outdated or inaccurate.

Always prioritize the official Lacoste resources to ensure you’re using the most current and precise sizing information. Regularly checking the website is recommended, as charts can be updated periodically to reflect changes in design or manufacturing.

winter park travel guide

Discover Winter Park, Florida, offering premier dining, shopping, museums, and golf! Explore attractions like the Morse Museum and enjoy outdoor activities․

Overview of Winter Park, Florida

Winter Park, Florida, is a charming city known for its upscale ambiance and beautiful landscapes․ Nestled near Orlando, it offers a refined escape with a vibrant cultural scene․ Park Avenue serves as the heart of the city, boasting premier dining and boutique shopping experiences․ The area is rich in arts and culture, highlighted by institutions like the Charles Hosmer Morse Museum of American Art․

Outdoor enthusiasts will appreciate the Winter Park Chain of Lakes, perfect for boating and watersports․ With well-maintained parks and playgrounds, it’s ideal for families․ The Mills 50 District adds an eclectic touch, while Leu Gardens provides a serene botanical experience․

Getting to Winter Park

Reaching Winter Park is convenient via several routes․ The closest major airport is Orlando International Airport (MCO), approximately a 20-minute drive․ From MCO, options include rental cars, taxis, and ride-sharing services․ Alternatively, you can utilize the SunRail commuter train, with a station conveniently located in Winter Park․

Driving is also a viable option, with easy access from major highways like I-4․ Once in the area, navigating Winter Park is straightforward, with well-maintained roads and clear signage․ Consider traffic during peak hours, especially around Park Avenue․

Accommodation Options

Winter Park presents a diverse range of lodging choices to suit every preference and budget․ From luxurious hotels offering top-tier amenities to charming boutique inns providing a more intimate experience, visitors are spoiled for choice․ Several well-regarded luxury hotels boast elegant rooms, fine dining, and spa services․

For those seeking a unique stay, numerous boutique hotels and cozy inns offer personalized service and local charm․ Consider options near Park Avenue for easy access to shopping and dining․ Booking in advance is recommended, especially during peak season and events․

Luxury Hotels

Winter Park’s luxury hotels epitomize elegance and provide an exceptional guest experience․ These establishments frequently feature beautifully appointed rooms, often with upscale décor and premium bedding․ Guests can anticipate amenities like gourmet restaurants serving exquisite cuisine, rejuvenating spa services, and sparkling swimming pools․

Concierge services are readily available to assist with planning excursions and securing reservations․ Expect impeccable service and attention to detail, ensuring a truly memorable stay․ These hotels often host events and offer convenient access to Park Avenue’s attractions․

Boutique Hotels & Inns

Winter Park boasts charming boutique hotels and cozy inns, offering a more intimate and personalized lodging experience․ These establishments often showcase unique architectural styles and individually decorated rooms, reflecting local character․ Expect a warm and welcoming atmosphere with attentive service from dedicated staff․

Many provide complimentary breakfast and convenient access to Park Avenue’s shops and restaurants․ Boutique hotels and inns are ideal for travelers seeking a quieter, more authentic experience, away from larger resorts․ They often represent excellent value and a memorable stay․

Park Avenue: Shopping & Dining

Park Avenue is the heart of Winter Park, renowned for its sophisticated shopping and diverse culinary scene․ Stroll along this tree-lined street and discover upscale boutiques, art galleries, and specialty shops offering unique finds․ From designer clothing to handcrafted jewelry, there’s something for every taste․

Dining options range from casual cafes to award-winning restaurants, serving international cuisine and local favorites․ Enjoy outdoor seating and people-watching while savoring delicious meals․ Park Avenue provides a vibrant atmosphere for a memorable day or evening․

Upscale Boutiques

Park Avenue boasts a curated collection of upscale boutiques, offering a refined shopping experience․ Discover designer clothing, stylish accessories, and unique gifts from both established brands and local artisans․ These boutiques prioritize personalized service and cater to discerning tastes․

Explore shops specializing in women’s fashion, men’s apparel, home décor, and fine jewelry․ Many boutiques feature exclusive collections and limited-edition items, ensuring a one-of-a-kind find․ The elegant atmosphere and attentive staff create a truly enjoyable shopping destination․

Fine Dining Restaurants

Park Avenue is renowned for its exceptional fine dining restaurants, offering diverse culinary experiences․ From classic American cuisine to international flavors, there’s something to satisfy every palate․ Expect impeccable service, elegant ambiance, and expertly crafted menus․

Many restaurants feature award-winning chefs and locally sourced ingredients, ensuring a fresh and flavorful meal․ Enjoy sophisticated wine lists and handcrafted cocktails to complement your dining experience․ Reservations are highly recommended, especially during peak season, to secure a table at these popular establishments․

Attractions & Museums

Winter Park boasts a vibrant cultural scene, anchored by world-class attractions and museums․ The Charles Hosmer Morse Museum of American Art houses the most comprehensive collection of Louis Comfort Tiffany’s work, a truly breathtaking experience․

Art enthusiasts will also appreciate the Albin Polasek Museum & Sculpture Gardens, showcasing the works of a renowned Czech-American sculptor amidst beautiful landscapes․ Beyond these gems, explore local galleries and cultural centers, offering a diverse range of artistic expressions and enriching experiences for visitors․

The Charles Hosmer Morse Museum of American Art

Immerse yourself in the stunning world of Louis Comfort Tiffany at the Morse Museum․ This internationally renowned museum features the most comprehensive collection of his artistry, including breathtaking lamps, glasswork, jewelry, and architectural masterpieces․

Explore Tiffany’s entire creative process, from initial sketches to finished works, gaining insight into his innovative techniques and artistic vision․ The museum’s serene atmosphere and exquisite displays offer a captivating experience for art lovers of all ages, making it a must-visit destination․

Albin Polasek Museum & Sculpture Gardens

Discover the captivating legacy of Czech-American sculptor Albin Polasek at his former winter home and studio․ This unique museum showcases a remarkable collection of his figurative sculptures, alongside paintings and drawings, offering a glimpse into his artistic journey․

Wander through the beautifully landscaped sculpture gardens, where Polasek’s works are harmoniously integrated with the natural surroundings․ The tranquil setting provides a serene escape and a chance to appreciate the beauty of art and nature․ It’s a truly inspiring and memorable experience․

Outdoor Activities

Embrace the Florida sunshine with Winter Park’s diverse outdoor offerings! The Winter Park Chain of Lakes provides opportunities for cycling, walking, paddling, and boating – perfect for all ages and skill levels․ Explore scenic parks and playgrounds, ideal for families seeking recreation․

Enjoy leisurely strolls along the lakefront, rent a kayak or paddleboard for an aquatic adventure, or simply relax and soak up the beautiful scenery․ These accessible activities ensure a refreshing experience, connecting visitors with the natural beauty of Central Florida․

Winter Park Chain of Lakes

Discover a stunning network of interconnected lakes – the heart of Winter Park’s outdoor allure! These pristine waters offer a haven for boating, kayaking, paddleboarding, and scenic lakefront walks․ Enjoy picturesque views and abundant wildlife as you explore this natural gem․

Several parks border the chain, providing convenient access and recreational opportunities․ Whether you prefer a relaxing boat tour or an active paddling session, the Winter Park Chain of Lakes promises a memorable experience, showcasing Florida’s natural beauty and tranquil atmosphere․

Parks & Playgrounds

Explore Winter Park’s beautifully maintained parks and playgrounds, perfect for families and outdoor enthusiasts! These green spaces offer a variety of amenities, including picnic areas, walking trails, and engaging play structures for children of all ages․ Enjoy a relaxing afternoon amidst lush landscapes and fresh air․

These parks provide a welcoming environment for recreation and community gatherings․ From leisurely strolls to energetic playtime, Winter Park’s parks and playgrounds cater to diverse interests, ensuring a delightful experience for visitors and residents alike․

Events & Festivals

Experience the vibrant cultural scene of Winter Park through its diverse events and festivals! The city hosts numerous annual art festivals, showcasing local and national talent․ These events feature captivating displays, live performances, and interactive experiences for all ages․

Throughout the year, seasonal events add to the city’s charm, offering unique celebrations and entertainment․ From holiday festivities to community gatherings, there’s always something exciting happening in Winter Park․ Check the local event calendar for the latest happenings during your visit!

Annual Art Festivals

Immerse yourself in creativity at Winter Park’s celebrated annual art festivals! These events transform the city into a vibrant showcase of artistic expression, attracting both renowned artists and enthusiastic art lovers․ Discover a diverse range of mediums, including painting, sculpture, photography, and jewelry․

Enjoy live music, culinary delights, and interactive demonstrations while browsing the stunning artwork․ These festivals provide a unique opportunity to connect with artists and acquire one-of-a-kind pieces․ Don’t miss these culturally enriching experiences during your visit!

Seasonal Events

Experience the magic of Winter Park year-round with its diverse seasonal events! From festive holiday celebrations to lively summer concerts, there’s always something happening․ Enjoy enchanting tree lighting ceremonies, dazzling parades, and heartwarming community gatherings during the winter months․

As the weather warms, indulge in outdoor movie nights, farmers markets brimming with fresh produce, and vibrant street festivals․ These events offer a glimpse into the local culture and provide memorable experiences for visitors of all ages․ Check the local event calendar for details!

Mills 50 District Exploration

Venture into the eclectic Mills 50 District, a vibrant hub brimming with artistic flair and culinary delights! Discover unique boutiques, vintage shops, and art galleries showcasing local talent․ Savor a delicious lunch at Pigzza, known for its innovative pizza creations, or explore diverse dining options․

Immerse yourself in the district’s colorful murals and street art, reflecting its creative spirit․ Enjoy a leisurely stroll and soak up the lively atmosphere․ Mills 50 offers a refreshing contrast to Winter Park’s upscale ambiance, providing a truly authentic experience․

Leu Gardens

Escape to the serene beauty of Harry P․ Leu Gardens, a 50-acre botanical oasis! Wander through themed gardens, including a rose garden, herb garden, and tropical stream garden, showcasing diverse plant collections․ Explore the historic Leu House Museum, offering a glimpse into the past․

Enjoy a peaceful stroll amidst lush landscapes and vibrant floral displays․ Leu Gardens hosts various events throughout the year, including concerts and art festivals․ It’s a perfect destination for nature lovers and those seeking tranquility, providing a refreshing break from the city’s bustle․

Golfing in Winter Park

Winter Park boasts exceptional golfing opportunities for enthusiasts of all skill levels! Several prestigious golf courses offer challenging layouts and meticulously maintained greens․ Enjoy a round amidst scenic landscapes and a relaxed atmosphere․ The area provides access to both public and private courses, catering to diverse preferences․

Perfect your swing and enjoy a day on the links, taking advantage of Florida’s beautiful weather․ Many courses offer lessons and pro shops, enhancing your golfing experience․ It’s a fantastic way to unwind and enjoy the outdoors, combining recreation with natural beauty․

Farmers Market

Experience the vibrant Winter Park Farmers’ Market, a beloved community tradition held every Saturday! Discover a delightful array of fresh, locally-sourced produce, artisanal foods, and unique crafts․ It’s a fantastic opportunity to support local farmers and businesses while enjoying a lively atmosphere․

Browse through colorful displays of seasonal fruits and vegetables, sample delicious baked goods, and find one-of-a-kind gifts․ The market offers a true taste of Florida’s agricultural bounty and local talent․ Enjoy live music and a friendly community vibe – a perfect weekend outing!

Day Trips from Winter Park

Expand your Florida adventure with exciting day trips from Winter Park! A short drive takes you to Orlando’s world-famous attractions, including theme parks like Disney World and Universal Studios․ For a relaxing escape, head to Florida’s beautiful beaches – Cocoa Beach and Daytona Beach are easily accessible․

Explore Kennedy Space Center for a fascinating glimpse into space exploration, or venture to charming nearby towns for a taste of local culture․ Whether you crave thrills, relaxation, or discovery, day trips from Winter Park offer something for everyone!

Orlando Attractions

Journey to Orlando, a world of thrilling entertainment just a short drive from Winter Park! Discover the magic of Walt Disney World, with its iconic parks like Magic Kingdom and Epcot․ Experience the excitement of Universal Studios, home to immersive worlds like The Wizarding World of Harry Potter․

Explore SeaWorld Orlando, offering marine life encounters and exhilarating rides․ Don’t miss the opportunity to visit LEGOLAND Florida, perfect for families with younger children․ Orlando’s attractions provide unforgettable experiences for all ages!

Beaches

Escape to Florida’s stunning coastline, easily accessible from Winter Park! Cocoa Beach, a mere hour’s drive, offers classic surf culture and wide sandy shores․ New Smyrna Beach boasts a vibrant arts scene and excellent waves for experienced surfers․

Daytona Beach provides a lively atmosphere with its famous boardwalk and auto racing history․ For a more secluded experience, explore Clearwater Beach, renowned for its soft white sand and calm waters․ Enjoy sunbathing, swimming, and watersports along Florida’s beautiful beaches!

Transportation within Winter Park

Navigating Winter Park is convenient with several options! Walking is ideal for exploring Park Avenue’s shops and restaurants․ The LYNX bus system provides affordable public transportation throughout the city and connects to Orlando․ Ride-sharing services like Uber and Lyft are readily available for quick trips․

Consider renting a bicycle to enjoy the scenic Chain of Lakes area․ Limited parking is available downtown, especially during peak hours, so plan accordingly․ SunRail, a commuter rail line, offers service to downtown Orlando and beyond, providing an alternative to driving․

Tips for Visiting

Plan your visit to Winter Park, especially during popular events, as accommodations fill quickly! Comfortable shoes are essential for exploring Park Avenue and the gardens․ Check the schedules for museums and attractions beforehand to maximize your time․ Consider visiting during the shoulder seasons (spring or fall) for pleasant weather and fewer crowds․

Stay hydrated, especially during outdoor activities․ Parking can be challenging, so utilize ride-sharing or public transportation when possible․ Don’t forget your camera to capture the beauty of the area!

cuisinart frozen yogurt ice cream maker instructions

Cuisinart Frozen Yogurt, Ice Cream & Sorbet Maker: A Comprehensive Guide

This guide details using your Cuisinart machine for delicious frozen treats․ It includes instructions, recipes, and troubleshooting, ensuring perfect results in under 30 minutes․

Included is a recipe booklet for inspiration, covering yogurt, ice cream, and sorbet․ Firmness can be improved with 2 hours of freezer storage․

Understanding Your Cuisinart Machine

Your Cuisinart machine is designed for effortless creation of frozen desserts – yogurt, ice cream, and sorbet․ It operates by freezing the bowl beforehand and then churning your mixture into a delightful treat․ The double-insulated freezer bowl is key; it maintains a consistently cold temperature without needing ice․

Automatic operation simplifies the process: add ingredients, turn it on, and enjoy! The large ingredient spout allows for easy addition of mix-ins during churning․ Familiarize yourself with the components and the included instruction/recipe booklet․ Proper understanding ensures optimal performance and delicious results every time․ Remember to consult the manual for specific model details․

Model Variations & Compatibility

Cuisinart offers several frozen dessert maker models, including the ICE-30BCP1 and the classic ICE-25 series․ While core functionality remains consistent – freezing and churning – slight variations exist in features and capacity․ Compatibility primarily concerns the freezer bowl; ensure it’s fully frozen before each use, regardless of the model․

Recipe booklets often differ between models, offering tailored suggestions․ Accessories may also vary․ The ICE-25 series instruction manual is readily available online․ Generally, recipes are interchangeable, but adjust churning times based on your specific machine and desired consistency․ Always refer to your model’s manual for precise guidance․

Key Components Overview

Your Cuisinart machine comprises several essential parts․ The double-insulated freezer bowl is crucial, requiring complete freezing before operation․ A motor base houses the churning mechanism․ The mixing bowl lid with the ingredient spout allows for easy addition of mix-ins during churning․

A dasher, or paddle, mixes the ingredients․ Understanding each component’s function is vital for proper assembly and operation․ The ingredient spout prevents large additions from stopping the churning process․ Refer to your manual for a detailed diagram identifying each part and its correct placement for optimal performance․

Before First Use: Preparation

Prior to initial use, thoroughly wash the freezer bowl, lid, dasher, and ingredient spout with warm, soapy water․ Ensure all components are completely dry before assembly․ The freezer bowl requires a minimum of 16-24 hours of freezing – a critical step for successful frozen dessert creation․

Place the bowl in the coldest part of your freezer, avoiding frequent door openings․ Confirm it’s fully frozen by shaking; no liquid sloshing should be audible․ Familiarize yourself with the machine’s parts and the instruction manual to ensure a smooth first experience․

Getting Started: Basic Instructions

Begin by ensuring the bowl is fully frozen․ Add your prepared base through the ingredient spout while the machine is running․ Enjoy fresh desserts!

Freezing the Bowl: Essential Step

Achieving the correct frozen bowl temperature is absolutely crucial for successful frozen dessert creation․ The bowl must be thoroughly frozen for a minimum of 16-24 hours before initial use, and after each subsequent use․ Ensure it’s placed in the freezer flat, without anything on top of it, to allow for even freezing․

A properly frozen bowl will feel very cold to the touch and have a frosted appearance․ If the bowl isn’t adequately frozen, the mixture won’t solidify, resulting in a soupy consistency․ Don’t attempt to operate the machine if the bowl isn’t completely frozen; it won’t work effectively and could potentially damage the unit․

For consistent results, dedicate a specific space in your freezer solely for the bowl․ This prevents accidental obstruction and ensures it remains consistently cold and ready for your next frozen treat adventure!

Ingredient Spout Functionality

The large ingredient spout on your Cuisinart machine is designed for convenient addition of mix-ins during the churning process․ This feature allows you to incorporate chocolate chips, nuts, fruit pieces, or other desired flavors without interrupting the freezing cycle․

To utilize the spout, simply turn on the machine and slowly pour your mix-ins through the opening while the mixture is churning․ Avoid adding too much at once, as this could overwhelm the machine and affect the final texture․ A steady stream is recommended for optimal distribution․

Remember to only add mix-ins during the last few minutes of churning to prevent them from becoming overly frozen or crushed․ This ensures a delightful texture in every bite!

Assembling the Machine Correctly

Proper assembly is crucial for optimal performance of your Cuisinart frozen dessert maker; First, ensure the freezer bowl is thoroughly frozen – typically at least 24 hours․ Next, place the dasher assembly into the bowl, aligning the motor shaft with the opening․

Securely attach the outer bowl and lid to the dasher assembly, ensuring a snug fit․ The lid should lock into place, creating a sealed environment for churning․ Double-check that all components are correctly aligned before plugging in the machine․

Incorrect assembly can lead to leakage, uneven freezing, or even damage to the unit․ Refer to your instruction manual for detailed diagrams and guidance․

Making Frozen Yogurt: Step-by-Step

Prepare your yogurt base, then pour it into the frozen bowl․ Turn on the machine and add mix-ins via the ingredient spout for delicious results!

Yogurt Base Recipes: Options

Creating the perfect yogurt base is crucial for exceptional frozen yogurt․ Begin with a simple blend of yogurt – Greek yogurt yields a thicker consistency – and a sweetener like honey or sugar․ Experiment with different yogurt fat contents to adjust the final texture․

For a richer base, incorporate cream or milk․ Fruit purees, such as mango (using fresh, ripe mangoes for optimal flavor), can be blended directly into the base․ Consider adding a touch of vanilla extract or lemon juice to enhance the overall taste profile․

Alternatively, explore recipes utilizing yogurt combined with condensed milk for a sweeter, creamier outcome․ Remember to chill the base thoroughly before churning in your Cuisinart machine for best results․

Adding Flavors & Mix-Ins

The large ingredient spout on your Cuisinart machine simplifies adding flavors and mix-ins during the churning process․ For best results, add these during the last few minutes of churning, preventing them from becoming overly crushed․

Popular mix-ins include chocolate chips, chopped nuts, fruit pieces, cookies, or even swirls of jam or caramel․ Liquid flavors, like extracts or sauces, can be added directly to the base before churning․

Be mindful of quantity; excessive mix-ins can hinder the freezing process․ A general guideline is to use no more than one cup of mix-ins per quart of base․ Experiment to discover your favorite combinations!

Churning Time & Consistency

Churning typically takes between 20 to 30 minutes, but this can vary depending on the recipe, ambient temperature, and the machine’s starting conditions․ Monitor the mixture’s consistency; it should resemble soft-serve ice cream․

If a firmer consistency is desired, transfer the frozen dessert to an airtight container and place it in the freezer for approximately 2 hours․ This allows it to harden further․

Remove from the freezer about 15 minutes before serving for easier scooping․ Note that homemade frozen desserts may not achieve the exact same hardness as commercially produced varieties․

Making Ice Cream: A Detailed Process

Simply add your ice cream base to the frozen bowl, turn the machine on, and enjoy freshly made ice cream in under 30 minutes!

Classic Ice Cream Recipes

Explore delightful classic ice cream recipes perfectly suited for your Cuisinart machine․ Begin with a simple vanilla base: combine 2 cups heavy cream, ¾ cup sugar, and 1 teaspoon vanilla extract․ For chocolate, add ½ cup cocoa powder to the base․

Remember to chill the base thoroughly before churning – at least 2 hours is recommended for optimal texture․ The machine’s ingredient spout allows for adding mix-ins like chocolate chips, nuts, or fruit during the final minutes of churning․

If a firmer consistency is desired, transfer the freshly churned ice cream to an airtight container and freeze for approximately 2 hours before serving․ This enhances the overall texture and enjoyment!

Achieving the Perfect Texture

Optimal texture relies on a fully frozen bowl and a well-chilled base․ Ensure the bowl is frozen for at least 24 hours before use․ The base mixture should be refrigerated for a minimum of 2 hours, ideally longer, to maximize smoothness․

Churning time varies, but generally 20-30 minutes yields a soft-serve consistency․ For a firmer texture, transfer the mixture to a freezer-safe container and freeze for an additional 2 hours․

Avoid overfilling the bowl; leave ample space for expansion during churning․ Consistent monitoring and adjusting churning time are key to achieving your desired ice cream texture․

Dealing with Soft Serve Consistency

Soft serve consistency is typical immediately after churning․ This is perfectly normal and often preferred for immediate enjoyment! However, if a firmer texture is desired, a simple solution exists․

Transfer the freshly churned mixture to an airtight container․ Place this container into your freezer for approximately 2 hours․ This “hardening” process will significantly improve the scoopability and overall firmness of your frozen dessert․

Remember to remove the container about 15 minutes before serving to allow for easier scooping․ Enjoy your perfectly textured homemade treat!

Making Sorbet: Refreshing & Fruity

Sorbet base preparation is key! Use fresh, ripe fruit for optimal flavor․ Adjust sweetness to your preference for a truly refreshing, homemade sorbet experience․

Sorbet Base Preparation

Creating a flavorful sorbet base begins with a simple syrup․ Combine equal parts sugar and water in a saucepan, heating until the sugar dissolves completely․ Allow this mixture to cool fully before proceeding – this is crucial for optimal freezing․

Next, incorporate your chosen fruit․ Pureeing the fruit ensures a smooth texture, eliminating any icy crystals․ The quantity of fruit will influence the sorbet’s intensity; experiment to find your ideal balance․

For a brighter flavor, add a touch of citrus juice, like lemon or lime․ This also helps prevent crystallization․ Remember to strain the mixture before churning to remove any seeds or pulp, resulting in a refined sorbet texture․

Fruit Selection for Optimal Flavor

Choosing ripe, high-quality fruit is paramount for exceptional sorbet․ The flavor intensity directly correlates with the fruit’s ripeness; underripe fruit will yield a bland result․ Mangoes, for example, should be fragrant and slightly soft to the touch for the best frozen yogurt․

Consider seasonal fruits at their peak for maximum flavor․ Berries, peaches, and plums are excellent choices during their respective seasons․ Frozen fruit can be used as a convenient alternative, though fresh fruit generally provides a superior taste․

Experiment with combinations! Pairing complementary fruits can create complex and delightful sorbet flavors․ Don’t be afraid to try unique blends to discover your personal favorites․

Adjusting Sweetness Levels

Sweetness is crucial in sorbet, as freezing dulls the perception of sugar․ Start with the recipe’s suggested amount, but taste the base before churning․ Adjust gradually, adding small increments of sugar or sweetener until the desired level is reached․

Consider the natural sweetness of the fruit; riper fruits require less added sugar․ For tart fruits like raspberries, you may need to increase the sugar slightly․ Liquid sweeteners like simple syrup dissolve more easily than granulated sugar․

Remember, you can always add more sweetness, but it’s difficult to remove it․ Taste frequently throughout the process to achieve the perfect balance․

Troubleshooting Common Issues

If the machine doesn’t start, check the power connection․ For soft mixtures, freeze for 2 hours․ Crystals form if the dessert isn’t stored airtight․

Machine Not Turning On

First, ensure the machine is properly plugged into a functioning electrical outlet․ Verify the outlet is delivering power by testing it with another device․ Next, double-check that the freezer bowl is securely locked into place; the machine won’t operate if it doesn’t detect proper assembly․

Confirm the unit’s on/off switch is fully engaged․ Sometimes, a simple reset can resolve the issue – unplug the machine for a few minutes, then plug it back in and try again․ If problems persist, inspect the power cord for any visible damage․ Do not attempt to repair the cord yourself; contact customer support for assistance․

Frozen Mixture Too Soft

If your frozen dessert lacks desired firmness, transfer it immediately to an airtight container․ Place this container in the freezer for approximately two hours to allow for further hardening․ This step is crucial, especially for achieving a scoopable consistency․

Ensure the freezer bowl was thoroughly frozen for the recommended duration – at least 24 hours – before use․ Insufficient freezing of the bowl is a common cause of soft mixtures․ Consider the recipe; some formulations naturally yield softer results․ Adjusting ingredients or adding stabilizers can improve texture․

Crystals Forming in Frozen Dessert

Ice crystal formation often indicates slow freezing or temperature fluctuations․ Ensure your freezer bowl is completely frozen – a minimum of 24 hours is vital․ Rapid freezing is key to minimizing crystal size․ Using high-fat content ingredients in your base can also help, as fat interferes with crystal development․

Proper storage is crucial; transfer the finished dessert to an airtight container immediately․ Avoid repeatedly thawing and refreezing, as this encourages larger crystals to form․ Consider adding a small amount of corn syrup or glucose to the base; these act as natural anti-crystallizing agents․

Cleaning & Maintenance

Disassemble components after each use for thorough cleaning․ Hand washing is recommended, though some parts are dishwasher safe․ Proper storage prevents damage․

Disassembling for Cleaning

Before cleaning, always unplug your Cuisinart frozen dessert maker․ Carefully remove the freezer bowl from the unit․ Detach the mixing arm – it typically pulls straight up and off․ Next, remove the dasher (the paddle inside the mixing arm)․ The lid and ingredient spout are also easily removable for separate washing․

Ensure all parts are fully detached before proceeding․ Inspect each component for any remaining frozen dessert․ A quick rinse with warm water can help loosen stubborn residue․ Remember to handle the freezer bowl with care, as sudden temperature changes could cause damage․ Proper disassembly simplifies the cleaning process and ensures longevity of your machine․

Hand Washing vs․ Dishwasher

Most Cuisinart frozen dessert maker parts are dishwasher-safe, offering convenience․ However, hand washing is often recommended to preserve the quality and appearance of the components․ The freezer bowl, being aluminum, should never be washed in a dishwasher, as it can lose its freezing properties․

For dishwasher use, place parts on the top rack․ When hand washing, use warm, soapy water and a soft sponge․ Avoid abrasive cleaners that could scratch surfaces․ Thoroughly rinse and dry all parts before reassembling․ Prioritizing gentle cleaning extends the lifespan of your machine and maintains optimal performance․

Proper Storage Techniques

To ensure longevity, store your Cuisinart machine properly․ Always completely dry all components before storage․ The freezer bowl requires special attention; it should be stored in the freezer to maintain its chilling capability, ready for the next use․ Avoid storing it at room temperature․

The motor unit and other parts can be stored in a cool, dry place, away from direct sunlight․ Keep the instruction booklet handy for future reference․ Proper storage prevents damage and ensures your machine is always ready to create delicious frozen desserts․ Regular checks for cleanliness are also advised․

Recipes & Inspiration

Explore delightful recipes like Mango Frozen Yogurt, Chocolate Ice Cream, and Strawberry Sorbet! Utilize fresh, ripe ingredients for optimal flavor and texture in every batch․

Mango Frozen Yogurt Recipe

To create a vibrant Mango Frozen Yogurt, begin with 2 cups of peeled, chopped fresh mangoes – ensure they are ripe for the best flavor․ Combine the mango with 1 cup of plain yogurt, ½ cup of sugar (adjust to taste), and 2 tablespoons of lemon juice in a blender․

Blend until completely smooth․ Pour the mixture into your pre-frozen Cuisinart freezer bowl․ Churn for approximately 20-25 minutes, or until it reaches a soft-serve consistency․ For a firmer texture, transfer to an airtight container and freeze for an additional 2 hours․ Remove from the freezer 15 minutes before serving for easier scooping!

Enjoy this refreshing and healthy treat!

Chocolate Ice Cream Recipe

For a classic Chocolate Ice Cream, combine 2 cups of heavy cream, ¾ cup of whole milk, ¾ cup of granulated sugar, and ¼ cup of unsweetened cocoa powder in a saucepan․ Heat gently, stirring until the sugar dissolves and the cocoa is fully incorporated․ Do not boil!

Remove from heat and stir in 1 teaspoon of vanilla extract․ Chill the mixture thoroughly – at least 4 hours, or preferably overnight․ Pour into your pre-frozen Cuisinart freezer bowl and churn for 20-25 minutes․ For a firmer consistency, freeze for an additional 2 hours․ Enjoy this decadent treat!

Strawberry Sorbet Recipe

To create a refreshing Strawberry Sorbet, begin with 2 pounds of fresh, ripe strawberries – quality matters! Combine the strawberries with ¾ cup of granulated sugar and ¼ cup of water in a blender․ Blend until completely smooth․ For a smoother texture, strain the mixture through a fine-mesh sieve to remove seeds․

Chill the strawberry puree thoroughly – at least 2 hours․ Pour into your pre-frozen Cuisinart freezer bowl and churn for 20-25 minutes․ Adjust sweetness to your preference․ Serve immediately for a soft sorbet, or freeze for a firmer consistency․

Advanced Techniques & Tips

Experiment with layering mix-ins during churning for varied textures․ Adjust recipes for dietary needs, and consider additives to enhance consistency and flavor profiles․

Layering Flavors & Mix-Ins

Achieving a dynamic dessert experience with your Cuisinart maker involves strategic layering․ During the final minutes of churning, slowly add mix-ins like chocolate chips, fruit pieces, or nuts through the ingredient spout․ This prevents them from sinking to the bottom․

For a ripple effect, drizzle melted chocolate or fruit purees down the sides of the bowl as it churns․ Alternating layers of different flavored bases—vanilla then strawberry, for example—creates a visually appealing and flavorful treat․ Remember to avoid overfilling, allowing space for proper mixing․ Experiment with textures, combining crunchy elements with smooth bases for a delightful contrast․

Adjusting Recipes for Dietary Needs

Adapting recipes for dietary restrictions is easily achievable with your Cuisinart machine․ For dairy-free options, substitute coconut milk or almond milk for traditional dairy․ Ensure the chosen alternative has a sufficient fat content for optimal texture․

To create sugar-free desserts, utilize natural sweeteners like stevia or erythritol, adjusting quantities to taste․ Vegan recipes require plant-based alternatives for all dairy components․ Experiment with fruit purees to enhance sweetness and flavor․ Always consider how substitutions might affect the freezing process and adjust churning time accordingly for desired consistency․

Improving Consistency with Additives

Achieving the perfect frozen dessert texture often benefits from strategic additives․ Gelatin or cornstarch, used in small amounts, can prevent ice crystal formation, resulting in a smoother consistency․ For richer ice cream, add a tablespoon of vodka – it inhibits complete freezing, creating a softer serve․

Guar gum or xanthan gum, also in minimal quantities, act as stabilizers, enhancing creaminess․ Consider adding a touch of glucose syrup to prevent crystallization and maintain a scoopable texture․ Remember to thoroughly blend additives into the base before churning for even distribution and optimal results․

Safety Precautions

Always unplug the machine before cleaning․ Ensure proper electrical safety and avoid component misuse․ Never operate a damaged machine, preventing potential hazards․

Electrical Safety Guidelines

Prioritize safety when operating your Cuisinart frozen dessert maker․ Always ensure the machine is plugged into a grounded electrical outlet, matching the voltage specified on the appliance․ Never immerse the motor base in water or any other liquid, as this presents a severe shock hazard․

Inspect the power cord regularly for any signs of damage․ If the cord is damaged, it must be replaced by the manufacturer, its service agent, or similarly qualified persons to avoid danger․ Do not operate the appliance with a damaged cord or plug․ Avoid using extension cords; if necessary, use a heavy-duty extension cord appropriately rated for the appliance’s power consumption․

Unplug the machine from the outlet when not in use, before cleaning, and during assembly or disassembly․ Never pull the cord to disconnect the appliance; grasp the plug instead․

Proper Usage of Components

Correct assembly is crucial for optimal performance․ Ensure the freezer bowl is thoroughly frozen – typically 24 hours – before use․ Carefully attach the bowl to the motor base, aligning it securely․ The ingredient spout facilitates adding mix-ins during churning; avoid overfilling․

The mixing blade must be properly inserted into the freezer bowl before operation․ Do not operate the machine without the blade in place․ Follow recipe instructions regarding ingredient quantities and chilling times․ Avoid using metal utensils inside the bowl, as they can damage the non-stick surface․

Always allow the machine to come to a complete stop before disassembling․ Handle components with care to prevent damage․

Avoiding Damage to the Machine

Never immerse the motor base in water or any other liquid․ Always unplug the machine before cleaning or disassembling․ Do not operate the machine continuously for extended periods; allow it to rest to prevent overheating․ Avoid forcing components together during assembly․

Ensure the freezer bowl is completely frozen before each use; a partially frozen bowl can strain the motor․ Do not use metal utensils inside the bowl, as they can scratch and damage the non-stick coating․ Avoid dropping or impacting the freezer bowl, as it is fragile․

Proper storage is key; protect the machine from extreme temperatures and humidity․

semiconductor manufacturing process pdf

Semiconductor manufacturing is a complex process, separated into front-end and back-end processes, evolving with technology. It transforms sand into functional chips, demanding precision and quality control.

Overview of the Process

The semiconductor manufacturing process is a remarkably intricate series of steps, from the initial purification of sand to the final packaging of chips. This journey is broadly divided into front-end (FEOL) and back-end (BEOL) manufacturing. FEOL focuses on creating the transistors and active devices on the silicon wafer, utilizing processes like oxidation, photolithography, etching, and ion implantation, alongside deposition techniques such as CVD and PVD.

BEOL then builds upon this foundation, establishing the electrical connections between these devices. This involves metallization, interconnect fabrication, and planarization through Chemical Mechanical Polishing (CMP). Following BEOL, the wafers undergo testing, are diced into individual dies, and encapsulated for protection. Finally, bonding techniques like wire bonding or flip chip are employed to connect the chip to its packaging. Throughout, rigorous testing and data analysis provide feedback to refine manufacturing and assembly, ensuring product quality and reliability.

Importance of Semiconductor Manufacturing

Semiconductor manufacturing is fundamentally critical to modern technology, underpinning nearly every electronic device we use daily. The business of producing semiconductor chips is a complex process, yet its output drives innovation across countless industries – from computing and telecommunications to healthcare and automotive. Without advancements in chip fabrication, progress in these fields would be severely limited.

The ability to create increasingly smaller, faster, and more energy-efficient chips directly impacts the performance and capabilities of electronic systems. Furthermore, robust manufacturing processes are essential for ensuring the reliability and longevity of these devices. Companies like Samsung emphasize data collection and analysis during testing to continually improve product quality. The entire global economy relies on a stable and advanced semiconductor supply chain, making its continued development and optimization paramount for a better future.

Historical Development of Semiconductor Fabrication

The journey of semiconductor fabrication began with the discovery of the transistor in 1947, revolutionizing electronics and paving the way for miniaturization. Early fabrication techniques were rudimentary, relying on manual assembly and discrete components. The late 1950s and 60s saw the development of planar technology, enabling the creation of integrated circuits – multiple transistors on a single chip.

Subsequent decades witnessed exponential advancements driven by Moore’s Law, leading to increasingly complex and densely packed circuits. Photolithography, a key process, evolved significantly, allowing for finer feature sizes. From the initial purification of sand to the final packaging of chips, each step became more refined. Today’s fabrication facilities are incredibly sophisticated, employing advanced techniques like CVD and PVD. This historical progression demonstrates a relentless pursuit of innovation, continually pushing the boundaries of what’s possible in microelectronics.

Front-End Manufacturing (FEOL)

Front-end manufacturing focuses on creating active devices on the wafer, utilizing processes like oxidation, photolithography, etching, and ion implantation to build transistors.

Wafer Fabrication ⏤ From Sand to Silicon

The journey begins with incredibly pure sand, the source material for silicon. This isn’t just any sand; it requires extensive purification to achieve the necessary levels of crystalline perfection. The silicon is then melted and formed into cylindrical ingots, often using the Czochralski process. These ingots are subsequently sliced into thin, circular wafers – the foundation upon which microchips are built.

Achieving this level of purity is paramount, as even minute imperfections can compromise the functionality of the final semiconductor device. The entire process, from the initial purification of sand to the final packaging of chips, is meticulously controlled. Wafers undergo polishing to create a flawlessly smooth surface, essential for the precise layering of materials that follows. This initial stage is absolutely crucial, setting the stage for all subsequent fabrication steps. The quality of the wafer directly impacts yield and performance.

Different materials are also used, and the process is a highly intricate series of steps. The resulting wafers are the canvases for the complex circuitry that powers modern electronics.

Oxidation

Oxidation is a fundamental step in wafer processing, involving the growth of a silicon dioxide (SiO2) layer on the silicon wafer surface. This layer serves multiple critical functions, primarily as an electrical insulator and as a mask during subsequent processes like etching and ion implantation. Thermal oxidation, typically performed at high temperatures, is the most common method, utilizing oxygen or steam as the oxidizing agent.

The thickness of the oxide layer is precisely controlled, as it directly impacts the electrical characteristics of the transistors formed later in the process. This layer is essential for creating the gate dielectric in MOSFETs, influencing device performance. The process is a highly intricate series of steps, requiring careful monitoring of temperature, time, and gas flow.

Following oxidation, a layer of light-blocking film is created, matching the design of the desired circuits. This process prepares the wafer for the next crucial step: photolithography, where patterns are transferred onto the oxide layer.

Photolithography

Photolithography is a pivotal process in semiconductor fabrication, responsible for transferring intricate circuit patterns onto the silicon wafer. It begins with coating the wafer with a light-sensitive material called photoresist. A mask, containing the desired circuit design, is then aligned over the wafer, and ultraviolet (UV) light is shone through it.

The UV light alters the chemical structure of the exposed photoresist, making it either soluble (positive resist) or insoluble (negative resist) in a developer solution. Following exposure, the developer removes the altered photoresist, leaving behind a patterned layer that mirrors the mask’s design. This leaves behind a layer of light-blocking film that matches the design of the desired circuits.

Precise alignment and control of exposure parameters are crucial for achieving high resolution and accurate pattern transfer. This process is a highly intricate series of steps, demanding extreme precision.

Etching Processes

Etching is a critical step following photolithography, used to selectively remove material from the wafer, defining the circuit patterns. It’s essentially the process of “carving” the desired structures into the silicon. Two primary etching methods are employed: wet etching and dry etching.

Wet etching utilizes liquid chemical solutions to dissolve the unprotected material. While simpler and more cost-effective, it can be less precise and isotropic, meaning it etches in all directions. Dry etching, conversely, employs plasma or reactive gases to remove material, offering greater anisotropy – etching primarily downwards – and improved control.

Following photolithography, the unwanted photoresist is removed by an etching process. The choice between wet and dry etching depends on the specific material being etched, the desired feature size, and the required precision. Both methods require careful control of parameters like temperature, pressure, and gas composition to achieve optimal results.

Ion Implantation

Ion implantation is a crucial process for introducing dopant atoms – impurities like boron or phosphorus – into the silicon wafer, modifying its electrical conductivity. This precisely controlled doping is fundamental to creating the transistors and other semiconductor devices. It involves accelerating ions to high energies and directing them towards the wafer surface.

The depth of ion penetration, and therefore the location of the dopant atoms, is determined by the ion’s energy. The concentration of dopants is controlled by the ion beam current and duration. Following implantation, an annealing step is essential to repair any crystal damage caused by the ion bombardment and to activate the dopants, allowing them to contribute to conductivity.

This technique allows for very precise control over dopant profiles, enabling the creation of complex device structures. It’s a cornerstone of modern semiconductor fabrication, vital for achieving the desired electrical characteristics of the final chips.

Deposition Techniques (CVD, PVD)

Deposition techniques are essential for building up thin films on the wafer surface, creating the layers needed for transistors, insulators, and interconnects. Two primary methods are Chemical Vapor Deposition (CVD) and Physical Vapor Deposition (PVD). CVD involves reacting gaseous precursors on the wafer, forming a solid film – offering excellent conformality.

PVD, conversely, involves physically ejecting material from a target and depositing it onto the wafer. Sputtering is a common PVD technique, utilizing ion bombardment. Both CVD and PVD offer different advantages; CVD excels at complex compositions and conformal coverage, while PVD is often simpler and suitable for metals.

The choice between CVD and PVD depends on the material being deposited and the desired film properties. Precise control of deposition parameters – temperature, pressure, gas flow – is crucial for achieving the required film thickness, composition, and quality, impacting device performance significantly.

Back-End Manufacturing (BEOL)

Back-End-Of-Line (BEOL) focuses on metallization and interconnects, building the wiring that connects transistors. This involves processes like CMP and passivation for reliable circuits.

Metallization and Interconnects

Metallization and interconnects represent a critical stage within Back-End-Of-Line (BEOL) processing, establishing the electrical pathways between the millions of transistors fabricated on a chip. This involves depositing conductive materials, traditionally aluminum but increasingly copper due to its superior conductivity, to form a complex network of wires. These layers are meticulously patterned using photolithography and etching techniques, mirroring the intricate circuit design.

Multiple layers of interconnects are built up, separated by insulating materials (dielectrics), creating a multi-dimensional wiring system. The goal is to minimize resistance and capacitance to ensure signal integrity and speed. Advanced techniques like dual damascene processing are employed to create both the via (vertical connection) and trench (horizontal wire) simultaneously, improving density and performance. Careful control of material properties and deposition processes is essential to avoid issues like electromigration and stress, which can compromise reliability. The quality of these interconnects directly impacts the overall functionality and performance of the integrated circuit.

Chemical Mechanical Polishing (CMP)

Chemical Mechanical Polishing (CMP) is a crucial planarization technique employed extensively in Back-End-Of-Line (BEOL) processing. As multiple layers of metallization and dielectrics are deposited, the wafer surface becomes increasingly uneven. CMP addresses this by simultaneously utilizing chemical etching and mechanical abrasion to achieve a globally flat surface.

The process involves pressing the wafer against a rotating polishing pad immersed in a chemical slurry. The slurry contains abrasive particles (like silica) and etchants that selectively remove material. Precise control of pressure, speed, slurry composition, and pad characteristics is vital for achieving uniform material removal and minimizing defects. CMP is essential for enabling the fabrication of multi-layer interconnect structures, ensuring accurate pattern transfer in subsequent lithography steps, and improving device performance. Without CMP, creating the dense, complex wiring required for modern chips would be impossible, leading to short circuits and reliability issues.

Passivation

Passivation is a critical final step in Back-End-Of-Line (BEOL) processing, designed to protect the delicate circuitry from environmental factors and mechanical damage. After metallization and CMP, the wafer surface remains vulnerable to contamination, moisture, and physical stress, which can degrade performance and reliability.

This process involves depositing a protective layer, typically a dielectric material like silicon nitride or silicon dioxide, over the entire wafer. This layer acts as a barrier, preventing the ingress of contaminants and providing mechanical strength. Passivation layers are often applied using techniques like Plasma-Enhanced Chemical Vapor Deposition (PECVD). Following deposition, openings are etched into the passivation layer to allow for bonding pads, enabling electrical connection to the outside world. To lend additional durability, resin is poured out to form a protective capsule over the chips during molding, further safeguarding them. Effective passivation is paramount for long-term device stability and operational lifespan.

Post-Processing & Packaging

Post-processing includes wafer testing, die singulation (dicing), chip molding, and bonding techniques like wire bonding or flip chip, ensuring functionality and protection.

Wafer Testing

Wafer testing is a critical step following front-end and back-end processing, performed before individual chips are separated. This rigorous process verifies the functionality of each die directly on the wafer, identifying defective circuits early in the production cycle. Automated test equipment (ATE) applies various electrical signals and measurements to each die, comparing the results against pre-defined specifications.

Samsung Semiconductor Global emphasizes data collection during testing, feeding back insights to manufacturing and assembly teams for continuous improvement. This data-driven approach enhances product quality and yield. Tests assess parameters like current leakage, signal propagation delay, and overall performance. Failing dies are marked, preventing them from proceeding to packaging. This stage significantly reduces costs by avoiding further processing of non-functional chips.

Sophisticated testing methodologies, including parametric testing and functional testing, are employed. The goal is to ensure that only fully operational dies advance to the next stage, guaranteeing the reliability of the final packaged integrated circuits. Accurate wafer testing is paramount for delivering high-quality semiconductor products.

Die Singulation (Dicing)

Die singulation, commonly known as dicing, is the process of physically separating individual integrated circuits (dies) from the wafer after wafer testing has identified functional units. This is achieved using a high-precision saw, typically employing a diamond blade, to cut through the wafer along designated streets – the spaces between the dies.

The dicing process requires extreme accuracy to avoid damaging the delicate circuitry of the individual chips. Precise control of blade speed, depth, and coolant flow are crucial. Following dicing, each die is now an independent unit ready for packaging. The process generates numerous individual chips, each representing a completed integrated circuit.

Modern dicing techniques also include laser dicing, offering advantages in terms of precision and reduced mechanical stress. After dicing, the separated dies undergo further inspection to ensure no damage occurred during the singulation process. This step prepares the chips for the subsequent stages of chip molding and encapsulation, ultimately leading to the finished product.

Chip Molding and Encapsulation

Chip molding and encapsulation represent a critical post-processing step, providing essential physical protection and environmental sealing for the delicate die. Following die singulation, each individual chip is placed into a mold cavity. Resin, often an epoxy molding compound, is then poured around the die, forming a protective capsule.

This encapsulation process shields the chip from mechanical damage, moisture, and contaminants, significantly enhancing its reliability and lifespan. The resin material also facilitates heat dissipation, crucial for maintaining optimal chip performance. Other materials besides epoxy are also utilized depending on the application requirements.

The molding process is carefully controlled to ensure complete coverage and void-free encapsulation. This step lends additional durability to the chips, preparing them for the final bonding and packaging stages. Proper molding is vital for long-term functionality and ensures the chip can withstand the rigors of its intended operating environment.

Bonding Techniques (Wire Bonding, Flip Chip)

Bonding techniques establish the electrical connections between the chip’s die and the external circuitry on the package substrate. Two primary methods dominate this crucial step: wire bonding and flip chip bonding. Wire bonding utilizes fine wires, typically gold or copper, to connect the chip’s pads to the package leads, creating a conductive pathway.

Flip chip bonding, a more advanced technique, inverts the die and directly connects it to the substrate using solder bumps. This method offers improved electrical performance, higher density, and better thermal management compared to wire bonding. Flip chip bonding reduces signal path length and inductance.

The selection of a bonding technique depends on factors like cost, performance requirements, and application specifics. Both methods require precise alignment and control to ensure reliable and consistent connections. These techniques are essential for enabling communication between the chip and the broader electronic system, completing the manufacturing process.

Quality Control and Data Analysis

Testing and inspection procedures are vital, with data collected during testing fed back to manufacturing teams. This improves product quality and ensures reliable chip performance.

Testing and Inspection Procedures

Rigorous testing and inspection procedures are integral throughout semiconductor manufacturing, extending from wafer fabrication to final packaging. Initial wafer testing identifies defective dies before proceeding to further processing stages, minimizing wasted resources. These tests verify electrical functionality, parametric performance, and identify potential reliability issues.

As chips progress through back-end processes, further inspections are conducted to ensure interconnect integrity and proper passivation. Automated Optical Inspection (AOI) systems detect defects like scratches, contamination, and alignment errors. Electrical testing, including probe testing, verifies circuit functionality and performance characteristics.

Final testing encompasses a comprehensive suite of assessments, including burn-in tests to accelerate potential failures, and functional tests to validate the chip’s intended operation. Data collected during these procedures is crucial for process optimization and yield improvement. Samsung, for example, analyzes test data to provide feedback to manufacturing and assembly teams, enhancing overall product quality and reliability.

Data Collection and Feedback Loops

Effective data collection and feedback loops are paramount in modern semiconductor manufacturing, driving continuous improvement and yield optimization. Throughout the entire process – from wafer fabrication to post-processing – vast amounts of data are generated, encompassing process parameters, inspection results, and test outcomes.

This data is meticulously collected and analyzed to identify trends, pinpoint root causes of defects, and refine manufacturing processes. Statistical Process Control (SPC) techniques are widely employed to monitor process stability and detect deviations from desired specifications. Advanced analytical tools, including machine learning algorithms, are increasingly used to extract valuable insights from complex datasets.

Crucially, this information isn’t simply archived; it’s actively fed back to the relevant teams – process engineers, equipment operators, and design teams – to implement corrective actions and prevent recurrence of issues. Samsung Semiconductor Global exemplifies this approach, utilizing accumulated test data to improve product quality through targeted feedback to manufacturing and assembly teams.