Heat Press Manual: A Comprehensive Guide
This manual details techniques, tips, and troubleshooting for heat transfer presses, emphasizing accurate settings and substrate preparation for optimal results.
Proper operation, safety, and maintenance are crucial for longevity and quality transfers, including DTF, vinyl, and sublimation processes.
Heat presses are essential tools for durable and professional heat transfers onto various materials like fabrics, mugs, and more. They utilize controlled heat and pressure to bond designs, offering a versatile solution for customization. Understanding the core principles of heat transfer is vital for achieving high-quality results.
From simple DIY projects to large-scale production, heat presses cater to diverse needs. Proper substrate preparation, accurate temperature settings, and consistent pressure application are key factors influencing transfer success. This guide will navigate you through the process, ensuring optimal adhesion and longevity of your designs, covering techniques like DTF and vinyl transfers.
Types of Heat Presses
Heat presses come in several designs, each suited for different applications and production volumes. Clamshell presses feature a top platen that closes down onto the substrate, ideal for smaller operations and ease of use. Swing-away presses allow the platen to swing to the side, providing safer access and better pressure distribution for larger designs.
Draw presses offer a sliding lower platen, enabling precise positioning and accommodating various substrate sizes. Choosing the right type depends on factors like budget, workspace, and the complexity of your projects. Each style delivers consistent heat and pressure, crucial for successful transfers using methods like DTF and sublimation.
Clamshell Heat Presses
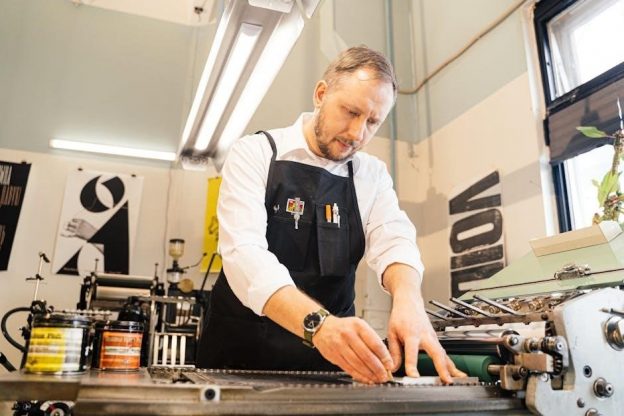
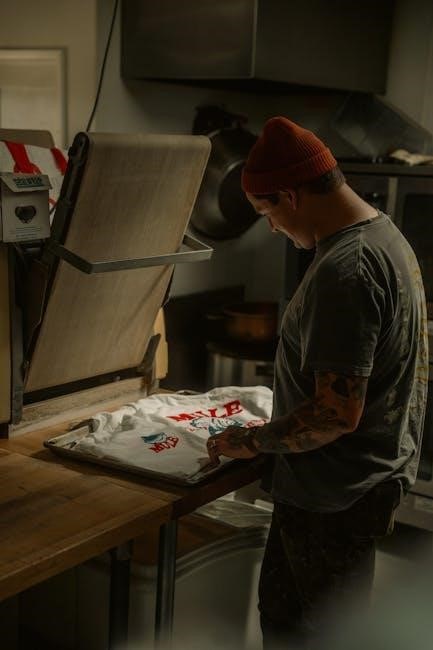
Clamshell heat presses are characterized by their top platen that hinges down onto the lower platen, resembling a clam opening and closing. These are popular for beginners and smaller businesses due to their compact size and relatively lower cost. They are particularly effective for flat transfers onto items like t-shirts and mousepads.
However, clamshell presses can sometimes present challenges with even pressure distribution, especially on larger designs. Precise timing is essential, as removing the garment immediately after pressing is crucial. They are a versatile option for various heat transfer techniques, including vinyl and DTF applications.
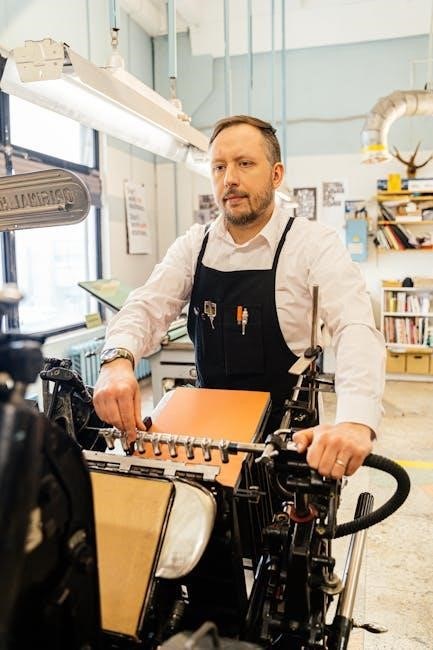
Swing-Away Heat Presses
Swing-away heat presses feature a top platen that swings 360 degrees away from the lower platen, providing unobstructed access to the substrate. This design facilitates easier placement and removal of items, especially those with thickness or awkward shapes, like garments or ceramic mugs.
They generally offer more even pressure distribution compared to clamshell models, making them ideal for larger designs and consistent results. Swing-away presses are favored by professionals for high-volume production and diverse applications, including sublimation and complex transfers.
Draw Heat Presses
Draw heat presses utilize a sliding drawer mechanism where the lower platen pulls out from beneath the heated upper platen. This unique design offers exceptional accessibility and simplifies the placement of substrates, particularly for larger items or those requiring precise positioning.
They are well-suited for various applications, including textiles, ceramics, and promotional products, providing consistent heat and pressure across the entire surface. Draw presses often feature robust construction and user-friendly controls, making them a popular choice for both beginners and experienced heat transfer operators.
Essential Components of a Heat Press
A functional heat press relies on several key components working in harmony. The heating element, crucial for generating the necessary temperature, is paired with a precise temperature control system for accurate heat distribution. Equally important is the pressure adjustment mechanism, ensuring firm contact between the heat platen and the substrate.
A reliable timer and clear digital display are vital for controlling dwell time, preventing under or over-application of heat. These components collectively determine the quality and durability of the heat transfer process, impacting the final product’s appearance and longevity.
Heating Element and Temperature Control
The heating element is the heart of the heat press, responsible for generating consistent and even heat. Accurate temperature control is paramount; readings should be verified with a laser thermometer, as presses can cool rapidly when lifted. Maintaining the correct temperature, like 400°F, is vital for successful transfers.
Precise temperature regulation ensures proper adhesion of materials like DTF and vinyl. Fluctuations can lead to peeling or incomplete bonding. A reliable control system, coupled with regular temperature checks, guarantees optimal results and consistent transfer quality.
Pressure Adjustment Mechanism
The pressure adjustment mechanism is critical for ensuring consistent contact between the heat platen and the substrate. Issues like difficulty closing the press or uneven pressure indicate a problem needing attention. Misalignment can also cause inconsistent results, leading to transfer failures.
Proper pressure guarantees optimal adhesion of the transfer material. High-quality heat presses offer reliable and adjustable pressure settings. Regularly inspect the mechanism for wear and tear, and ensure even distribution across the entire platen surface for consistently successful heat transfers.
Timer and Digital Display
The timer and digital display are essential for precise heat transfer control. Accurate timing is crucial, as under- or over-application of heat can ruin a transfer. Digital displays provide clear, consistent temperature readings, vital for material-specific settings.
Reliable temperature readings are paramount; remember that the platen cools quickly when lifted. A well-calibrated digital display ensures consistent results. Regularly check the accuracy of the temperature, and utilize the timer function to maintain consistent dwell times for optimal adhesion and transfer quality.
Preparing for Heat Transfer
Successful heat transfer hinges on meticulous preparation. Begin with substrate preparation – ensuring fabrics are clean, dry, and wrinkle-free is paramount. Pre-pressing fabrics removes moisture and creates a smooth surface for optimal adhesion.
Next, focus on design preparation and materials. Select appropriate transfer papers or films based on your chosen technique. Precise design positioning is critical; utilize alignment tools like rulers or laser guides for accuracy. Proper substrate and design preparation significantly impacts the final transfer quality and durability.
Substrate Preparation (Fabrics, Mugs, etc.)
Thorough substrate preparation is fundamental for successful heat transfers. For fabrics, ensure they are clean, completely dry, and free from wrinkles or any debris. Pre-pressing the fabric is crucial; this removes residual moisture and eliminates wrinkles, creating an ideal surface for adhesion.
Mugs and other items require similar attention. Clean the surface thoroughly to remove oils or contaminants. Proper preparation guarantees a strong bond and prevents transfer failures, ultimately enhancing the longevity and visual appeal of your finished product.
Design Preparation and Materials
Selecting the correct materials is paramount for a quality heat transfer. Whether utilizing Direct-to-Film (DTF), vinyl, or sublimation, ensure compatibility with your chosen substrate. Designs should be mirrored correctly before printing, especially for transfers.
High-quality transfer papers and vinyls contribute significantly to the final result. Always refer to the material specifications for recommended heat and time settings. Proper design preparation, combined with appropriate materials, minimizes the risk of peeling, fading, or cracking, ensuring a durable and vibrant finish.
Positioning the Design
Accurate design placement is critical for a professional-looking heat transfer. Begin by ensuring the substrate – be it a t-shirt, mug, or other item – is smooth and free of wrinkles. Place the design on the substrate with the carrier sheet facing upwards, carefully aligning it to your desired location.
Utilize alignment tools, such as rulers or laser guides, to guarantee precision. Consistent positioning enhances the aesthetic appeal and overall quality of the finished product. Take your time during this step; a well-positioned design makes all the difference!
Heat Transfer Techniques
Several techniques exist for applying designs using a heat press, each with unique characteristics. Direct-to-Film (DTF) transfers offer vibrant, detailed prints suitable for various fabrics. Vinyl transfers provide durability and a classic look, ideal for simple designs and lettering.
Sublimation printing, best for polyester materials, creates a permanent, full-color image that becomes part of the fabric. Understanding the nuances of each technique – including material compatibility and required settings – is essential for achieving professional results and maximizing transfer quality.
Direct-to-Film (DTF) Transfers
DTF transfers represent a revolutionary advancement in custom apparel decoration. This process involves printing designs onto a specialized film, then transferring them onto fabric using heat and adhesive powder. DTF excels at reproducing intricate details and vibrant colors on a wide range of materials, including cotton, polyester, and blends.
However, successful DTF application requires precise temperature and time settings, alongside careful consideration of powder adhesion and transfer pressure. Troubleshooting common DTF challenges, like poor adhesion or color fading, is crucial for optimal results, ensuring a durable and high-quality finish.
Vinyl Transfers
Vinyl transfers offer a versatile and cost-effective method for customizing garments and accessories. This technique involves cutting designs from heat-transfer vinyl (HTV) using a cutting machine, then applying them to the substrate with heat and pressure. HTV is available in a vast array of colors, finishes, and textures, allowing for creative design possibilities.
Successful vinyl application hinges on proper weeding, precise positioning, and appropriate heat settings. Ensuring the carrier sheet adheres correctly and applying consistent pressure are vital for a durable, long-lasting bond. Careful attention to these details prevents peeling or cracking.
Sublimation Printing
Sublimation printing is a fantastic technique for vibrant, full-color designs on polyester fabrics and polymer-coated items. This process utilizes special sublimation inks that transform into a gas when heated, bonding with the substrate at a molecular level. The result is a print that is incredibly durable, soft to the touch, and resistant to fading.
Successful sublimation requires a high polyester content (typically 65% or higher) and precise temperature and time settings. Proper ventilation is also crucial due to the fumes released during the process. Achieving optimal color vibrancy depends on ink quality and consistent pressure.
Temperature and Time Settings
Precise temperature and time are paramount for successful heat transfers; always consult material specifications. Variations exist based on the transfer type (DTF, vinyl, sublimation) and substrate. Accurate temperature readings are vital, as presses can cool rapidly when lifted.
Adjustments may be needed for different transfer paper brands and thicknesses. Pre-testing is highly recommended to dial in the ideal settings for your specific materials. Consistent pressure, alongside correct temperature and timing, ensures proper adhesion and a durable, high-quality finish.
Material-Specific Settings
Polyester fabrics generally require higher temperatures and longer pressing times compared to cotton. Sublimation demands specific temperature ranges – typically between 380-400°F – for optimal ink transfer. Vinyl transfers often need lower temperatures, around 305-320°F, to prevent melting or bubbling.
Mugs necessitate different settings than textiles, usually lower temperatures and shorter durations to avoid cracking. Always refer to the manufacturer’s guidelines for both the substrate and transfer material; Testing on scrap material is crucial to confirm settings before applying to the final product, ensuring a flawless result.
Importance of Accurate Temperature Readings

Precise temperature control is paramount for successful heat transfers. Inaccurate readings can lead to under-pressing, resulting in poor adhesion, or over-pressing, causing scorching or discoloration. Regularly test your heat press’s temperature using a laser thermometer to verify the platen’s surface temperature.
Remember that temperature can drop quickly when the platen is lifted. Aim for the upper end of the recommended range to compensate. Consistent and reliable temperature readings are vital for achieving professional-quality results and avoiding wasted materials, ensuring a durable and vibrant final product.
Adjusting for Different Transfer Papers
Various transfer papers necessitate unique temperature and time adjustments. Always consult the manufacturer’s specifications for optimal settings, as these can significantly impact transfer quality. Different papers have varying heat activation points and adhesion properties.
For example, sublimation paper requires higher temperatures than vinyl transfer paper. Conduct test presses on scrap material to fine-tune settings before applying to your final product. Proper adjustment ensures vibrant colors, strong adhesion, and prevents issues like bleeding or ghosting, maximizing transfer success.
Troubleshooting Common Heat Press Issues
Addressing issues promptly ensures consistent transfer quality. Common problems include inconsistent heating, uneven pressure, and the press failing to close correctly. Verify temperature accuracy using a laser thermometer; readings should match the set point. Uneven heat distribution may stem from a faulty heating element or improper platen pressure.
Pressure issues often involve misalignment or worn components. If the press won’t close, check for obstructions and adjust the pressure knob. DTF transfers can present unique challenges, requiring careful attention to temperature and dwell time. Regular inspection and maintenance are key to preventing these issues.
Heat Press Not Heating Properly
A heat press failing to reach the set temperature is a critical issue. First, verify the power supply and ensure the unit is correctly plugged in. Check the heating element for visible damage or breaks. Temperature sensors can malfunction, providing inaccurate readings; testing with a laser thermometer is vital.
If the temperature remains low, the thermostat might be defective. Consider a heating element replacement if damage is confirmed. Ensure proper voltage is reaching the press. Consistent monitoring and prompt attention to temperature fluctuations are essential for successful heat transfers.
Uneven Heat Distribution
Uneven heating leads to inconsistent transfer quality, causing fading or incomplete adhesion. Inspect the heat platen for warping or damage. Ensure even pressure across the entire surface during pressing; misalignment can contribute to this issue. Regularly calibrate the heat press to maintain accurate temperature distribution.
Check for obstructions between the platen and substrate. Use a heat-resistant tape to identify cool spots. Consider a platen replacement if warping is significant. Consistent monitoring with a laser thermometer helps identify and address hot or cold areas, ensuring uniform results.
Heat Press Not Closing Correctly (Pressure Issues)
Difficulty closing indicates misalignment or insufficient pressure, resulting in poor transfer adhesion. Inspect hinge points for looseness or damage, tightening as needed. Check for obstructions preventing full closure, like stray materials. Adjust the pressure knob to increase force, but avoid over-tightening.
Ensure the substrate is not too thick for the press’s capacity. A misaligned press requires professional adjustment. High-quality presses offer consistent pressure. Regularly inspect and maintain the pressure adjustment mechanism for optimal performance and even transfer results.
Maintaining Your Heat Press
Regular maintenance extends the lifespan and ensures consistent performance. Clean the heat platen after each use with a non-abrasive cloth to remove residue. Inspect components – heating element, pressure pad, timer – for wear and tear. A preventative schedule should include checking screws, hinges, and electrical connections.
Address any issues promptly to prevent further damage. Proper cleaning prevents transfer of unwanted materials. Consistent inspection identifies potential problems early. Following a schedule guarantees optimal functionality and reliable heat transfer results over time.
Cleaning the Heat Platen
Consistent cleaning is vital for preventing residue buildup and ensuring quality transfers. After each use, allow the platen to cool completely before cleaning. Use a soft, non-abrasive cloth – microfiber is ideal – to wipe away any transferred material. Avoid harsh chemicals or scouring pads, as these can damage the platen’s surface.
For stubborn residue, a specialized heat press cleaning solution can be used sparingly. Always test the solution in an inconspicuous area first. Regular cleaning prevents ghosting and ensures even heat distribution, contributing to professional-looking results.
Regular Inspection of Components
Consistent inspection is key to preventative maintenance and safe operation. Regularly check the heating element for any signs of damage or wear. Examine the pressure adjustment mechanism to ensure smooth and accurate operation. Inspect cords and wiring for fraying or damage, immediately replacing any compromised parts.
Verify the timer and digital display are functioning correctly, providing accurate readings. Look for loose screws or bolts and tighten them as needed. Proactive inspection identifies potential issues before they escalate, extending the lifespan of your heat press.
Preventative Maintenance Schedule
Establish a routine maintenance schedule to maximize your heat press’s lifespan and performance. Daily, wipe down the platen after each use. Weekly, thoroughly clean the heat platen, removing any residual transfer material. Monthly, inspect all components – heating element, pressure adjustment, timer – for wear and tear.
Every three months, check and tighten all screws and bolts. Annually, consider a professional inspection and servicing. Consistent adherence to this schedule minimizes downtime and ensures consistent, high-quality heat transfers.
Safety Precautions
Prioritize safety when operating a heat press. Always wear heat-resistant gloves to avoid burns from the hot platen. Ensure adequate ventilation to dispel any fumes released during the transfer process. Never leave the heat press unattended while it’s heated or in operation.
Be mindful of electrical hazards; keep the area dry and avoid using damaged cords. Follow safe operating procedures, including proper substrate placement and avoiding contact with moving parts. Regularly inspect the equipment for any safety concerns before each use.
Avoiding Burns and Electrical Hazards
Protect yourself from burns by consistently wearing heat-resistant gloves when handling heated platens or substrates. Maintain a safe distance from the open heat press during operation; Electrical hazards are serious; always ensure the heat press is properly grounded and the power cord is undamaged.
Never operate the press in a damp environment and avoid contact between the electrical components and water. Regularly inspect the cord for fraying or damage. If damage is detected, discontinue use immediately and seek professional repair to prevent shocks or fires.
Proper Ventilation
Adequate ventilation is essential when using a heat press, particularly with sublimation and certain transfer materials; These processes can release fumes that may be irritating or harmful if inhaled. Ensure the work area is well-ventilated by opening windows or using an exhaust fan to circulate air.
Consider investing in an air purifier with a carbon filter to capture airborne particles and odors. Avoid operating the heat press in enclosed spaces without proper airflow. Prioritizing ventilation safeguards your respiratory health and creates a more comfortable working environment.
Safe Operating Procedures
Always disconnect the heat press from the power source during maintenance or when not in use. Never leave the heat press unattended while it’s heated. Use heat-resistant gloves when handling hot platens or transferring items to prevent burns. Be mindful of the hot surface and maintain a safe working distance.
Avoid loose clothing or jewelry that could come into contact with the hot platen. Inspect the heat press for any damage before each use. Follow the manufacturer’s instructions carefully and prioritize safety at all times to prevent accidents.
Advanced Heat Press Techniques
Layering transfers allows for complex designs with multiple colors and effects, requiring precise alignment and adjusted temperature/time settings. Utilizing multiple colors within a single transfer demands careful color separation and registration for vibrant results. Experimenting with specialty substrates, like wood or ceramics, necessitates specific transfer papers and optimized heat profiles.
Mastering these techniques expands creative possibilities, but demands thorough testing and understanding of material compatibility. Consider pressure adjustments for different substrates to ensure proper adhesion. Always prioritize quality control and refine your process for professional-grade outcomes.
Layering Transfers
Layering transfers involves applying multiple transfer sheets onto a single substrate to achieve intricate designs and depth. Precise alignment is paramount; utilize alignment guides or laser systems for accuracy. Start with the base layer, applying heat and pressure according to the transfer paper’s instructions, then carefully add subsequent layers.
Adjust temperature and time for each layer, potentially reducing settings for later applications to prevent bleeding. Consider using a Teflon sheet between layers to protect the design. Test thoroughly on scrap material before committing to the final product, ensuring proper adhesion and color vibrancy.
Using Multiple Colors
Achieving vibrant, multi-colored designs with a heat press requires careful planning and execution. Utilize layered vinyl or full-color sublimation transfers for best results. When layering vinyl, weed each color meticulously and apply in the correct order, ensuring proper adhesion with each press.
For sublimation, a high-quality printer and sublimation paper are essential. Consider color profiles to ensure accurate reproduction. Proper heat and pressure are crucial to prevent color bleeding or fading. Always test on a scrap piece of fabric to verify color accuracy and transfer quality before production.
Specialty Substrates
Heat presses aren’t limited to fabrics! Expanding beyond t-shirts opens exciting possibilities. Mugs, hats, tiles, and even puzzles can be personalized with heat transfer techniques. However, each substrate demands unique settings – temperature, time, and pressure must be adjusted accordingly.
Ceramic mugs require a specialized mug press and sublimation inks. Polyester-coated items are ideal for sublimation, while cotton blends work well with vinyl. Always research the specific substrate’s requirements and conduct test presses to avoid damage or poor adhesion.